SPT SD-2201S Instruction Manual
Hide thumbs
Also See for SD-2201S:
- Instruction manual (22 pages) ,
- Instruction manual (21 pages) ,
- Instruction manual (21 pages)
Advertisement
Table of Contents
- 1 Rinse Aid Dispenser
- 2 Detergent Dispenser
- 3 Amount of Detergent to Use
- 4 Fill in Detergent
- 5 Switch off the Dishwasher
- 6 Open the Door Carefully
- 7 Unloading the Dishwasher
- 8 Filter Assembly
- 9 Cleaning the Filter
- 10 Cleaning the Door
- 11 Protect against Freezing
- 12 Cleaning the Spray Arms
- 13 Moving the Appliance
- 14 Disconnecting Your Dishwasher
- 15 Your Guarantee
- Download this manual
Advertisement
Table of Contents

Subscribe to Our Youtube Channel
Related Manuals for SPT SD-2201S


Summary of Contents for SPT SD-2201S
- Page 1 SD-2201S SD-2201W...
- Page 2 Dear Customer, Please carefully reading it before using the dishwasher will help you to use and maintain the dishwasher properly. Keep it to refer to at a later date. Pass it on to any subsequent owner of the appliance. This manual contains sections of Safety Instructions, Contro l Pan el...........3 Operating Instructions,Installation Instructions and Dishwasher Features........
- Page 3 When using your dishwasher, follow the precautions listed below: This appliance must be grounded. In the event of a Improper connection of the equipment-grounding malfunction or breakdown, grounding will reduce conductor can result in a risk of electric shock. the risk of electric shock by providing a path of Check with a qualified electrician or service least resistance of electric current.
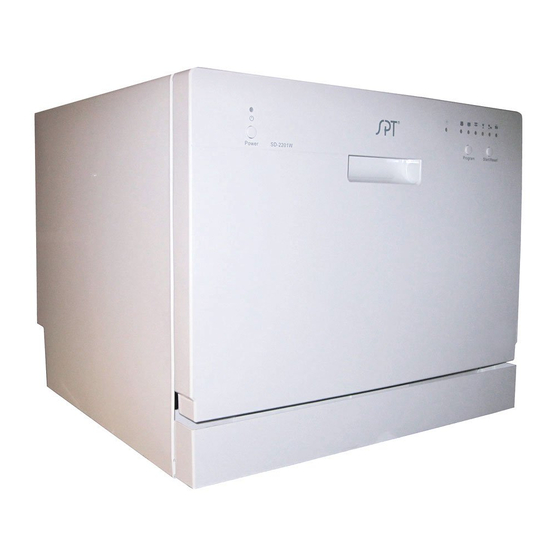
- Page 4 To get the best performance from your dishwasher, read all operating instructions before using it for the first time. Po wer Button: To turn on/off the power s upply. Program indicator light. Po wer Light : To be on when the ON/OFF Button Washing Program Selector: Press the button is Pressed down.
-
Page 5: Rinse Aid Dispenser
Rinse Aid Dispenser The rinse aid is released during the final rinse to prevent water from forming droplets on your dishes. That can leave spots and streaks. It also improves drying by allowing water to sheet off the dishes. Your dishwasher is designed to use liquid rinse aids. -
Page 7: Detergent Dispenser
Detergent Dispenser The dispenser must be refilled before the start of each wash cycle following the instructions provided in the Wash Cycle Table . Your dishwasher uses less dete rgent and rinse aid then conventional dishwasher. Generally, only one tablespoon of detergent is needed for a normal wash load. - Page 8 Consider buying utensils which are ide ntified as dishwasher-proof. Use a mild detergent that is de scribed as 'kind of dishes'. If necessary, seek further information from detergen t ma nufacturers. For particular items, select a p rogramme with a s low a temp erature. To prevent damage, d o not take gla ss a nd c utlery out of the dishwasher immediately after the programme h as ended.
- Page 9 Position the dishes and cookware so that they will not g et moved by the spra y of water. Cups Se rving bowl Glasses Saucers Oval platter Fruit bowl Brea d and Dinner plates butter plates Cutlery basket Plate racks of Basket The basket is fitted with plate racks which can be stowed horizontal if required.
- Page 10 Cutlery should be pla ced in the cutlery basket with handles at the bottom. If the rack has side baskets, the spoon should be loaded individually into the appropriate slots, especially long utensils should be placed in the horizontal position at th e front o f the upper b asket as shown. Dinner forks Salad forks Knives...
-
Page 12: Switch Off The Dishwasher
Premise: You can modify the washing program, When the dishwasher just runs for a short time. Otherwise, the detergent may have already been released, and the appliance may have already drained the wash water. If this is the case, the detergent dispenser must be refilled (see the section entitled "... -
Page 13: Filter Assembly
The filter prevent larger remnants of food o r other o bje cts from getting inside the pump. The filter system con sists of a coarse filter, a flat (Main filter) and a micro filte r (fine filter). Main filter Food and soil particles trapped by this filter are pulverized by a spe cial jet on the spray arm and washed down to drain. -
Page 14: Cleaning The Filter
Remarks: - Inspect the filters for blo cking e very time the dis hwa sher has been used. - By unscrewing the coarse filter.you can remove the filter sys tem.Remove any foo d remna nts and clean the filters under running water. The entire filter assembly should be cleaned once a week. -
Page 15: Cleaning The Spray Arms
Cleaning the Spray Arms The spray arms can be easily removed for periodic cleaning of the noz zles , to prevent possible clogging. Wash them under running water and ca refu lly replace them in th eir seats, checking that their rotary movement is in no way impeded . Grasp the mid dle of the spray arm, pull it upwards to remove it. - Page 16 Position the applianc e in the desired location. The back should rest against the wall behind it, and the sides, along the adjacent cabinets or wall. The dishwasher is equipped with water supply and drain hoses that can b e positioned to the right or the left to facilitate proper installation. For personal safety: DO NOT USE AN EXTENSION CORD OR AN ADAPTER PLUG WITH THIS APPLIANCE.
- Page 17 Your dishwasher comes equipped with a 'quick connect' assembly (includes inlet and drain hose). The faucet adapter must be installed on the faucet before you can connect the dishwasher. This adapter is included inside your dishwasher. The faucet adapter is compatible with faucets inclusive of either male (outside) or female (inside) threaded faucet connections.
-
Page 18: Disconnecting Your Dishwasher
Screw the faucet adapter onto (or into) the faucet tap. Check for leaks (use Teflon tape to eliminate if necessary). Connect the six-sided connection of the drain hose to the drain port connection on the back of the dishwasher cabinet. Do not over-tighten (to avoid damage to threads). Connect the star-shaped connection of the inlet hose to the inlet port on the back of the dishwasher cabinet. - Page 20 The dishes were not See notes in " Loading the Dishwasher Baskets ". loaded correctly. The programme was Select a more intensive programme. not powerful enough. See" Wash Cycle Table . " Not enough detergent Use more detergent, or change your detergent. was dispensed.
-
Page 22: Your Guarantee
This guarantee is subject to the following terms: Sunpentown must be notified of the fault. Proof of purchase must be presented to Sunpentown nominated representative. The warranty will be void if the product if modified, misused or repaired by an unauthorized person.
Need help?
Do you have a question about the SD-2201S and is the answer not in the manual?
Questions and answers