Table of Contents
Advertisement
Quick Links
Advertisement
Table of Contents

Subscribe to Our Youtube Channel
Related Manuals for Runco REFLECTION CL-510


Summary of Contents for Runco REFLECTION CL-510
- Page 1 ’ WNER PERATING ANUAL CL-510 / CL-510LT...
-
Page 2: Limited Warranty
WHAT IS COVERED UNDER THE TERMS OF THIS WARRANTY: SERVICE LABOR: Runco will pay for service labor by an approved Runco service center when needed as a result of manufacturing defect for a period of two (2) years from the effective date of delivery to the end user. - Page 3 IMPORTANT: WARRANTY REGISTRATION: Please fill out and mail your warranty registration card. It is imperative that Runco knows how to reach you promptly if we should discover a safety problem or product update for which you must be notified. TO OBTAIN SERVICE, CONTACT YOUR RUNCO DEALER:...
-
Page 4: Warning
User’s Manual Thank you for your purchase of this quality Runco video projector! It has been designed to provide you with the quality of video that is expected in a home theater. For the best performance, please read this manual carefully as it is your guide through the menus and operation. -
Page 5: Table Of Contents
Warning Message ......... . 27 Replace the Lamp (Contact your Runco Dealer) ....27 Troubleshooting . -
Page 6: Overview
480P, 1080i and 720P (576P PAL Version) formats are all compatible with this unit (via an external DTV decoder, not provided). De-interlacing with 3:2 Pull-down Using Runco's proprietary De-interlacing technology, this projector provides exceptional scaling and film to video (3:2 pulldown) conversion for the most artifact-free images possible. PIP/ PBP function Picture in picture/ Picture by picture functions allow you to display two inputs on the screen at the same time. -
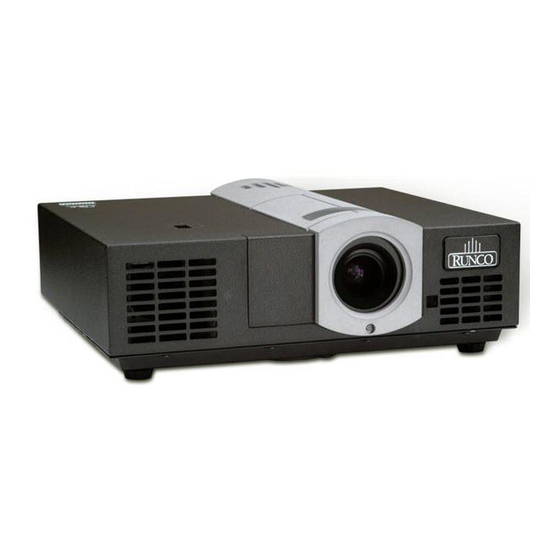
Page 7: Projector Exterior View
For more details, see "Control Panel" on page 5. 3. Front IR Sensor 8. Top IR Sensor 4. Ventilation Holes (intake) 9. Runco Logo (Can be turned off, see "Options" 5. Ventilation Holes (exhaust) on page 24.) Rear / Bottom Side 1. -
Page 8: Controls And Functions
LAMP LED Indicates the status of lamp Red when the lamp has developed a problem. Please contact your Runco Dealer for assistance. ZOOM RING Adjust the size of the image Rotate right to enlarge the image, and rotate left to make the image smaller. -
Page 9: Connector Panel
Runco CL-510/ CL-510LT User’s Manual Connector Panel Video (RCA Jack) Composite video signal input. S-Video (mini DIN 4-pin) Y/C (S-video) signal input Component (RCA Jacks) 480i Component (Y/C ) video signal input RGB/ HDTV (BNC) or Progressive Scan DVD players DTV Y/P or DTV RGB video signal input. -
Page 10: Remote Control
Runco CL-510/ CL-510LT User’s Manual Remote Control Hold down this button for ONE second to turn on the unit. Press this button to turn off the unit. Anamorphic For 16: 9 DVDs. M1, M2, M3, Default Recall video memory sequentially 4 X 3 (see "Selecting Video Memory"... - Page 11 Runco CL-510/ CL-510LT User’s Manual Arrow ( , , , ) Use to select the menu or to make various adjustments. Enter Enter the setting of items in the menu. Picture Access the Picture Setting menu (see "Picture Quality Adjustments" on page 23)
-
Page 12: Installation
Runco CL-510/ CL-510LT User’s Manual 2. Installation Remote Control Push forward on the tap and lift to open the cover. Install the two AAA batteries with the correct polarity, then close the cover. Notes on Batteries Make sure that the battery polarities are correct when installing the batteries. -
Page 13: Adjust The Lens Zoom/Focus Ring
Runco CL-510/ CL-510LT User’s Manual Adjust the Lens Zoom/Focus ring Adjust the projected image size you need with the zoom ring on the lens. To focus the image, rotate the focus ring on the lens. Focus Zoom in Zoom out... -
Page 14: Installation For Cl-510 (With 1.75 - 2.00 Lens)
Runco CL-510/ CL-510LT User’s Manual Installation For CL-510 (With 1.75 - 2.00 Lens) Ceiling Screen __________ (H) x __________ (W) B) THROW DISTANCE: CL-510 16 x 9 Screens: Minimum: (screen width x 1.75) = __________ inches Maximum: (screen width x 2.00) = __________ inches C) VERTICAL OFFSET: Screen width x 0.12 = _________ inches from the center of the lens. -
Page 15: Throw Distance Chart For Cl-510 (With 1.75 - 2.00 Lens)
Runco CL-510/ CL-510LT User’s Manual Throw Distance Chart For CL-510 (With 1.75 - 2.00 Lens) CL-510 @ 1024 x 576 Min Throw Max Throw Vertical Offset Screen Height Screen Width Distance Distance Position 40.5 126.00 144.00 8.64 134.75 154.00 9.24 140.00... -
Page 16: Installation For Cl-510Lt (With 2.30 - 3.00 Lens)
Runco CL-510/ CL-510LT User’s Manual Installation For CL-510LT (With 2.30 - 3.00 Lens) Ceiling Screen __________ (H) x __________ (W) B) THROW DISTANCE: CL-510LT 16 x 9 Screens: Minimum: (screen width x 2.30) = __________ inches Maximum: (screen width x 3.00) = __________ inches C) VERTICAL OFFSET: Screen width x 0.10 = _________ inches from the center of the lens. -
Page 17: Throw Distance Chart For Cl-510Lt (With 2.30 - 3.00 Lens)
Runco CL-510/ CL-510LT User’s Manual Throw Distance Chart For CL-510LT (With 2.30 - 3.00 Lens) CL-510LT @ 1280 x 720 Min Throw Max Throw Vertical Offset Screen Height Screen Width Distance Distance Position 40.5 165.60 216.00 7.20 177.10 231.00 7.70 184.00... -
Page 18: Connecting
Runco CL-510/ CL-510LT User’s Manual 3. Connecting When connecting, make sure to: 1. Turn off all equipment before making any connections. 2. Use the correct signal cables for each source. 3. Ensure the cables are firmly connected. 4. Connect all audio signals to external speakers. This projector is not equipped with speakers. -
Page 19: Progressive Component (Dtv Y/Pb/Pr)
Runco CL-510/ CL-510LT User’s Manual Progressive Component (DTV Y/P DTV Source RGBHV (DTV RGB) DTV Source The RGB BNC input supports two kinds of HDTV formats: Progressive component (DTV Y/P ) and DTV RGB. The unit will detect the resolution automatically. -
Page 20: Connecting A Computer (Dvi/ Hdcp)
Runco CL-510/ CL-510LT User’s Manual Connecting a Computer (DVI/ HDCP) PC or Notebook This unit is compatible with the following computer resoultions: 1280x720, 1024x768, 800x600, 640x480. 3. Connecting... -
Page 21: Basic Operation
Runco CL-510/ CL-510LT User’s Manual 4. Basic Operation Turning on the Power The Power LED lights orange when power is applied and the power switch is turned on. Press and hold the ON key on the remote control for ONE second to turn on the unit. The POWER LED will blink orange during warm up period, then light solid green. -
Page 22: Selecting "Aspect Ratio
Runco CL-510/ CL-510LT User’s Manual Selecting "ASPECT RATIO" Select the proper aspect ratio according to the content being used. There are four aspect ratios: Anamorphic: 4:3 image is stretched horizontally to fit a 16: 9 screen. This is for 16:9 DVDs. -
Page 23: Selecting Input Source
Runco CL-510/ CL-510LT User’s Manual Selecting Input Source When this unit is turned on, it will search for the input source you last selected. You may select the input source directly on the remote control. PIP/ PBP function Press the PIP button to enable the PIP function... -
Page 24: Turning Off The Power
Runco CL-510/ CL-510LT User’s Manual Turning off the Power Press the OFF key on the remote control to turn off the unit. The POWER LED will blink green and the fans will speed up for a quick cool down. The projector will not respond to any command for 90 seconds. -
Page 25: Menu
Runco CL-510/ CL-510LT User’s Manual 5. Menu Using the Menu This unit is equipped with an on-screen display (OSD) menu for making various adjustments and settings. There are four different menu languages; see page 24 Language setting for more details. -
Page 26: Picture Quality Adjustments
Runco CL-510/ CL-510LT User’s Manual Picture Quality Adjustments Runco CL-510 Adjustment > Video Brightness S-Video Contrast Component Color Component HD Tint RGB HD Sharpness DVI-I Filter ----------------------- Temperature Aspect Ratio Store Options Recall Set Up To access the picture quality adjustments, press Menu, highlight the active source (indicated by the arrow) and press Enter or . -
Page 27: Options
Runco CL-510/ CL-510LT User’s Manual 4 x 3: The input signal will be scaled to fit in the center of the 16:9 screen. Active Image Area LETTERBOX: The image in the Letterbox mode will be stretched vertically, and the top and bottom portion 'blanked off'. -
Page 28: Setup
Background Color The Setup menu is passcode protected and for use by Runco personnel only. Many of the adjustments available in this section are intended for use by trained service personnel only. If you are having difficulty with one of these items, please contact your Runco Dealer for service. -
Page 29: White Balance
Runco CL-510/ CL-510LT User’s Manual White Balance: To adjust grey scale. White Balance Red Gamma Green Gamma Adjust the Gamma Curve Blue Gamma Red Gain Green Gain Adjust High End Blue Gain Red Offset Green Offset Adjust Low End Blue Offset Store Reset Lamp Timer: Use this function to reset lamp usage counter. -
Page 30: Additional Information
Please change the lamp ! has operated for more than (1,000) hours. The power will turn off automatically after 10 minutes. Replace the Lamp (Contact your Runco Dealer) 1. Loosen the screw of 2. Take off the front lamp front lamp cover cover. -
Page 31: Troubleshooting
Video, S-Video, Component, Component HD, RGB HD and DVI-I on the remote control. POWER LED or LAMP LED blinking. Please contact your Runco dealer for assistance. Image is unstable The connection cables are not Correctly connect the cables to the connected to this unit. -
Page 32: Specifications
Runco CL-510/ CL-510LT User’s Manual Specifications CL-510/ CL-510LT Specifications Projector Type: Digital Light Processing™ (DLP™), Single Matterhorn DMD™ Chip Native Resolution: 1024 x 576, (16:9) Aspect Ratios: 4:3, Letterbox, 16:9, Anamorphic, Virtual Wide Video Standards: NTSC, PAL DTV Compatibility: 480p, 720p, 1080i... - Page 33 Digital Cinema theaters using DLP™ technology. The foot-Lambert is dependant on screen size, screen gain, and projector light output. All measurements are made at RUNCO to ANSI/NAPM IT7.228-1997 specifications using the Photo Research PR-650 SpectraColorimeter and Minolta LS-100 Light Meter, Video Essentials test DVD, and a Stewart Filmscreen StudioTech 130, 1.3 gain, 72-inch wide screen.
-
Page 34: Dimensions
Runco CL-510/ CL-510LT User’s Manual Dimensions Unit: in. (mm) 6. Additional Information... -
Page 35: Rs-232 Setup
Runco CL-510/ CL-510LT User’s Manual RS-232 Setup PC Out Adapter 1. Connect D-Sub 9-pin female to RJ-11 adapter (not Baud Rate: 115200 or 9600 included) to Com port on PC. Parity: None 2. Connect RJ-11 to Projector. Data Bits: 8 Bits... - Page 36 RUMA-010300 rev 7-03 Runco International 2900 Faber Street Union City, CA 94587 ph (510) 324-7777 fax (510) 324-9300 www.runco.com...
Need help?
Do you have a question about the REFLECTION CL-510 and is the answer not in the manual?
Questions and answers