Table of Contents
Advertisement
Quick Links
Advertisement
Table of Contents
Troubleshooting

Subscribe to Our Youtube Channel
Related Manuals for Runco CL-420


Summary of Contents for Runco CL-420
- Page 1 ’ W N E R P E R A T I N G A N U A L CL-410 CL-420 DLP™ Projectors...
-
Page 3: Two Year Limited Warranty
(6) months or 1000 hours, whichever comes first, from the effective date of delivery to the end user. In addition, Runco will provide a new or rebuilt replacement lamp for the lamp that fails due to defects in materials or workmanship for a period of six (6) months or 1000 hours, whichever comes first, from the effective date of delivery to the end user. - Page 4 IMPORTANT -- WARRANTY REGISTRATION: Please fill out and mail your warranty registration card. It is imperative that Runco knows how to reach you promptly if we should discover a safety problem or product update for which you must be notified.
- Page 5 ADDITIONAL INFORMATION: To locate the name and address of the nearest Runco Authorized Service Center, or for additional information about this Limited Warranty, please call or write: RUNCO INTERNATIONAL, INC. Attn: Customer Service Department 2900 Faber Street Union City, CA 94587...
-
Page 6: Safety Precautions
Safety Precautions Thank you for your purchase of this quality Runco video projector! It has been designed to provide you with the quality of video that is expected in a home theater. For the best performance, please read this manual carefully as it is your guide through the menus and operation. -
Page 7: Table Of Contents
Installation Considerations ..................14 Installation Type ....................14 Ambient Light ......................14 Other Considerations ...................14 Throw Distance.....................15 Vertical and Horizontal Position................16 Vertical and Horizontal Lens Shift................16 Adjusting the Projection Angle ................18 Mounting ......................19 Folded Optics .......................19 Runco CL-410 and CL-420 Owner’s Operating Manual... - Page 8 Table of Contents Connections to the CL-410/CL-420 ................20 Connector Panel Access..................20 Connecting the CL-410/CL-420 to Source Components ........20 RS-232 Controller Connection ................25 Connecting to the 12-Volt Trigger Output .............26 4. Operation .........................27 Turning on the Power ....................27 Adjusting the Projector Height or Projection Angle ............27 Changing the OSD Language ..................28...
- Page 9 4-7. Typical Color Bar Pattern for Adjusting Color Saturation and Tint........36 4-8. Typical Test Pattern for Adjusting Sharpness..............38 4-9. CIE 1931 Chromaticity Diagram .................39 4-10. Horizonal and Vertical Keystone Correction ..............43 4-11. ISF-Enabled CL-410/CL-420 Splash Screen ............45 7-1. CL-410/CL-420 Dimensions..................57 Runco CL-410 and CL-420 Owner’s Operating Manual...
- Page 10 List of Figures Notes: Runco CL-410 and CL-420 Owner’s Operating Manual...
-
Page 11: Introduction
Target Audience most out of the CL-410/CL-420. Runco has made every effort to ensure that this manual is accurate as of the date it was printed. However, because of ongoing product improvements and customer feedback, it may require updating from time to time. You can always find the latest version of this and other Runco product manuals on-line, at www.runco.com. -
Page 12: Using This Manual
... Turn to page: Information about obtaining service General information about the CL-410 and CL-420 DLP Projectors Installation instructions First-time configuration instructions Advanced configuration instructions Troubleshooting tips CL-410 and CL-420 DLP Projectors specifica- tions Runco CL-410 and CL-420 Owner’s Operating Manual... -
Page 13: Description, Features And Benefits
96 inches wide with ease. The CL-420 features a 16:9 aspect ratio resolution of 1280 x 720; the CL-410 boasts a native resolution of 1024 x 576. Both models provide an HDMI input for pure digital video signal transmission. -
Page 14: Parts List
Introduction Parts List Your CL-410/CL-420 is shipped with the following items. If any items are missing or damaged, please contact your Runco dealer or Runco Customer Service at (800) 23-RUNCO. • CL-410 or CL-420 DLP Projector • AC Power Cord (North America) •... -
Page 15: Controls And Functions
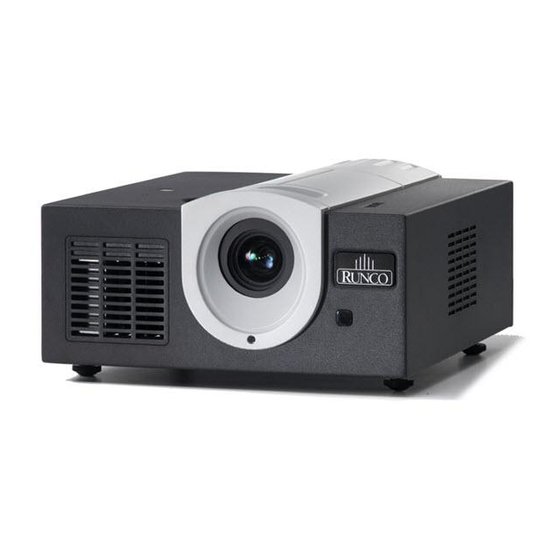
2. Controls and Functions CL-410/CL-420 at a Figure 2-1 and Figure 2-2 show the locations of key CL-410/CL-420 projector Glance components. Front/Top/Side View Figure 2-1. CL-410/CL-420 Top/Front/Side View 1. TOP IR SENSOR 2. VERTICAL LENS SHIFT DIAL Shifts the image up or down. -
Page 16: Rear/Top/Side View
During normal operation, this LED is off. Rear/Top/Side View COMP 1 COMP 2 RGB-HD HDMI VIDEO S-VIDEO RGB-HD HDMI VIDEO S-VIDEO COMP COMP RS-232 RS-232 AC 110-240 110-240 0 - 2 Figure 2-2. CL-410/CL-420 Rear/Top/Side View Runco CL-410 and CL-420 Owner’s Operating Manual... - Page 17 For best results, do not run your DVD player in progressive mode. 4. RGB HD A 15-pin VGA connection to a personal computer or HD tuner with an RGB output. The CL-410/CL-420 automatically detects the signal resolution: 480p, 576i, 720p or 1080i. 5. HDMI / Computer Input (Digital) HDCP-compliant digital video input for connecting a DVD player, personal computer or HD tuner with a DVI or HDMI output.
-
Page 18: Cl-410/Cl-420 Remote Control
Controls and Functions Figure 2-3 shows the CL-410/CL-420 remote control, and the paragraphs that follow describe its functionality. CL-410/CL-420 Remote Control Figure 2-3. CL-410/CL-420 Remote Control 1. IR OUTPUT INDICATOR Lights when a button is pressed to indicate that an IR signal is being transmitted. - Page 19 Press to recall settings for the current input from the “ISF Night” memory preset. 11. ISF DAY Press to recall settings for the current input from the “ISF Day” memory preset. 12. CUST Press to recall settings for the current input from the “Custom” memory preset. Runco CL-410 and CL-420 Owner’s Operating Manual...
- Page 20 Controls and Functions Notes: Runco CL-410 and CL-420 Owner’s Operating Manual...
-
Page 21: Installation
• Do not mix an old battery with a new one or different types of batteries. • If you will not use the remote control for a long time, remove the batteries to avoid damage from battery leakage. Runco CL-410 and CL-420 Owner’s Operating Manual... -
Page 22: Notes On Remote Control Operation
• If the effective range of the remote control decreases, or it stops working, replace the batteries with new ones. • Ambient conditions may possibly impede the operation of the remote control. If this happens, point the remote control at the projector, and repeat the operation. Runco CL-410 and CL-420 Owner’s Operating Manual... -
Page 23: Quick Setup
Installation Table 3-1 gives a quick overview of the CL-410/CL-420 installation process. The sections following this one provide detailed instructions. Quick Setup Installation should be performed by a qualified custom video Note installation specialist. Table 3-1. Installation Overview For Details, refer to... -
Page 24: Installation Considerations
• Keep the projector away from devices that radiate electromagnetic energy such as motors and transformers. Common sources of these include slide projectors, speakers, power amplifiers and elevators. Runco CL-410 and CL-420 Owner’s Operating Manual... -
Page 25: Throw Distance
• The CL-410 has a throw distance range of between 131.5 inches (3.34 meters) and 160.3 inches (4.07 meters). • The CL-420 has a throw distance range of between 134.4 inches (3.41 meters) and 163.2 inches (4.14 meters). Estimating Throw Distance (TD) CL-410: Minimum TD = Screen Width x 1.37... -
Page 26: Vertical And Horizontal Position
(1.5 x H) Note: This is a general example of lens shift. Lenses vary in their shift capabilities. No particular lens or projector is shown in this example. Figure 3-4. Vertical Lens Shift (Example only) Runco CL-410 and CL-420 Owner’s Operating Manual... -
Page 27: Horizontal Lens Shift (Example Only)
Screen Width (W) Note: This is a general example of lens shift. Lenses vary in their shift capabilities. No particular lens or projector is shown in this example. Figure 3-5. Horizontal Lens Shift (Example only) Runco CL-410 and CL-420 Owner’s Operating Manual... -
Page 28: Adjusting The Projection Angle
Installation Table 3-3 gives the lens shift limits for the CL-410 and CL-420, as percentages and absolute measurements with a 96 x 54 inch (1.78:1) screen. Table 3-3. Vertical and Horizontal Lens Shift Limits CL-410 CL-420 Lens Shift Limits, as Percentages of Screen Height or Width (Notes 1 and 2) -
Page 29: Mounting
This type of mounting is recommended for fixed installations and for those that want the projector out of sight or have a limited space for projector and audience. Use only the Runco-approved ceiling mount kit designed for your Note projector. -
Page 30: Connections To The Cl-410/Cl-420
Connector Panel Access To access the connector panel, pull firmly on the cable access cover to open it. Connecting the Connect your video sources to the CL-410/CL-420 as shown and described in the CL-410/CL-420 to Source sections that follow. Components HDMI Connections: The CL-410/CL-420 has an HDMI input for connecting a DVD player, DTV decoder, personal computer or any other device with a DVI or HDMI output. -
Page 31: Hdmi (Or Dvi) Source Connections
HDMI or DVI Source (DVD Player or HD Set Top Box) Note: To connect a DVI source, use the HDMI-to-DVI adapter and DVI cable provided with the projector. Figure 3-7. HDMI (or DVI) Source Connections Runco CL-410 and CL-420 Owner’s Operating Manual... -
Page 32: Analog Rgb Connections
Installation RGB-HD Connections: The CL-410/CL-420 has an RGB input for connecting a personal computer or DTV decoder with an RGB output. See Figure 3-8. COMP 1 COMP 2 RGB-HD VIDEO S-VIDEO HDMI VIDEO S-VIDEO RGB-HD HDMI COMP COMP RS-232 RS-232... -
Page 33: Component Video Connections
COMP 1 COMP 2 RGB-HD VIDEO S-VIDEO HDMI RGB-HD VIDEO S-VIDEO HDMI COMP COMP RS-232 RS-232 Pr/Cr Pb/Cb Component Video Source (DVD Player or HD Set Top Box) Figure 3-9. Component Video Connections Runco CL-410 and CL-420 Owner’s Operating Manual... -
Page 34: Composite And S-Video Connections
Installation Composite/S-Video Connections: The CL-410/CL-420 has S-Video and composite video inputs for connecting a DVD player, VCR, satellite receiver, camcorder, laser disc player et cetera; see Figure 3-10. COMP 1 COMP 2 RGB-HD VIDEO S-VIDEO HDMI VIDEO S-VIDEO RGB-HD HDMI... -
Page 35: Rs-232 Controller Connection
Installation Use a standard, 9-pin RS-232 cable to connect a PC or home theater control/automation RS-232 Controller system (if present) to the RS-232 port on the CL-410/CL-420; see Figure 3-11. Connection For more information about using this connection, refer to Serial Communications page 53. -
Page 36: Connecting To The 12-Volt Trigger Output
Installation Connecting to the 12-Volt If your home theater contains a retractable screen or other, 12-Volt trigger-activated Trigger Output equipment, connect it to the 12-volt trigger output on the CL-410/CL-420 as shown in Figure 3-12. COMP 1 COMP 2 RGB-HD... -
Page 37: Operation
5. After a brief warm-up period (approximately 10 seconds), the CL-410/CL-420 will start projecting. When the CL-410/CL-420 is installed upright, you can adjust the projector height or projection angle by turning the four adjustable feet on the bottom of the projector; see Adjusting the Figure 4-1. -
Page 38: Changing The Osd Language
Operation The CL-410/CL-420 OSD language is initially set to English, but can also display the menus in French, Italian, German or Spanish. To change the OSD language: Changing the OSD Language 1. Press MENU. 2. Select Installation from the Main Menu. -
Page 39: Lens Adjustments
To focus the projected image, rotate the focus ring left or right. Focus/Zoom To make the picture larger (zoom in), rotate the zoom ring to the left, toward the Runco logo. To make the picture smaller (zoom out), rotate the zoom ring to the right. -
Page 40: Shift
6. To return to the previous menu, press EXIT. The CL-410/CL-420 OSD menus are arranged hierarchically, as shown in Figure 4-4. Depending on the selected input source, some menu options may not be available. Runco CL-410 and CL-420 Owner’s Operating Manual... -
Page 41: Cl-410/Cl-420 Osd Menu Structure
Auto Power Off (on/off) Blue Enable (on/off) Top Left, Bottom Left, Top Right or OSD Position Bottom Right V Keystone Keystone H Keystone Reset Fan High Speed Mode (on/off) Figure 4-4. CL-410/CL-420 OSD Menu Structure Runco CL-410 and CL-420 Owner’s Operating Manual... -
Page 42: Main Menu
Otherwise, the change will be lost when a different Virtual Cinema input is selected. (The aspect ratio is saved for each input and resolution separately.) For information about saving settings, refer to Save Settings on page 40. Runco CL-410 and CL-420 Owner’s Operating Manual... - Page 43 Select Cinema to view 2.35 source material on a 16:9 screen. The upper and lower 2.35:1 Image on portions of the screen are 16:9 Screen masked, but the geometry of the active image area is not changed. Runco CL-410 and CL-420 Owner’s Operating Manual...
-
Page 44: Picture Adjust
2.35:1 Image on 16:9 Screen with Virtual Cinema Picture Adjust Use the controls in the Picture Adjust menu to calibrate your CL-410/CL-420 for optimum picture quality. Picture Adjust The CL-410/CL-420 has been designed to incorporate setup and calibration standards Brightness established by the Imaging Science Foundation (ISF). -
Page 45: Typical Pluge Pattern For Adjusting Brightness
• The dark gray areas are barely visible. • The lighter gray areas are clearly visible. • The white areas are a comfortable level of true white. • The image contains only black, gray and white (no color). Runco CL-410 and CL-420 Owner’s Operating Manual... -
Page 46: Typical Gray Bar Pattern For Adjusting Contrast
Color Saturation: On your external test pattern source, select a color bar pattern like the one shown in Figure 4-7. Figure 4-7. Typical Color Bar Pattern for Adjusting Color Saturation and Tint Runco CL-410 and CL-420 Owner’s Operating Manual... - Page 47 A change to one may require a subtle change to the other in order to achieve the optimum setting. 2. Color and tint controls are not available on the HDMI or RGB-HD inputs. Runco CL-410 and CL-420 Owner’s Operating Manual...
-
Page 48: Typical Test Pattern For Adjusting Sharpness
All images will be more vibrant while still showing good detail in dark areas. The default Gamma setting of 2.2 is appropriate for most typical home theater environments. Runco CL-410 and CL-420 Owner’s Operating Manual... -
Page 49: Cie 1931 Chromaticity Diagram
Result red hues blue hues green hues yellow hues To restore the default color temperature, select Reset Color Temp and press ENTER. Press ENTER again to confirm. Figure 4-9. CIE 1931 Chromaticity Diagram Runco CL-410 and CL-420 Owner’s Operating Manual... -
Page 50: Image Option
Offset for that color. Save Settings: The CL-410/CL-420 lets you save image quality settings for each input and supported resolution to a preset. You can recall this preset at a later time by simply pressing a button on the remote control or using the Restore Picture Settings menu command (see below). - Page 51 • Film Mode: Use the Film Mode control to smooth out moving images from interlaced sources. In most cases, the CL-410/CL-420 detects the proper “pull-down” rate and vertical frequency. However, if your source is jittery and/or tearing you may wish to force a setting to ensure stable processing for that source.
-
Page 52: Installation
To enable automatic source detection, select Source Detect from the Installation menu and set it to Auto. Auto Power Off: The CL-410/CL-420 can be set to power off automatically after 15 minutes of no input signal or user input via the remote control. To enable this feature, set it to ON. -
Page 53: Horizonal And Vertical Keystone Correction
Positive values compress top; negative values compress bottom. Figure 4-10. Horizonal and Vertical Keystone Correction 1. The CL-410/CL-420 keystone correction can compensate for up Note to approximately 15 degrees of screen and/or projector tilt. 2. Straight lines or the edges of images may appear jagged while adjusting the image. -
Page 54: Isf Settings
To do this, select Lamp Timer Reset from the ISF Calibration menu and press ENTER. The CL-410/CL-420 shows the number of hours the projector lamp has been in service and asks you to confirm or cancel the reset. Press ENTER to confirm or EXIT to cancel. -
Page 55: Isf-Enabled Cl-410/Cl-420 Splash Screen
(Figure 4-7). When you have finished customizing the color space, select Store Setting and press ENTER. ISF Enable: Use ISF Enable to control the display of the ISF logo on the CL-410/CL-420 splash screen upon power-up; see Figure 4-11. CALIBRATED FOR: CUSTOM BUILT BY: Figure 4-11. - Page 56 Splash Screen Timer: Press the right- or left-arrow buttons to set the Splash Screen Timer. This timer controls how long the startup (ISF and Runco logo) image stays on-screen after you turn on the projector. Select from 15 to 60 seconds, in 5-second increments.
-
Page 57: Maintenance And Troubleshooting
Do not use any liquid cleaning agents, as they may wear the coating film on the surface of the lens. • The surface of the lens is easily damaged. Do not scrape or hit the lens. Runco CL-410 and CL-420 Owner’s Operating Manual... -
Page 58: Cleaning The Intake And Exhaust Vents
• The actual lamp service life may be less than 2,000 hours depending on the environment in which the projector is used. • For lamp replacement, please contact your nearest Runco authorized service center or Runco dealer. Do not attempt to replace the lamp yourself! Runco CL-410 and CL-420 Owner’s Operating Manual... -
Page 59: Lamp Cautions
Touching a hot lamp can cause burns or injury. Wait at least one hour after the disconnecting the power cord to allow the surface of the lamp unit to fully cool before removing. Runco CL-410 and CL-420 Owner’s Operating Manual... -
Page 60: Lamp Replacement
10. Reset the Lamp Timer to zero. To do this, select Lamp Timer Reset from the ISF Calibration menu and press ENTER. The CL-410/CL-420 shows the number of hours the projector lamp has been in service and asks you to confirm or cancel the reset. -
Page 61: Troubleshooting Tips
Maintenance and Troubleshooting Table 5-1 provides some general guidelines for troubleshooting problems you may encounter with the CL-410/CL-420. If you encounter an issue not described here, please Troubleshooting Tips contact your Runco dealer or Runco Technical Support. Table 5-1. Troubleshooting Chart... - Page 62 Maintenance and Troubleshooting Notes: Runco CL-410 and CL-420 Owner’s Operating Manual...
-
Page 63: Serial Communications
Port Configuration Configure the RS-232 controller or PC serial port as follows: no parity, 8 data bits, 1 stop bit and no flow control. Set the baud rate to 9600, to match that of the CL-410/CL-420 RS-232 port. Table 6-1 lists the RS-232 command set. All commands are in ASCII format and must be in UPPERCASE. - Page 64 2. The power on command (PON) will not provide an OK reply; it will instead reply with a random character. For your automation system, simply ensure that you receive a character after the PON command. If you do not get any reply after PON, send PON again. Runco CL-410 and CL-420 Owner’s Operating Manual...
-
Page 65: Specifications
(1) Composite; (1) S-Video; (2) RCA Component (YPbPr); (1) VGA; (1) HDMI 1.2 with HDCP Control Options: Discrete infrared remote Serial commands via RS-232 RS-232 Communication 9600 bps, no parity, 8 data bits, 1 stop bit, no flow control Parameters: Runco CL-410 and CL-420 Owner’s Operating Manual... - Page 66 850 ANSI Lumens (CL-420) Contrast Ratio: 2500:1 (CL-410); 2600:1 (CL-420) These are typical projector brightness and contrast specifications found in most companies’ sales literature. Runco includes these measurements in its literature to allow for direct comparison with other manufacturers’ projectors. These measurements are...
-
Page 67: Cl-410/Cl-420 Dimensions
Specifications Figure 7-1 shows the CL-410/CL-420 dimensions. CL-410/CL-420 Dimensions 13.98 in 355.0 mm 8.276 in 5.701 in 210.2 mm 144.8 mm 3.425 in 3.425 in 87.0 mm 87.0 mm Figure 7-1. CL-410/CL-420 Dimensions Runco CL-410 and CL-420 Owner’s Operating Manual... -
Page 68: Computer Signal Compatibility
Specifications The CL-410/CL-420 can display video signals from a variety of computer sources via its RGB-HD and HDMI inputs. It is compatible with the three most common sync modes – Computer Signal sync-on-green, composite sync and RGB with separate sync – as well as XGA display Compatibility adapters that use advanced intelligent compression. - Page 69 2. When this projector receives 640 × 350 VESA format VGA signals, “640 × 400” appears on the screen. 3. Interlaced video signals received through the RGB input may not display correctly. If this occurs, use the Component 1, Component 2, S-video or Composite video input instead. Runco CL-410 and CL-420 Owner’s Operating Manual...
-
Page 70: Video Signal Compatibility
HTPC 720p 720p/ √ (Note 576p/ 1024 x √ 576p Notes: 1. The Component 1 and Component 2 inputs accept both analog (YPbPr) and digital (YCbCr) signals. 2. HTPC = Home Theater PC Runco CL-410 and CL-420 Owner’s Operating Manual... - Page 72 S ER IAL N UM B E R RUMA-011170 rev 08-14-06 v2.0 Runco International • 2900 Faber Street • Union City, CA 94587 • Ph (510) 324-7777 / (800) 23RUNCO / Fax (510) 324-9300 www.runco.com Runco CL-810 Owner’s Operating Manual...
Need help?
Do you have a question about the CL-420 and is the answer not in the manual?
Questions and answers