Table of Contents
Advertisement
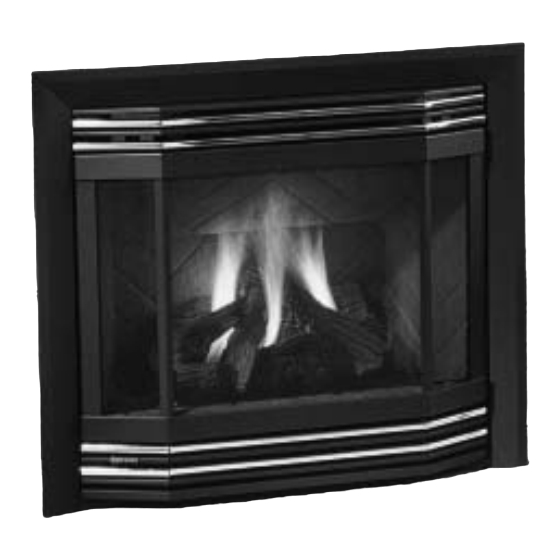
Direct Vent Gas Fireplace
WARNING:
If the information in these instructions are not followed exactly,
a fi re or explosion may result causing property damage,
personal injury or loss of life.
FOR YOUR SAFETY
Do not store or use gasoline or other fl ammable vapors and
liquids in the vicinity of this or any other appliance.
Installation and service must be performed by a qualifi ed
installer, service agency or the gas supplier.
Tested by:
918-262a
FPI FIREPLACE PRODUCTS INTERNATIONAL LTD.
www.regency-fi re.com
P33-3 Zero Clearance
MODELS:
P33-NG3 Natural Gas
Installer: Please complete the details on the back cover
and leave this manual with the homeowner.
Homeowner: Please keep these instructions for future reference.
P33-LP3 Propane
FOR YOUR SAFETY
What to do if you smell gas:
Do not try to light any appliance
Do not touch any electrical switch:
do not use any phone in your
building.
Immediately call your gas supplier
from a neighbour's phone. Follow
the gas supplier's instructions.
If you cannot reach your gas
supplier, call the fi re department.
6988 Venture St., Delta, BC Canada, V4G 1H4
Owners &
Installation Manual
01/04/06
Advertisement
Table of Contents

Related Manuals for Regency P33-LP3


Summary of Contents for Regency P33-LP3
- Page 1 Owners & Installation Manual Direct Vent Gas Fireplace MODELS: P33-NG3 Natural Gas P33-LP3 Propane WARNING: FOR YOUR SAFETY If the information in these instructions are not followed exactly, What to do if you smell gas: a fi re or explosion may result causing property damage, Do not try to light any appliance personal injury or loss of life.
- Page 2 INFORMATION FOR MOBILE/MANUFACTURED HOMES AFTER FIRST SALE This Regency product has been tested and listed by Warnock Hersey as a Direct Vent Wall Furnace to the following standards: VENTED GAS FIRE- PLACE HEATERS ANSI Z21.88-2002/CSA 2.33-2002 and GAS-FIRED APPLIANCES FOR USE AT HIGH ALTITUDES CAN/CGA-2.17-M91.
-
Page 3: Table Of Contents
Replacement/Spare Parts List ........41 Conversion to Propane ..........26 Optional Brick Panels ..........27 Warranty Log Installation ............27 Flush Door - Standard ..........28 Warranty ..............47 Flush Trim (optional) ..........28 Regency P33-3 Zero Clearance Direct Vent Gas Fireplace... -
Page 4: Safety Label
For the State of Massachusetts, fl exible connectors shall not exceed 36 inches in length. For the State of Massachusetts, the appli- ances individual manual shut-off must be a t-handle type valve. Regency P33-3 Zero Clearance Direct Vent Gas Fireplace... -
Page 5: Installation
THEY ARE IN THE SAME ROOM INSTRUCTIONS AS THE APPLIANCE. 11) Under no circumstances should this ap- The P33-NG3 or P33-LP3 Direct Vent Fireplace pliance be modifi ed. Parts that have to be CLOTHING OR OTHER FLAM- must be installed in accordance with these in-... -
Page 6: Installation Checklist
This includes the internal ing, the appliance must be installed on a blower option as well. metal or wood panel extending the full width and depth of the appliance. Regency P33-3 Zero Clearance Direct Vent Gas Fireplace... -
Page 7: Clearances
Combustible mantel leg clearances as per diagram below: Maximum 1-1/2" projection at 2" minimum clearance. The HeatWave Duct Kit has different clear- Clearances for Bay or Flush Front ance and framing requirements, check the HeatWave manual for details. Regency P33-3 Zero Clearance Direct Vent Gas Fireplace... -
Page 8: Framing And Finishing
HeatWave manual for details. You must maintain clearance from the vent to combustible materials for fl ex for Simpson Dura-Vent, see page 7. Regency P33-3 Zero Clearance Direct Vent Gas Fireplace... -
Page 9: Unit Assembly Prior To Installation
There are 2 vent systems approved for use with the P33-3: the Regency Direct Vent System (Flex) for Horizontal Terminations only (see pages 11-12), and the Simpson Dura-Vent Systems for Horizontal and Vertical Terminations (see pages 13-24). -
Page 10: Exterior Vent Termination Locations
INSTALLATION EXTERIOR VENT TERMINATION LOCATIONS Regency P33-3 Zero Clearance Direct Vent Gas Fireplace... -
Page 11: Horizontal Terminations Only
Hersey. The location of the termination cap must conform to the requirements in the Vent Terminal Locations diagram on page 10. Regency Direct Vent (Flex) System Termination Kit (Part # 946-513) includes all the parts needed to install the P33-3 with a maximum run of 2 feet. -
Page 12: System (Flex)
2 x 4 or 2 x 6 walls. The liners must slip over the collars a minimum of 1-3/8". Wall Thimble 2 pieces (10" (254mm) Outer Diameter) Regency P33-3 Zero Clearance Direct Vent Gas Fireplace... -
Page 13: Venting - Rigid Pipe Venting Systems
American Metal Products, Ameri Vent Direct vent and Selkirk Direct-Temp. FPI , and FPI AstroCap are the proprietary trademarks of FPI Fireplace Products International Ltd. Dura-Vent® and Direct Vent GS are registered and/or proprietary trademarks of Simpson Dura-Vent Co. Inc. Regency P33-3 Zero Clearance Direct Vent Gas Fireplace... -
Page 14: Rigid Pipe Venting Components List
640-530/P Riser Vent Terminal 946-523/P AstroCap Horizontal Cap 510-994 Rigid Pipe Adaptor (must use with all rigid piping) 946-206 Vinyl Siding Standoff - AstroCap 946-205 Vinyl Siding Shield for Riser Vent Terminal Regency P33-3 Zero Clearance Direct Vent Gas Fireplace... -
Page 15: Venting Arrangements - Vertical Terminations
Firestops are required at each fl oor level and whenever passing through a wall. • Maintain clearances to combustibles. Note: Must use optional rigid pipe adapter when using rigid pipevent systems (Part # 510-994). Regency P33-3 Zero Clearance Direct Vent Gas Fireplace... - Page 16 Propane and Natural Gas. Maximum two 45 elbows allowed. • Vent must be supported at offsets. • Firestops are required at each fl oor level and whenever passing through a wall. • Maintain clearances to combustibles. Regency P33-3 Zero Clearance Direct Vent Gas Fireplace...
-
Page 17: Venting Arrangements - Horizontal Terminations
fi rst and venting must be attached to unit before sliding into fi nal position. Also Simpson Dura-Vent venting can- not be used with any of the mantels noted above. Regency P33-3 Zero Clearance Direct Vent Gas Fireplace... - Page 18 8 feet 3' Max. 4' Min. 6' Max. total horizontal. 4' Max. 6' Min. 7' Max. Please note min. 1 foot 5' Max. 8' Min. 8' Max. between 90 elbows is required. Regency P33-3 Zero Clearance Direct Vent Gas Fireplace...
- Page 19 90 elbows is 6' Max. 6' Min. quired. required. 5' Min. 8' Max. 6' Min. For additional vertical venting with 2 x 90 elbows, refer to page 15. Regency P33-3 Zero Clearance Direct Vent Gas Fireplace...
- Page 20 5' Max. 7' Min. horizontal. 5' Min. 6' Max. 8' Min. Please note min. 1 foot 6' Min. 7' Max. 9' Min. between 90 elbows is required. 7' Min. 8' Max. 10' Min. Regency P33-3 Zero Clearance Direct Vent Gas Fireplace...
-
Page 21: Vertical Terminations - Co-Linear Flex System
Air Intake are maintained. Pipe Length Co-Linear Flex Rigid Pipe Adaptor Adapter # 510-994 with Kit# 946-563 45 Elbow Inner Pipe Adapter with Kit# 946-563 Regency P33-3 Zero Clearance Direct Vent Gas Fireplace... -
Page 22: Venting Arrangements
INSTALLATION Venting Arrangements - Vertical Terminations with Co-linear Flex System for both Residential & Manufactured Homes into Masonry Fireplaces The shaded area in the diagrams show the allowable vertical terminations. Regency P33-3 Zero Clearance Direct Vent Gas Fireplace... -
Page 23: Venting - Horizontal Installations
Note: Apply sealant "Mill-Pac" to inner pipe ent clearances. and high temperature silicone seal- 8) Slide the appliance and vent assembly to- ant to outer pipe on every twist-lock wards the wall carefully inserting the vent joint. Regency P33-3 Zero Clearance Direct Vent Gas Fireplace... -
Page 24: Venting - Vertical Termination
fl ashing to the roof with roofi ng rails, soap and water solution or gas leak detector. slide storm collar over the pipe section and Do not use open fl ame for leak testing. seal with a mastic. Diagram 2 Regency P33-3 Zero Clearance Direct Vent Gas Fireplace... -
Page 25: Pilot Adjustment
2) Manual high/low adjustment 3) Pilot Adjustment 4) Thermocouple Connection - option 5) Outlet Pressure Tap 6) Inlet Pressure Tap 7) Pilot Outlet 8) Main Gas Outlet 9) Alternative TC Connection Point Regency P33-3 Zero Clearance Direct Vent Gas Fireplace... -
Page 26: Conversion To Propane
Attach white label "This valve has 18) Check for proper fl ame appearance and been converted from NG to LPG using SIT glow on logs. conversion Kit Code 0.907.202" onto the valve. Regency P33-3 Zero Clearance Direct Vent Gas Fireplace... -
Page 27: Optional Brick Panels
5) Slide the Top Brick Panel into position and slide the Top Brick Retaining clips so that they hold the Top Brick Panel in place and tighten down the screws. 2nd Grate Tab Regency P33-3 Zero Clearance Direct Vent Gas Fireplace... -
Page 28: Flush Door - Standard
Attach the round magnets to the back of the top trim piece and to the bottom trim piece, then at- tach trim to the top and bottom of Flush door. 5th Grate Tab Regency P33-3 Zero Clearance Direct Vent Gas Fireplace... -
Page 29: Louvers - Flush
2) Secure to the fl ush door bottom bracket with 2 screws provided. 3) Slide the valve extension knobs onto the valve knobs. Burner ON/OFF control box attached to bot- tom fl ush louver. Regency P33-3 Zero Clearance Direct Vent Gas Fireplace... -
Page 30: Louvers - Bay
3) Install top louver by sliding the two bracket clips into the brackets located on top of the bay door. See below. The fi tted louver leaves a small gap between faceplate bottom and louver top. Regency P33-3 Zero Clearance Direct Vent Gas Fireplace... -
Page 31: Full Screen Front
3) Before attaching the Full Screen Door Frame, remove the Screen Doors from the Full Screen Door Frame by fully opening the doors Cut-Outs and lifting up off of the hinges. See important note in step 10. Regency P33-3 Zero Clearance Direct Vent Gas Fireplace... - Page 32 7) Mount the Burner ON/OFF Control Box to the left side of the Bottom Grill using 2 x #8 - 1/4" Philips Head Screws. Left Side of Bottom Grill Screen Door Burner ON/OFF Control Box 11) Close screen doors. Regency P33-3 Zero Clearance Direct Vent Gas Fireplace...
-
Page 33: Wall Switch
The remote control is now ready for Thermostat (CP-2 System) operation. Wire Size Max. Length 14 GA. 50 Ft. 16 GA. 32 Ft. 18 GA. 20 Ft. 20 GA. 12 Ft. 22 GA. 9 Ft. Regency P33-3 Zero Clearance Direct Vent Gas Fireplace... -
Page 34: Wiring Diagram
Caution: Ensure that the wires do not touch any hot surfaces and are away from sharp edges. CAUTION: Label all wires prior to disconnection when servicing controls. Wiring errors can cause improper and dangerous operation. Regency P33-3 Zero Clearance Direct Vent Gas Fireplace... -
Page 35: Fan Installation (Optional)
Push hold-down clip onto inside motors on a regular basis by vacuuming louver and press tab until it is out the fan blades and housing using a soft at 90 brush nozzle. louver. Diagram 1 Regency P33-3 Zero Clearance Direct Vent Gas Fireplace... -
Page 36: Lighting Plate Instructions
OPERATING INSTRUCTIONS COPY OF THE LIGHTING PLATE INSTRUCTIONS Regency P33-3 Zero Clearance Direct Vent Gas Fireplace... -
Page 37: Operating Instructions
If the pilot does not is normal and will disappear in a few minutes as the glass heats up. remain lit, repeat operation allowing a longer period before releasing gas control knob. Regency P33-3 Zero Clearance Direct Vent Gas Fireplace... -
Page 38: Normal Operating Sounds Of Gas Appliances
These com- ponents should be replaced immediately. 2) Remove the Cap, and shine a fl ashlight down the Vent. Remove any bird nests, or other foreign material. Regency P33-3 Zero Clearance Direct Vent Gas Fireplace... -
Page 39: Thermopile/Thermocouple
Replacement of the glass panels should be done by a licensed or qualifi ed service person. Caution: Wear gloves when removing damaged or broken glass. Regency P33-3 Zero Clearance Direct Vent Gas Fireplace... -
Page 40: Removing Valve
17) Close the door and replace the louvers. 18) Fire up the unit again and check for proper fl ame appearance and glow on logs. Valve Tray Assembly screws Diagram 2: Rear Log Stand & Valve Tray Assembly Regency P33-3 Zero Clearance Direct Vent Gas Fireplace... -
Page 41: Parts List
Fan Switch Assy (120 Volts) 510-994 Dura-Vent Adaptor 43) 910-813 Power Cord (120 Volts) 46) 910-330 Fan Speed Control 918-262 Manual 47) 904-586 Knob - Speed Control 431-969 Conversion Kit - NG to LP Regency P33-3 Zero Clearance Direct Vent Gas Fireplace... - Page 42 PARTS LIST Regency P33-3 Zero Clearance Direct Vent Gas Fireplace...
- Page 43 Burner Grate Assembly - NG/LP 83) * Rear Log Support Bracket - NG/LP 85) 431-930 Log Set 86) 430-097 Air Defl ector-Left 87) 433-018 Air Defl ector-Right *Not available as a replacement part. Regency P33-3 Zero Clearance Direct Vent Gas Fireplace...
- Page 44 Glass (Flush) Screw - #8 x 1/2" 137) 904-691 U-Clip 139) 936-155 Glass Gasket (Tadpole) 179) 948-216 Regency Logo Plate 140) 948-042 Spring Hinge - Black *Not available as a replacement part. Regency P33-3 Zero Clearance Direct Vent Gas Fireplace...
- Page 45 Bay Louver Assy-Top 433-026 Bay Door Defl ector 126) * Bay Louver Assy-Bottom 129) 948-042 Hinge 130) 432-960 Bay Front Screen 131) 948-216 Regency Logo Plate *Not available as a replacement part. Regency P33-3 Zero Clearance Direct Vent Gas Fireplace...
- Page 46 NOTES ___________________________________________________ ___________________________________________________ ___________________________________________________ ___________________________________________________ ___________________________________________________ ___________________________________________________ ___________________________________________________ ___________________________________________________ ___________________________________________________ ___________________________________________________ ___________________________________________________ ___________________________________________________ ___________________________________________________ ___________________________________________________ ___________________________________________________ ___________________________________________________ ___________________________________________________ ___________________________________________________ ___________________________________________________ ___________________________________________________ ___________________________________________________ ___________________________________________________ ___________________________________________________ ___________________________________________________ Regency P33-3 Zero Clearance Direct Vent Gas Fireplace...
-
Page 47: Warranty
It is the general practice of FPI to charge for larger, higher priced replacement parts and issue credit once the replaced component has been returned to FPI and evaluated for manufacturer defect. The authorized selling dealer is responsible for all in-fi eld service work carried out on your Regency product. FPI will not be liable for results or costs of workmanship from unauthorized service persons or dealers. - Page 48 Dealer Name & Address: ______________________________________________ ___________________________________________________________________ Installer: ___________________________________________________________ Phone #: ___________________________________________________________ Date Installed: ______________________________________________________ Serial No.: __________________________________________________________ Regency and Panorama are trademarks of FPI Fireplace Products International Ltd. Printed in Canada © Copyright 2006, FPI Fireplace Products International Ltd. All rights reserved.
Need help?
Do you have a question about the P33-LP3 and is the answer not in the manual?
Questions and answers