
Related Manuals for Fisher & Paykel CT2802


Summary of Contents for Fisher & Paykel CT2802
-
Page 1: Installation Instructions
Installation instructions User guide Ceramic glass cooktops CT2802, CT560C, CT5602F and CT6551S models NZ AU... -
Page 3: Table Of Contents
Contents Safety and warnings Installation instructions Introduction Using your cooktop Cookware and cooking tips Care and cleaning Frequently asked questions Warranty and service Important! SAVE THESE INSTRUCTIONS The models shown in this User Guide may not be available in all markets and are subject to change at any time. -
Page 4: Safety And Warnings
This appliance is to be installed only by an authorised person. Incorrect installation, for which the manufacturer accepts no responsibility, may cause personal injury or damage. Always disconnect the cooktop from mains power supply before carrying out any maintenance or repairs. WARNING! - Page 5 100 mm from the wall, some form of protection against heat is used, such as ceramic tiles. if the appliance is a CT2802 model, the power supply cable is rated for use at 100 a suitable disconnection switch is incorporated in the permanent wiring, mounted and positioned to comply with local wiring rules and regulations.
- Page 6 Do not attempt to use this appliance if the ceramic glass surface is cracked. If the surface becomes cracked, switch the appliance and the power supply off immediately. Switch the cooktop off at the wall before cleaning or maintenance. Failure to do so may result in death or electrical shock Hot Surface Hazard During use, accessible parts of this appliance will become hot enough to cause burns.
- Page 7 Do not use pans with jagged edges or drag pans across the ceramic glass surface as this can scratch the glass. Do not use scourers or any other harsh/abrasive cleaning agents to clean your cooktop, as these can scratch the ceramic glass.
-
Page 8: Installation Instructions
Dimensions and clearances Models Product Width (side to side) CT560C 578 mm CT5602F 578 mm CT2802 289 mm (cooktop) 578 mm CT6551S (controls) 88 mm CT560C, CT5602F, CT6551S Fig. 1 Thermal protection barrier - Dimensions and locations of ventilation holes... - Page 9 Feed the cooktop wiring harness up through the control panel cutout. Remove the control panel cover. Connect the cooktop wiring harness by aligning the numbers/letters on the harness with those on the control panel connector block (see Fig. 3 below).
-
Page 10: Introduction
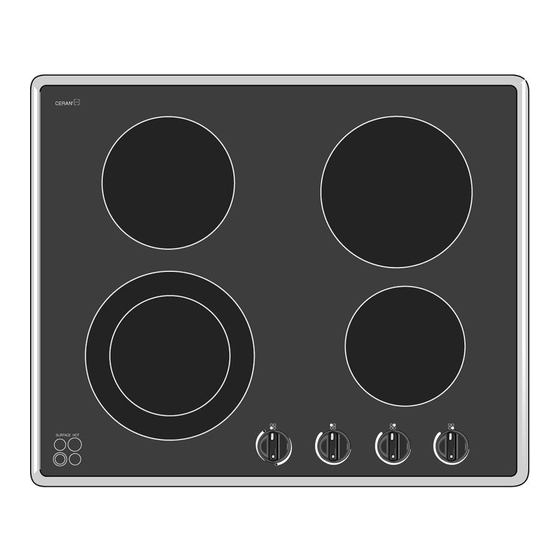
About your new cooktop Thank you for buying a Fisher & Paykel ceramic glass cooktop. Once it is installed and ready to use, you will want to know everything about it to make sure you get excellent results right from the start. - Page 11 Fig.7 Cooktop layout-CT5602F models Fig.8 Cooktop layout-CT6551S models Introduction Left front element Left front element control knob Left rear element Left rear element control knob Right rear element Right rear element control knob Right front element Right front element control knob ‘Surface Hot’...
-
Page 12: Using Your Cooktop
Using your cooktop Controls Depending on your model, your cooktop has two or four individual elements below a ceramic glass surface. In CT5602F and CT6551S models, one of the elements is a dual element; you may use either the full element or the inner element only. See ‘Dual element controls’ below. - Page 13 Using your cooktop Dual element controls (CT5602F and CT6551S models only) Select the full element by turning the knob anticlockwise to High to begin cooking, and adjust as necessary. To heat the inner element only, turn clockwise to High to begin cooking, and adjust as necessary.
-
Page 14: Cookware And Cooking Tips
Cooking tips The elements of your cooktop operate over a wide range of settings from very low to very high, giving you accurate and repeatable control of the heat. Use the low setting for delicate tasks like melting chocolate or keeping milk warm. -
Page 15: Care And Cleaning
Always read the label to check if your cleaner contains chlorine. Use cleaner on the cooktop while it is still warm to touch. Rinse and wipe dry with a clean cloth or paper towel. The cooktop may become stained if cleaning residue is left on it. -
Page 16: Frequently Asked Questions
You may experiment by turning the control knob below the marked low setting. Can I install my cooktop above my DishDrawer or oven? Yes, you can install your cooktop above your DishDrawer or oven with a standard bench height (see ‘Installation instructions’ for clearances below benchtop). -
Page 17: Warranty And Service
Before you call for service or assistance ... Check the things you can do yourself. Refer to the installation instructions and your user guide and check that: Your product is correctly installed. You are familiar with its normal operation. If after checking these points you still need assistance, please refer to the Service & Warranty book for warranty details and your nearest Authorised Service Centre, Customer Care, or contact us through our website: www.fisherpaykel.com... - Page 20 Under our policy of continuous product improvement, these specifications may change at any time. You should therefore check with your Dealer to ensure this booklet correctly describes the product currently available. www.fisherpaykel.com NZ AU Ceramic glass cooktop user guide Published: 02/2008 Part No. 599517 A...
Need help?
Do you have a question about the CT2802 and is the answer not in the manual?
Questions and answers