Fisher & Paykel ELBA CG905 Series Installation Instructions And User Manual
Hide thumbs
Also See for ELBA CG905 Series:
- Installation instructions and user manual (36 pages) ,
- Installation instructions and user manual (36 pages) ,
- Installation instructions & user manual (32 pages)
Table of Contents
Advertisement
Quick Links
Advertisement
Table of Contents

Related Manuals for Fisher & Paykel ELBA CG905 Series


Summary of Contents for Fisher & Paykel ELBA CG905 Series
-
Page 1: User Guide
Gas cooktops Installation instructions CG604 & CG905 models User guide NZ AU... -
Page 3: Table Of Contents
Contents Safety and warnings Installation instructions Introduction Using your cooktop Care and cleaning Troubleshooting Warranty and service Important! SAVE THESE INSTRUCTIONS The models shown in this user guide may not be available in all markets and are subject to change at any time. For current details about model and specification availability in your country, please visit our local website listed on the back cover or contact your local Fisher &... -
Page 4: Safety And Warnings
Safety and warnings WARNING! Cut Hazard Beware of sharp edges when handling stainless steel appliances. Failure to use caution could result in injury or cuts. WARNING! Electrical Shock Hazard Before carrying out any work on the electrical section of the appliance, it must be disconnected from the mains electricity supply. - Page 5 Safety and warnings Always disconnect the cooktop from the electricity supply before carrying out any maintenance operations or repairs. In the room where the cooktop is installed, there must be enough air to allow the gas to burn correctly, according to the current local regulations. Particular attention shall be given to the relevant requirements regarding ventilation.
- Page 6 Safety and warnings WARNING! Hot Surface Hazard This appliance becomes hot during use. Do not touch the cooktop components, burners, trivets, pan supports or the base when hot. Before cleaning, turn the burners off and make sure the whole cooktop is cool. Failure to follow this advice may result in serious injury.
-
Page 7: Important Safety Instructions
Safety and warnings Important safety instructions Operation Keep children away from the cooktop when it is in use. Household appliances are not intended to be played with by children. Children, or persons with a disability which limits their ability to use the appliance, should have a responsible person to instruct them in its use. -
Page 8: Installation Instructions
Fig. Figs. 3a and 3b. CG905 models only: A partition between the base of the hob and the cupboard below should be fitted 100 mm below the workbench surface if the cupboard is to be used for storage. - Page 9 AG 601 (AS 5601) and NZS5261 - Gas Installations code. Fig. 3a CG604 models - Mounting the base clearance spacers Fig. 2a CG604 models - Clearances Fig. 3b CG905 models - Mounting the base clearance spacers Fig. 2b CG905 models - Clearances...
- Page 10 Insert the cooktop into the cutout and position it correctly. Adjust the position of the brackets “F and R” (CG604 models) or “A” (CG905 models) and tighten screws “B” to secure the cooktop firmly in position.
- Page 11 Installation instructions Connecting the cooktop to the gas supply The gas connection must be carried out by an authorised person according to the relevant standards. Before connecting the appliance to the gas main, mount the brass conical adaptor onto the gas inlet pipe, upon which the washer has been placed (Figs.
- Page 12 Installation instructions Leak-testing and flame-testing the cooktop After connecting the gas supply, check the piping and connections for leaks using a soap and water solution. The presence of bubbles indicates a leak. Tighten or replace connections as appropriate. Important! Do not use any naked flame to check for leaks. The operation of the appliance MUST be tested before leaving.
- Page 13 Installation instructions Converting to a different gas type Important! The conversion procedure must be carried out only by an authorised person. This appliance is suitable for use with Natural gas or LPG (check the “gas type” sticker attached to the appliance). To convert from one gas type to another, you need to replace the injectors, and then adjust the minimum burner setting.
- Page 14 Installation instructions Adjusting the minimum burner setting When changing from one type of gas to another, the minimum valve output must also be correct, considering that in this position the flame must be about 4 mm long and must re- main lit even when the knob is turned quickly from the maximum to the minimum position.
-
Page 15: Electrical Requirements
Installation instructions Important! Installation must be carried out according to the manufacturer's instructions. Incorrect installation may cause harm and damage to people, animals or property, for which the manufacturer accepts no responsibility. If the installation requires alterations to the domestic electrical system, call a qualified electrician. - Page 16 Installation instructions Wiring diagram Ignition switch Ignition coil Terminal block Spark electrode CG905 models only CG905 models only Fig. 11...
-
Page 18: Introduction
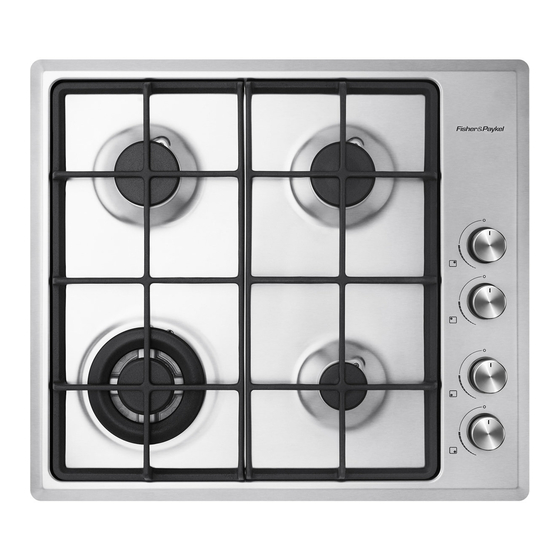
Introduction About your new cooktop Thank you for buying an ELBA gas cooktop. Once it is installed and ready to use, you will want to know everything about it to make sure you get excellent results right from the start. This guide introduces you to all its special features. - Page 19 Introduction Fig.13 CG905 models (with flame failure safety feature) Auxiliary burner Wok burner knob Semi-rapid burner Rapid burner knob Rapid burner Left semi-rapid burner knob Triple-ring wok burner Right semi-rapid burner knob Auxiliary burner knob...
- Page 20 Fig. 14c Burner knob and symbols (CG604 models (no flame failure)) (CG604 models (with flame failure)) (CG905 models) Using the burners Choose the control knob for the burner you want to use. Press the knob down gently and turn it anticlockwise to the position.
- Page 21 Using your cooktop Flame failure safety feature (some models only) Some cooktop models have a flame failure safety device. These models have a flame failure probe as well as the ignitor (see Fig 15). The flame failure probe cuts off the gas supply to the burner if the flame is blown out. When lighting the burner on flame failure models, hold down the knob for approximately 10 seconds after the burner has lit.
- Page 22 Fig. 16a Correct and incorrect matching Fig. 16b Efficient and inefficient saucepan bottoms Small pan support (CG905 models only) This pan support is to be placed on top of the auxiliary burner when using small diameter pans, in order to prevent them from tipping over.
-
Page 23: Using Your Cooktop
Using your cooktop Wok stand - models fitted with triple-ring wok burner only (Fig. 17b) The wok stand fits over the triple-ring wok burner trivet. Important! Using a wok without the stand may cause the wok to tip or the wok burner to operate incorrectly. Do not use the stand for ordinary, flat-bottomed saucepans. - Page 24 Care and cleaning General advice Maintenance Period Description Daily Clean gas cooktop as per following instructions. Monthly Remove all burner parts, and clean using a non-abrasive detergent. Rinse in cold water, dry thoroughly, and replace. Clean the ignitor carefully, using a toothbrush and methylated spirits.
-
Page 25: Care And Cleaning
Care and cleaning Burners and trivets You can remove and clean these parts with hot soapy water or other appropriate products - see ‘Cleaning chart’ . After cleaning, check that the burners and their flame spreaders are dry before replacing correctly. - Page 26 Care and cleaning Replacing the triple-ring wok burner Fit the burner spreader to the housing as shown by the arrow in Fig. 20. Make sure the burner is not able to rotate (Fig. 21). Probe Ignitor Fig. 20 Fitting the burner spreader to the housing. Ring Fig.
- Page 27 Care and cleaning Cleaning chart Cooktop part Cleaning Important Trivets, burner caps Hot soapy water and nylon scourer. Always allow cooktop parts to cool completely before cleaning Soak removeable parts in a solution them. of biological clothes-washing detergent. Always apply minimal pressure Mild abrasive cream cleaners.
-
Page 28: Troubleshooting
Troubleshooting Troubleshooting chart Problem Possible solutions A burner does not light Check the cooktop is plugged in and the electricity is switched on. Check the gas supply valve is turned on and the supply to the house is working. You should hear the gas when you turn a burner Check the gas bottle is not empty. -
Page 29: Warranty And Service
Warranty and service Before you call for service or assistance ... Check the things you can do yourself. Refer to the installation instructions and your user guide and check that: your product is correctly installed. you are familiar with its normal operation. If after checking these points you still need assistance or replacement parts, please refer to the Service &... - Page 32 www.elba.co.nz www.elba.com.au Copyright © Fisher & Paykel 2012. All rights reserved. The product specifications in this booklet apply to the specific products and models described at the date of issue. Under our policy of continuous product improvement, these specifications may change at any time. You should therefore check with your Dealer to ensure this booklet correctly describes the product currently available.
Need help?
Do you have a question about the ELBA CG905 Series and is the answer not in the manual?
Questions and answers