Advertisement
Table of Contents
- 1 User Guide
- 2 Table of Contents
- 3 Introduction
- 4 Safety and Warnings
- 5 Important Safety Instructions
- 6 Using Your Cooktop
- 7 Cooking Guidelines
- 8 Care and Cleaning
- 9 Sound Preference Settings
- 10 Troubleshooting
- 11 Alert Codes
- 12 Warranty and Service
- Download this manual
See also:
Instruction and Installation Manual
Advertisement
Table of Contents

Related Manuals for Fisher & Paykel CG903ML


Summary of Contents for Fisher & Paykel CG903ML
-
Page 1: User Guide
Gas cooktop User guide CG903ML & CG903MLD models NZ AU... -
Page 3: Table Of Contents
Contents Introduction Safety and warnings Using your cooktop Cooking guidelines Care and cleaning Sound preference settings Troubleshooting Alert codes Warranty and service Important! SAVE THESE INSTRUCTIONS The models shown in this user guide may not be available in all markets and are subject to change at any time. -
Page 5: Introduction
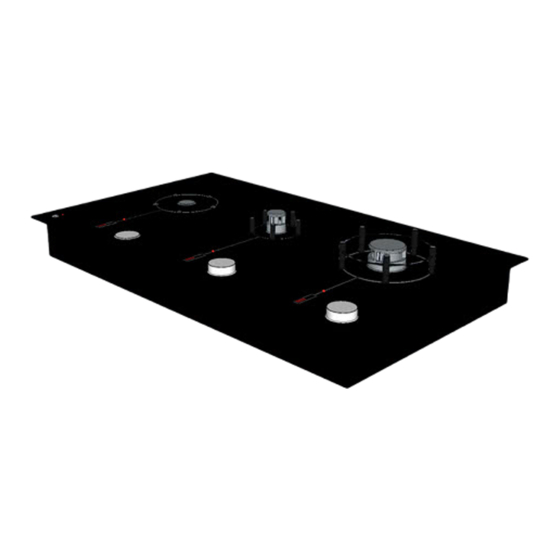
Read this guide, taking special note of the ‘Safety and warnings’ section. A heat-resistant removable sticker on the glass has been provided as a quick reference guide. When you no longer need it, it can be easily peeled off. Fig.1 CG903ML only illustrated On/Off power button Control display... -
Page 6: Safety And Warnings
Safety and warnings Your safety is important to us. Please read this information before using your cooktop. WARNING! Explosion Hazard Do not use or store flammable materials such as gasoline near the appliance. Do not spray aerosols in the vicinity of this appliance while it is in operation. Failure to follow this advice may result in injury or death. -
Page 7: Important Safety Instructions
Safety and warnings Important safety instructions Use this appliance only for its intended purpose as described in this user guide. Do not modify this appliance. Household appliances are not intended to be played with by children. Children, or persons with a disability which limits their ability to use the appliance, should have a responsible person to instruct them in its use. -
Page 8: Using Your Cooktop
Using your cooktop Operating the cooktop Press the on/off Press the control dial. The dial and the pan supports power button. A tone will sound. will rise. The burner-ready light will then glow for four seconds. While the burner-ready light is glowing, Place your pan on the pan supports. - Page 9 Using your cooktop Operating the cooktop Turn the dial to accurately adjust the flame. To stop cooking, press the dial. The gas will be shut off, and the pan supports will stay Note: the flame will not go out if you keep raised.
- Page 10 Using your cooktop ...3 seconds To lower the pan supports automatically after you have finished cooking, press and hold the dial for three seconds while the burner is lit. The flame will go out and the pan supports, if cool enough, will lower.
-
Page 11: Cooking Guidelines
Cooking guidelines Important! Do not use pans with jagged edges or drag pans across the ceramic glass surface as this can scratch the glass. Do not drag pans backwards and forwards across the pan support pins, burner heads and trim rings eg when placing and removing pans or sauteing food, as this can damage them, especially the coating on the pan support pins. - Page 12 Cooking guidelines Searing steak To cook juicy flavoursome steaks: Stand the meat at room temperature for about 20 minutes before cooking. Heat up a heavy-based frying pan. Brush both sides of the steak with oil. Drizzle a small amount of oil into the hot pan and then lower the meat onto the hot pan.
- Page 13 Cooking guidelines Using a wok Important! Use your wok only on the wok burner. When using a wok, always use the wok stand. Make sure the wok stand is fitted correctly over the raised pan supports. (see Fig.2) Do not use a wok larger than 40 cm (16”) diameter. Check that your wok is adequately supported by the wok stand.
-
Page 14: Care And Cleaning
Care and cleaning Your cooktop has been designed to combine the easy-care cleaning of ceramic glass with the performance of gas. Important! Read through the ‘Safety and warnings’ and ‘Care and cleaning’ sections carefully before doing any cleaning or maintenance. To avoid the risk of electrical shock or burners being accidentally turned on during cleaning, make sure you turn the cooktop off before cleaning by pressing the on/off power button. - Page 15 Care and cleaning Melts and spills that require immediate attention Anything that melts onto the ceramic glass surface or food spills with a high sugar content may cause pitting of the ceramic glass surface if left there to cool. Remove these spills immediately with a fish slice, palette knife or cooktop scraper.
- Page 16 Care and cleaning Cleaning the pan supports (the pan support pins and burner head) Important! Do not wash pan supports in a dishwasher or use dishwashing machine detergent to clean these parts so as not to remove the easy-clean coating. After reassembling any burner, always lower the burner before using the cooktop to check it has been reassembled correctly.
- Page 17 Care and cleaning To clean the burner head Lift out the burner head and clean with a cloth or scourer. The burner head gets much hotter than the pan support pins and for this reason it is not finished with an easy-clean coating. If cooking splatter and spills get burnt onto the burner head, scrub with a mildly abrasive cleaner and a soft cloth.
-
Page 18: Sound Preference Settings
Sound preference settings The cooktop has three pre-set sound preference settings (tones, tone volume, feedback tones). Changing the settings To change the settings, follow these steps..2 seconds ...3 seconds Hold down the on/off power button Firmly press both the on/off power button and the nearest burner control dial for three for two seconds. - Page 19 Sound preference settings Touch the dial to change the selected setting. The burner-ready light will go on or off, depending on which option you have chosen. To revert to the previous option, touch the dial again. Sound Settings Default option Alternative option TONES (You can turn the cooktop...
-
Page 20: Troubleshooting
Troubleshooting Troubleshooting chart Problem Possible causes What to do The pan supports will not Power is not turned on. Turn on the cooktop. rise. The pan supports, on/off Food has been spilled on these See ‘Care and cleaning’ . power button, or control parts. - Page 21 Troubleshooting Troubleshooting chart Problem Possible causes What to do Pan supports rise or Food has been spilled on these Clean the pan supports (see lower slowly and noisily. parts. ‘Care and cleaning’ . ) There is an unpleasant The cooktop is not functioning Shut off the gas and electricity (gas) smell.
-
Page 22: Alert Codes
Alert codes Your cooktop can self-diagnose and then communicate this information to you. If there is a problem, the cooktop will: shut one or all burners off beep every three seconds flash one or more lights display an alert code on the control display(s). If only one burner has a problem, then its control display will show the alert code. - Page 23 Alert codes Individual burner codes Alert code Possible causes What to do The pan is too heavy for the pan Remove the pan, let the pan supports supports to lift. rise up, and then place the pan back on the pan supports. The pan support pins are stuck in Try to remove the food with a damp, the down position because of spilled...
- Page 24 Alert codes Entire Cooktop codes Alert code Possible causes What to do There is not enough air getting to Check that the burners. the underside of the cooktop has direct unrestricted ventilation to the room where the cooktop is installed nothing is obstructing the air filter mesh on the underside of the cooktop the airway to the cooktop is not affected...
-
Page 25: Warranty And Service
Warranty and service Before you call for service or assistance ... Check the things you can do yourself. Refer to the installation instructions and your user guide and check that: your product is correctly installed you are familiar with its normal operation. If after checking these points you still need assistance or parts, please refer to the Service &... - Page 28 www.fi sherpaykel.co.nz www.fi sherpaykel.com.au Copyright © Fisher & Paykel 2011. All rights reserved. The product specifications in this booklet apply to the specific products and models described at the date of issue. Under our policy of continuous product improvement, these specifications may change at any time. You should therefore check with your Dealer to ensure this booklet correctly describes the product currently available.
Need help?
Do you have a question about the CG903ML and is the answer not in the manual?
Questions and answers