Table of Contents
Advertisement
Quick Links
Contents
FCC Class B/European CE Compliance ............................... 3
Introduction ...................................................................... 4
What's In the Box ............................................................... 4
Quick Start ........................................................................ 5
About the DMAN .............................................................. 5
Digital Audio Features of DMAN ....................................... 6
About Plug-and-Play ......................................................... 7
The Solution ................................................................ 7
PnP Theory of Operation .............................................. 8
About Digital Recording .................................................... 8
Digital Recording Dos and Don'ts ................................. 9
DMAN Connections ......................................................... 10
DMAN Block Diagram ............................................... 11
Hardware Installation ...................................................... 12
DMAN Connections ................................................... 12
DMAN Typical Setup ................................................. 13
Daughterboard Installation (optional) ......................... 14
Windows 3.1x Software .................................................... 15
Driver and Utilities Installation ................................... 15
Windows 3.1x Driver Control Panel ............................ 19
Audio Setup for Non-PnP Computers ......................... 19
Audio Setup for Computers with PnP ......................... 20
MIDI (MPU401 ) Setup ............................................... 21
Windows 3.1x Utility Applications .............................. 22
Audio Input Control Panel ......................................... 22
Audio Mixer Control Panel ......................................... 24
The Audio Transport .................................................. 26
Defining a New Audio File ......................................... 28
The User-defined Audio Transport Button ................... 29
Sound Check Application ........................................... 30
Windows 95 Software ...................................................... 31
Driver Installation ...................................................... 31
Windows 95 Configuration ......................................... 32
Windows 95 Mixer (WSS Mixer) ................................. 33
WSS Playback (Master Out) Mixer ........................ 33
WSS Properties Page ............................................ 34
WSS Recording (Wave Input) Mixer ...................... 35
Windows Sound Recorder .......................................... 36
DOS Software Utilities ..................................................... 38
DMAN Diagnostics Utility ......................................... 38
Diagnostics Parameters Box .................................. 38
Diagnostics Test Box ............................................ 39
DMAN DOS Mixer Utility .......................................... 39
1
Advertisement
Table of Contents
Troubleshooting

Related Manuals for M-Audio DMAN


Summary of Contents for M-Audio DMAN
-
Page 1: Table Of Contents
Introduction ..............4 What’s In the Box ............... 4 Quick Start ................ 5 About the DMAN .............. 5 Digital Audio Features of DMAN ........6 About Plug-and-Play ............7 The Solution ..............7 PnP Theory of Operation ..........8 About Digital Recording ............ 8 Digital Recording Dos and Don’ts ......... - Page 2 DMAN with 3rd Party Applications ........41 Audio Formats ..............42 Troubleshooting .............. 43 DOS Troubleshooting ............45 Windows 3.1x Troubleshooting ......... 47 Windows 95 Troubleshooting ........... 49 Appendix - Technical Specs ..........51 Limited Lifetime Warranty ..........52...
-
Page 3: Fcc Class B/European Ce Compliance
FCC Class B/European CE Compliance WARNING: This equipment has been tested and found to comply with the limits for a CLASS B digital device, pursuant to Part 15 of the FCC Rules. These limits are designed to provide reasonable protection against harmful interference in a residential installation. -
Page 4: Introduction
1 Disk for Windows 95 installation Midiman Warranty Registration Card IMPORTANT: It's very important that you fill out the included Warranty Registration Card and mail or fax it to us. Registering your DMAN will help us to give you the best possible service and support. -
Page 5: Quick Start
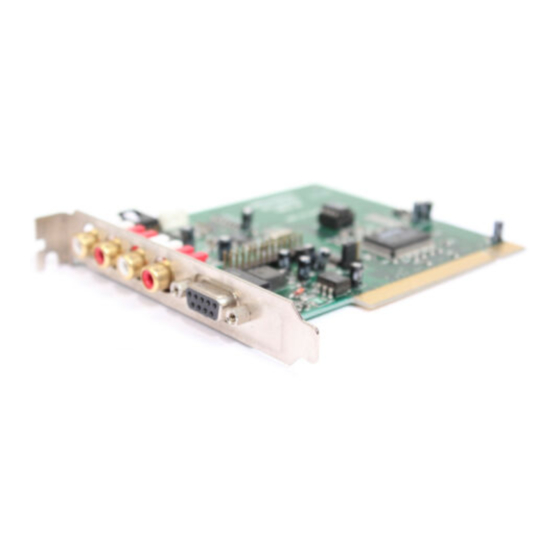
4. Configure your digital recording software. (see your software manual) About the DMAN The DMAN is a full-featured, yet low-cost digital audio card with a built-in MPU401 interface and a header for an optional wavetable synthesis daughterboard. The DMAN features 16-bit stereo sampling at various frequencies from 5.53 to 48 kHz, full-... -
Page 6: Digital Audio Features Of Dman
Digital Audio Features of DMAN 16 or 8 bit stereo digital audio recording and playback. Selectable sampling rates from 5.3 kHz to 48 kHz Interrupt and DMA driven simultaneous recording and playback. -
Page 7: About Plug-And-Play
About Plug-and-Play The PC ISA bus architecture requires allocation of memory and I/O address spaces, DMA channels, and interrupt request (IRQ) lines among all peripherals, yet there are no defined hardware or software mechanisms for allocating these resources. As a result, configuration of ISA cards is typically done with DIP switches and jumpers that change the decode maps for memory and I/O space and steer the DMA and IRQ signals to different pins on the... -
Page 8: Pnp Theory Of Operation
PnP Theory of Operation Think of PnP as digital aspirin. Device configuration occurs transparently in an all-PnP environment. At bootup, the BIOS and the operating system detect changes and attempt to allocate resources, eliminating the need to manually configure resources such as IRQ lines, DMA channels, I/O ports and memory space. -
Page 9: Digital Recording Dos And Don'ts
DMAN, the only way to make a noisy digital recording is to add the noise yourself! Digital Recording Dos and Don’ts Meters are not meant to ever go into the red. Digital recording is very unforgiving of clipping. Unlike analog systems, where tape saturation gives a nice smooth compression, digital distortion sounds like someone is breaking a pane of glass in your ear. -
Page 10: Dman Connections
DAT or other stereo mixdown recorder or headphones. 5. MIDI Interface – The included MIDI Interface Cable, when connected to the MIDI Interface connector on the DMAN board, provides standard MIDI In and MIDI Out (5-pin DIN) connectors. Normal these MIDI connections will go to a MIDI keyboard or tone module. -
Page 11: Dman Block Diagram
DMAN Block Diagram... -
Page 12: Hardware Installation
This bracket is usually fastened to the computer with a single screw. Position the DMAN card over the target ISA slot and fit the card loosely over it with the DMAN card upright. Press the card gently but firmly downward into the slot until the card is completely and squarely seated in the slot. -
Page 13: Dman Typical Setup
DMAN connector at the back of the computer. Use the thumb screws on the cable assembly to attach it securely to the DMAN. If you don’t plan on using external MIDI, this step is not necessary. Attach any MIDI devices you have by connecting the MIDI... -
Page 14: Daughterboard Installation (Optional)
2. Locate the DMAN card in your computer. 3. Remove the bracket screw that is holding the DMAN in place. 4. Gently pull the DMAN straight out of the slot. If it is a tight fit, once again use a slight rocking motion. -
Page 15: Windows 3.1X Software
Windows 3.1x Software Driver and Utilities Installation Included with DMAN is a set of Windows 3.1x Drivers and Applications diskettes which contain the Windows 3.1x drivers, Windows 3.1x utility applications, and DOS software utilities. The installation program on the first disk, SETUP.EXE, is run from Windows 3.1x and installs all the Windows and DOS... - Page 16 6. After you have selected the destination directory, the Setup program begins to copy the DMAN software there. As each software item is installed, its name is displayed. Also a percentage is displayed, indicating the percentage completion of the total installation.
- Page 17 WSS DMA playback channel. Changing this setting will also change the related DOS WSS setting. MPU401 - This checkbox enables/disables the MPU401 compatible MIDI port on the DMAN. If desired, the MPU401 base address and IRQ may be changed later (see Windows 3.1x Driver Control Panel section).
- Page 18 CD ROM - DMAN does not include a CD ROM interface. This checkbox should be unchecked to disable CD ROM support. FM Synthesis - Although the driver may support an FM synthesizer, there is no true FM synthesizer installed on the DMAN board.
-
Page 19: Windows 3.1X Driver Control Panel
Windows 3.1x Main group), then open the Drivers applet from within the Control Panel. The DMAN actually installs and uses two separate drivers for its digital audio and MIDI. The "DMAN Digital Audio / Mixer Driver” handles the digital audio recording and playback, as well as the on-board audio mixer. -
Page 20: Audio Setup For Computers With Pnp
Windows 3.1x audio driver settings through the Drivers Applet. First you must select the driver to set up by highlighting the “DMAN Digital Audio / Mixer Driver ” entry, then press the “Setup” button. The driver setup dialog below will... -
Page 21: Midi (Mpu401 ) Setup
You may modify the Windows 3.1x MIDI driver settings through the Drivers Applet. First you must select the driver to set up by highlighting the “DMAN MPU 401” entry, then press the “Setup” button. The driver setup dialog below will pop up. -
Page 22: Windows 3.1X Utility Applications
MPU. Use IRQ 6 as a last resort. Windows 3.1x Utility Applications The DMAN Windows 3.1x setup program creates a Windows Group called Midiman Audio which contains several sound utilities. - Page 23 Mixer - This button opens the Audio Mixer Control Panel application. Save - The Save button saves the current control settings to be used as the initial settings when Windows is loaded. OK - This button exits the Input Control Panel and keeps the current device settings for the duration of the current Windows session.
-
Page 24: Audio Mixer Control Panel
Dither - Clicking on the Dither box toggles dither on/off for 8-bit PCM audio. Dither improves 8-bit recordings. IMPORTANT: To enable AGC and the Volume Meter at the same time, you should first turn the “Vu On” checkbox off. Next, turn the AGC on, then turn the Vu On back on. Full Scale - The Full Scale window below the Dither box shows the maximum allowable input level to the Analog/Digital converter. - Page 25 DMAN. Line Mix - The Line Mix sliders control the left and right mix for audio present at the DMAN’s Line In jack. When the Gang box is checked, both left and right channels are adjusted in tandem.
-
Page 26: The Audio Transport
When the Mute box is checked, the audio from the DMAN Aux In jack is muted. The Audio Transport The Audio Transport application allows you to record and playback digital audio files. Clicking on the Audio Transport icon nested in the Midiman Audio group will present you with the Audio Transport shown here. - Page 27 The Audio Transport control buttons are similar to those on a tape recorder: From left to right, these buttons are: Play - Plays the selected audio file. Stop - Stops playback of the selected audio file. Pause - Pauses play. Record - Starts recording the selected audio file.
-
Page 28: Defining A New Audio File
write protected and you cannot overwrite new data onto this file. Click on this box to toggle between write protection on/off. Defining a New Audio File When you select the open file button and specify a new audio file by entering a new filename, the Select Tape Format dialog box appears, allowing you to select the attributes of the new audio file. -
Page 29: The User-Defined Audio Transport Button
ADPCM - Provides 4:1 compression compared to 16-bit PCM format. The compression means this format uses less disk space but causes degradation in playback quality. m-Law - Provides 2:1 compression compared to PCM format. A-Law - Provides 2:1 compression compared to PCM format. -
Page 30: Sound Check Application
Where pathname is the path (drive and directory) of the application file, and filename is the name of the file to run. 3. Save and close the CSACBAT1.INI file. The following is an example of the command lines in the CSACBAT1.INI file that would cause Windows Write to start up when you select the user-defined button: [APPLETS]... -
Page 31: Windows 95 Software
(DMAN!) will be automatically detected as shown here. Windows 95 New Hardware Detection 3. Click OK to install the DMAN driver software from floppy. 4. When prompted for the Windows ‘95 Driver Disk, place it into the A: drive and click OK. -
Page 32: Windows 95 Configuration
DMAN is ready for immediate use. Windows 95 Driver Configuration Windows 95 displays the DMAN driver status in the Device Manager page of the System Properties dialog box. The Systems Properties dialog is opened via the Windows 95 Start button. -
Page 33: Windows 95 Mixer (Wss Mixer)
If an exclamation point is ever displayed for the Midiman DMAN, you may go into the Device Manager and manually make the adjustments necessary to get DMAN up and running. -
Page 34: Wss Properties Page
If you do not want one or more of the devices to show up in the mixer window, uncheck the box for that specific device. By the way, PC Speaker does not apply to the DMAN and should be unchecked. Then select OK. -
Page 35: Wss Recording (Wave Input) Mixer
Main Out. The relative mixes of the devices to be recorded is determined by the WSS playback mixer settings. Mix Out is the only way to record from the Aux In input to the DMAN board. It is much more convenient to record the Line In since it has its own record path into the DMAN. -
Page 36: Windows Sound Recorder
The figure below shows advanced options available for microphone control. Although there are no Tone Controls on DMAN, the microphone does have a 20 dB gain boost block that may be enabled or disabled via this dialog box. Advanced Controls for Mic... - Page 37 Win 95 Sound Recorder Applet Additional features from the pull down menus include volume and speed adjustment, echo and reverse effects, and audio file insertion, mixing and sound quality conversion.
-
Page 38: Dos Software Utilities
DOS Software Utilities The DMAN DOS software utilities are installed as a part of the Windows 3.1x drivers and utilities, or the Windows 95 drivers. IMPORTANT: The DOS utility programs must be run from the native DOS prompt, not from within Windows. For Windows 95 users, this means you should choose "Shutdown"... -
Page 39: Diagnostics Test Box
DOS batch file. In fact, the DMAN Windows software installation will place a CS32MIX command in your AUTOEXEC.BAT file that is run at boot time to initialize the mix levels of your DMAN. To run the program as a graphical interface, type CS32DIAG and press the [ENTER] key. - Page 40 DOS Sound Card Mixer The easiest way to control the sound parameters is with a mouse. Simply drag the solid black “sliders” to their desired positions and click on the Line, Mic, and Aux “checkboxes” to select the input source. The various parameters may also be controlled by using hot keys (Alt + highlighted letter), and the tab and arrow keys to increase/decrease left/right channels for each input.
-
Page 41: Dman With 3Rd Party Applications
DMAN with 3rd Party Applications Sooner or later you will want to use DMAN with some of the advanced 3rd party applications currently available. It is with these applications that the DMAN becomes a true multi-track digital audio recording tool. Although there are various setup parameters built into Windows for selecting audio quality, etc.,... -
Page 42: Audio Formats
Audio Formats DMAN supports recording and playback in many audio formats. When selecting an audio format, you are usually trading off sound quality versus the amount of disk space the recorded audio will consume. In general, sound quality increases as the... -
Page 43: Troubleshooting
Troubleshooting This section addresses potential problems that can occur in all operating system environments, with emphasis on hardware troubleshooting. Within the PC environment there is a limited number of hardware resources (addresses, IRQs, and DMA channels) available for use. Since audio cards require many resources, most audio card installation problems arise from improperly set IRQ and DMA values. - Page 44 If this problem occurs in Windows, open the driver configuration dialog box and set the IRQ to match the current DMAN setting. If this problem is in DOS, reconfigure the IRQ in the DOS application itself to match that of DMAN.
-
Page 45: Dos Troubleshooting
DMAN can be contacted at the parameter in question, and also pauses for a period of time to ensure that no IRQ, DMA request, etc. is initiated by a device other than DMAN. Failing to reach DMAN or detecting the signal from another device will cause the test to fail. - Page 46 MPU401 Port Address: If the MPU401 test fails, you may have a port address conflict. Change the I/O Port Address that the application is using to communicate with DMAN by changing the "MPU401IO=" line in the CS4232.INI file. Set it to 300, 320, 332, 338, 340 or 360.
-
Page 47: Windows 3.1X Troubleshooting
(see Windows 3.1x Software section). Possible Cause 3: Your Windows 3.1x driver settings do not match those of the DMAN hardware and must be changed to match those of the hardware. Problem: The Windows Media Player does not play MIDI through the... - Page 48 Install/reinstall all DMAN audio drivers (see Windows 3.1x Software section). Possible Cause 3: You have not selected the DMAN MIDI driver from your application. Many 3rd party applications require you to select a specific MIDI driver (because there can be more than one in an advanced system) for use with the application.
-
Page 49: Windows 95 Troubleshooting
Possible Cause 1: The DMAN Audio driver is not properly installed. Install/reinstall all DMAN audio drivers (see Windows 95 Software section). Possible Cause 2: You have not selected the DMAN audio driver from your application. Many 3rd party applications require you to select a... - Page 50 Install/reinstall all DMAN audio drivers (see Windows 95 Software section). Possible Cause 3: You have not selected the DMAN MIDI driver from your application. Many 3rd party applications require you to select a specific MIDI driver (because there can be more than one in an advanced system) for use with the application.
-
Page 51: Appendix - Technical Specs
Appendix - Technical Specs Channel Volume Controls Over a range of 64 dB: Stereo Master Volume: 64 steps range Stereo Aux In: 32 steps range Stereo Line in: 32 steps range Stereo Digital Audio: 64 steps range Stereo Synth In: 32 steps range Mono Mic-in: 32 steps range... -
Page 52: Limited Lifetime Warranty
Limited Lifetime Warranty MIDIMAN warrants that this product is free of defects in materials and workmanship under normal use so long as the product is: owned by the original purchaser; the original purchaser has proof of purchase from an authorized MIDIMAN dealer;...
Need help?
Do you have a question about the DMAN and is the answer not in the manual?
Questions and answers