
Related Manuals for QSC PowerLight3 Series


Summary of Contents for QSC PowerLight3 Series
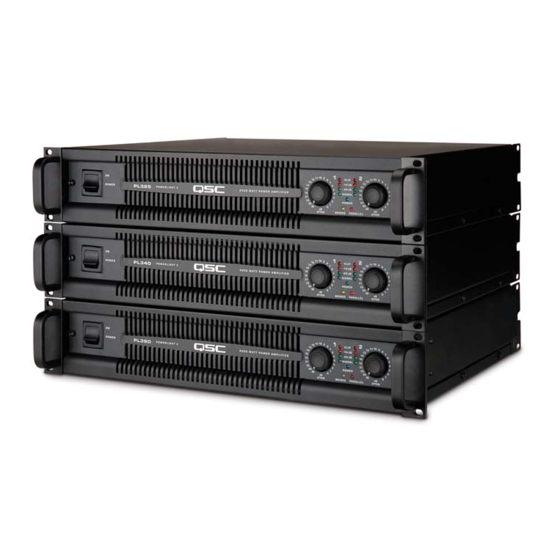
- Page 1 PowerLight3 Series ▲ ▲ ▲ ▲ ▲ PL325 ▲ ▲ ▲ ▲ ▲ PL340 ▲ ▲ ▲ ▲ ▲ PL380 *TD-000274-00* *TD-000274-00* QSC Audio Products, LLC Rev. A Costa Mesa, CA 92626 USA www.qscaudio.com...
- Page 3 +1 (714) 754-6173 Postal: 1665 MacArthur Blvd. Costa Mesa, California 92626 USA E-mail: tech_support@qscaudio.com Web: http://www.qscaudio.com (product information and support) http://www.qscstore.com (parts and accessory sales) Copyright © 2008 QSC Audio Products, Inc. All rights reserved. PL3 Series Service Manual TD-000274-00 Rev. A...
-
Page 4: Pl325 And Pl340 Amplifier, Rear View
PL325 and PL340 amplifier, rear view PL380 amplifier, rear view QSC Audio Products, LLC... -
Page 5: Table Of Contents
6.1 Semiconductor package descriptions and pinouts ..............................89 6.2 PL325 parts and assemblies ..................................... 93 PL325 Power Amplifier (120V) (QSC part # FG-032500-00) ..................................93 PL325 Power Amplifier (100V) (QSC part # FG-032500-01) ..................................93 PL325 Power Amplifier (230V) (QSC part # FG-032500-02) ..................................93 Chassis Assembly PL325 (120V) (QSC part # WP-032500-00) .................................. -
Page 6: Tables And Figures
Chassis Assembly PL380 (100V) (QSC part # WP-038000-01) ..................................121 Chassis Assembly PL380 (230V) (QSC part # WP-038000-02) ..................................122 PCB Assembly PL380 (120V) (QSC part # WP-038001-00) through January 2008 ............................. 122 PCB Assembly PL380 (100V) (QSC part # WP-038001-01) through January 2008 ............................. 126 PCB Assembly PL380 (230V) (QSC part # WP-038001-02) through January 2008 ............................. - Page 7 Tables and Figures (continued) Table 3.4. Troubleshooting short circuit cutback clamping ........................... 47 Figure 3.13. Output signal and positive rail steps..............................48 Figure 3.14. Output signal and negative rail steps............................... 48 PL325 and PL340 main circuit board, with major circuit sections shown ......................53 PL325 and PL340 main circuit board, top layer ..............................
-
Page 8: Specifications
Agency Approvals UL, CE, RoHS / WEEE compliant, FCC Class B (conducted and radiated emissions) * Burst mode testing required due to AC service current limitations ** Representative of current draw with tyical music program material with occasional clipping All specifications are subject to change without notice. QSC Audio Products, LLC... -
Page 9: Introduction
1.2 Service bulletins and updates Contact QSC Technical Services to make sure you have the most up-to-date service bulletins, schematics, and parts lists for PowerLight 3 Series amplifiers. Service materials may be distributed in hard copy, via fax, and electronically (Adobe Acrobat PDF) via CD-ROMs, FTP from the QSC web site (www.qscaudio.com), and e-mail. -
Page 10: Working With Surface-Mount Components
Figure 1.2. Use two irons • Wire strippers • PL380 Automated test equipment, such as an Audio Precision workstation, is very useful for servicing QSC amplifiers. Contact QSC Technical Services to obtain applicable AP test files. Solder braid 1.4 Working with surface-mount components PowerLight 3 amplifiers, like many modern electronic products, use surface-mount technology (SMT) compo- Figure 1.3. - Page 11 1.4 Working with surface-mount components (continued) Three-terminal components (transistors, etc.) Removal 1 With a soldering iron and solder braid, remove as much solder as possible from the middle terminal of the component. 2 With a soldering iron in each hand, hold one tip on the solder at the terminal at one end of the component and the other tip on the terminal at the other end.
-
Page 12: Pl380 Service Fixture
With its class D output section, the PL380 amplifier differs from all abnormal situations such as defective op amps or other circuitry previous QSC stand-alone models, which up to now have used that could cause abnormally high or low current demand. -
Page 13: Figure 1.11. Connecting The Hookup Leads
1.5 PL380 Service Fixture (continued) Turn off the service fixture’s power switch and connect it to the Initial tests with the service fixture AC mains. The service fixture has a universal power supply that can operate on any AC voltage from 100 to 240 volts. These initial tests with the service fixture will allow you to deter- mine whether the amplifier’s clock and control circuitry are working properly, with no risk of damaging high-power devices or circuits. - Page 14 QSC Audio Products, LLC...
-
Page 15: Figure 1.13. Proper Igbt Drive Signals (With Chassis Ground Reference )
1.5 PL380 Service Fixture (continued) terminal). The voltage is derived from other low-voltage power supplies, so its presence indicates that the other supplies are probably good. If the voltage is not present, then check the other supplies and associated circuitry to find the fault. For more detailed troubleshooting, see Troubleshooting Serious Failures in Section 3.1. -
Page 16: Technical Descriptions And Testing
DC rails of approximately ±16 V. Each of the two amplifier channels uses two large switching FETs operating as a half-bridge at a clock frequency of 250 kHz. The FETs The housekeeping flyback supply operates independently of the QSC Audio Products, LLC... -
Page 17: Protection Systems
The PL380 uses the same type of HD-15 connector used on other the positive rail, and turning on the low-side switch for longer QSC DataPort amplifiers to connect to QSControl devices such as intervals will lower the output voltage towards the negative rail. -
Page 18: Pl380 Major Circuit Blocks
L5, L6, C226, and C227 to filter out 3. When the capacitor charges to greater than 3.3 V, the compara- switching noise. All circuitry connected to these rails will be QSC Audio Products, LLC... - Page 19 2.2 PL380 Major Circuit Blocks (continued) tor U24:1 will swing low, turning on Q35 and Q37. These actuate an actual difference to be noted. relay K2 (schematic: sheet Supply, PL380 , zone C-6), which couples AC through large NTC resistors R262 and R266 to the High Current Switching main AC rectifier BR1.
- Page 20 10 V. Higher temperatures described next. will further increase the fan voltage. The maximum fan voltage available, which would be at temperatures at or about the point of QSC Audio Products, LLC...
- Page 21 2.2 PL380 Major Circuit Blocks (continued) thermal shutdown, is about 30 V DC. Feedback elements R160, connects CL-A-ON to ground; when set to “enable” the clip limiter, it R157, Q45, and R153 provide stabilizing feedback to regulate the is open and allows the falling voltage at CLIP-A to let Q72 turn on fan voltage.
- Page 22 LEDs. “DataPort” Connector and Monitoring Signals The DataPort is a QSC-specific connector scheme that passes low- voltage (line level) signals to and from external monitoring devices such as the Basis series. The DataPort may also host a plug-in accessory that receives power from the +15 V line and sends processed signals to the amplifier.
-
Page 23: Pl380 Test Procedure
2.3 PL380 Test Procedure mately 2800 watts with a continuous sine wave signal). Test Equipment required: The circuit design of the PL380 is fine-tuned and requires no internal • Distortion analyzer with built-in signal generator trim pots. Therefore, no adjustment or calibration is required during The generator must have total harmonic distortion plus noise testing. - Page 24 1. Connect a 4-ohm load resistance to channel 1’s output. Apply a and -10 dB) should be lit. Set the analyzer’s 0 dB reference to 2.7 V rms, 1 kHz sine wave signal to amp channel 1’s XLR input . this level. QSC Audio Products, LLC...
- Page 25 2.3 PL380 Test Procedure (continued) 2. Adjust the gain control to obtain 2500 watts output power 3. Measure AC line current; should be about 13–21 A (120 V model) (100 V rms). Verify that the THD is below 1%. Check the output or 6.5–12 A (230 V model).
-
Page 26: Pl340 Test And Calibration Procedure
3 with the other channel. 6. Turn on the analyzer’s 80 kHz filter. 7. Plug the amplifier’s power cord into a variable autoformer (set to 0 V) and set up an ammeter to monitor AC line current. QSC Audio Products, LLC... -
Page 27: Figure 2.4. Noise And Distortion Residual With Bias Properly Set
2.4 PL340 Test and Calibration Procedure (continued) Signal Indicators Test 1. Disconnect the load resistors. 2. With a 1.96 V rms, 1 kHz input signal into the channel, turn the gain control to maximum. The three signal LEDs (Signal, -20 dB, and -10 dB) should be be lit. - Page 28 Reassemble the amplifier and verify its operation prior to returning 2. Apply a short across the output of each channel and turn the the product to service. amplifier gain controls to maximum. Clip LEDs should be on. QSC Audio Products, LLC...
-
Page 29: Pl325 Test And Calibration Procedure
2.5 PL325 Test and Calibration Procedure Test Equipment required: Power On and Mute Delay Test • Distortion analyzer with built-in signal generator 1. Turn the amplifier on and slowly increase the AC voltage to 50 V The generator must have total harmonic distortion plus noise (120 V model) or 100 V (230 V model) while monitoring the AC (THD+N) of no higher than 0.01%, and the analyzer must be line current. - Page 30 4. Adjust the bias trimpot VR43 (channel 1) or VR166 (channel 2) for a total THD+N figure of 0.07% or slightly less. Figure 2.4 shows what the residual crossover spike should look like when the bias QSC Audio Products, LLC...
- Page 31 2.5 PL325 Test and Calibration Procedure (continued) 2. Turn the amplifier gain controls to maximum. Set the analyzer’s 2 Ohm Power and Short Circuit 0 dB reference to this level. Current Test 3. Disconnect the input signal from the amplifier input and measure the residual noise level produced into the load.
- Page 32 This page is blank. QSC Audio Products, LLC...
-
Page 33: Troubleshooting
3. Troubleshooting 3.1 PL380: Symptoms, causes, and remedies Relay Circuit, Inrush System. Prerequisites to troubleshooting • To prevent high surge currents that would otherwise flow into the large primary- and secondary-side capacitors, the power Safely turning on an unknown PL380 amplifier supply IGBTs start switching before voltage is applied to the main reservoir capacitors. -
Page 34: Figure 3.1 Igbt Gate Drive Waveforms
2. Failed switch-mode power supply: If you suspect that the What to look for switching supply IGBTs Q68 and Q69 (QSC part # QD-000315-00) are Symptoms may include one or more of these: damaged: • The amplifier draws excessive current; it may trip circuit breakers •... -
Page 35: Figure 3.2 Fet Gate Drive Waveforms
Failed output FETs: If you suspect that the output switching FETs CAUTION: Voltage—even residual amounts—on the main supply Q10 and Q11 (channel 1; QSC part # QD-000318-00) or Q58 and Q59 rails can cause high current surges into a grounded scope probe (channel 2;... -
Page 36: Figure 3.5 The Power Supply Sync Pulse
• Components C15, R26, and R21 create a short pulse buffered by supplying power, the drive signal at the gates (referenced to the U5:1, which serves as the power supply sync signal. Note that it source) on each channel should be two similar but complementary QSC Audio Products, LLC... -
Page 37: Figure 3.6 Triangle Wave At Comparator Inputs (Pin 2 Of U8 And U28)
3.1 PL380: Symptoms, causes, and remedies (continued) 0–12 V square waves, with a slightly rounded leading edge and • With your oscilloscope, check and confirm the optocoupler input steeper falling edge (see Figure 3.2). signals, with respect to ground. On channel 1, optocouplers U12 and U13 should receive a 5 V If there is any signal into the modulator, you should also observe PWM logic signal at their inputs (pin 2) . - Page 38 D47, and C139). If the rear section of the heatsink is warmer Symptoms may include one or more of these: than the front, check channel 1’s dead time circuit (R43, D4, and C29; R44, D5, and C30). • The amplifier operates, but poorly or incorrectly. QSC Audio Products, LLC...
- Page 39 3.1 PL380: Symptoms, causes, and remedies (continued) Excessive distortion: Each channel should exhibit midband With no load, the output may show one or two cycles of damped (approx. 1 kHz) THD of 0.01–0.02% at output levels between about ringing after the square wave leading edge. If you increase the 50 W and 500 W (about 20–63 V rms) into 8 ohms, increasing to signal or the channel gain to nearly the point of clipping, the about 0.2% just below clipping and above about 5 kHz.
- Page 40 (about 80 A peak; less current at higher FET temperatures). • Any missing or open components will prevent current clamping, which will probably allow FET failure if the outputs are shorted. QSC Audio Products, LLC...
-
Page 41: Pl325 And Pl340: Symptoms, Causes, And Remedies
3.2 PL325 and PL340: Symptoms, causes, and remedies When first checking the operation of an amplifier on the bench, • Perform a quick test of the bias supply as instructed in Trouble- always turn your variable autoformer down to zero before plugging shooting the TOP-210 Bias Supply Faults . -
Page 42: Figure 3.9: Switching Signal With Dead Time At Nodes N397 And 398 (Pins 11 And 14 Of U19)
• Check the step FETs. If any is shorted, it will cause the amplifier Troubleshooting and Replacing Blown Output Transistors. to run inefficiently. See Troubleshooting Step Problems for in- depth troubleshooting. • Check for leaking capacitors C179, C180, C189, or C190. QSC Audio Products, LLC... -
Page 43: Figure 3.10. Typical Crossover Residual From Distortion Analyzer Output
3.2 PL325 and PL340: Symptoms, causes, and remedies (continued) • The bias may be set excessively high. Calibrate the bias on the Faults With Signal Present suspect channel as described in the test procedure. Figure 3.10 shows an acceptable crossover spike at the distortion analyzer The customer complains that the amplifier passes a signal but output. - Page 44 • Resistor R349 subtracts about 0.5 V, bringing the net voltage at The amplifier’s IGBTs are driven by an active, direct coupled pin 4 (feedback reference) of U16 to about 5.1V. integrated circuit rather than a gate drive transformer. IGBT or driver QSC Audio Products, LLC...
-
Page 45: Plc Power Supply Restoration Kit
PL325 • U13 has fairly high supply voltage ratings and should rarely fail. amplifier. Audio Output: Troubleshooting and replacing PLC Series Power Supply Restoration Kit (QSC damaged output transistors part number: SG-000060-00) Part Number Description Reference Qty. -
Page 46: Table 3.1. Clamping Voltage Troubleshooting
R51, R72 R53, R75 R174, R195 R176, R198 If voltage is approx. 0.7 V check for missing resistor: R182 R185 If voltage is wrong check for wrong value R59, R60 R61, R62 R182, R183 R184, R185 QSC Audio Products, LLC... -
Page 47: Table 3.2. Troubleshooting Clamp Malfunctions
3.2 PL325 and PL340: Symptoms, causes, and remedies (continued) Table 3.2. Troubleshooting clamp malfunctions Channel and polarity ☛ Channel 1 + Channel 1 - Channel 2 + Channel 2 - Measure clamping voltage across: Check for low resistance R67, R73 R68, R74 R190, R196 R191, R197... -
Page 48: Figure 3.12. The Overcurrent Detection Circuit For Power Supply Cutback
3 seconds at full power. Table 3.3. Troubleshooting clamp transistors Channel and polarity ☛ Channel 1 + Channel 1 - Channel 2 + Channel 2 - Clamping voltage Measure voltage on decreases, but no Check clamp transistor current cutback QSC Audio Products, LLC... -
Page 49: Table 3.4. Troubleshooting Short Circuit Cutback Clamping
3.2 PL325 and PL340: Symptoms, causes, and remedies (continued) Table 3.4. Troubleshooting short circuit cutback clamping Channel and polarity ☛ Channel 1 + Channel 1 - Channel 2 + Channel 2 - Measure clamping voltage across: Check cutback transistor and Q24, R67 Q25, R68 Q69, R190... -
Page 50: Figure 3.13. Output Signal And Positive Rail Steps
Fault: Clip limiting doesn’t work (only one channel) With your oscilloscope, probe the op-amp output on pin 7 of U2 Figure 3.14. Output signal and negative rail steps. (channel 1) or U7 (channel 2), while the channel is clipping. If the QSC Audio Products, LLC... - Page 51 3.2 PL325 and PL340: Symptoms, causes, and remedies (continued) • Q7 (channel 1) or Q52 (channel 2), may be missing or open. Fault: FET does not stay fully turned on This generally causes clipping and possible distortion problems at • R28 (channel 1) or Q151 (channel 2), may be missing or open. low frequencies when the amp drives 2-ohm loads.
- Page 52 • POSREF should be about 20 V below the +MID-RAIL node. ing specific FET types. If these problems appear in any QSC amplifier, please report it to QSC Technical Services.
- Page 53 3.2 PL325 and PL340: Symptoms, causes, and remedies (continued) Audio Power Stage and Power Supply: Fault: Shutdown occurs when output signal exceeds Troubleshooting DC Fault Shutdown • Check Q87, C7, R240, and D48 for open or missing components. Normal circuit behavior •...
- Page 54 29 V when hot. • If the fan voltage is okay, replace the fan. • No voltage: check Q89–Q91, R264, and 265 for open or missing components. Confirm that ±15 V supply voltages are present. QSC Audio Products, LLC...
- Page 55 Ch. 1 negative Ch. 1 positive Ch. 2 positive Ch. 2 negative IGBT switches driver and driver and driver and driver and “Keep-alive” and spike EMI line output output output output supply filter filter Top side Top side Mute and fan control Output Zobel filters...
-
Page 56: Pl325 And Pl340 Main Circuit Board, Top Layer
Top layer Top side PL325 and PL340 main circuit board, top layer QSC Audio Products, LLC... -
Page 57: Pl325 And Pl340 Main Circuit Board, Bottom Layer, Mirror Image
Bottom layer (mirror image) Silk screen shown for reference Bottom side (mirror image) Silk screen layer is shown for reference. PL325 and PL340 main circuit board, bottom layer, mirror image PL3 Series Service Manual TD-000274-00 Rev. A... -
Page 58: Pl325 And Pl340 Input Board, Top Layer
Input module circuit board assembly Top layer Top side PL325 and PL340 input board, top layer QSC Audio Products, LLC... -
Page 59: Pl325 And Pl340 Input Board, Bottom Layer, Mirror Image
Bottom layer (mirror image) Silk screen shown for reference Bottom side (mirror image) Silk screen layer is shown for reference. PL325 and PL340 input board, bottom layer, mirror image PL3 Series Service Manual TD-000274-00 Rev. A... -
Page 60: Main Module Circuit Board Assembly
±25V supplies reservoir caps PL380 main circuit board, with Ch. 1 temp Ch. 2 output Ch. 2 temp Ch. 2 output major circuit sections shown sensor filter network sensor MOSFETs QSC Audio Products, LLC... -
Page 61: Pl380 Main Circuit Board, Detailed View
Relay timer & Relay timer & stby/mute control stby/mute control shutdown shutdown -15V, ±5V -15V, ±5V Service Service +15V +15V Fan speed Fan speed supply supply plug-in plug-in regulator regulator control control Ch. 2 clip Ch. 1 & 2 limiter Ch. -
Page 62: Pl380 Main Circuit Board, Top Layer
Top layer Top layer PL380 main circuit board, top layer QSC Audio Products, LLC... -
Page 63: Pl380 Main Circuit Board, Mid1 Layer
Mid-1 layer (top view) Silk screen shown for reference Mid 1 layer (top view) PL380 main circuit board, mid1 layer Silk screen layer shown for reference PL3 Series Service Manual TD-000274-00 Rev. A... -
Page 64: Pl380 Main Circuit Board, Mid2 Layer
Mid-2 layer Silk screen shown for reference Mid 2 layer (top view) PL380 main circuit board, Silk screen layer shown for reference mid2 layer QSC Audio Products, LLC... -
Page 65: Pl380 Main Circuit Board, Bottom Layer
Bottom layer (top view) Silk screen shown for reference Bottom layer (top view) PL380 main circuit board, bottom layer Silk screen layer shown for reference PL3 Series Service Manual TD-000274-00 Rev. A... -
Page 66: Schematic Diagrams
5. Schematic Diagrams Check www.qscaudio.com for the latest schematic revisions. 5.1 PL325 Schematics ITEM NO. PART NO. DESCRIPTION VENDOR PL325 schematic notes QSC Audio Products, LLC... -
Page 67: Schematic Sheet Input, Pl325
Signal Path Schematic sheet INPUT, PL325 PL3 Series Service Manual TD-000274-00 Rev. A... -
Page 68: Pl325 Wiring Diagram
PL325 wiring diagram QSC Audio Products, LLC... -
Page 69: Pl325 Schematic Guide
ITEM NO. PART NO. DESCRIPTION VENDOR PL325 schematic guide PL3 Series Service Manual TD-000274-00 Rev. A... -
Page 70: Schematic Sheet Amp Ch-A, Pl325
Signal Path Schematic sheet AMP CH-A, PL325 QSC Audio Products, LLC... -
Page 71: Schematic Sheet Amp Ch-B, Pl325
Signal Path Schematic sheet AMP CH-B, PL325 PL3 Series Service Manual TD-000274-00 Rev. A... -
Page 72: Schematic Sheet Protect/Control, Pl325
Schematic sheet PROTECT/CONTROL, PL325 QSC Audio Products, LLC... -
Page 73: Schematic Sheet Power Supply, Pl325
Schematic sheet POWER SUPPLY, PL325 PL3 Series Service Manual TD-000274-00 Rev. A... -
Page 74: Pl340 Schematics
5.2 PL340 Schematics ITEM NO. PART NO. DESCRIPTION VENDOR PL340 schematic notes QSC Audio Products, LLC... -
Page 75: Schematic Sheet Input, Pl340
Signal Path Schematic sheet INPUT, PL340 PL3 Series Service Manual TD-000274-00 Rev. A... -
Page 76: Pl340 Wiring Diagram
PL340 wiring diagram QSC Audio Products, LLC... -
Page 77: Pl340 Schematic Guide
ITEM NO. PART NO. DESCRIPTION VENDOR PL340 schematic guide PL3 Series Service Manual TD-000274-00 Rev. A... -
Page 78: Schematic Sheet Amp Ch-A, Pl340
Signal Path Schematic sheet AMP CH-A, PL340 QSC Audio Products, LLC... -
Page 79: Schematic Sheet Amp Ch-B, Pl340
Signal Path Schematic sheet AMP CH-B, PL340 PL3 Series Service Manual TD-000274-00 Rev. A... -
Page 80: Schematic Sheet Protect/Control, Pl340
Schematic sheet PROTECT/CONTROL, PL340 QSC Audio Products, LLC... -
Page 81: Schematic Sheet Power Supply, Pl340
Schematic sheet POWER SUPPLY, PL340 PL3 Series Service Manual TD-000274-00 Rev. A... -
Page 82: Pl380 Schematics
5.3 PL380 Schematics ITEM NO. PART NO. DESCRIPTION VENDOR PL380 schematic notes QSC Audio Products, LLC... -
Page 83: Pl380 Wiring Diagram
PL380 wiring diagram PL3 Series Service Manual TD-000274-00 Rev. A... -
Page 84: Pl380 Schematic Guide
PL380 schematic guide QSC Audio Products, LLC... -
Page 85: Schematic Sheet Amp Ch-A, Pl380 Through January 2008
+5V:SW A-HI-25 +180 +5V:SW A-HI-S Signal Path (linear) Signal Path (PWM) RUN-B-LO SYNC +5V:SW +5V:SW AMP_TRIG_B +5V:SW SW-A CLK-B CLK-A AMP_TRIG_A RUN-A-LO +5V:SW CLK-A OC-FB-A SW-A +5V:SW VCL-P VCL-N A-25V-LO IN-A-REF +14V CLIP-A +14V -180 OFFSET-A IN-A-POS +5V:LIN CL-A-ON OC-LIM-A -5V:SW OC-FB-A -5V:LIN... -
Page 86: Schematic Sheet Protect/Control, Pl380
IGBT-SW A-MUTE-LO B-MUTE-LO AC-OFF-LO +15_TOP +5_TOP +5_TOP AC-ON +5V:LIN A+B_MUTE 50A-RY 20A-RY -15_TOP -15_TOP +5V:LIN +180 +16V A/B_THERM B-THERM A-THERM OFFSET-A OFFSET-B +5V:LIN OUT-B AC-OFF-LO -5V:LIN OUT-A +14V -180 -5_TOP -16V -14V Schematic sheet PROTECT/CONTROL, PL380 QSC Audio Products, LLC... -
Page 87: Schematic Sheet Amp Ch-B, Pl380 Through January 2008
B-HI-25 +180 +5V:SW +5V:SW B-HI-S Signal Path (linear) Signal Path (PWM) +5V:SW AMP_TRIG_B VCL-P CLK-B VCL-N SW-B OC-FB-B SW-B -5V:SW +5V:SW +5V:SW IN-B-REF +14V B-25V-LO OFFSET-B IN-B-POS CLIP-B +14V -180 -5V:SW +5V:LIN CL-B-ON OC-LIM-B -5V:SW OUT-B OC-FB-B +14V -5V:LIN CLIM-B -5V:LIN -14V FB-B... -
Page 88: Schematic Sheet Power Supply, Pl380 Through January 2008
+16V +14V PRI-LO +5V:SW +16V +25_TOP +5_TOP AC-ON -16V -14V -25_TOP A-HI-25 -5V:SW -16V -5V:LIN -15_TOP -5_TOP A-HI-S +5_TOP +25_TOP B-HI-25 -25_TOP Power Supply, PL380 B-HI-S SERV-1 Schematic sheet POWER SUPPLY, PL380 through January 2008 AC-ON QSC Audio Products, LLC... -
Page 89: Schematic Sheet Input, Pl380 Through January 2008
IN-B-POS BR-R POT-B IN-B-REF -XLRB SEND-B +XLRB +5V_IN -XLRB +15_AUD +XLRB CL-DPB CL-DPB CLIP-B IM-B +5V_IN VM-B IM-B IMON-B CL-B -15_AUD +15_AUD +10DP +15IN LOG-B B-LIM VM-B VMON-B -15_AUD LD-B CL-DPA IM-A CL-B-ON VM-A -15IN STBY-LO STBY-LO AC-OFF-LO VM-B -15_AUD +15_AUD +10DP +10V... -
Page 90: Schematic Sheet Amp Ch-A, Pl380 From February 2008
OC-LIM-A +5V:LIN +14V A-THERM +14V A-LIM ZOB-A BR-POS -14V VMON-A BR-NEG CLIM-A -14V EMI_G LIMITER-A PS-LIM Components changed since prior OUT-A -5V:LIN version are highlighted in yellow. -14V Schematic sheet AMP CH-A, PL380 from February 2008– QSC Audio Products, LLC... -
Page 91: Schematic Sheet Amp Ch-B, Pl380 From February 2008
B-HI-25 +180 +5V:SW +5V:SW Signal Path (linear) B-HI-S Signal Path (PWM) +5V:SW AMP_TRIG_B VCL-P CLK-B VCL-N SW-B OC-FB-B SW-B -5V:SW +5V:SW +5V:SW IN-B-REF +14V B-25V-LO OFFSET-B IN-B-POS CLIP-B +14V -180 -5V:SW +5V:LIN CL-B-ON OC-LIM-B -5V:SW OUT-B OC-FB-B +14V -5V:LIN CLIM-B -5V:LIN -14V FB-B... -
Page 92: Schematic Sheet Power Supply, Pl380 From February 2008
+5_TOP AC-ON -16V -14V -25_TOP A-HI-25 -5V:SW -16V -5V:LIN -15_TOP -5_TOP A-HI-S +5_TOP +25_TOP B-HI-25 -25_TOP B-HI-S SERV-1 Components changed since prior AC-ON version are highlighted in yellow. Schematic sheet POWER SUPPLY, PL380 from February 2008– QSC Audio Products, LLC... -
Page 93: Schematic Sheet Input, Pl380 From February 2008
IN-B-POS BR-R POT-B IN-B-REF -XLRB SEND-B CL-MASK +XLRB -XLRB +15_AUD +XLRB CL-DPB CL-DPB CLIP-B IM-B VM-B IM-B IMON-B CL-B -15_AUD +15_AUD +10DP +15IN LOG-B B-LIM VM-B VMON-B -15_AUD LD-B CL-DPA IM-A CL-B-ON VM-A -15IN STBY-LO STBY-LO AC-OFF-LO VM-B -15_AUD +15_AUD +10DP +10V +5V_IN... - Page 94 This page is blank. QSC Audio Products, LLC...
-
Page 95: Replacement Parts
6. Replacement parts 6.1 Semiconductor package descriptions and pinouts Legend: A = anode; B = base; C = collector; D = drain; G = gate; K = cathode; S = source IC-000024-00 IC-000047-30 PWM controller, SG3525AN COMPARATOR, DUAL, LM393, SMT OUTPUT A INV. - Page 96 INVERTING INPUT B V OUT V IN OUTPUT A OUTPUT B BUFFER INPUT A BUFFER INPUT B BUFFER OUTPUT A BUFFER OUTPUT B IC-000106-30 QD-000315-00 D FLIP FLOP, DUAL, 74HC74, SMT 600V 75A IGBT, 250W, IXGR60N60C2, TO-247 QSC Audio Products, LLC...
- Page 97 6.1 Semiconductor package descriptions and pinouts (continued) IC-000316-00 IC-000342-00 Counter, 14 stage, 74HC4060, SMT TOP SWITCH, TOP244YN Y Package (TO-220-7C) Tab Internally Connected to SOURCE Pin QD-000318-00 IC-000371-30 N-channel MOSFET 500V 85A, IXFN80N50Q2, SOT-227B package MOSFET DRIVER, UCC37321D, SMT PL3 Series Service Manual TD-000274-00 Rev.
- Page 98 6.1 Semiconductor package descriptions and pinouts (continued) IC-000446-30 OPTO COUPLER, , HCPL-0723, SMT QSC Audio Products, LLC...
-
Page 99: Pl325 Parts And Assemblies
6.2 PL325 parts and assemblies PL325 Power Amplifier (120V) (QSC part # FG-032500-00) QSC Part # Description Qty. Reference Comments CH-000579-00 COVER, BOTTOM, , PL3, LB-000209-00 AGENCY, CERTIFICATION, CLASS B, , FCC LB-000437-00 LABEL, WARNING, RAIN & MOISTURE, , PM-000309-00... -
Page 100: Chassis Assembly Pl325 (100V) (Qsc Part # Wp-032500-01)
WC-000344-00 CABLE ASSY, INPUT POWER, 22 AWG, 3 CONDUCTOR, PL3, 14" L, WP-000057-00 FAN ASSY, , PLC, , WP-032502-00 PCB ASSY, INPUT, PL325, , Chassis Assembly PL325 (100V) (QSC part # WP-032500-01) QSC Part # Description Qty. Reference Comments CH-000118-00... -
Page 101: Chassis Assembly Pl325 (230V) (Qsc Part # Wp-032500-02)
WC-000344-00 CABLE ASSY, INPUT POWER, 22 AWG, 3 CONDUCTOR, PL3, 14" L, WP-000057-00 FAN ASSY, , PLC, , WP-032502-00 PCB ASSY, INPUT, PL325, , Chassis Assembly PL325 (230V) (QSC part # WP-032500-02) QSC Part # Description Qty. Reference Comments CH-000118-00... - Page 102 REF: Q96, Q97 PL-000138-00 SPACER, T-1 LED, 0.52", PLASTIC, BLACK, REF: LD1, LD2, LD5, LD7, LD10, LD11 PT-150000-AT TRIM, 500, 20 PCNT, 0.15W, , VR43, VR166 PT-310005-00 GAIN, 10K, 20 PCNT, 0.2W, 21 DETENT, 16MM LENGTH VR2, VR121 QSC Audio Products, LLC...
- Page 103 PCB Assembly PL325 (120V) continued QSC Part # Description Qty. Reference Comments QD-000014-QD DIODE RECTIFIER ULTRAFAST, 200V, 15A, , MUR1520, TO-220, 35NS D21, D22, D46, D47, D74, D75, D80, D81 QD-000021-QD DIODE ZENER, 10V, , 1W, 1N4740A, DO-41, D7, D32, D88...
-
Page 104: Pcb Assembly Pl325 (100V) (Qsc Part # Wp-032501-01)
TRANSFORMER, HOUSEKEEPING, , , , PLC, , XF-000066-00 INDUCTOR, ZOBEL CURRENT SENSE, , 2UH, PLC, , L1, L2 XF-000179-00 TRANSFORMER, SWITCHING, 115KHZ, E55, 1500W, DCA1222, 120V/230V, PCB Assembly PL325 (100V) (QSC part # WP-032501-01) QSC Part # Description Qty. Reference Comments CA-010002-30... - Page 105 PCB Assembly PL325 (100V) continued QSC Part # Description Qty. Reference Comments CA-168003-30 680PF, 5 PCNT, 50V, CERAMIC NPO, 0805, C25, C60 CA-210005-30 0.001UF, 5 PCNT, 50V, CERAMIC NPO, 1206, C75, C81, C85, C93–C96, C120, C124 CA-222001-00 0.0022UF, 20 PCNT, 125VAC, CERAMIC Y5U, DISC, YCAP...
- Page 106 383, 1 PCNT, 1/10W, THICK FILM, 0805, 100V R44, R167, R254, R255 RE-047002-00 470, 5 PCNT, 2W, METAL OXIDE FP, , R274–R277, R279 RE-047502-30 475, 1 PCNT, 1/10W, THICK FILM, 0805, 100V R28, R37, R151, R160 QSC Audio Products, LLC...
- Page 107 PCB Assembly PL325 (100V) continued QSC Part # Description Qty. Reference Comments RE-053602-30 536, 1 PCNT, 1/10W, THICK FILM, 0805, 100V R22, R146, R302, R361, R374, R377 RE-093101-30 931, 1 PCNT, 1/10W, THICK FILM, 0805, 100V R379 RE-110006-30 1.00K, 1 PCNT, 1/8W, THICK FILM, 1206, 200V...
-
Page 108: Pcb Assembly Pl325 (230V) (Qsc Part # Wp-032501-02)
PCB Assembly PL325 (230V) (QSC part # WP-032501-02) QSC Part # Description Qty. Reference Comments CA-010002-30 10PF, 5 PCNT, 50V, CERAMIC NPO, 0805, C14, C49 CA-015002-10 15PF, 10 PCNT, 500V, CERAMIC SL, DISC, C16, C50 CA-047002-30 47PF, 5 PCNT, 50V, CERAMIC NPO, 0805,... - Page 109 PCB Assembly PL325 (230V) continued QSC Part # Description Qty. Reference Comments PA-000017-00 LED ASSY, GREEN, SPACER, , LD3, LD4, LD8, LD9 PA-000018-00 LED ASSY, YELLOW, SPACER, , PA-000043-00 PLATE ASSY, PLX, OUTPUT, , PC-003606-00 MAIN, PL2/PL2A, , , (ECO IN PROCESS) PL-000098-00 INSULATOR, TRANSISTOR, 0.85"...
- Page 110 WIRE ASSY, , 16 AWG, 1 CONDUCTOR, PLC, 12.5" L, BLACK W5A-B XF-000005-00 BEAD, 100MHZ, 271 OHM, L7–L12 XF-000023-00 INDUCTOR, COMMON MODE, , 2MH, , , L3, L4 XF-000061-00 INDUCTOR, 2 COUPLED WINDINGS, TOROID, 1.9UH, PL/DCA/CX, 230V, QSC Audio Products, LLC...
-
Page 111: Input Assembly Pl325 (Qsc Part # Wp-032502-00)
TRANSFORMER, HOUSEKEEPING, , , , PLC, , XF-000066-00 INDUCTOR, ZOBEL CURRENT SENSE, , 2UH, PLC, , L1, L2 XF-000179-00 TRANSFORMER, SWITCHING, 115KHZ, E55, 1500W, DCA1222, 120V/230V, Input Assembly PL325 (QSC part # WP-032502-00) QSC Part # Description Qty. Reference Comments CA-110002-30... -
Page 112: Pl340 Parts And Assemblies
6.3 PL340 parts and assemblies PL340 Power Amplifier (120V) (QSC part # FG-034000-00) QSC Part # Description Qty. Reference Comments CH-000579-00 COVER, BOTTOM, , PL3, LB-000209-00 AGENCY, CERTIFICATION, CLASS B, , FCC LB-000437-00 LABEL, WARNING, RAIN & MOISTURE, , PM-000309-00... -
Page 113: Chassis Assembly Pl340 (100V) (Qsc Part # Wp-034000-01)
WC-000344-00 CABLE ASSY, INPUT POWER, 22 AWG, 3 CONDUCTOR, PL3, 14" L, WP-000057-00 FAN ASSY, , PLC, , WP-034002-00 PCB ASSY, INPUT, PL340, , Chassis Assembly PL340 (100V) (QSC part # WP-034000-01) QSC Part # Description Qty. Reference Comments CH-000118-00... -
Page 114: Chassis Assembly Pl340 (230V) (Qsc Part # Wp-034000-02)
WC-000344-00 CABLE ASSY, INPUT POWER, 22 AWG, 3 CONDUCTOR, PL3, 14" L, WP-000057-00 FAN ASSY, , PLC, , WP-032502-00 PCB ASSY, INPUT, PL325, , Chassis Assembly PL340 (230V) (QSC part # WP-034000-02) QSC Part # Description Qty. Reference Comments CH-000118-00... - Page 115 PCB Assembly PL340 (120V) continued QSC Part # Description Qty. Reference Comments CA-410001-00 0.1UF, 20 PCNT, 250VAC, FILM, BOX STYLE, XCAP C126 CA-410002-10 0.1UF, 5 PCNT, 100V, FILM, DIPPED, C8, C12, C44, C47 CA-410003-10 0.1UF, 10 PCNT, 250V, FILM, DIPPED,...
- Page 116 R22, R146, R302, R361, R374, R377 RE-068002-00 680, 5 PCNT, 2W, METAL OXIDE FP, , R274, R275 RE-082002-00 820, 5 PCNT, 2W, METAL OXIDE FP, , R276, R277 RE-093101-30 931, 1 PCNT, 1/10W, THICK FILM, 0805, 100V R379 QSC Audio Products, LLC...
- Page 117 PCB Assembly PL340 (120V) continued QSC Part # Description Qty. Reference Comments RE-110006-30 1.00K, 1 PCNT, 1/8W, THICK FILM, 1206, 200V R1, R7, R42, R117, R118, R128, R165, R232, R250, R369 RE-115002-30 1.50K, 1 PCNT, 1/10W, THICK FILM, 0805, 100V...
-
Page 118: Pcb Assembly Pl340 (100V) (Qsc Part # Wp-034001-01)
PCB Assembly PL340 (100V) (QSC part # WP-034001-01) QSC Part # Description Qty. Reference Comments CA-010002-30 10PF, 5 PCNT, 50V, CERAMIC NPO, 0805, C14, C49 CA-015002-10 15PF, 10 PCNT, 500V, CERAMIC SL, DISC, C16, C50 CA-047002-30 47PF, 5 PCNT, 50V, CERAMIC NPO, 0805,... - Page 119 PCB Assembly PL340 (100V) continued QSC Part # Description Qty. Reference Comments PA-000017-00 LED ASSY, GREEN, SPACER, , LD3, LD4, LD8, LD9 PA-000018-00 LED ASSY, YELLOW, SPACER, , PA-000043-00 PLATE ASSY, PLX, OUTPUT, , PC-003606-00 MAIN, PL2/PL2A, , , (ECO IN PROCESS) PL-000098-00 INSULATOR, TRANSISTOR, 0.85"...
- Page 120 WIRE ASSY, SPEAKER, 16 AWG, 1 CONDUCTOR, PL3, 9.50" L, BLACK W10A-B WC-000118-00 WIRE ASSY, , 16 AWG, 1 CONDUCTOR, PLC, 12.5" L, BLACK W5A-B WC-000118-01 WIRE ASSY, , 16 AWG, 1 CONDUCTOR, PLC, 10.5" L, RED W8A-B QSC Audio Products, LLC...
-
Page 121: Pcb Assembly Pl340 (230V) (Qsc Part # Wp-034001-02)
TRANSFORMER, HOUSEKEEPING, , , , PLC, , XF-000066-00 INDUCTOR, ZOBEL CURRENT SENSE, , 2UH, PLC, , L1, L2 XF-000188-00 TRANSFORMER, SWITCHING, 115KHZ, E55, 1500W, DCA3422, 100V, PCB Assembly PL340 (230V) (QSC part # WP-034001-02) QSC Part # Description Qty. Reference Comments CA-010002-30... - Page 122 DIODE ZENER, 15V, 5 PCNT, 3W, , , D53, D54, D87, D88 QD-005200-NP TRANSISTOR NPN, 230V, 15A, 150W, 2SC5200, TO-264, Q29, Q35, Q37, Q40, Q74, Q80, Q82, Q85 QD-005402-DX DIODE, 200V, 3A, , 1N5402, DO-27, D19, D20, D44, D45 QSC Audio Products, LLC...
- Page 123 PCB Assembly PL340 (230V) continued QSC Part # Description Qty. Reference Comments RE-.04703-10 0.47, 5 PCNT, 2W, METAL OXIDE FP, MINI, R88, R89, R91, R92, R94, R95, R97, R99, R102, R103, R107, R108, R111– R114, R211, R212, R214, R215, R217, R218, R220, R222, R225, R226, R230, R231, R234–R237...
-
Page 124: Input Assembly Pl340 (Qsc Part # Wp-034002-00)
TRANSFORMER, HOUSEKEEPING, , , , PLC, , XF-000066-00 INDUCTOR, ZOBEL CURRENT SENSE, , 2UH, PLC, , L1, L2 XF-000183-00 TRANSFORMER, SWITCHING, 115KHZ, E55, 1500W, DCA3422, 120V/230V, Input Assembly PL340 (QSC part # WP-034002-00) QSC Part # Description Qty. Reference Comments CA-110002-30... - Page 125 Input Assembly PL340 (230V) continued QSC Part # Description Qty. Reference Comments RE-214300-30 14.3K, 1 PCNT, 1/10W, THICK FILM, 0805, 100V R454, R455, R460, R461 RE-220002-30 20.0K, 1 PCNT, 1/10W, THICK FILM, 0805, 100V R423 RE-229402-30 29.4K, 1 PCNT, 1/10W, THICK FILM, 0805, 100V...
-
Page 126: Pl380 Parts And Assemblies
6.4 PL380 parts and assemblies PL380 Power Amplifier (120V) (QSC part # FG-038000-00) QSC Part # Description Qty. Reference Comments CH-000579-00 COVER, BOTTOM, , PL3, LB-000208-00 AGENCY, CERTIFICATION, CLASS A, , FCC LB-000437-00 LABEL, WARNING, RAIN & MOISTURE, , PM-000309-00... -
Page 127: Chassis Assembly Pl380 (100V) (Qsc Part # Wp-038000-01)
AC CORD ASSY, 25 AMP 125V, 12 AWG, 3 CONDUCTOR, PL380, 65" L, WC-000358-00 WIRE ASSY, CIRCUIT BREAKER, 12AWG, 1 CONDUCTOR, PL380, 6" L, BLACK WP-000057-00 FAN ASSY, , PLC, , Chassis Assembly PL380 (100V) (QSC part # WP-038000-01) QSC Part # Description Qty. Reference Comments... -
Page 128: Chassis Assembly Pl380 (230V) (Qsc Part # Wp-038000-02)
(RED: J19 TO J20) WC-000358-00 WIRE ASSY, CIRCUIT BREAKER, 12AWG, 1 CONDUCTOR, PL380, 6" L, BLACK WP-000057-00 FAN ASSY, , PLC, , PCB Assembly PL380 (120V) (QSC part # WP-038001-00) through January 2008 QSC Part # Description Qty. Reference Comments... - Page 129 PCB Assembly PL380 (120V) through January 2008, continued QSC Part # Description Qty. Reference Comments CA-410003-10 0.1UF, 10 PCNT, 250V, FILM, DIPPED, C262, C263, C268, C269, C279, C317, C318 CA-410006-30 0.1UF, 10 PCNT, 50V, CERAMIC X7R, 1206, C1, C4–C7, C11, C14, C18, C22–C24, C26, C28, C33, C40, C41, C43–C45, C50, C52, C97, C99, C100, C110, C116–C119, C129–C134, C136, C140, C147,...
- Page 130 R72, R73, R242, R243, R281, R288, R380, R381 RE-.27001-10 2.7, 5 PCNT, 2W, METAL OXIDE FP, MINI, R295, R296 RE-.56002-10 5.6, 5 PCNT, 2W, METAL OXIDE FP, MINI, R283 RE-000211-NR NTC, 10 OHMS, 15 AMPS-250J, , , INRUSH LIMIT R262, R266 QSC Audio Products, LLC...
- Page 131 PCB Assembly PL380 (120V) through January 2008, continued QSC Part # Description Qty. Reference Comments RE-001003-30 10, 1 PCNT, 1/8W, THICK FILM, 1206, 200V R60, R61, R63, R64, R230, R231, R233, R234, R269, R274, R275, R293, R294, R351 RE-001008-10 10, 5 PCNT, 2W, METAL OXIDE FP, MINI,...
- Page 132 XF-000306-00 INDUCTOR, COUPLED, , 1.8UH, PL380, , L2, L4 XF-000307-00 INDUCTOR, COMMON MODE, TOROID, 3.2MH, PL380, , L15, L16 PCB Assembly PL380 (100V) (QSC part # WP-038001-01) through January 2008 QSC Part # Description Qty. Reference Comments CA-022004-30 22PF, 5 PCNT, 200V, CERAMIC NPO, 0805,...
- Page 133 PCB Assembly PL380 (100V) through January 2008, continued QSC Part # Description Qty. Reference Comments CA-447011-00 0.47UF, 5 PCNT, 400V, FILM, BOX STYLE, C78, C185 CA-510004-30 1.0UF, 20 PCNT, 50V, CERAMIC Z5U, 1210, C49, C51, C62, C77, C156, C158, C226–C229, C257, C258, C282–C285 CA-510006-00 1.0UF, 20 PCNT, 250VAC, FILM, BOX STYLE, XCAP...
- Page 134 R297 Until June 2007 RE-047502-30 475,1 PCNT,1/10W,THICK FILM,0805,100V R297 Beginning June 2007 RE-049901-30 499, 1 PCNT, 1/10W, THICK FILM, 0805, 100V R46, R214 RE-053602-30 536, 1 PCNT, 1/10W, THICK FILM, 0805, 100V R76, R77, R246, R247 QSC Audio Products, LLC...
- Page 135 PCB Assembly PL380 (100V) through January 2008, continued QSC Part # Description Qty. Reference Comments RE-063403-30 634, 1 PCNT, 1/10W, THICK FILM, 0805, 100V R32, R112, R116, R202, R320, R323, R337, R386, R388 RE-076801-30 768, 1 PCNT, 1/10W, THICK FILM, 0805, 100V...
- Page 136 L2, L4 XF-000307-00 INDUCTOR, COMMON MODE, TOROID, 3.2MH, PL380, , L15, L16 XF-000338-00 TRANSFORMER, SWITCHING, 125KHZ, E55, 2000W, PL380, 100V, PCB Assembly PL380 (230V) (QSC part # WP-038001-02) through January 2008 QSC Part # Description Qty. Reference Comments CA-022004-30 22PF, 5 PCNT, 200V, CERAMIC NPO, 0805,...
- Page 137 PCB Assembly PL380 (230V) through January 2008, continued QSC Part # Description Qty. Reference Comments CH-000114-00 CLAMP, DIODE, 2 FINGER, PLX3002, CH-000692-00 HEAT SINK, MAIN, , PL380, CO-000009-ZT ZTAB, 0.025" TAB, 1 POS, MALE, AUTO INSERTABLE J10, J15, J19, J20, J21, J24...
- Page 138 RE-124902-30 2.49K, 1 PCNT, 1/10W, THICK FILM, 0805, 100V R18, R153, R192 RE-130102-30 3.01K, 1 PCNT, 1/10W, THICK FILM, 0805, 100V R19, R21, R53, R54, R150, R190, R223, R224, R321, R325, R341, R343, R345, R347, R354 QSC Audio Products, LLC...
- Page 139 PCB Assembly PL380 (230V) through January 2008, continued QSC Part # Description Qty. Reference Comments RE-134803-30 3.48K, 1 PCNT, 1/8W, THICK FILM, 1206, 200V R29, R201, R271 RE-136502-30 3.65K, 1 PCNT, 1/10W, THICK FILM, 0805, 100V R1, R3, R57, R58, R110, R120, R126, R176, R177, R227, R228, R336, R338 RE-143201-30 4.32K, 1 PCNT, 1/10W, THICK FILM, 0805, 100V...
- Page 140 PCB Assembly PL380 (120V) (QSC part # WP-038001-00) from February 2008– Revision notes: This revision results in the following changes in performance or operation. • The amplifier no longer goes into standby when the Basis unit shuts off. • The clip LED indicators no longer stay lit when the amplifier is in standby.
- Page 141 PCB Assembly PL380 (120V) from February 2008–, continued QSC Part # Description Qty. Reference Comments CO-000106-00 JACK, HD15, 15 POS, FEMALE, RIGHT ANGLE SWAGED JACK SCREW CO-000148-00 XLR, NEUTRIK, 3 POS, FEMALE, VERTICAL J3, J4 CO-000155-00 HEADER, 0.1" CENTERS, 2 POS (1X2), MALE, RAMP LOCK...
- Page 142 6.34K, 1 PCNT, 1/10W, THICK FILM, 0805, 100V R27, R197, R355 RE-175002-30 7.50K, 1 PCNT, 1/10W, THICK FILM, 0805, 100V R5, R22, R30, (delete R45), R80, R81, R141, R178, R193, R200, (delete R213), R250, R251, R317, R318 QSC Audio Products, LLC...
- Page 143 PCB Assembly PL380 (120V) from February 2008–, continued QSC Part # Description Qty. Reference Comments RE-190902-30 9.09K, 1 PCNT, 1/10W, THICK FILM, 0805, 100V R7, R8, R15, R40, R157, R172, R173, R180, R181, R187, R210, R340, R342, R344, R346 RE-210003-30 10.0K, 1 PCNT, 1/10W, THICK FILM, 0805, 100V...
- Page 144 PCB Assembly PL380 (100V) (QSC part # WP-038001-01) from February 2008– Revision notes: This revision results in the following changes in performance or operation. • The amplifier no longer goes into standby when the Basis unit shuts off. • The clip LED indicators no longer stay lit when the amplifier is in standby.
- Page 145 PCB Assembly PL380 (100V) from February 2008–, continued QSC Part # Description Qty. Reference Comments CO-000098-00 HEADER, 0.1" CENTERS, 26 POS (2X13), MALE, LATCHING BOX SHORT J8A, J8B CO-000106-00 JACK, HD15, 15 POS, FEMALE, RIGHT ANGLE SWAGED JACK SCREW CO-000148-00...
- Page 146 5.62K, 0.1 PCNT, 1/10W, THICK FILM, 0805, 100V R92–R95, R100–R103 R111, R114, R132, R310, R366, R395 RE-159002-30 5.90K, 1 PCNT, 1/10W, THICK FILM, 0805, 100V RE-163402-30 6.34K, 1 PCNT, 1/10W, THICK FILM, 0805, 100V R27, R197, R355 QSC Audio Products, LLC...
- Page 147 PCB Assembly PL380 (100V) from February 2008–, continued QSC Part # Description Qty. Reference Comments R5, R22, R30, (delete R45), R80, R81, R141, R178, R193, R200, (delete RE-175002-30 7.50K, 1 PCNT, 1/10W, THICK FILM, 0805, 100V R213), R250, R251, R317, R318 RE-190902-30 9.09K, 1 PCNT, 1/10W, THICK FILM, 0805, 100V...
- Page 148 PCB Assembly PL380 (230V) (QSC part # WP-038001-02) from February 2008– Revision notes: This revision results in the following changes in performance or operation. • The amplifier no longer goes into standby when the Basis unit shuts off. • The clip LED indicators no longer stay lit when the amplifier is in standby.
- Page 149 PCB Assembly PL380 (230V) from February 2008–, continued QSC Part # Description Qty. Reference Comments CO-000106-00 JACK, HD15, 15 POS, FEMALE, RIGHT ANGLE SWAGED JACK SCREW CO-000148-00 XLR, NEUTRIK, 3 POS, FEMALE, VERTICAL J3, J4 CO-000155-00 HEADER, 0.1" CENTERS, 2 POS (1X2), MALE, RAMP LOCK...
- Page 150 6.34K, 1 PCNT, 1/10W, THICK FILM, 0805, 100V R197, R27, R355 RE-175002-30 7.50K, 1 PCNT, 1/10W, THICK FILM, 0805, 100V R5, R22, R30, (delete R45), R80, R81, R141, R178, R193, R200, (delete R213), R250, R251, R317, R318 QSC Audio Products, LLC...
- Page 151 PCB Assembly PL380 (230V) from February 2008–, continued QSC Part # Description Qty. Reference Comments RE-190902-30 9.09K, 1 PCNT, 1/10W, THICK FILM, 0805, 100V R7, R8, R15, R40, R157, R172, R173, R180, R181, R187, R210, R340, R342, R344, R346 RE-210003-30 10.0K, 1 PCNT, 1/10W, THICK FILM, 0805, 100V...
- Page 152 QSC Audio Products, LLC...
- Page 154 “QSC” and the QSC logo are registered trademarks of QSC Audio Products, LLC 1665 MacArthur Blvd. Costa Mesa, CA 92626 Phone +1 (714) 957-7150 (800) 772-2834 (USA only) FAX +1 (714)754-6173 www.qscaudio.com...
Need help?
Do you have a question about the PowerLight3 Series and is the answer not in the manual?
Questions and answers