Honda HS928 Owner's Manual
Hide thumbs
Also See for HS928:
- Owner's manual (80 pages) ,
- Dealer instructions (18 pages) ,
- Owner's manual (80 pages)

Related Manuals for Honda HS928


Summary of Contents for Honda HS928
- Page 1 Owner s Manual SNOWBLOWER HS928 HS1332 2011 Honda Motor Co., Ltd. -All Rights Reserved...
- Page 2 The engine exhaust from this product contains chemicals known to the State of California to cause cancer, birth defects or other reproductive harm. Keep this owner’s manual handy, so you can refer to it any time. This owner’s manual is considered a permanent part of the snowblower and should remain with the snowblower if resold.
- Page 3 INTRODUCTION Congratulations on your selection of a Honda snowblower. We are certain you will be pleased with your purchase of one of the finest snowblowers on the market. We want to help you get the best results from your new snowblower and to operate it safely.
- Page 4 INTRODUCTION A FEW WORDS ABOUT SAFETY Your safety and the safety of others are very important. And using this snowblower safely is an important responsibility. To help you make informed decisions about safety, we have provided operating procedures and other information on labels and in this manual.
-
Page 5: Table Of Contents
CONTENTS SNOWBLOWER SAFETY ................IMPORTANT SAFETY INFORMATION ..........SAFETY LABEL LOCATIONS ..............CONTROLS & FEATURES ................COMPONENT & CONTROL LOCATIONS ..........CONTROLS .................... Fuel Valve Lever ................Engine Switch ..................Fuel Gauge ..................Chute Crank ..................Starter Grip ..................Throttle Lever .................. - Page 6 CONTENTS SERVICING YOUR SNOWBLOWER (continued) ENGINE OIL LEVEL CHECK ..............ENGINE OIL CHANGE ................ENGINE OIL RECOMMENDATIONS ............ HYDROSTATIC TRANSMISSION FLUID ..........SPARK PLUG SERVICE ................. TRACK ADJUSTMENT ................. TIRE INSPECTION ................. AUGER AND BLOWER INSPECTION ..........LOCK BOLT REPLACEMENT PROCEDURE .........
-
Page 7: Snowblower Safety
SNOWBLOWER SAFETY IMPORTANT SAFETY INFORMATION Honda snowblowers are designed to clear snow from driveways and walkways. Other uses can result in injury to the operator or damage to the snowblower and other property. Most injuries or property damage with snowblowers can be prevented if you follow all instructions in this manual and on the snowblower. - Page 8 SNOWBLOWER SAFETY Keep Shields in Place Guards and shields are designed to protect you from being hit by thrown objects and to keep you from touching hot engine parts and moving components. For your safety and the safety of others, keep all shields in place when the engine is running.
- Page 9 SNOWBLOWER SAFETY Operating Conditions Do not use the snowblower when visibility is poor. Under conditions of poor visibility, there is a greater risk of striking an obstacle or causing injury. Adjust the snow discharge chute to avoid hitting passing bystanders or vehicles. Stay clear of the snow discharge chute while the engine is running and be aware that loose clothing can get drawn into the moving parts.
-
Page 10: Safety Label Locations
SNOWBLOWER SAFETY SAFETY LABEL LOCATIONS These labels warn you of potential hazards that can cause serious injury. Read them carefully. If a label comes off or becomes hard to read, contact your Honda snowblower dealer for a replacement. -
Page 11: Controls & Features
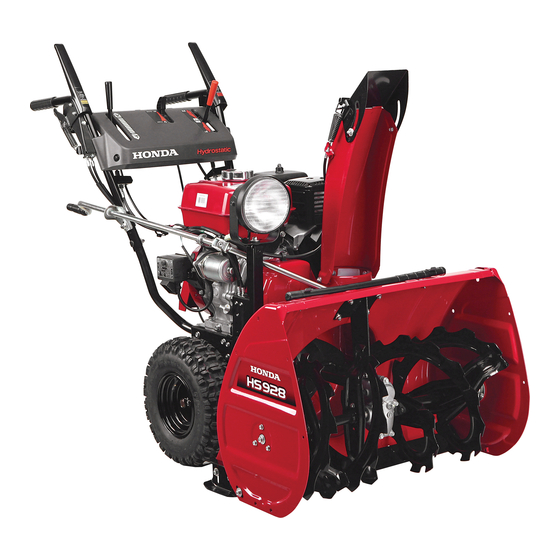
CONTROLS & FEATURES COMPONENT & CONTROL LOCATIONS Use the two illustrations on these pages to locate and identify the most frequently used controls. Track type DISCHARGE DEFLECTOR LEVER THROTTLE LEVER AUGER CLUTCH LEVER DRIVE CLUTCH FUEL TANK CAP LEVER DISCHARGE DEFLECTOR WORK LIGHT SHIFT LEVER SNOW DISCHARGE... - Page 12 CONTROLS & FEATURES Wheel type DISCHARGE DEFLECTOR LEVER AUGER CLUTCH LEVER THROTTLE LEVER SHIFT LEVER FUEL TANK CAP DRIVE CLUTCH LEVER DISCHARGE DEFLECTOR WORK LIGHT MUFFLER SNOW DISCHARGE CHUTE WHEEL AUGER AC STARTER BUTTON FUEL VALVE STARTER GRIP (WAS type) SNOW CLEARING BAR CHOKE KNOB ENGINE SWITCH...
-
Page 13: Controls
CONTROLS & FEATURES CONTROLS Fuel Valve Lever FUEL VALVE LEVER The fuel valve opens and closes the fuel line leading from the fuel tank to the carburetor. Make sure that the fuel valve is positioned exactly at either the ON or OFF position. -
Page 14: Chute Crank
CONTROLS & FEATURES Chute Crank Use the chute crank to turn the snow discharge chute right or left. To throw snow to the right CHUTE CRANK To throw snow to the left Starter Grip STARTER GRIP Pull this grip to start the engine. See page for starting procedures. -
Page 15: Choke Knob
CONTROLS & FEATURES Choke Knob The choke knob opens and closes the choke valve in the carburetor. The CLOSED position enriches the fuel mixture for starting a cold engine. The OPEN position provides the correct fuel mixture for operation after starting, and for restarting a warm engine. OPEN CLOSED CHOKE KNOB... -
Page 16: Discharge Deflector Lever
CONTROLS & FEATURES Discharge Deflector Lever The discharge deflector lever controls the snow discharge angle. HIGH AND FAR DISCHARGE DEFLECTOR LOW AND NEAR LOW AND NEAR HIGH AND FAR DISCHARGE DEFLECTOR LEVER Foot Pedal (track type only) Use the pedal for adjusting the height and angle of the machine in relation to the tracks. -
Page 17: Drive Clutch Lever And Auger Clutch Lever
CONTROLS & FEATURES Drive Clutch Lever and Auger Clutch Lever Use these controls to engage the snow blowing mechanism and/or the drive mechanism. DRIVE CLUTCH LEVER Squeeze to engage the drive transmission. AUGER CLUTCH LEVER Squeeze to engage the snow blowing mechanism. When both levers are squeezed, the drive clutch lever locks the auger clutch lever down. -
Page 18: Transmission Release Lever
CONTROLS & FEATURES Transmission Release Lever The transmission release lever has two positions, RELEASED and ENGAGED. Set the lever in the ENGAGED position for self-propelled operation. Set it in the RELEASED position when pushing the snowblower with the engine stopped. Operating the transmission release lever while the engine is running can damage the transmission. -
Page 19: Features
CONTROLS & FEATURES FEATURES Work Light WORK LIGHT The light comes ON while the engine is running, and it goes OFF when the engine stops. The light does not come ON when the engine switch is turned ON unless the engine is started. The light can be adjusted up or down. -
Page 20: Before Operation
BEFORE OPERATION ARE YOU READY TO GET STARTED? Your safety is your responsibility. A little time spent in preparation will significantly reduce your risk of injury. Knowledge Read and understand this manual. Know what the controls do and how to operate them. Familiarize yourself with the snowblower and its operation before you begin using it. -
Page 21: Check The General Condition Of The Snowblower
BEFORE OPERATION Check the General Condition of the Snowblower: Look around and underneath the snowblower for signs of oil or gasoline leaks. Check the auger house and the discharge chute for accumulation of packed snow or ice. Clean the auger housing and discharge chute before starting the snowblower. -
Page 22: Check Your Work Area
BEFORE OPERATION CHECK YOUR WORK AREA For your safety and the safety of others, always inspect the area before operating the snowblower. Objects Anything which can be picked up by the augers and thrown is a potential hazard to you and others. Thoroughly inspect the area where the equipment is to be used and remove all doormats, sleds, boards, wires, stones, and nails, and remove them from the work area. -
Page 23: Operation
OPERATION SNOWBLOWING PRECAUTIONS Before operating the snowblower for the first time, please review both the SNOWBLOWER SAFETY chapter (see page ) and the BEFORE OPERATION chapter (see page Even if you have operated other snowblowers, take time to become familiar with how this snowblower works, and practice in a safe area until you build up your skills. - Page 24 OPERATION Set the transmission release lever in the ENGAGED position (see page TRANSMISSION RELEASE LEVER Turn the fuel valve to the ON position. Be sure that the drain knob is tightened securely. DRAIN KNOB FUEL VALVE LEVER...
- Page 25 OPERATION In cold weather and when the engine is cold, pull the choke knob to the CLOSED position and move the throttle lever to the FAST position. FAST CLOSED CHOKE KNOB THROTTLE LEVER Start the engine. Electric-start Models (TAS, WAS type): Connect your power cord to the switch box and the male end of the power cord to a properly grounded 120 Volt ac outlet.
- Page 26 OPERATION Turn the engine switch to the ON position. ENGINE SWITCH Push the starter button until the PUSH engine starts. After the engine starts, disconnect the power cord from the electrical outlet, and then from the switch box. Do not operate the starter for more than 1 minute. If the engine fails to start, release the button and allow the starter to cool for 15 minutes before operating it again.
- Page 27 OPERATION Let the engine warm up for several minutes. If the choke knob has been pulled to the CLOSED position to start the engine, gradually push it to the OPEN position as the engine warms up. Move the throttle lever to the SLOW position. FAST SLOW OPEN...
-
Page 28: Stopping The Engine
OPERATION While warming the engine up, also warm the transmission as follows: Check that the shift lever is in the ‘‘N’’ (Neutral) position. N (Neutral) SHIFT LEVER DRIVE CLUTCH LEVER Squeeze the drive clutch lever for about 30 seconds to warm up the transmission fluid. - Page 29 OPERATION Release the auger and drive clutch levers. The drive and snow blowing mechanism will stop operation. DRIVE CLUTCH LEVER AUGER CLUTCH LEVER Move the shift lever to ‘‘N’’ (Neutral) position. N (Neutral) SHIFT LEVER Turn the throttle lever to the SLOW position. FAST SLOW THROTTLE LEVER...
- Page 30 OPERATION Turn the engine switch to the OFF position. ENGINE SWITCH Turn the fuel valve to the OFF position. FUEL VALVE LEVER...
-
Page 31: Clearing Snow
OPERATION CLEARING SNOW Move the throttle lever to the FAST position for normal operation. N (Neutral) F (Forward) Release the auger clutch lever, SLOW SLOW FAST and move the shift lever to select R (Reverse) the desired drive speed. FAST Low speed is recommended for removing deep or hard-packed snow. - Page 32 OPERATION Squeeze the drive clutch lever to self-propel the snowblower. If the transmission release lever (see page ) is in the ENGAGED position, and the shift lever (see page ) is in the FORWARD (F) position, the hydrostatic drive will propel the snowblower forward when you squeeze the drive clutch lever.
- Page 33 OPERATION Release the clutch levers to stop clearing or moving. DRIVE CLUTCH LEVER AUGER CLUTCH LEVER...
-
Page 34: Snow-Clearing Tips
OPERATION SNOW-CLEARING TIPS For best efficiency, clear snow before it melts, refreezes and hardens. Do not reduce engine speed while clearing snow. Operating tips for clearing hard or deep snow: Reduce forward speed. If that is not sufficient, use the shift lever to clear snow with a back and forth motion. -
Page 35: Removing Obstructions
OPERATION REMOVING OBSTRUCTIONS If the snow discharge chute or snow blowing mechanism becomes restricted, review snow clearing information (see page ) to reduce the possibility of reoccurring obstructions. SNOW CLEARING BAR Before removing the obstruction, be sure to stop the engine, and make sure that all rotating parts have come to a complete stop. -
Page 36: Servicing Your Snowblower
SERVICING YOUR SNOWBLOWER THE IMPORTANCE OF MAINTENANCE Good maintenance is essential for safe, economical, and trouble-free operation. It will also help reduce air pollution. To help you properly care for your snowblower, the following pages include a maintenance schedule, routine inspection procedures, and simple maintenance procedures using basic hand tools. -
Page 37: Maintenance Safety
SERVICING YOUR SNOWBLOWER MAINTENANCE SAFETY Some of the most important safety precautions follow. However, we cannot warn you of every conceivable hazard that can arise in performing maintenance. Only you can decide whether or not you should perform a given task. Failure to properly follow maintenance instructions and precautions can cause you to be... - Page 38 SERVICING YOUR SNOWBLOWER Safety Precautions Make sure the engine is off before you begin any maintenance or repairs. This will eliminate several potential hazards: Carbon monoxide poisoning from engine exhaust. Operate outside, away from open windows or doors. Burns from hot parts. Let the engine and exhaust system cool before touching.
-
Page 39: Tool Kit
SERVICING YOUR SNOWBLOWER TOOL KIT The tools necessary for performing some of the periodic maintenance, simple adjustments and repairs are supplied in the tool kit. Spare shear bolts and nuts are also located in the tool kit. SPARK PLUG WRENCH 6 mm SELF LOCK NUTS (3) WRENCH HANDLE... -
Page 40: Maintenance Schedule
SERVICING YOUR SNOWBLOWER MAINTENANCE SCHEDULE REGULAR SERVICE PERIOD (1) Every year Perform at every First indicated month or Each Before Before month Every Every Every Page operating hour interval, operation storage 100 hrs. 300 hrs. 4 years whichever comes first. 20 hrs. - Page 41 SERVICING YOUR SNOWBLOWER REGULAR SERVICE PERIOD (1) Every year Perform at every First indicated month or Each Before Before month Every Every Every Page operating hour interval, operation storage 100 hrs. 300 hrs. 4 years whichever comes first. 20 hrs. Item Fuel sediment Clean...
-
Page 42: Refueling
SERVICING YOUR SNOWBLOWER REFUELING With the engine stopped, remove the fuel tank cap and check the fuel level. Refill the tank if the fuel level is low. Do not fill above the base of the filler neck. Gasoline is highly flammable and explosive. -
Page 43: Fuel Recommendations
SERVICING YOUR SNOWBLOWER Spilled fuel is not only a fire hazard, it causes environmental damage. Wipe up spills immediately. Fuel can damage paint and plastic. Be careful not to spill fuel when filling your fuel tank. Damage caused by spilled fuel is not covered under warranty. -
Page 44: Engine Oil Level Check
SERVICING YOUR SNOWBLOWER ENGINE OIL LEVEL CHECK Check the engine oil level with the engine stopped and in a level position. Remove the oil filler cap/dipstick and wipe it clean. Insert and remove the dipstick without screwing it into the filler neck. Check the oil level shown on the dipstick. -
Page 45: Engine Oil Change
SERVICING YOUR SNOWBLOWER ENGINE OIL CHANGE Drain the oil while the engine is still warm to assure rapid and complete draining. Place the snowblower on a level surface. Place a suitable container below the engine to catch the used oil, then remove the oil filler cap/dipstick and the drain plug. -
Page 46: Engine Oil Recommendations
SERVICING YOUR SNOWBLOWER If the oil level is low, fill to the edge of the oil filler hole with the recommended oil (this page). UPPER LIMIT Running the engine with a low oil level can cause engine damage. This type of damage is not covered by the Distributor’s Limited Warranty. -
Page 47: Hydrostatic Transmission Fluid
SERVICING YOUR SNOWBLOWER HYDROSTATIC TRANSMISSION FLUID Check the hydrostatic fluid level in the reservoir. Hydrostatic fluid expands and contracts with changes in temperature. The UPPER and LOWER limit marks on the reservoir are calibrated for room temperature fluid. It is normal for the fluid level to rise above the UPPER level mark when snowblower operation warms the transmission. - Page 48 SERVICING YOUR SNOWBLOWER If the fluid level is low, add Honda Hydrostatic Fluid. The use of other hydrostatic fluids will reduce transmission performance and may damage the transmission. Use only Honda Hydrostatic Fluid. Unscrew the reservoir cap and remove the seal. Be careful to prevent dirt, water, or snow from entering the reservoir.
-
Page 49: Spark Plug Service
SERVICING YOUR SNOWBLOWER SPARK PLUG SERVICE Recommended spark plug: BPR5ES (NGK) W16EPR-U (DENSO) Use only the recommended spark plugs or equivalent. Spark plugs which have an improper heat range may cause engine damage. To ensure proper engine operation, the spark plug must be properly gapped and free of deposits. - Page 50 SERVICING YOUR SNOWBLOWER SIDE ELECTRODE Measure the plug gap with a wire- type feeler gauge. Correct as necessary by carefully bending 0.028 0.031 in (0.7 0.8 mm) the side electrode. SEALING The gap should be: WASHER 0.028 0.031 in (0.7 0.8 mm) Make sure that the spark plug INSULATOR sealing washer is in good...
-
Page 51: Track Adjustment
SERVICING YOUR SNOWBLOWER TRACK ADJUSTMENT Make sure the tracks are clean and dry before adjustment. The tracks cannot be correctly adjusted if clogged with snow or debris, or coated with ice. With the snowblower resting on its tracks, check track deflection by pressing down midway between the wheels with a force of 33 lbf (15 kgf). -
Page 52: Tire Inspection
SERVICING YOUR SNOWBLOWER TIRE INSPECTION Check the side wall and tread surface of each tire for cracks, damage, or excessive wear. Check the tire pressure Tire pressure: 8.0 psi (55 kPa, 0.55 kgf/cm ) Excessive inflation pressure can damage the tires. Do not inflate the tires beyond the recommended pressure. -
Page 53: Lock Bolt Replacement Procedure
SERVICING YOUR SNOWBLOWER LOCK BOLT REPLACEMENT PROCEDURE Place the snowblower on a firm, level surface. Turn the engine switch OFF, and remove the cap from the spark plug. Clean the auger and blower of snow, ice or any other foreign particles. -
Page 54: Skid Shoes And Scraper
SERVICING YOUR SNOWBLOWER SKID SHOES AND SCRAPER Turn the engine switch to the OFF position, and disconnect the spark plug cap, so the engine cannot be accidentally started while you are near the auger. The skid can be installed at the rear or side of the auger housing. The initial position set at the factory is rear. - Page 55 SERVICING YOUR SNOWBLOWER SKID SHOE Adjustment Place the snowblower on a level surface. (For track-type snowblowers, step on the foot pedal, and set the auger in the middle position.) SCRAPER Loosen the skid shoe bolts and adjust the skid shoes to obtain the SKID SHOE auger ground clearance for snow conditions recommended below.
-
Page 56: Storage
STORAGE STORAGE PREPARATION Proper storage preparation is essential for keeping your snowblower trouble-free and looking good. The following steps will help to keep rust and corrosion from impairing your snowblower’s function and appearance, and will make the engine easier to start when you use the snowblower again. -
Page 57: Fuel
STORAGE Fuel Depending on the region where you operate your equipment, fuel formulations may deteriorate and oxidize rapidly. Fuel deterioration and oxidation can occur in as little as 30 days and may cause damage to the carburetor and/or fuel system. Please check with your servicing dealer for local storage recommendations. - Page 58 STORAGE Adding a Fuel Stabilizer to Extend Fuel Storage Life When adding a fuel stabilizer, fill the fuel tank with fresh gasoline. If only partially filled, air in the tank will promote fuel deterioration during storage. If you keep a container of gasoline for refueling, be sure that it contains only fresh gasoline.
- Page 59 STORAGE Draining the Fuel Tank and Carburetor Place an approved gasoline container below the carburetor, and use a funnel to avoid spilling fuel. DRAIN KNOB Loosen the carburetor drain knob, then move the fuel valve lever to the ON position. Drain the carburetor until the fuel tank is empty.
-
Page 60: Engine Oil
STORAGE Engine Oil Change the engine oil (see page Remove the spark plug (see page Pour a teaspoon (5 cc) of clean engine oil into the cylinder. Pull the starter rope slowly several times to distribute the oil. Reinstall the spark plug. Pull the starter grip slowly until you feel resistance, then return the starter grip gently. -
Page 61: Storage Precautions
STORAGE STORAGE PRECAUTIONS If your snowblower will be stored with gasoline in the fuel tank and carburetor, it is important to reduce the hazard of gasoline vapor ignition. Select a well-ventilated storage area away from any appliance that operates with a flame, such as a furnace, water heater, or clothes dryer. -
Page 62: Transporting
TRANSPORTING BEFORE LOADING Loading the snowblower on a trailer should be performed on a firm, level surface. Use a loading ramp that is strong enough to support the combined weight of the snowblower and the operator: Weight of snowblower: (Operating weight) Models HS928 HS1332... -
Page 63: Loading
TRANSPORTING LOADING Track type: Step on the foot pedal, and raise the auger to the HIGH position (see page Start the engine (see page ) and maneuver the snowblower backward into line with the loading ramp. Track type: Run the snowblower backward slowly up the loading ramp. - Page 64 TRANSPORTING Tie the snowblower down with rope or straps, and block the treads. Keep the tie-down rope or straps away from controls and cables. Do not tie with rope or straps stronger than necessary to prevent snowblower parts from breaking. Tie-down Points Front Rear...
-
Page 65: Taking Care Of Unexpected Problems
TAKING CARE OF UNEXPECTED PROBLEMS ENGINE PROBLEMS Electric starter Possible cause Correction does not operate Check electrical No electric current Try known good outlet. from outlet. electrical outlet. Start engine by using the recoil starter. Check power cord. Defective power Try another power cord. -
Page 66: Engine Lacks Power
TAKING CARE OF UNEXPECTED PROBLEMS Engine has low Possible cause Correction power Check ground Fast ground speed Blow snow at speed. when blowing wet, slower ground deep snow puts speed. excessive load on engine. Snowblowing Wet, deep cuts Reduce swath cut too wide place excessive snowblowing for snow... -
Page 67: Driver Problems
TAKING CARE OF UNEXPECTED PROBLEMS DRIVE PROBLEMS Engine runs, but Possible cause Correction snowblower doesn’t move Check Lever is in the Move lever to the transmission RELEASED ENGAGED release. position. position (see page 22 ). Check hydrostatic Fluid level is low. Add hydrostatic transmission fluid transmission fluid... -
Page 68: Snowblower Problems
TAKING CARE OF UNEXPECTED PROBLEMS SNOWBLOWER PROBLEMS Won’t blow snow Possible cause Correction Check lock bolts. Lock bolts broken. Replace broken lock bolt(s) (see page 51 ). Check auger Discharge chute Clear discharge housing. restricted. chute of obstructions (see Foreign object page 17 ). - Page 69 TAKING CARE OF UNEXPECTED PROBLEMS Snow not Possible cause Correction discharging properly (cont.) Check ground Snowblower Use shift lever to speed. moving too fast for reduce ground snow conditions. speed (see page 29 ). Engine stalls when Possible cause Correction auger clutch lever is set to On Check throttle...
-
Page 70: Technical Information
TECHNICAL INFORMATION Serial Number Locations Record the engine and frame serial numbers in the spaces below. You will need these serial numbers when ordering parts, and when making technical or warranty inquiries (see page FRAME SERIAL NUMBER ENGINE SERIAL NUMBER Engine serial number: Frame serial number: Date of purchase:... -
Page 71: Carburetor Modification For High Altitude Operation
TECHNICAL INFORMATION Carburetor Modification for High Altitude Operation At high altitude, the standard carburetor air-fuel mixture will be too rich. Performance will decrease, and fuel consumption will increase. A very rich mixture will also foul the spark plug and cause hard starting. Operation at an altitude that differs from that at which this engine was certified, for extended periods of time, may increase emissions. -
Page 72: Emission Control System Information
TECHNICAL INFORMATION Emission Control System Information Source of Emissions The combustion process produces carbon monoxide, oxides of nitrogen, and hydrocarbons. Control of hydrocarbons and oxides of nitrogen is very important because, under certain conditions, they react to form photochemical smog when subjected to sunlight. Carbon monoxide does not react in the same way, but it is toxic. - Page 73 TECHNICAL INFORMATION Problems That May Affect Emissions If you are aware of any of the following symptoms, have your engine inspected and repaired by your authorized Honda servicing dealer. Hard starting or stalling after starting. Rough idle. Misfiring or backfiring under load. Afterburning (backfiring).
-
Page 74: Air Index
TECHNICAL INFORMATION Air Index An Air Index Information hang tag/label is applied to engines certified to an emission durability time period in accordance with the requirements of the California Air Resources Board. The bar graph is intended to provide you, our customer, the ability to compare the emissions performance of available engines. -
Page 75: Specifications
TECHNICAL INFORMATION Specifications Frame Model HS928 Type Items Discription code SAVJ Overall length 57.7 in (1,465 mm) 55.5 in (1,410 mm) Overall width 28.5 in (725 mm) Overall height 44.3 in (1,125 mm) 43.9 in (1,115 mm) Dry mass [weight] 243 lbs 254 lbs 209 lbs... - Page 76 TECHNICAL INFORMATION Frame Model HS1332 Type Items Discription code SAWJ Overall length 57.7 in (1,465 mm) Overall width 32.5 in (825 mm) Overall height 44.3 in (1,125 mm) Dry mass [weight] 254 lbs (115 kg) 265 lbs (120 kg) Width of snow clearance 31.9 in (810 mm) Height of snow clearance 20.1 in (510 mm)
-
Page 77: Consumer Information
CONSUMER INFORMATION DEALER LOCATOR INFORMATION To find an authorized Honda Servicing Dealer anywhere in the United States: Visit our web site: www.hondapowerequipment.com and click on Dealer Locator. Honda PUBLICATIONS Shop Manual This manual covers complete maintenance and overhaul procedures. It is intended to be used by a skilled technician. Available through your Honda dealer or through Helm Inc. -
Page 78: Customer Service Information
General Manager can help. Almost all problems are solved in this way. If you are dissatisfied with the decision made by the dealership’s management, contact the Honda Power Equipment Customer Relations Office. You can write: American Honda Motor Co., Inc. -
Page 79: Quick Reference Information
QUICK REFERENCE INFORMATION Fuel Type Unleaded gasoline with a pump octane rating of 86 or higher Engine Oil Type SAE 5W-30 API SJ or later for general use Spark Plug Type BPR5ES (NGK) W16EPR-U (DENSO) Tires Tire 8.0 psi (55 kPa, 0.55 kgf/cm ) Pressure Before each Engine oil level. - Page 80 2000.2011.06 31V41600 00X31-V41-6000 Printed in Japan...
Need help?
Do you have a question about the HS928 and is the answer not in the manual?
Questions and answers
la terrière tourne quand l n'y a pas de neige et aussi tôt qu'il y a de la neige elle ne tourne plus que faire
The Honda HS928 auger turning without snow but stopping when snow is present could be caused by either a worn-out auger belt that cannot grip the pulley properly or a broken keyway on the auger/impeller pulley, which causes the pulley to spin freely on the shaft. These issues prevent the auger from engaging effectively under load.
This answer is automatically generated
What is the part number for Honda's HS928TAS snowblower work light and where does it plug into the machine?