Grizzly G0505 Owner's Manual
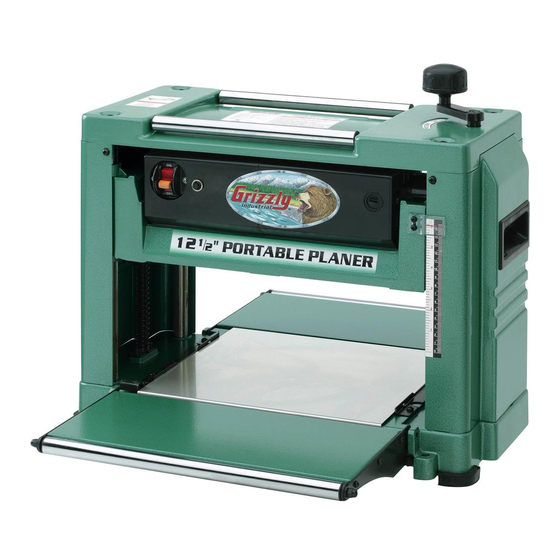
12 1/2" lean & mean portable planer
Hide thumbs
Also See for G0505:
- Instruction manual (35 pages) ,
- Parts list (7 pages) ,
- Owner's manual (40 pages)

Related Manuals for Grizzly G0505


Summary of Contents for Grizzly G0505
- Page 1 MODEL G0505 ⁄ " LEAN & MEAN PORTABLE PLANER OWNER'S MANUAL WARNING: NO PORTION OF THIS MANUAL MAY BE REPRODUCED IN ANY SHAPE OR FORM WITHOUT THE WRITTEN APPROVAL OF GRIZZLY INDUSTRIAL, INC.
-
Page 3: Table Of Contents
Table of Contents INTRODUCTION ..........2 SECTION 5: ACCESSORIES ......20 SECTION 6: MAINTENANCE ......22 SECTION 1: SAFETY ........6 SECTION 7: SERVICE ........25 SECTION 2: CIRCUIT REQUIREMENTS ..9 SECTION 3: SETUP ........10 SECTION 8: PARTS ........30 WARRANTY AND RETURNS ...... -
Page 4: Introduction
WE STRONGLY REC- OMMEND that you read books, trade maga- zines, or get formal training before begin- ning any projects. Regardless of the con- tent in this section, Grizzly Industrial will not be held liable for accidents caused by lack of training. - Page 5 Identification Figure 2.
-
Page 6: Machine Data Sheet
Machine Data Sheet MACHINE DATA SHEET Customer Service #: (570) 546-9663 · To Order Call: (800) 523-4777 · Fax #: (800) 438-5901 MODEL G0505 12-1/2" PLANER Weight................................71 lbs. Length/Width/Height......................21-3/4 x 27-3/8 x 18-3/4 in. Foot Print (Length/Width)......................... 20-7/8 x 10-1/2 in. Type................................ - Page 7 Cutterhead Type............................2 Knife Cutterhead Dia............................1-7/8 in. No. Of Knives..............................2 Knife Type..........................Double Edged HSS Knife Size Length..........................12-1/2 in. Knife Size Width............................ 23/32 in. Knife Size Thickness..........................1/8 in. Knife Adjustment........................Gibs and Springs Table Bed Size Length.........................11-1/2 in. Table Bed Size Width...........................12-1/2 in.
-
Page 8: Section 1: Safety
SECTION 1: SAFETY For Your Own Safety, Read Instruction Manual Before Operating this Machine The purpose of safety symbols is to attract your attention to possible hazardous conditions. This manual uses a series of symbols and signal words intended to convey the level of importance of the safety messages. -
Page 9: Safety Instructions For Machinery
Safety Instructions for Machinery 7. ONLY ALLOW TRAINED AND PROP- 16. REMOVE CHUCK KEYS OR ADJUSTING ERLY SUPERVISED PERSONNEL TO TOOLS. OPERATE MACHINERY. 17. DAMAGED MACHINERY. 8. KEEP CHILDREN/VISITORS AWAY. 18. DO NOT FORCE MACHINERY. 9. UNATTENDED OPERATION. 19. SECURE WORKPIECE. 10. -
Page 10: Additional Safety Instructions For Planers
Additional Safety Instructions for Planers OWNER'S MANUAL. LOOKING INSIDE PLANER. KICKBACK. CUTTING LIMITATIONS. Until you have a clear understand- ing of kickback and how it occurs, DO NOT Data Sheet operate this planer! REACHING INSIDE PLANER. 10. CLEAN STOCK. INFEED ROLLER CLEARANCE. 11. -
Page 11: Section 2: Circuit Requirements
SECTION 2: CIRCUIT REQUIREMENTS Power Connection Device 110V Operation Figure 3 Serious personal injury could occur if you connect the machine to power before com- pleting the setup process. DO NOT connect the machine to the power until instructed later in this manual. Electrocution or fire could Figure 3. -
Page 12: Section 3: Setup
SECTION 3: SETUP Inventory This machine presents serious injury hazards to untrained users. Read through this entire manu- al to become familiar with the controls and opera- Note: If you can't find an item on this list, check tions before starting the the mounting location on the machine or examine machine! the packaging materials carefully. -
Page 13: Site Considerations
Site Considerations Mounting Options Workbench Load Machine Data Sheet Figure 6 Placement Location Figure 5 Figure 6. Figure 5. Using Rubber Feet Figure 6 Children and visitors may be seriously injured if unsuper- vised around this machine. Lock entrances to the shop or disable start switch or power connection to prevent unsupervised use. - Page 14 Using Machine Mounts Mounting to the Workbench Figure 7 Figure 6 Figure 6 Figure 8 Figure 7 Figure 8. Figure 9 Figure 9.
- Page 15 Assembly Accidental contact with the cutterhead dur- ing operation could cause serious personal To assemble your planer: injury. The chip deflector MUST be securely in place when the planer is connected to power! Figure 10 Figure 11 Note: The chip deflector directs wood chips away from the cutterhead during operation, and it covers the cutterhead and outfeed roller for operator safety.
-
Page 16: Test Run
Test Run Figure 12 Troubleshooting Page 25 Figure 12. To test run the machine:... -
Page 17: Section 4: Operations
SECTION 4: OPERATIONS ON/OFF Switch To reduce the risk of serious injury when using this machine, read and Figure 13 understand this entire manual before beginning any operations. Damage to your eyes, lungs, and ears could result from using this machine without proper protective gear. -
Page 18: Depth Of Cut
Depth of Cut Workpiece Inspection Before cutting, inspect all workpieces for the following: Figure 14 Material Type: Foreign Objects: Figure 14. Excessive Warping: No list of safety guidelines can be complete. Every shop environment is different. Always consider safety first, as it applies to your individual working conditions. -
Page 19: Planing Tips
Planing Tips Wood Hardness Figure 15 Note: The Janka Hardness Rating is expressed in the pounds of force required to embed a 0.444" steel ball into the surface of the wood to a depth equal to half the ball's diameter. Janka Species Hardness... - Page 20 Cutting Problems Reason: Solution: Reason: Reason: Solution: Solution: Reason: Reason: Solution: Reason: Solution: Reason: Solution: Solution:...
-
Page 21: Basic Operation
Basic Operation To use the planer: Note: The infeed and outfeed rollers will con- trol the feed rate of the workpiece through the Figure 16 planer. Do not push or pull on the workpiece during operation. Step 10 Figure 16. Step 10 Figure 16 Note: Anytime you switch directions with the... -
Page 22: Section 5: Accessories
SECTION 5: ACCESSORIES G8983—Tilting Roller Stand G9256—6" Dial Caliper G9257—8" Dial Caliper G8984—Single Roller Stand G9258—12" Dial Caliper G8985—5 Roller Stand Figure 19. G3641—Mini Planer Pal Figure 17. H7516—Dust Hood for Model G0505 Planer Figure 20. Figure 18. - Page 23 T20501—Face Shield Crown Protector 4" H5038—Double-Edged HSS Replacement T20502—Face Shield Crown Protector 7" Knives for Model G0505, Set of 2 T20503—Face Shield Window T20452—"Kirova" Anti-Reflective S. Glasses G2790—Universal Knife Grinder T20451—"Kirova" Clear Safety Glasses H0736—Shop Fox ® Safety Glasses H7194—Bifocal Safety Glasses 1.5 H7195—Bifocal Safety Glasses 2.0 H7196—Bifocal Safety Glasses 2.5 T20502...
-
Page 24: Section 6: Maintenance
SECTION 6: MAINTENANCE Knife Sharpening Always disconnect power to the machine before performing maintenance. Failure to do this may result in serious person- al injury. Schedule Daily Maintenance: Page 21 Page 27 Page 27 Each 40 Hours of Operation: Page 23 Page 23 Page 23 Page 28... -
Page 25: Motor Brushes
Lubrication Motor Brushes Tools Needed Tools Needed To check/replace the motor brushes: To lubricate the planer: Figure 26 Note: As you remove the brush assembly, Figure 25 make note of the orientation of the carbon tip so that, if found acceptable, you can re-install it the same way. -
Page 26: Feed Rollers
To removed trapped sawdust from the feed Feed Rollers rollers: Figure 27 Steps 3–6 Figure 27. Tools Needed... -
Page 27: Section 7: Service
SECTION 7: SERVICE Troubleshooting Motor & Electrical Page 23 Page 28 Page 23... - Page 28 Planer Operation Page 29 A small amount of snipe is inevitable. Page 27 Page 16 Page 27 Page 27 Page 27 Page 27 Page 27...
-
Page 29: Adjusting Knives
Adjusting Knives Note: Make sure the gibs and springs do not fall out of the cutterhead by re-tightening the gib bolts. Steps 3–4 Tools Needed Note: The knives have two cutting edges and can be reversed to double their usage. Installing &... - Page 30 Steps 2–11 Figures 29–30 Replacing Drive Belt Tools Needed Figure 30. To replace the drive belt: Figure 31 Figure 32 Figure 31. Step 8 Step 8 Figure 29 Figure 32. Steps 6-11...
- Page 31 Figure 32 Figure 33 Note: Make sure the ribs of the belt are seated in the pulley indents in this process. Steps 6–8 Figure 33. Adjusting Extension Wing Figure 33 Note: Loosening an adjustment bolt will raise that side of the wing, and tightening it will lower that side.
-
Page 32: Section 8: Parts
SECTION 8: PARTS Head Breakdown... - Page 33 Head Parts List REF PART # DESCRIPTION REF PART # DESCRIPTION P0505001 WING NUT M5-.8 PW05M FLAT WASHER 4MM P0505002 THREADED STUD M5-.8 X 50 P0505030 PULLEY GUARD P0505003 CHIP DEFLECTOR P0505031 CHAIN GUARD P0505004 SPONGE PIECE PS05M PHLP HD SCR M5-.8 x 8 P0505005 TOP COVER PR21M...
- Page 34 Motor Assembly Breakdown...
- Page 35 KEY 3 X 3 X 7 P0505156 MOTOR LABEL P0505123 BUSHING PN02M HEX NUT M10-1.5 P0505124 GEAR 33T P0505158 GRIZZLY LABEL (COLOR) P0505125 SHAFT PS15M PHLP HD SCR M6-1 X 14 P6202ZZ BALL BEARING 6202ZZ PLW03M LOCK WASHER 6MM PK05M...
-
Page 36: Base Breakdown
Base Breakdown REF PART # DESCRIPTION REF PART # DESCRIPTION P0505200 BASE ASSEMBLY P0505221 MAIN TABLE P0505201 LEFT LEADSCREW M8-1.25 X 60 PS05M PHLP HD SCR M5-.8 x 8 PK29M KEY 4 X 4 X 8 P0505223 GUIDE PLATE P0505203 BEVEL GEAR P0505224 COLUMN... -
Page 39: Warranty And Returns
WARRANTY AND RETURNS... - Page 40 ® Buy Direct and Save with Grizzly – Trusted, Proven and a Great Value! ~Since 1983~ Visit Our Website Today For Current Specials! ORDER 24 HOURS A DAY! 1-800-523-4777...
Need help?
Do you have a question about the G0505 and is the answer not in the manual?
Questions and answers