Grandstream Networks GXP2200 User Manual
Enterprise application phone
Hide thumbs
Also See for GXP2200:
- User manual (162 pages) ,
- Customization manual (15 pages) ,
- Quick start manual (6 pages)
Table of Contents
Advertisement
Quick Links
Download this manual
See also:
User Manual
Advertisement
Table of Contents

Subscribe to Our Youtube Channel
Related Manuals for Grandstream Networks GXP2200


Summary of Contents for Grandstream Networks GXP2200
- Page 1 Grandstream Networks, Inc. GXP2200 Enterprise Application Phone User Manual Grandstream Networks, Inc. www.grandstream.com...
-
Page 2: Table Of Contents
GXP2200 User Manual Index GNU GPL INFORMATION ................9 CHANGE LOG ..................10 FIRMWARE VERSION 1.0.1.9 ......................10 WELCOME ....................11 PRODUCT OVERVIEW ................12 FEATURE HIGHTLIGHTS ........................12 GXP2200 TECHNICAL SPECIFICATIONS ..................13 INSTALLATION ..................15 EQUIPMENT PACKAGING ......................... 15 CONNECTING YOUR PHONE ...................... - Page 3 IP LOCATION ..........................77 MEDIA PLAYER ..........................78 MESSAGE ............................ 84 MUSIC ............................88 SEARCH ............................89 CONNECTING TO NETWORK AND DEVICES ........92 ETHERNET ............................92 TURNING ETHERNET ON OR OFF .................... 92 GXP2200 USER MANUAL Page 2 of 129...
- Page 4 ADVANCED SETTING/CALL FEATURES ................. 108 ADVANCED SETTING/TONE GENERATOR ................109 MAINTENANCE PAGE DEFINATION ....................109 MAINTENANCE/NETWORK SETTINGS ................... 109 MAINTENANCE/TIME SETTINGS ..................... 110 MAINTENANCE/WEB/SSH ACCESS ..................111 MAINTENANCE/UPGRADE ......................111 MAINTENANCE/SYSLOG ......................113 MAINTENANCE/LOGCAT ......................113 MAINTENANCE/DEBUG ......................113 GXP2200 USER MANUAL Page 3 of 129...
- Page 5 FACTORY FUNCTIONS AND FACTORE RESET ........125 FACTORY FUNCTIONS ........................125 RESTORE TO FACTORY DEFAULT VIA LCD MENU ..............125 RESTORE TO FACTORY DEFAULT VIA THE WEB GUI ..............126 EXPERIENCING THE GXP2200 APPLICATION PHONE ...... 128 GXP2200 USER MANUAL Page 4 of 129...
- Page 6 Table of Tables GXP2200 User Manual Table 1: GXP2200 TECHNICAL SPECIFICATIONS ................... 13 Table 2: GXP2200 EQUIPMENT PACKAGING ..................15 Table 3: GXP2200 CONNECTORS ......................15 Table 4: GXP2200 EXTENSION BOARD PACKAGING ................16 Table 5: GXP2200 ONSCREEN ICONS ..................... 22 Table 6: GXP2200 KEYPAD BUTTONS .....................
- Page 7 Figure 61: GXP2200 Calendar Screen - Edit Event ................... 62 Figure 62: GXP2200 Calculator - Basic Panel .................... 62 Figure 63: GXP2200 Calculator - Advanced Panel ..................63 Figure 64: GXP2200 Call History - All Calls ....................64 GXP2200 USER MANUAL Page 6 of 129...
- Page 8 Figure 102: GXP2200 Message - Send SMS ..................... 86 Figure 103: GXP2200 Message – SMS Draft List ..................87 Figure 104: GXP2200 Message - Storage Status ..................87 Figure 105: GXP2200 Music - Now Playing ....................88 GXP2200 USER MANUAL Page 7 of 129...
- Page 9 Figure 116: GXP2200 Firmware Upload Done ..................123 Figure 117: GXP2200 LCD - Factory Reset ....................126 Figure 118: GXP2200 LCD - Confirm Factory Reset ................126 Figure 119: GXP2200 Web GUI - Confirm Factory Reset ................ 127 GXP2200 USER MANUAL Page 8 of 129...
-
Page 10: Gnu Gpl Information
GXP2200 firmware contains third-party software licensed under the GNU General Public License (GPL). Grandstream uses software under the specific terms of the GPL. Please see the GNU General Public License (GPL) for the exact terms and conditions of the license. -
Page 11: Change Log
This section documents significant changes from previous versions of GXP2200 user manuals. Only major new features or major document updates are listed here. Minor updates for corrections or editing are not documented here. FIRMWARE VERSION 1.0.1.9 • This is the initial version. GXP2200 USER MANUAL Page 10 of 129... -
Page 12: Welcome
Caution: Changes or modifications to this product not expressly approved by Grandstream, or operation of this product in any way other than as detailed by this User Manual, could void your manufacturer warranty. Warning: Please do not use a different power adaptor with the GXP2200 as it may cause damage to the products and void the manufacturer warranty. -
Page 13: Product Overview
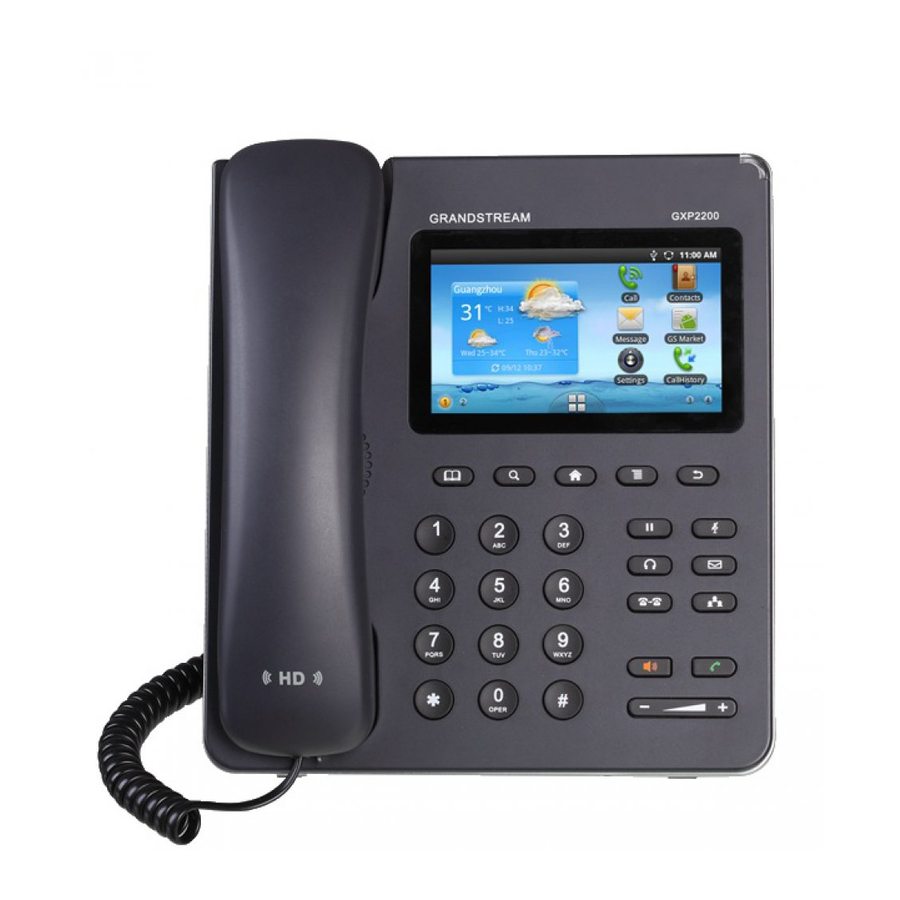
LCD display (GXP2200 EXT); • Automated provisioning using TR-069 or AES encrypted XML configuration file, TLS/SRTP/HTTPS for advanced security and privacy protection, LLDP, LDAP, IPv6. Figure 1: GXP2200 Front View GXP2200 USER MANUAL Page 12 of 129... -
Page 14: Gxp2200 Technical Specifications
Layer 2 (802.1Q, 802.1p) and Layer 3 (ToS, DiffServ, MPLS) QoS User administrator level passwords, MD5-sess based Security authentication, 256-bit AES encrypted configuration file, TLS, SRTP, HTTPS, 802.1x media access control English, German, Italian, French, Spanish, Portuguese, Russian, Croatian, Multi-language GXP2200 USER MANUAL Page 13 of 129... - Page 15 GXP2200 phone, handset with cord, universal power supply, network cable, quick start guide Compliance FCC Part 15 (CFR 47) Class B; EN55022 Class B, EN55024, EN61000-3-2, EN61000-3-3, EN60950-1; AS/NZS CISPR 22 Class B, AS/NZS CISPR 24, RoHS; UL 60950 (power adapter) GXP2200 USER MANUAL Page 14 of 129...
-
Page 16: Installation
CONNECTING YOUR PHONE SD Card Slot USB Port EXT Connecting Slot Phone Stand EXT Port Handset Port PC Port LAN Port 12V Power Headset Port Figure 2: GXP2200 Back View Table 3: GXP2200 CONNECTORS GXP2200 USER MANUAL Page 15 of 129... -
Page 17: Gxp2200 Extension Board
160 fully programmable phone extensions to the phone. Table 4: GXP2200 EXTENSION BOARD PACKAGING Yes (1) Extension Board Yes (1) Extension Board Stand RJ11-RJ11 Cable Yes (1) Connector Plate Yes (1) Screws Yes (4) GXP2200 USER MANUAL Page 16 of 129... -
Page 18: Figure 3: Gxp2200 Back View With Gxp2200 Extension Board
Figure 3: GXP2200 Back View with GXP2200 Extension Board The GXP2200 Extension board can be configured via the web GUI of GXP2200 connected. Login the GXP2200's web GUI and configure Multiple Purpose Keys for Extension board 1/2/3/4 following the tags. GXP2200 USER MANUAL Page 17 of 129... -
Page 19: Safety Compliances
If the phone was purchased directly from Grandstream, contact the Grandstream Sales and Service Representative for a RMA (Return Materials Authorization) number before the product is returned. Grandstream reserves the right to remedy warranty policy without prior notification. -
Page 20: Getting To Know Gxp2200
Figure 4: GXP2200 Default Main Screen Tap the onscreen MENU icon, the settings and applications menu will be brought up as Figure 5 shows. Figure 5: GXP2200 Onscreen Menu GXP2200 USER MANUAL Page 19 of 129... -
Page 21: Idle Screen
• The screen with selected in a red frame is the HOME screen. Others are shown with icon . Tap on the icon to select the corresponding screen as the new HOME screen. GXP2200 USER MANUAL Page 20 of 129... -
Page 22: Adding Idle Screens
Then pinch on the idle screen, or press the MENU button then touch "Edit" option to bring up the display as Figure 7 shows. Now tap on the icon for the screen you would like to delete. GXP2200 USER MANUAL Page 21 of 129... -
Page 23: Idle Screen Icons
Screen indicator. Displayed on the bottom of each idle screen. Orange: the current displayed screen. Account registered. Displayed on the default HOME screen. Tap on it to make call via this account. Account unregistered. Displayed on the default HOME screen. GXP2200 USER MANUAL Page 22 of 129... - Page 24 Alarm. Displayed in status bar when there is alarm set up. DND. Displayed in status bar when DND is on. Missed call. Displayed in status bar when there is missed call. Mute. Displayed in status bar when the ongoing call is muted. GXP2200 USER MANUAL Page 23 of 129...
-
Page 25: Onscreen Keyboard
The GXP2200 onscreen keyboard can be activated by tapping on an input field. • English input method and Chinese input method To switch input method to English when the current method is Chinese, tap on (Figure 8). GXP2200 USER MANUAL Page 24 of 129... -
Page 26: Figure 8: Gxp2200 Onscreen Keyboard - Chinese Input Method
Figure 9: GXP2200 Onscreen Keyboard - English Input Method • Lowercase and Uppercase When using English input method, to switch between uppercase and lowercase input, tap on (Figure 10) or (Figure 11). Figure 10: GXP2200 Onscreen Keyboard - Lowercase GXP2200 USER MANUAL Page 25 of 129... -
Page 27: Figure 11: Gxp2200 Onscreen Keyboard - Uppercase
To input number and symbols, on the following screens in Figure 12, tap on to switch the mode and tap on to go to another page for more symbols. Figure 12: GXP2200 Onscreen Keyboard - Number and Symbols GXP2200 USER MANUAL Page 26 of 129... -
Page 28: Using The Keypad
Menu. Press to view options for different screen or applications. Back. Press to go back. Hold. Press to put call on hold or resume the call. Mute. Press to mute or unmute the call. GXP2200 USER MANUAL Page 27 of 129... -
Page 29: Using The Message Waiting Indicator
LED Status Description Fast Flashing Incoming call Solid Calling, Talking Slow Flashing Call on hold Flashing Missed call (s), New voicemail (s), New SIP Message (s) Solid High memory usage, Maximum message number Normal GXP2200 USER MANUAL Page 28 of 129... -
Page 30: Managing Status Bar
Figure 15: GXP2200 Status Bar - Notification • Process Tap on Process tab then users could view all the running processes on the GXP2200. Press on the process to open it, or tap on to close the process. GXP2200 USER MANUAL Page 29 of 129... -
Page 31: Figure 16: Gxp2200 Status Bar - Process
Turn on/off BlueTooth. Turn on/off LCD display. Scroll left/right to adjust LCD brightness. Speaker on/off incoming call. Select Media Channel when playing audio or video. Figure 17: GXP2200 Status Bar - System Settings GXP2200 USER MANUAL Page 30 of 129... -
Page 32: Making Phone Calls
Authenticate ID, Authenticate Password and etc. Once the correct information is entered and saved, the account registration status will show on the main screen. Note: For web GUI login and configuration information, please refer to section GXP2200 Web GUI Settings. GXP2200 USER MANUAL Page 31 of 129... -
Page 33: Handset, Speaker And Headset Mode
Send button or tap on (audio call). To use handset, lift the handset up from the hook switch. If headset is used, press to call via headset. Figure 19: GXP2200 Call Screen GXP2200 USER MANUAL Page 32 of 129... -
Page 34: Figure 20: Gxp2200 Offhook Call Screen
The LCD will display all call history types: "All", "Outgoing", "Incoming" and "Missed" calls; • Select the call history you would like to view by sliding up/down and tapping on the corresponding number; • Press on the dial icon or Send button to dial out. GXP2200 USER MANUAL Page 33 of 129... -
Page 35: Figure 21: Gxp2200 Call History Screen - One Entry Selected
The LCD screen will display the records in the contacts; • Navigate to the contacts by sliding up/down on the screen; • Tap on the dial key to dial the corresponding contact. Figure 22: GXP2200 Contacts Screen GXP2200 USER MANUAL Page 34 of 129... -
Page 36: Direct Ip Call
Under "Mode Select" button in the call screen, tap on it and select the mode as "IP Call"; • Input the 12-digit target IP address. For example, if the target IP address is 192.168.1.60 and the port GXP2200 USER MANUAL Page 35 of 129... -
Page 37: Answering A Call
When the phone rings, users could use the headset, handset or speaker to answer the call. The user may also tap on the Answer key in the ringing screen to pick up the call via Speaker. Figure 24: Single Incoming Call GXP2200 USER MANUAL Page 36 of 129... -
Page 38: Figure 25: Multiple Incoming Calls
To enable auto-answer/paging/intercom feature, user could login GXP2200 Web GUI->Account x->Call Settings to select the options for "Auto Answer" (see Figure 26). Or, users could use LCD onscreen MENU->Settings->Account Preference->select Account Name to enable auto-answer (see Figure 27). GXP2200 USER MANUAL Page 37 of 129... -
Page 39: Figure 26: Auto Answer Option In Web Gui
• Yes: Enable Auto-Answer feature. The incoming call will be answered automatically via speaker; • Enable Intercom/Paging: Only incoming Paging/Intercom Call will be automatically answered via speaker. Other regular calls won't be auto-answered. GXP2200 USER MANUAL Page 38 of 129... -
Page 40: Call Hold
When there is an active call, tap on the right panel to open up another line or accept the new incoming call. This will automatically put the current call on hold. Touch the bars indicating different lines on the right panel to toggle among multiple calls. Figure 29: GXP2200 Multiple Calls Screen GXP2200 USER MANUAL Page 39 of 129... -
Page 41: Call Transfer
2. Attended Transfer • During the active call, tap on in the right panel to make the second call. This will place the current call on hold; GXP2200 USER MANUAL Page 40 of 129... -
Page 42: 5-Way Conference
To transfer calls across SIP domains, SIP service providers must support transfer across SIP domains; • If users would like to cancel the transfer, press button to go back to the previous talking screen. 5-WAY CONFERENCE The GXP2200 supports up to 5-way conferencing. GXP2200 USER MANUAL Page 41 of 129... -
Page 43: Figure 32: Gxp2200 Conference Screen
As Figure 33 shows, users could manually select account, enter digits and then tap on the icon, or select the call (on hold or active ) to add to the conference; Figure 33: Invite Party to Conference GXP2200 USER MANUAL Page 42 of 129... -
Page 44: Figure 34: 3-Way Conference Call Established
During the conference, users could press the HOLD button to hold or resume the conference at any time. Note: For 4-way conference and 5-way conference, PCMA and PCMU are the supported codec in current firmware version. GXP2200 USER MANUAL Page 43 of 129... -
Page 45: Voicemail(Message Waiting Indication
"Voice Mail UserID". When dialing out, this Voicemail User ID will be used to access the voicemail message. Figure 35: New Voicemail Notification Regular voicemail. Urgent voicemail. Figure 36: Press Message Button to Retrieve Voicemail GXP2200 USER MANUAL Page 44 of 129... -
Page 46: Mute
Tap on Call Forwarding to activate the feature. Then a list of options will show. Select the option to configure the call forward type (None, Unconditional, Time Based, Others) and then enter necessary number in the fields. GXP2200 USER MANUAL Page 45 of 129... -
Page 47: Figure 38: Call Forwarding On Gxp2200 Lcd
Login web GUI and go to page Account X->Call Settings. Call Forward option is displayed on the bottom of the page. By default, Call Forward feature is set to None. Figure 39: Call Forwarding on GXP2200 Web GUI GXP2200 USER MANUAL Page 46 of 129... -
Page 48: Figure 40: Call Forward - Unconditional
Call Forward on Busy / Call Forward No Answer: The incoming call will be forwarded when the GXP2200 is busy or no answer after certain interval "Delayed Call Forward Wait Time (s)". Figure 42: Call Forward - Busy/No Answer GXP2200 USER MANUAL Page 47 of 129... -
Page 49: Gxp2200 Applications
• Folders for New folder, All contacts, Bluetooth received, Contacts with phone numbers and Starred contacts. Select the folder so shortcut can be created and placed on the screen; GXP2200 USER MANUAL Page 48 of 129... -
Page 50: Moving An Item On Idle Screen
3. When the item gets close to the Recycle Bin, it will turn red. Now lift your finger to release. Note: When the item is removed from the idle screen, it still exists on GXP2200. Users could always add it back to display on the idle screen. GXP2200 USER MANUAL Page 49 of 129... -
Page 51: Changing Idle Screen Wallpaper
MENU . Touch and hold the app's icon until the Move to Desktop bar is displayed on the bottom. Then drag the app's icon there without lifting your finger up. GXP2200 USER MANUAL Page 50 of 129... -
Page 52: Opening Apps
1. In idle screen, tap on the top status bar and slowly drag it down; 2. Tap on Notification or Process tab to have a list of apps shown up; 3. Touch the name or thumbnail of the item in the list to open the corresponding app. GXP2200 USER MANUAL Page 51 of 129... -
Page 53: Managing Apps
Storage provides storage information that an app uses on the GXP2200; Delete an app’s settings and other data by touching the Clear data. For example, clear data for app Account and Sync Settings; GXP2200 USER MANUAL Page 52 of 129... -
Page 54: Figure 47: Running Application Screen
Figure 47: Running Application Screen Note: Stopping an app, operating system processes or services might disable one or more dependent functions on GXP2200. Users may need restart the GXP2200 to restore full functionality. GXP2200 USER MANUAL Page 53 of 129... -
Page 55: Managing Downloads
Sort by size or Sort by time to sort the downloaded files. Figure 48: GXP2200 Downloads App PLAYING WITH APPS In this section, the apps that come with GXP2200 are described in details. GXP2200 USER MANUAL Page 54 of 129... -
Page 56: Blacklist
Blacklist screen. Each entry contains the caller name and caller number of the blocked contact. The number of blocked calls for the contact is displayed on the right hand side too. GXP2200 USER MANUAL Page 55 of 129... -
Page 57: Figure 50: Gxp2200 Blacklist
Figure 52 shows Manually add number to blacklist. Once Manually add option is touched, a window will be prompted for users to enter the phone number in the first field and name/other note information in the second field (optional). Tap on Save to finish the adding operation . GXP2200 USER MANUAL Page 56 of 129... -
Page 58: Figure 52: Manually Add Number To Blacklist
Check/uncheck on the call log entry to make selections. Then tap on Select to add it/them into the blacklist. You can also CheckAll entries, UncheckAll entries and InvertAll the selection by tapping on the corresponding buttons on the bottom. GXP2200 USER MANUAL Page 57 of 129... -
Page 59: Figure 54: Add Number From Call Log
Then touch the Delete button on the bottom. You can also CheckAll entries, UncheckAll entries and InvertAll the selection by tapping on the corresponding buttons on the bottom. Figure 55: Delete Entry From Blacklist GXP2200 USER MANUAL Page 58 of 129... -
Page 60: Broswer
In the Browser app, press on the MENU button , then users could open new windows, manage the windows, refresh the page, forward, exit or select text from the web page. GXP2200 USER MANUAL Page 59 of 129... -
Page 61: Figure 57: Gxp2200 Web Browser
Figure 57. To zoom in/zoom out, place two fingers on the blank area of the web page, then pinch together or spread out. Figure 58: GXP2200 Web Browser-Bookmarks GXP2200 USER MANUAL Page 60 of 129... -
Page 62: Calendar
Day, view events by Agenda, specify a particular date via GoToDay, and sync up with Google Calendar by tapping on Settings; Figure 59: View Calendar Events by Month Figure 60: View Calendar Events by Day GXP2200 USER MANUAL Page 61 of 129... -
Page 63: Calculator
MENU button then users could switch the operation between "Basic panel" and "Advanced panel". Or users could simply slide to the left and right to switch between Basic panel and Advanced panel. Figure 62: GXP2200 Calculator - Basic Panel GXP2200 USER MANUAL Page 62 of 129... -
Page 64: Call History
Call History App provides users access to phone's call records with different categories on the left panel. • All calls • Incoming calls, indicated by per call; • Outgoing calls, indicated by per call; • Missed calls, indicated by per call. GXP2200 USER MANUAL Page 63 of 129... -
Page 65: Figure 64: Gxp2200 Call History - All Calls
• To view more details. Tap on one entry displayed in the call history list to view the details; Figure 65: GXP2200 Call History - Entry Details GXP2200 USER MANUAL Page 64 of 129... -
Page 66: Clock
The operation list will show options View detailed call history, Edit number before calling, View contact and Add to BlackList. Figure 66: GXP2200 Call History - Entry Operations CLOCK • Use Clock to display the date and time on your screen; GXP2200 USER MANUAL Page 65 of 129... -
Page 67: Figure 67: Gxp2200 Clock Screen
Figure 67: GXP2200 Clock Screen • Turn on night mode by tapping on on the top right in Figure 67; • Set up alarm by tapping on the icon Figure 68: GXP2200 Alarm Screen GXP2200 USER MANUAL Page 66 of 129... -
Page 68: Contacts
First name, Last name, Phone number, Email address and etc). When there are more than one Phone number added for the contact, the first one will be used and displayed by default. Figure 70: GXP2200 Contacts - New Contact GXP2200 USER MANUAL Page 67 of 129... -
Page 69: Figure 71: Gxp2200 Contacts - Edit Contact
• Edit contacts in Group category. Touching on the left panel, to view, add or delete groups; • Check Storage Status. In Figure 69, tap on Options->Storage status; GXP2200 USER MANUAL Page 68 of 129... -
Page 70: Figure 72: Gxp2200 Contacts - Storage Status
Export contacts. Contacts information in GXP2200 could be converted to Vcard/XML/CSV files and exported to external device such as PC. In Figure 69, tap Options->Export, select the format and choose the directory you would like to save the file. Then tap on OK. GXP2200 USER MANUAL Page 69 of 129... -
Page 71: Email
The GXP2200 Email app provides users easy access to business or personal email account. When opening it for the first time, a wizard will be provided for users to configure the email account on GXP2200. GXP2200 USER MANUAL Page 70 of 129... -
Page 72: Figure 76: Gxp2200 Email Setup Wizard 1
Figure 76: GXP2200 Email Setup Wizard 1 Figure 77: GXP2200 Email Setup Wizard 2 GXP2200 USER MANUAL Page 71 of 129... -
Page 73: File Manager
Refresh, Compose, Folders, Accounts and Account settings options. Figure 79: GXP2200 Email FILE MANAGER File manager is a tool that helps manage folders and files such as pictures, music, video and other files on GXP2200. GXP2200 USER MANUAL Page 72 of 129... - Page 74 Then tap on Paste. The files/folders will be moved; Rename. Tap on Rename and enter the new name. Once done, tap on OK; GXP2200 USER MANUAL Page 73 of 129...
-
Page 75: Gallery
Users could also perform basic editing tasks on pictures and set them as wallpaper or picture for contacts. The pictures can be easily shared with friends in Gallery app by sending via Bluetooth, and Email too. Figure 80: GXP2200 Gallery GXP2200 USER MANUAL Page 74 of 129... -
Page 76: Gs Market
Search button. Then touch the input field to activate the onscreen keyboard. Enter the keyword of the app and touch Go in the onscreen keyboard. Or press again to start the search. GXP2200 USER MANUAL Page 75 of 129... -
Page 77: Figure 82: Gxp2200 Gs Market - Search App
AngryBirds app is still in downloading process. Progress bar will show in downloading process and you could cancel the downloading by tapping on the Cancel icon. Figure 83: GXP2200 GS Market - History GXP2200 USER MANUAL Page 76 of 129... -
Page 78: Ip Location
IP address and then tap on Search to view the result. Based on the IP address provided, the following information will be given: Country, Region, City, Latitude, Longitude, Time Zone and GXP2200 USER MANUAL Page 77 of 129... -
Page 79: Media Player
GXP2200 Media Player supports video format in MP4 and 3GP, audio format in AAC, MP3, AMR, WAVE, MIDI and Vorbis to be displayed. Users could scan the media files by tapping on Scan and files detected from internal storage and USB/SD card storage will be displayed. GXP2200 USER MANUAL Page 78 of 129... -
Page 80: Figure 87: Gxp2200 Media Player
Music. On Local Files tab, Select Music to bring up the screen for the detected audio files. User could select to sort music files by Song, Artist, Album, File when tapping on Sort button. GXP2200 USER MANUAL Page 79 of 129... -
Page 81: Figure 89: Gxp2200 Media Player - Sort Music Files
Also, users could simply tap and hold onto the music file to bring up options list to edit the file. Besides Add to List, Delete and Send, users could also set the music as local ringtone by selecting Set as Ringtone. GXP2200 USER MANUAL Page 80 of 129... -
Page 82: Figure 91: Gxp2200 Media Player - Music File Options
Next Stop Switch play mode Figure 92: GXP2200 Media Player - Playing To view the lyrics, touch the frequency bar on the above figure. Local lyrics file is required to display the lyrics. GXP2200 USER MANUAL Page 81 of 129... -
Page 83: Figure 93: Gxp2200 Media Player - Lyrics
Users could add the media files in a folder to PlayList here. Tap on Edit button and following screen will show. Click on the checkbox on the right hand side of the folder to select. Then touch Add to List. GXP2200 USER MANUAL Page 82 of 129... -
Page 84: Figure 95: Gxp2200 Media Player - Folder
PlayList. Tap on the PlayList tab on the left panel to bring up playlist screen. Figure 96: GXP2200 Media Player - PlayList To create New Playlist, tap on the New Playlist button. Type the name of new playlist and Save it. GXP2200 USER MANUAL Page 83 of 129... -
Page 85: Message
To edit or play a playlist, touch and hold onto one of the playlist. Then options Play, Clear All, Delete, Rename will show. Figure 98: GXP2200 Media Player - Playlist Options MESSAGE GXP2200 has built-in Message app, which could be used with SIP server's support. If two parties (1 of GXP2200 USER MANUAL Page 84 of 129... -
Page 86: Figure 99: Gxp2200 Message
Tap on the contact you have pervious chatted with to view the message dialog. Figure 100: View Dialog Touch and hold on to the message to bring up the operation options including Lock/Unlock, Forward, Copy, Delete and Resend. GXP2200 USER MANUAL Page 85 of 129... -
Page 87: Figure 101: Message Options
Tapping on Draft in Figure 99 will show you the SMS Draft List, which saves the messages edited but not sent yet. Tap to select the draft, then you could edit and send it. GXP2200 USER MANUAL Page 86 of 129... -
Page 88: Figure 103: Gxp2200 Message - Sms Draft List
Tap on Delete in Figure 99. Select the message you would like to delete, then Tap on Delete again. • Check Storage Status In Figure 99, tap on Storage Status to display storage information. The maximum storage capacity for GXP2200 message is 1000 messages. Figure 104: GXP2200 Message - Storage Status GXP2200 USER MANUAL Page 87 of 129... -
Page 89: Music
Go to playlist. Tap on • Shuffle. Tap on • Repeat the current music. Tap on • More options. Press the MENU button , options such as Add to playlist, Use as ringtone, Delete will show; GXP2200 USER MANUAL Page 88 of 129... -
Page 90: Search
Type to Search. Search on Web. Type in the content you would like to search from the onscreen keyboard and then press Go. A new web page will be opened listing the searching result. GXP2200 USER MANUAL Page 89 of 129... -
Page 91: Figure 107: Gxp2200 Search - Search On Web
(see Figure 108). If it's number, "Dial number" using the entered digits will display, tap on it the call will be made via the first registered account (see Figure 109). Figure 108: GXP2200 Search - Search on GXP2200 GXP2200 USER MANUAL Page 90 of 129... -
Page 92: Figure 109: Gxp2200 Search - Dial Number
Manage search privacy. In Search app, tap on MENU button and touch Search Settings. Under Phone, tap on Clear shortcuts. The suggestions that have been recently selected in Search app will be cleared. GXP2200 USER MANUAL Page 91 of 129... -
Page 93: Connecting To Network And Devices
WIFI is supported on GXP2200 with WIFI adaptor plugged in. Insert the USB WIFI adaptor to the USB port on the back of GXP2200 first and then go to GXP2200's Settings application->Networks. TURNING WIFI ON OR OFF 1. Go to GXP2200's Settings; 2. Touch Networks; GXP2200 USER MANUAL Page 92 of 129... -
Page 94: Adding Wifi Networks
On Home screen, press button ->Settings->Networks; • Press onscreen MENU icon and tap on Settings App->Networks. TURNING BLUETOOTH ON OR OFF 1. Go to GXP2200's Settings; 2. Touch Networks; 3. Check or uncheck the option for Bluetooth. GXP2200 USER MANUAL Page 93 of 129... -
Page 95: Changing Bluetooth Device Name
Once it's connected, users could also press and hold on to the Bluetooth device ID, then options Disconnect, Disconnect & unpair, and Options will show. Tap on Options, users could select different profiles for the connected devices (e.g., for Bluetooth headset, users could check or uncheck connect to GXP2200 USER MANUAL Page 94 of 129... -
Page 96: Sending And Receiving Files Via Bluetooth
2. To use headset mode, press headset button on the GXP2200. A headset icon will show on the GXP2200 status bar. There are two different headset mode for users to select from web GXP2200 USER MANUAL Page 95 of 129... -
Page 97: Usb
2. It will take a few seconds for the GXP2200 to prepare the connection. Then the SD Card icon will show on the status bar; 3. To access SD Card, go to GXP2200 MENU->FileManager->sdcard. Tap on it to access and manage your data. GXP2200 USER MANUAL Page 96 of 129... -
Page 98: Gxp2200 Web Gui Settings
To access the GXP2200 Web GUI: 1. Connect the computer to the same network as the phone; 2. Make sure the phone is turned on and shows its IP address on the desktop; GXP2200 USER MANUAL Page 97 of 129... -
Page 99: Figure 111: Gxp2200 Main Screen - Ip Address
Apply button on the top of the page to apply the configuration changes. For those options with next to it in the Web page, users must reboot the phone for the changes to take effect. GXP2200 USER MANUAL Page 98 of 129... -
Page 100: Definitions
Default gateway of the phone. DNS Server 1 DNS Server 1 of the phone. DNS Server 2 DNS Server 2 of the phone. NAT Type The type of NAT connection used by the phone. GXP2200 USER MANUAL Page 99 of 129... -
Page 101: Status/System Info
MESSAGE button on the phone. This ID is usually the VM portal access number. For example, in Asterisk server, 8500 could be used. Name The SIP server subscriber's name (optional) that will be used for Caller ID display. GXP2200 USER MANUAL Page 100 of 129... -
Page 102: Account/Network Settings
Set this to "VPN" if OpenVPN is used. Proxy-Require A SIP Extension to notify the SIP server that the phone is behind a NAT/Firewall. Do not configure this parameter unless this feature is supported on the SIP server. GXP2200 USER MANUAL Page 101 of 129... -
Page 103: Account/Sip Settings
Callee Request Timer If set to "Yes" and the remote party supports session timers, the phone will use a session timer when it receives inbound calls. GXP2200 USER MANUAL Page 102 of 129... -
Page 104: Account/Codec Settings
SDP message. Arrange your preferred vocoder orders using the Up and Down button. SRTP Mode Enables the SRTP mode based on your selection from the drop-down menu. The default setting is "Disable". GXP2200 USER MANUAL Page 103 of 129... -
Page 105: Account/Call Settings
Allows any number with leading digit 1 followed by a 3 digit number, followed by any number between 2 and 9, followed by any 7 digit number OR Allows any length of numbers with leading digit 2, replacing the 2 with 011 when dialed. GXP2200 USER MANUAL Page 104 of 129... - Page 106 Users can choose from Standard, CBCOM, RNK, China Mobile, ZTE IMS, Mobotix, ZTE NGN, or Huawei IMS depending on the server type. The default GXP2200 USER MANUAL Page 105 of 129...
- Page 107 Specifies the number to be forwarded to for Call Forward On Busy. No Answer To Specifies the number to be forwarded to for Call Forward On No Answer. No Answer Timeout (s) Defines the timeout (in seconds) before the call is forwarded on no GXP2200 USER MANUAL Page 106 of 129...
-
Page 108: Advanced Settings Page Definations
1 will use port_value+4 for RTP and port_value+5 for its RTCP. For video, channel 0 will use port_value+2 for RTP and port_value+3 for its RTCP; channel 1 will use port_value+6 for RTP and port_value+7 for RTCP. The default value is 5004. GXP2200 USER MANUAL Page 107 of 129... -
Page 109: Advanced Setting/Call Features
Disables the Conference function. The default setting is "No". Disable Transfer Disables the Transfer function. The default setting is "No". Escape # as %23 in SIP URI Replaces “#” by “%23” for some special situations. The default setting is "Yes". GXP2200 USER MANUAL Page 108 of 129... -
Page 110: Advanced Setting/Tone Generator
IP Address Enter the IP address when static IP is used. Subnet Mask Enter the Subnet Mask when static IP is used. Default Gateway Enter the Default Gateway when static IP is used. GXP2200 USER MANUAL Page 109 of 129... -
Page 111: Maintenance/Time Settings
LAN. The default setting is "Yes". DHCP Option 2 to override Allows device to get provisioned for Time Zone from DHCP Option 2 in Time Zone setting the local server automatically. The default setting is "No". GXP2200 USER MANUAL Page 110 of 129... -
Page 112: Maintenance/Web/Ssh Access
The password for encrypting the XML configuration file using OpenSSL. This is required for the phone to decrypt the encrypted XML configuration file. HTTP/HTTPS User Name The user name for the HTTP/HTTPS server. GXP2200 USER MANUAL Page 111 of 129... - Page 113 Defines the rules for automatic upgrade: Always Check at bootup, when F/W pre/suffix changes, Skip the Firmware Check. Authenticate Conf File Authenticates configuration file before acceptance. The default setting is "No". Factory Reset Restore to factory default settings. GXP2200 USER MANUAL Page 112 of 129...
-
Page 114: Maintenance/Syslog
Press LIST to view the list of captured traces. It will show the time when the trace was captured. Click on the name of the file to download and view the trace. MAINTENANCE/LANGUAGE Language Select the language displayed on the phone. GXP2200 USER MANUAL Page 113 of 129... -
Page 115: Maintenance/Tr-069
Click on Yes and the phone will reboot. Wait for approximately 1 minute to log in again. GXP2200 USER MANUAL Page 114 of 129... -
Page 116: Gxp2200 Lcd Settings
Others. When phone is busy, calls are forwarded to the number specified in Busy To; when incoming calls are not answered, those calls are forwarded to the number specified in No Answer To; the waiting time for answering calls is specified in Delayed Call Forward Wait Time (s). GXP2200 USER MANUAL Page 115 of 129... -
Page 117: Networks
Silent mode. Check/uncheck to turn on/off the ring from speaker when there is incoming call; • Volume. Tap on Volume and scroll left/right to adjust the volume for Ringtone and Media; • Phone ringtone. Select phone's ringtone for incoming call; • Notification ringtone. Select notification ringtone; GXP2200 USER MANUAL Page 116 of 129... -
Page 118: Display
• Unknown sources. Check/uncheck to enable/disable permission to install applications that you obtain from web sites, email, or other locations other than GS Market; GXP2200 USER MANUAL Page 117 of 129... -
Page 119: Language & Keyboard
24-hour format, 13:00 will be displayed instead of 1:00 pm. • Select date format. Select the format of year, month and day for the date to be displayed. ABOUT PHONE About Phone lists the GXP2200's account information, network status and system information. GXP2200 USER MANUAL Page 118 of 129... -
Page 120: Advanced Settings
Syslog Level. Select the level of logging for syslog. The default setting is None. There are 4 levels: DEBUG, INFO, WARNING AND ERROR. Syslog Server. The URL/IP address for the syslog server. • Factory Reset. Open and tap on Factory Reset to restore the GXP2200 to factory default settings. GXP2200 USER MANUAL Page 119 of 129... -
Page 121: Upgrading And Provisioning
IP address or FQDN for the Firmware server and the Config server. After making the changes, tap Save button to save the change. Then reboot the phone. Figure 112: GXP2200 Upgrade Configuration via LCD GXP2200 USER MANUAL Page 120 of 129... -
Page 122: Confirm Upgrage To Start
Figure 113). Confirm the message by tapping on "Yes" to start the upgrading process. Figure 113: Start GXP2200 Upgrade Note: Please do not interrupt or power cycle the GXP2200 when the upgrading process is on. GXP2200 USER MANUAL Page 121 of 129... -
Page 123: Upload Firmware Locally
When uploading is done, a message will show in the Web GUI; • Check the GXP2200 LCD and select "Yes" to the confirm message. Upgrading process will start. Figure 114: Upload GXP2200 Firmware via Web GUI GXP2200 USER MANUAL Page 122 of 129... -
Page 124: No Local Firmware Servers
Figure 116: GXP2200 Firmware Upload Done NO LOCAL FIRMWARE SERVERS For users that would like to use remote upgrading without a local TFTP server, Grandstream offers a NAT-friendly HTTP server. This enables users to download the latest software upgrades for their phone via this server. -
Page 125: Configuration File Download
Access page. For a detailed parameter list, please refer to the corresponding firmware release configuration template. When a Grandstream Devices boots up or reboots, it will issue a request for a configuration XML file named "cfgxxxxxxxxxxxx.xml" followed by a file named "cfgxxxxxxxxxxxx", where "xxxxxxxxxxxx" is the MAC address of the device, i.e., "cfg000b820102ab". -
Page 126: Factory Functions And Factore Reset
Restoring the Factory Default Settings will delete all configuration information on the phone. Please backup or print all the settings before you restore to the factory default settings. Grandstream is not responsible for restoring lost parameters and cannot connect your device to your VoIP service provider. -
Page 127: Restore To Factory Default Via The Web Gui
RESTORE TO FACTORY DEFAULT VIA THE WEB GUI 1. Login GXP2200 Web GUI and go to Maintenance->Upgrade page; 2. At the bottom of the page, click on the Reset button for Factory reset. A dialog box will pop up; GXP2200 USER MANUAL Page 126 of 129... -
Page 128: Figure 119: Gxp2200 Web Gui - Confirm Factory Reset
3. Click OK to restore the phone to factory settings. Figure 119: GXP2200 Web GUI - Confirm Factory Reset GXP2200 USER MANUAL Page 127 of 129... -
Page 129: Experiencing The Gxp2200 Application Phone
FAQs User and Developer Forum for answers to your general questions. If you have purchased our products through a Grandstream Certified Partner or Reseller, please contact them directly for immediate support. Our technical support staff is trained and ready to answer all of your questions. Contact a technical support...
Need help?
Do you have a question about the GXP2200 and is the answer not in the manual?
Questions and answers