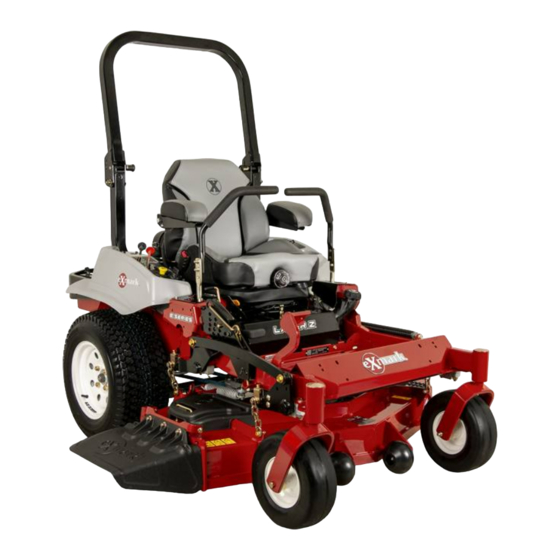
Exmark Lazer Z Advantage series Operator's Manual
Hide thumbs
Also See for Lazer Z Advantage series:
- Operator's manual (48 pages) ,
- Parts manual (32 pages) ,
- Operator's manual (52 pages)
Table of Contents
Advertisement
Advertisement
Table of Contents
Troubleshooting

Related Manuals for Exmark Lazer Z Advantage series


Summary of Contents for Exmark Lazer Z Advantage series
- Page 1 For Serial Nos. 670,000 & Higher Part No. 109-6447 Rev A.
- Page 2 Replacements may be ordered through the engine manufacturer. Exmark reserves the right to make changes or add improvements to its products at any time without incurring any obligation to make such changes to products manufactured previously. Exmark, or its distributors and dealers, accept no responsibility for variations which may be evident in the actual specifications of its products and the statements and descriptions contained in this publication.
- Page 3 3. Exmark being unable to ship the part and the Exmark parts order is received by 3:00 p.m., central time, Exmark pays for the part and freight. 4. If the part does not arrive overnight due to the shipper (UPS), the shipper pays for the freight and Exmark pays for the part.
- Page 4 If additional information is needed, or should you require trained mechanic service, contact your authorized Exmark equipment dealer or distributor. All Exmark equipment dealers and distributors are kept informed of the latest methods of servicing and are equipped to provide prompt and efficient service in the field or at their service stations.
-
Page 5: Table Of Contents
TABLE OF CONTENTS 1. SAFETY PAGE Safety Alert Symbol ..................1 Training ......................1 Preparation....................1-3 Operation ....................4-7 Maintenance & Storage ................7-9 Safety Signs ..................... 9-11 2. SPECIFICATIONS Model Numbers ................... 12 Engine ......................12 Fuel System ....................12 Electrical System .................. -
Page 6: Safety Alert Symbol
MAY result in minor or moderate injury. 1.2 TRAINING 1.2.1 Regard the Exmark mower as a piece of power equipment and teach this regard to all who operate this unit. 1.2.2 Read the instructions carefully. Familiarize yourself with the controls and the proper use of the equipment. - Page 7 1.3.3 While mowing, always wear substantial footwear and long trousers. Do not operate equipment when barefoot or when wearing open sandals. 1.3.4 Thoroughly inspect the area where the equipment is to be used and remove all stones, sticks, wires, bones, and other foreign objects which may damage the equipment or cause personal injury to the operator or bystanders.
- Page 8 DANGER POTENTIAL HAZARD ♦ In certain conditions gasoline is extremely flammable and highly explosive. WHAT CAN HAPPEN ♦ A static charge can ignite gasoline vapors. A fire or explosion from gasoline can burn you, others, and cause property damage. HOW TO AVOID THE HAZARD ♦...
-
Page 9: Operation
WARNING POTENTIAL HAZARD ♦ Gasoline vapor can collect inside enclosed trailers and may be ignited by electrical sparks or hot engine/exhaust components. WHAT CAN HAPPEN ♦ Explosion and fire may occur, resulting in property damage, personal injury, and/or death. HOW TO AVOID THE HAZARD ♦... - Page 10 WARNING POTENTIAL HAZARD ♦ Hands, feet, hair, clothing, or accessories can become entangled in rotating parts. WHAT CAN HAPPEN ♦ Contact with rotating parts can cause traumatic amputation or severe lacerations. HOW TO AVOID THE HAZARD ♦ Do not operate the machine without guards, shields, and safety devices in place and working properly.
- Page 11 FIGURE 1 • Progressively greater care is needed as the slope increases. • Always avoid sudden starting or stopping on a slope. If tires lose traction, disengage the blades and proceed slowly off the slope. • Avoid sudden starts when mowing uphill. Mower may tip backwards. •...
- Page 12 • Check carefully for overhead clearances (i.e. branches, doorways, and electrical wires) before driving under any objects and do not contact them. 1.4.6 Use EXTREME caution when backing up. LOOK BEHIND YOU! 1.4.7 Stop the blades when crossing surfaces other than grass and when transporting the mower to and from the area to be mowed.
-
Page 13: Maintenance & Storage
1.5 MAINTENANCE AND STORAGE 1.5.1 For engine maintenance, follow the engine manufacturer’s recommendations precisely as stated in the engine manual. 1.5.2 Disconnect the battery cable from the negative battery post when the unit will be allowed to sit for more than 30 days without use. 1.5.3 Allowing batteries to stand for an extended period of time without recharging them will result in reduced performance and service life. -
Page 14: Safety Signs
1.6.3 When new components are installed, be sure that current safety signs are affixed to the replaced components. 1.6.4 New safety signs may be obtained from your authorized Exmark equipment dealer or distributor or from Exmark Mfg. Co. Inc. 1.6.5 Safety signs may be affixed by peeling off the backing to expose the adhesive surface. - Page 15 PART NO. 109-0736 LOCATION: LH Side of Console PART NO. 109-0737 LOCATION: RH Side of Console PART NO. 107-2102 LOCATION: Inside Surface of Upper Roll bar PART NO. 1-633706 PART NO. 1-403005 LOCATION: LH Side of Cutting LOCATION: Left and Right Corners Height Adjustment of Mower Deck Plate...
- Page 16 PART NO. 107-2112 LOCATION: Top Center of Floorpan PART NO. 1-513742 LOCATION: Top of Mower Deck PART NO. 103-3270 Belt Shields, Left and LOCATION: On Engine Right Sides PART NO. 103-6319 LOCATION: Back of Seat PART NO. 1-643222 PART NO. 1-633922 PART NO.
-
Page 17: Specifications
2. SPECIFICATIONS 2.1 MODEL NUMBER: Serial Nos. 670,000 and Higher LAS25KC604, LAS28KA524, LAS28KA604, LAS28KA724, LAS25KC604B, LAS28KA724B 2.2 ENGINE: 2.2.1 Engine Specifications: See your Engine Owner’s Manual 2.2.2 RPM: Full Speed: 3750 ±50 RPM (No Load) Idle: 1500 RPM 2.3 FUEL SYSTEM 2.3.1 Capacity: 11 gal. -
Page 18: Hydrostatic Ground Drive System
• Deluxe suspension seat with high back, low profile foam-in-place cushion (dampened, adjustable spring suspension) and armrests. 2.6.2 Mounting: Hinged to tilt up for access to hydraulic pumps, battery and other components. Held in tilted position with prop rod. Adjustable fore and aft seat track. 2.6.3 Armrests: Standard seat: foam padded flip-up armrests. -
Page 19: Dimensions
2.10 DIMENSIONS 2.10.1 Overall Width: without deck deflector up deflector down w/52” Deck 49.8 in. (126.5 cm) 53.4 in. (135.6 cm) 64.2 in. (163.1 cm) w/60” Deck 53.8 in. (136.7 cm) 61.4 in. (156.0 cm) 72.2 in. (183.4 cm) w/72” Deck 57.3 in. - Page 20 FIGURE 2 By moving both levers an equal amount forward or back from the neutral position the machine can be caused to move forward or backward in a straight line. Movement of the left lever forward will cause the left drive wheel to rotate in a forward direction.
- Page 21 more to the right and counterclockwise to cause the machine to track more to the left. Adjust in quarter-turn increments until the machine tracks straight. Check that the machine does not creep when in neutral with the park brakes disengaged. IMPORTANT: Do not rotate the knob too far, as this may cause the machine to creep in neutral.
-
Page 22: Pre-Start
3.2 PRE-START 3.2.1 Fill fuel tanks. For best results use only clean, fresh regular grade unleaded gasoline with an octane rating of 87 or higher. Regular grade leaded gasoline may also be used; however, combustion chamber and cylinder head will require more frequent service. -
Page 23: Transporting
DANGER POTENTIAL HAZARD ♦ An uncovered discharge opening will allow objects to be thrown in an operator’s or bystander’s direction. Also, contact with the blade could occur. WHAT CAN HAPPEN ♦ Thrown objects or blade contact can cause serious injury or death. HOW TO AVOID THE HAZARD ♦... - Page 24 CAUTION POTENTIAL HAZARD ♦ This unit does not have proper turn signals, lights, reflective markings, or a slow moving vehicle emblem. These items are required to drive on a public street or roadway. WHAT CAN HAPPEN ♦ Driving on a street or roadway without such equipment is dangerous and can lead to accidents causing personal injury.
-
Page 25: Maintenance & Adjustments
section of the tractor frame extends back between the rear wheels and serves as a stop for tipping backward. Having a full width ramp provides a surface for the frame members to contact if the unit starts to tip backward. If it is not possible to use one full width ramp, use enough individual ramps to simulate a full width continuous ramp. -
Page 26: Periodic Maintenance
4.1 PERIODIC MAINTENANCE 4.1.1 Check engine oil level: Service Interval: Daily a) Stop engine and wait for all moving parts to stop. Make sure unit is on a level surface. b) Check with engine cold. c) Clean area around dipstick. Remove dipstick and wipe oil off. Reinsert the dipstick and push it all the way down into the tube. - Page 27 4.1.3 Clean engine cooling system: Service Interval: Daily or more often in dry conditions CAUTION POTENTIAL HAZARD ♦ Excessive debris and damaged or missing rubber baffles can cause the engine and hydraulic system to overheat. WHAT CAN HAPPEN ♦ Excessive debris around the engine cooling air intake and inside of the pump drive belt compartment can create a fire hazard.
- Page 28 HOW TO AVOID THE HAZARD ♦ Always install the original Exmark blades, blade bushings, spring disc washers, and blade bolts as shown.
- Page 29 NOTE: If machine does not pass any of these tests, do not operate. Contact your authorized EXMARK SERVICE DEALER. IMPORTANT: It is essential that operator safety mechanisms be connected and in proper operating condition prior to use for mowing.
- Page 30 4.1.10 Service air cleaner: Service Interval: 50 hrs. More often under severe conditions. See Engine manual for additional information. Stop engine, wait for all moving parts to stop, and remove key. Engage parking brake. Loosen retaining clips and remove air cleaner compartment cover. Remove paper element.
- Page 31 4.1.13 Check tire pressures: Service Interval: 40 hrs. Stop engine, wait for all moving parts to stop, and remove key. Engage parking brake. Check tire pressure in drive tires. Inflate drive tires to 13 psi (90 kPa). Check tire pressure in caster tires. Inflate caster tires to 13 psi (90 kPa).
- Page 32 Pack the bearings with NGLI grade #1 multi-purpose grease. g) Insert (1) bearing, (1) new seal into the wheel. NOTE: Seals (Exmark PN 103-0063) must be replaced. h) If the axle assembly has had both spacer nuts removed (or broken loose), apply a thread locking adhesive to (1) spacer nut and thread onto the axle with the wrench flats facing outward.
- Page 33 Service Interval: After First 250 hrs. Then yearly thereafter NOTE: Use only Exmark Part No. 109-4180 for summer use above 32° F (0°C) or Part No. 1-523541 for winter use below 32° F (0°C). Stop engine, wait for all moving parts to stop, and remove key. Engage parking brake.
- Page 34 Carefully clean area around filter. It is important that no dirt or contamination enter hydraulic system. Unscrew filter to remove and allow oil to drain from reservoir. IMPORTANT: Before reinstalling new filter, fill it with Mobil 1 15W-50 and apply a thin coat of oil on the surface of the rubber seal. Turn filter clockwise until rubber seal contacts the filter adapter, then tighten the filter an additional 2/3 to 3/4 turn.
-
Page 35: Adjustments
4.1.28 Mobil HTS grease (or food-grade antiseize) is used in the following locations: Between the cutter housing spindle and bearings. Between the cutter housing spindle and sheave. Under top cutter housing bearing guard. Between jackshaft and bearings and jackshaft and sheaves. Copper-based antiseize is used in the following locations: On threads of Blade Bolts (See Figure 3). - Page 36 FIGURE 6 4.2.2 Deck Leveling Position mower on a flat surface. Stop engine, wait for all moving parts to stop, and remove key. Engage parking brake. Check tire pressure in drive tires. Proper inflation pressure for tires is 13 psi (90 kPa).
- Page 37 FIGURE 7 Raise deck lift lever to the 5.0” (12.7 cm) cutting height position (See Figure 5). Adjust spring compression until proper distance is obtained between the two large washers (See Figure 7). Adjustment is made by turning the nut at the front of each spring (clockwise will shorten the spring, counter-clockwise will lengthen the spring).
- Page 38 4.2.5 Deck Belt Tension. The deck belt is tensioned by a self-tensioning idler, no adjustment is necessary. 4.2.6 Adjust Seat Switch a) If necessary, adjust the seat actuator rod length to where the machine will shut off when the operator raises off the seat (with brake disengaged or PTO engaged) but will continue to run with operator in seat (a slight shift in weight should not shut machine off).
- Page 39 3/16” (4.8 mm) to 1/4” (6.4 mm) FIGURE 10 4.2.9 Brake Adjustment. a) Check for brake link 2.75” (7.0 cm) measurement as described in section 4.2.8. b) Engage brake lever (lever up). Measure the distance between the trunion roller and the rod collar. Measurement should be 1/4”...
- Page 40 adjustment bolt in the appropriate direction until lever is centered (keeping rearward pressure on the lever will keep the pin at the end of the slot and allow the adjustment bolt to move the lever to the appropriate position). Tighten lock nut. Repeat on opposite side of unit.
- Page 41 This adjustment must be made with the drive wheels turning. First raise the frame and block up so that drive wheels can rotate freely. Remove the electrical connection from the seat safety switch, located directly to the left of the seat switch assembly beside the hydraulic oil reservoir.
-
Page 42: Waste Disposal
4.2.14 Motion Control Damper Adjustment a) The top damper mounting bolt can be adjusted to obtain a more desired motion control lever resistance. See Figure 15 for mounting options. FIGURE 15 4.2.15 Caster pivot bearings pre-load adjustment. Remove dust cap from caster and tighten nyloc nut until washers are flat and back off 1/4 of a turn to properly set the pre-load on the bearings. -
Page 43: Trouble Shooting
NOTE: After carefully checking the above steps, attempt to start the engine. If it does not start, contact your authorized Exmark service dealer. IMPORTANT: It is essential that all operator safety mechanisms be connected and in proper operating condition prior to mower use. -
Page 44: Trouble Shooting
When a problem occurs, do not overlook the simple causes. For example: starting problems could be caused by an empty fuel tank. The following table lists some of the common causes of trouble. Do not attempt to service or replace major items or any items that call for special timing of adjustments procedures (such as valves, governor, etc.). -
Page 45: Electrical Diagrams
7. KOHLER ELECTRICAL DIAGRAM... -
Page 46: Electrical Diagrams
7.1 KAWASAKI ELECTRICAL DIAGRAM... -
Page 47: Hydraulic Diagram
8. HYDRAULIC DIAGRAM... -
Page 48: Warranty
This warranty extends only to replace or adjust any part manufactured by Exmark and found turf equipment operated under normal conditions. You by us (in the exercise of our reasonable discretion) to be... - Page 49 NOTES...
-
Page 50: Service Record
SERVICE RECORD Date Description of Work Done Service Done By... - Page 52 The engine exhaust from this product contains chemicals known to the State of California to cause cancer, birth defects, or other reproductive harm. © 2004-2007 EXMARK MFG. CO. INC. PART NO. 109-6447 Rev. A INDUSTRIAL PARK BOX 808 (402) 223-6300...
Need help?
Do you have a question about the Lazer Z Advantage series and is the answer not in the manual?
Questions and answers