Grizzly G0514X Owner's Manual
Extreme series bandsaw
Hide thumbs
Also See for G0514X:
- Owner's manual (96 pages) ,
- Parts breakdown (6 pages) ,
- Owner's manual (92 pages)
Table of Contents
Advertisement
Quick Links
MODEL G0514X, G0514X2,
G0514X2B, & G0514X3
EXTREME SERIES BANDSAW
OWNER'S MANuAL
(For models manufactured since 2/12)
Copyright © january, 2006 By grizzly industrial, inC., revised FeBruary, 2012 (ts)
WARNING: NO pORTION Of ThIS MANuAL MAy BE REpRODucED IN ANy ShApE
OR fORM WIThOuT ThE WRITTEN AppROvAL Of GRIzzLy INDuSTRIAL, INc.
#eWtr7787 printed in taiWan
Advertisement
Table of Contents

Related Manuals for Grizzly G0514X


Summary of Contents for Grizzly G0514X
- Page 1 OWNER'S MANuAL (For models manufactured since 2/12) Copyright © january, 2006 By grizzly industrial, inC., revised FeBruary, 2012 (ts) WARNING: NO pORTION Of ThIS MANuAL MAy BE REpRODucED IN ANy ShApE OR fORM WIThOuT ThE WRITTEN AppROvAL Of GRIzzLy INDuSTRIAL, INc.
- Page 2 This manual provides critical safety instructions on the proper setup, operation, maintenance, and service of this machine/tool. Save this document, refer to it often, and use it to instruct other operators. Failure to read, understand and follow the instructions in this manual may result in fire or serious personal injury—including amputation, electrocution, or death.
-
Page 3: Table Of Contents
Table of contents INTRODucTION ..........2 Fine tune tracking ........43 Manual accuracy ........... 2 ripping ............43 Contact info............ 2 Crosscutting ..........44 identification (g0514X) ........3 resawing ............. 44 identification Cutting Curves ..........45 (g0514X2/g0514X2B/g0514X3) ....4 stacked Cuts..........46 Machine data .......... -
Page 4: Introduction
G0514X/-X2/-X2B/-X3 (Mfg. Since 2/12) -
Page 5: Identification (G0514X)
Identification (G0514X) figure 1. Bandsaw front view. figure 2. Bandsaw rear view. A. tension indicator Window S. Motor B. Key switch, start and stop Buttons dust port 4" c. resaw Fence M. hinged door D. Fence locking lever N. lifting eye Bolt E. -
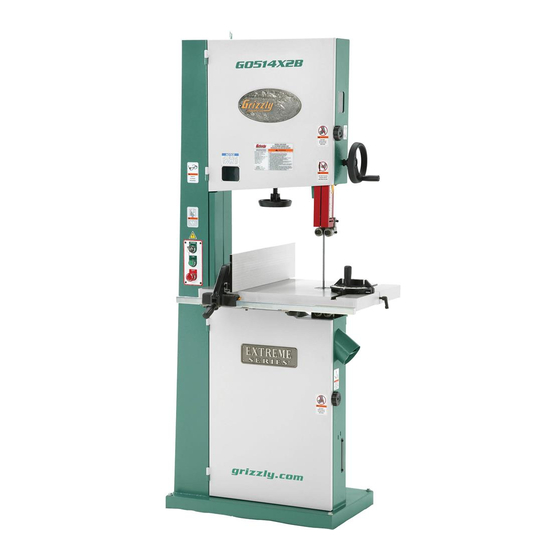
Page 6: Identification (G0514X2/G0514X2B/G0514X3)
Identification (G0514X2/G0514X2B/G0514X3) figure 4. rear upper controls. figure 5. table tilt controls. guide post handwheel M. Blade tracking Window figure 3. Bandsaw front view. N. hinged Wheel Cover O. eye Bolt A. tension indicator Window p. Quick release Blade tension lever B. -
Page 7: Machine Data
MODEL G0514X, G0514X2, G0514X2B, G0514X3 19" 3 HP EXTREME SERIES BANDSAW Model Number G0514X G0514X2 G0514X2B G0514X3 product dimensions Weight 383 lbs. 427 lbs. 421 lbs. Width (side-to-side) x depth 36" x 32" x 76" (front-to-back) x height Footprint (length x Width) ⁄... - Page 8 Model Number G0514X G0514X2 G0514X2B G0514X3 operation Blade speeds 1700 & 3500 FpM table tilt left 5°, right 45° Cutting Capacities Maximum Cutting height 12" Maximum Capacity left of ⁄ " Blade Blade information standard Blade length 143" Blade Width range ⁄...
-
Page 9: Section 1: Safety
SEcTION 1: SAfETy For Your Own Safety, Read Instruction Manual Before Operating This Machine The purpose of safety symbols is to attract your attention to possible hazardous conditions. This manual uses a series of symbols and signal words intended to convey the level of impor- tance of the safety messages. - Page 10 INTENdEd usAGE. Only use machine for its machine in good working condition. A machine intendedpurposeandnevermakemodifications that is improperly maintained could malfunction, not approved by Grizzly. Modifying machine or leadingtoseriouspersonalinjuryordeath. using it differently than intended may result in ChECK dAMAGEd PARTs. Regularly inspect...
-
Page 11: Additional Safety For Bandsaws
Additional Safety for Bandsaws BLADE cONDITION. do not operate with dull, cuTTING TEchNIQuES. plan your operation cracked or badly worn blade. dull blades require so the blade always cuts to the outside of the more effort to perform the cut and increase the workpiece. -
Page 12: Section 2: Power Supply
SEcTION 2: pOWER SuppLy Availability Before installing the machine, consider the avail- ability and proximity of the required power supply Serious injury could occur if you connect circuit. If an existing circuit does not meet the the machine to power before completing the requirements for this machine, a new circuit must setup process. -
Page 13: Grounding Requirements
G0514X, G0514X2, G0514X2B Grounding Requirements This machine MUST be grounded. In the event of certain malfunctions or breakdowns, grounding reduces the risk of electric shock by providing a path of least resistance for electric current. For 220V operation: This machine is equipped with a power cord that has an equipment-ground- ing wire and a grounding plug (see following fig- No adapter should be used with the... - Page 14 G0514X3 circuit Requirements 220v A permanently connected (hardwired) power sup- ply is typically installed with wires running through This machine is prewired to operate on a 220V mounted and secured conduit. A disconnecting power supply circuit that has a verified ground and means, such as a locking switch (see following meets the following requirements: Figure), must be provided to allow the machine...
-
Page 15: G0514X3 440V Conversion
#p0514X3161av2) for this procedure can be pur- any changes to the motor shipped with your chased by calling grizzly Customer service at machine. (800) 523-4777. all wiring changes must be performed by an elec- trician or qualified service personnel before the bandsaw is connected to the power source. -
Page 16: Section 3: Setup
SEcTION 3: SETup Needed for Setup This machine presents serious injury hazards the following are needed to complete the setup to untrained users. Read process, but are not included with your machine. through this entire manu- al to become familiar with Description the controls and opera- •... -
Page 17: G0514X Inventory
G0514X Inventory The following is a list of items shipped with your machine. Before beginning setup, lay these items out and inventory them. If any non-proprietary parts are missing (e.g. a nut or a washer), we will gladly replace them; or for the sake of expediency, replacements can be obtained at your local hardware store. -
Page 18: G0514X2 & G0514X3 Inventory
G0514X2 & G0514X3 Inventory The following is a list of items shipped with your machine. Before beginning setup, lay these items out and inventory them. If any non-proprietary parts are missing (e.g. a nut or a washer), we will gladly replace them; or for the sake of expediency, replacements can be obtained at your local hardware store. -
Page 19: G0514X2B
G0514X2B The following is a list of items shipped with your machine. Before beginning setup, lay these items out and inventory them. If any non-proprietary parts are missing (e.g. a nut or a washer), we will gladly replace them; or for the sake of expediency, replacements can be obtained at your local hardware store. -
Page 20: Hardware Recognition Chart
hardware Recognition chart -18- G0514X/-X2/-X2B/-X3 (Mfg. Since 2/12) -
Page 21: Clean Up
clean up Site considerations the unpainted surfaces are coated with a waxy floor Load oil to prevent corrosion during shipment. remove refer to the Machine Data Sheet for the weight this protective coating with a solvent cleaner or and footprint specifications of your machine. degreaser. -
Page 22: Moving & Placing Base Unit
Moving & placing To move and place the bandsaw using wood shims: Base unit Move the crate to the prepared location, then remove the crate from the shipping pallet. unbolt the bandsaw from the pallet. This bandsaw is a heavy Carefully place the forklift forks under the machine. -
Page 23: Mounting
Mounting Assembly We recommend mounting your new machine to Guide post handwheel the floor. Because floor materials may vary, floor secure the guide post handwheel onto the mounting hardware is not included. you may also handwheel shaft flat with the included set screw mount your machine to a mobile base that has (see figure 23). - Page 24 adjust the upper and lower blade guides slide the blade through the upper and lower away from the blade. refer to Adjusting blade guides, and mount it over the upper Blade Guide Bearings on page 33 for more and lower wheels. details.
-
Page 25: Blade Tracking
Blade Tracking secure the table tilt handwheel onto the flat part of the handwheel shaft with the included cap screw (see figure 27). Cap screw Serious personal injury can occur if the machine starts while your hand is touch- ing the bandsaw wheel dur- ing tracking adjustments. - Page 26 loosen the lock lever (figure 31) so that the spin the upper wheel by hand at least three times and watch how the blade rides on the blade tracking knob can rotate. crown of the wheel. refer to figure 30 for an illustration of this concept.
-
Page 27: Positive Stop
positive Stop positioning positive Stop disConneCt BandsaW FroM poWer! adjust the blade tension until the mark on the the positive stop allows the table to be quickly blade tension scale is between 4 and 6. and accurately returned to the horizontal (0˚) posi- tion after being adjusted to a different angle. -
Page 28: Dust Collection
Dust collection Installing fence (G0514X, -X2, X3) To install the fence: DO NOT operate this bandsaw without an adequate dust collection system. This saw attach the back square tube to the table with creates substantial amounts of wood dust the (2) M6-1 x 16 cap screws as shown in while operating. - Page 29 thread the M6-1 hex nut onto the rail pad, tighten the lock handle. then thread the rail pad into the fence (see figure 37). pull the fence handle up and place the fence assembly on the fixed rail as, shown in figure 39.
-
Page 30: Installing Fence (G0514X2B)
Installing fence install the resaw fence lock handle (with the washer and moving plate) onto the fence, (G0514X2B) then slide the resaw fence over the moving plate as shown in figure 42. Note: Leave the moving plate and lock han- To install the fence: dle loose enough to slide on the fence. -
Page 31: G0514X, -X2, & X2B Power Connection
G0514X, -X2, & X2B G0514X3 power power connection connection After you have completed all previous setup Before the machine can be connected to the instructions and circuit requirements, the machine power source, an electrical circuit and connec- tion device must be prepared per the POWER is ready to be connected to the power supply. -
Page 32: Test Run
Test Run switch once the assembly is complete, test run your disabling machine to make sure it runs properly and is ready for regular operation. the test run consists of verifying the following: 1) the motor powers up and runs correctly, 2) the safety disabling mechanism on the switch works correctly, and 3) the stop button safety feature works correctly. -
Page 33: Tensioning Blade
Tensioning Blade turn the bandsaw ON and allow it to reach full speed, then press the foot brake (figure 64 on page 38) completely. a properly tensioned blade is essential for making — if the bandsaw blade stops, the foot brake accurate cuts and is required before making many is working correctly;... -
Page 34: Adjusting Support Bearings
Adjusting Support top view Bearings Bandsaw Blade support the support bearings are positioned behind Bearing the blade for support during cutting operations. proper adjustment of the support bearings is an important part of making accurate cuts and also keeps the blade teeth from coming in contact with the guide bearings while cutting. -
Page 35: Adjusting Blade Guide Bearings
Note: For a quick gauge, fold a dollar bill in half Check to make sure the guide block assem- twice (four thicknesses of a dollar bill is approxi- bly is perpendicular with the face of the sup- mately 0.016") and place it between the support port bearing as illustrated in figure 51. - Page 36 Familiarize yourself with the blade guide con- trols shown in figure 55. Make sure that the blade teeth will not con- tact the guide bearings when the blade is Blade guide lateral against the rear support bearing during the Bearings adjustment cut or the blade teeth will be damaged.
-
Page 37: Aligning Table
Aligning Table Aligning fence to ensure cutting accuracy when the table is first to ensure cutting accuracy when the fence is first installed, the fence should be aligned with the installed, the table should be aligned so that the miter slot is parallel to the bandsaw blade. this miter slot. -
Page 38: Fence Pointer Calibration
fence pointer Miter Gauge calibration the miter gauge needs to be calibrated to the blade when it is first mounted in the miter slot. your new bandsaw is equipped with a fence mea- surement system that includes a fence pointer, To calibrate the miter gauge: which must be calibrated when the bandsaw is first set up. -
Page 39: Section 4: Operations
Button Regardless of the content in this section, Grizzly Industrial will not be held liable for accidents caused by lack of training. figure 62. Control panel features. -37-... -
Page 40: Front Controls
front controls A. Blade Tension Scale: allows for easy moni- toring of blade tension. B. Blade Tension handwheel: tensions blade in gradual increments. c. Blade Tracking Window: allows for easy monitoring of blade tracking (refer to page figure 64. Foot brake. 23). -
Page 41: Operation Overview
K. Table Tilt Lock Lever (G0514X2, G0514X2B, Checks to make sure the workpiece can safe- & G0514X3): locks or unlocks the table at ly pass all the way through the blade without the current angle. interference from other objects. Table Tilt handwheel (G0514X2, G0514X2B, puts on safety glasses. -
Page 42: Workpiece Inspection
Workpiece Inspection some wood workpieces are not safe to cut or may require modification before they are safe to cut. Before cutting wood, get in the habit of inspecting all workpieces for the following: • Material Type: this machine is intended for cutting natural and man-made wood products, and laminate covered wood products. -
Page 43: Foot Brake
foot Brake Table Tilt the Models g0514X2 and g0514X3 are equipped the bandsaw table will tilt 5˚ left and 45˚ right to with a foot brake (figure 69). use the brake to cut provide a wide range of cutting options. remove power to the motor and bring the blade to a halt. -
Page 44: Guide Post
Guide post G0514X2, G0514X2B, & G0514X3 Table Tilt disConneCt BandsaW FroM poWer! the guide post, shown in figure 72, connects loosen the table tilt lock lever shown in the upper blade guide assembly to the bandsaw. figure 71. the guidepost allows the blade guide assembly to move up or down to be as close to the workpiece as possible. -
Page 45: Fine Tune Tracking
fine Tune Tracking Ripping To fine tune the tracking: ripping is the process of cutting with the grain of the wood stock. For plywood and other processed wood, ripping simply means cutting down the Close the wheel covers and turn the bandsaw length of the workpiece. -
Page 46: Crosscutting
crosscutting Resawing resawing (figure 76) is the process of cutting a Crosscutting is the process of cutting across the board into two or more thinner boards. the maxi- grain of wood. For plywood and other processed mum board width that can be resawn is limited by wood, crosscutting simply means cutting across the maximum cutting height of the bandsaw. -
Page 47: Cutting Curves
cutting curves To resaw a workpiece: verify that the bandsaw is setup properly and that the table is perpendicular to the blade. When cutting curves, simultaneously feed and turn the stock carefully so that the blade follows use the widest blade your bandsaw will the layout line without twisting. -
Page 48: Stacked Cuts
Stacked cuts Blade Speed the blade speed can be adjusted to 1700 or 3500 one of the benefits of a bandsaw is its ability to FpM. speed adjustments are made by moving the cut multiple copies of a particular shape by stack- v-belt position on the motor and wheel pulleys. -
Page 49: Blade Information
Blade Information refer to figure 79 to locate the correct v-belt position for the desired blade speed. selecting the right blade requires a knowledge of the various blade characteristics to match the BANDSAW blade with the particular cutting operation. WHEEL Blade Length Measured by the circumference, blade lengths are usually unique to the brand of your bandsaw... -
Page 50: Tooth Pitch
Straight Cutting: use the largest width Hook: the teeth on this style have a posi- • • blade that you own. narrow blades can cut tive angle (downward) which makes them tight curves (a small radius) but are not very dig into the material, and the gullets are usu- good at cutting straight lines because they ally rounded for easier waste removal. -
Page 51: Blade Changes
The most common causes of blade breakage rotate the blade 90˚ and slide it through the are: slot in the table. • Faulty alignment and adjustment of the Installing Blade guides. disConneCt BandsaW FroM poWer! • Forcing or twisting a wide blade around a slide the blade through the table slot, ensur- curve of short radius. -
Page 52: Section 5: Accessories
To minimize this risk, only install accessories recommended for this machine by Grizzly. NOTICE Refer to the newest copy of the Grizzly catalog for other accessories available for this machine. figure 85. g1094 Bandsaw power Feeder. - Page 53 Roller Stands T20388—Success with Bandsaws SHOP FOX ® G8984—Single Roller Stand explore the many creative possibilities of floor- adjusts from 26 ⁄ " to 45". standing and portable bench-top bandsaws. With G8985—5 Roller Stand these practical instructions and color photographs, adjusts from 26"...
-
Page 54: Section 6: Maintenance
SEcTION 6: MAINTENANcE unpainted cast Iron Always disconnect power to the machine before protect the unpainted cast iron surfaces on the performing maintenance. table by wiping the table clean after every use— failure to do this may this ensures moisture from wood dust does not result in serious person- remain on bare metal surfaces. -
Page 55: Tension Adjustment Assembly
Blade Guide Rack and pinion Tension Adjustment Assembly Lubricant frequency Lubricant frequency Multi-purpose as needed thin Coat Multi-purpose as needed thin Coat gl2 grease gl2 grease To lubricate the blade guide rack and pinion: To lubricate the tension adjustment assem- bly: disConneCt BandsaW FroM poWer! disConneCt BandsaW FroM poWer! - Page 56 Table Tilt Rack and pinion Assembly Trunnion (G0514X2, G0514X2B, & G0514X3) Lubricant frequency Lubricant frequency Multi-purpose as needed thin Coat gl2 grease Multi-purpose as needed thin Coat gl2 grease To lubricate the trunnion, do these steps: To lubricate the table tilt rack and pinion assembly: disConneCt BandsaW FroM poWer! disConneCt BandsaW FroM poWer!
-
Page 57: Section 7: Service
SEcTION 7: SERvIcE Review the troubleshooting and procedures in this section if a problem develops with your machine. If you need replacement parts or additional help with a procedure, call our Technical Support at (570) 546-9663. Note: Please gather the serial number and manufacture date of your machine before calling. Troubleshooting symptom possible Cause... - Page 58 symptom possible Cause possible solution 1. tighten v-belt. see page 59. Machine has 1. v-belt tension incorrect. excessive vibration 2. Bent, dull, or damaged blade. 2. replace blade (page 49). or noise. 3. loose or damaged blade. 3. tighten or replace blade. 4.
- Page 59 symptom possible Cause possible solution table hard to tilt. 1. sawdust or pitch trapped between trunnion 1. Calibrate pointer/scale at true 45 degrees. and base. 2. Metal burrs on trunnion. 2. remove burrs. the cuts are rough, 1. Blade is overloaded and twists. 1.
- Page 60 symptom possible Cause possible solution 1. adjust tracking (page 23). Blade tracks 1. tracking is not adjusted properly. incorrectly, or 2. Wheels are not coplanar. 2. adjust wheel coplanarity (page 65). comes off wheels. 3. increase blade tension (page 31). 3.
-
Page 61: Checking V-Belt
checking v-Belt Tensioning v-Belt to ensure optimum power transmission from the Tools Needed: motor to the blade, the v-belt must be in good hex Wrench 6mm ..........1 condition and operate under proper tension. the belt should be checked for cracks, fraying, and To tension the v-belt: wear. -
Page 62: Replacing V-Belt
Replacing v-Belt slip the old v-belt off of the wheel pulley and install the new v-belt in its place. install the lower wheel back onto the bearing Tools Needed: shaft and replace/tighten the wheel mount hex Wrench 6mm ..........1 bolt. hex Wrench 8mm ..........1 slip the new v-belt onto the motor pulley. -
Page 63: Blade Lead
Blade Lead Cut halfway through the board on the line by pushing it into the blade. turn the bandsaw OFF and wait for the blade to stop. Bandsaw blades commonly wander off the cut Clamp the board to the bandsaw table with- line when sawing, as shown in figure 99. -
Page 64: Adjusting Wheel Brush
Adjusting Wheel Adjusting Tension Brush Lever the lower wheel compartment contains two wheel the quick release tension lever is setup correctly brushes, one of which is shown in figure 100. for use with the preinstalled 143" blade. however, if you install a different length blade, you will need these brushes are designed to sweep sawdust off the wheel tire as the bandsaw is operating. -
Page 65: Adjusting Guide Post Travel
Adjusting Guide loosen the guide post lock knob, lower the guide post to within 1" of the table top, then post Travel tighten the knob. place a machinist's square on the table next to the right hand side of the guide post, as the guide post assembly should remain paral- shown in figure 103. - Page 66 gently tap the lower part of the guide post in place the guide post guard on top of the the appropriate direction until there is no gap guide post assembly so you can access the between the square and the guide post. guide post bracket.
-
Page 67: Aligning Wheels
Aligning Wheels 3-1/2" components and hardware Needed: 60" long 2x4 ............1 Tools Needed: 19" hex Wrenches 4 & 6 mm ......1 ea Wrench 13mm ............1 tape Measure .............1 Coplanarity gauge (see figure 107) ....1 straightedge ............Fine ruler ............1 Wheel alignment is one of the most critical factors for optimal performance from your bandsaw. -
Page 68: Shimming Upper Wheel
— if the wheels are coplanar (figure 109, A), the straightedge will evenly touch the top and bottom of both wheels. Not Coplanar Coplanar — if the wheels are not coplanar (figure 109, B), place the straightedge on the lower wheel first (ensuring that it touches both Solution: the top and bottom rim), then adjust the... -
Page 69: Adjusting Lower Wheel
Adjusting Lower Wheel loosen one tilt adjustment set screw, then tighten the opposing set screw approximately only do this procedure if you cannot make the an equal amount. wheels coplanar with the tracking knob or by shimming the upper wheel. Make sure the upper Check the wheels with the coplanarity gauge, wheel is adjusted as close as possible to being then adjust the lower wheel at the hub as... -
Page 70: Section 8: Wiring
Technical source. Support at (570) 546-9663. The photos and diagrams included in this section are best viewed in color. You can view these pages in color at www.grizzly.com. -68- G0514X/-X2/-X2B/-X3 (Mfg. Since 2/12) -
Page 71: G0514X Wiring Diagram
G0514X Wiring Diagram Ground 220V 6-15 Plug (As Recommended) Control Panel Magnetic Switch Assembly (Viewed from Behind) Power Switch L1/1 L2/3 L3/5 NO13 Contactor SDE MA-18 NC15 NC16 T1/2 T2/4 T3/6 NO14 OL Relay SDE RA-20 Set at Start Capacitor 300MFD 250VAC Ground Motor... -
Page 72: G0514X2 Wiring Diagram
G0514X2 Wiring Diagram Ground 220V 6-15 Plug (As Recommended) Control Panel Magnetic Switch Assembly (Viewed from Behind) Power Switch L1/1 L2/3 L3/5 NO13 Contactor SDE MA-18 NC15 NC16 T1/2 T2/4 T3/6 NO14 Foot Brake OL Relay Switch SDE RA-20 Set at Start Capacitor 300MFD 250VAC Ground... -
Page 73: G0514X2B Wiring Diagram
G0514X2B Wiring Diagram Ground 220V 6-20 Plug (As Recommended) Control Panel Magnetic Switch Assembly (Viewed from Behind) Power Switch L1/1 L2/3 L3/5 NO13 Contactor SDE MA-18 NC15 Rectifier PU-23-2 NC16 T1/2 T2/4 T3/6 NO14 OL Relay SDE RA-20 Set at Motor Magnetic Ground... -
Page 74: G0514X3 Wiring Diagram
G0514X3 Wiring Diagram Power Supply Junction Box Ground Ground Ground Locking Disconnect Control Panel Switch Magnetic Switch Assembly (Viewed from Behind) (As Recommended) Power Switch L1/1 L2/3 L3/5 NO13 Contactor SDE MA-09 NC15 NC16 Foot Brake T1/2 T2/4 T3/6 NO14 Switch OL Relay SDE RA-20... -
Page 75: Section 9: Parts
SEcTION 9: pARTS G0514X Main -73- G0514X/-X2/-X2B/-X3 (Mfg. Since 2/12) - Page 76 G0514X Main parts List REF PART # DESCRIPTION PART # DESCRIPTION PSS01M SET SCREW M6-1 X 10 PN03M HEX NUT M8-1.25 PFS07M FLANGE SCREW M5-.8 X 10 PB124M HEX BOLT M8-1.25 X 90 P0513X003 BUSHING P0513066 KNOB SCREW M10-1.5 X 20 P0513004 LIFTING EYE BOLT M10-1.5 P0513067...
-
Page 77: G0514X Fence/Guides
G0514X fence/Guides 125-20 125-14 125-30 125-24 125-28 125-18 125-19 125-11 125-16 125-27 125-12 125-2 125-4 125-13 125-23 125-15 125-22 125-25 125-9 125-10 125-5 125-26 125-7 125-3 125-21 125-8 125-6 125-1 125-29 125-17 125-20 153-5 152-4 152-3 153-6 152-2 153-7 152-8 152-1 153-8 152-7... - Page 78 G0514X fence/Guide parts List PART # DESCRIPTION PART # DESCRIPTION PSS07M SET SCREW M5-.8 X 5 125-26 PFB13M FLANGE BOLT M4-.7 X 8 PCAP02M CAP SCREW M6-1 X 20 125-27 PW03M FLAT WASHER 6MM P0514X052 WORM SHAFT THIN NUT 125-28 PH7589028 RESAW FENCE AL 640MM PFH31M FLAT HD SCR M4-.7 X 8...
- Page 79 MuST maintain the original location and readability of the labels on the machine. If any label is removed or becomes unreadable, REpLAcE that label before using the machine again. contact Grizzly at (800) 523-4777 or www.grizzly.com to order new labels. -77-...
-
Page 80: G0514X2 & G0514X3 Main
G0514X2 & G0514X3 Main -78- G0514X/-X2/-X2B/-X3 (Mfg. Since 2/12) - Page 81 G0514X2 & G0514X3 Main parts List REF PART # DESCRIPTION PART # DESCRIPTION PSS01M SET SCREW M6-1 X 10 PLN03M LOCK NUT M6-1 PFS07M FLANGE SCREW M5-.8 X 10 P0513062 STRAIN RELIEF 16MM P0513X003 BUSHING P0513063 HEIGHT POINTER P0513004 LIFTING EYE BOLT M10-1.5 PN03M HEX NUT M8-1.25 P0514X2005...
- Page 82 G0514X2 & G0514X3 Main parts List PART # DESCRIPTION REF PART # DESCRIPTION PLW04M LOCK WASHER 8MM P0514X168 CORD CLAMP PCAP02M CAP SCREW M6-1 X 20 PFS12M FLANGE SCREW M5-.8 X 12 PFS07M FLANGE SCREW M5-.8 X 10 P0514X2173 STRAIN RELIEF 9 X 10MM P0514X165 CONTROL CORD 16G 3W P0514X2174...
-
Page 83: G0514X2 & G0514X3 Fence & Guides
G0514X2 & G0514X3 fence & Guides 125-20 125-30 125-28 125-24 125-18 125-14 125-19 125-16 125-11 125-4 125-12 125-2 125-27 125-13 9-18 9-19 125-23 125-22 125-15 9-11 9-10 125-25 125-9 125-26 125-10 125-5 9-19 125-7 9-12 125-3 125-8 125-21 9-13 125-6 125-1 9-14 125-29... -
Page 84: Parts List
G0514X2 & G0514X3 fence & Guides parts List REF PART # DESCRIPTION PART # DESCRIPTION P0514X2006 TRUNNION ASSEMBLY 9-18 PN05M HEX NUT M16-1.5 PWF08M FENDER WASHER 8MM 9-19 P0514X2009-19 GUIDE BRACKET PLASTIC SET SCREW PLN04M LOCK NUT M8-1.25 PLW04M LOCK WASHER 8MM PCB10M CARRIAGE BOLT M8-1.25 X 85 PCAP14M... - Page 85 G0514X2 & G0514X3 fence & Guides parts List PART # DESCRIPTION PART # DESCRIPTION 125-12 PCAP06M CAP SCREW M6-1 X 25 PCAP02M CAP SCREW M6-1 X 20 125-13 PH7587013 LOCK WEDGE P0514X152 UPPER BLADE GUIDE ASSEMBLY 125-14 PH7589014 REAR RAIL 710MM 152-1 PCAP01M CAP SCREW M6-1 X 16...
-
Page 86: G0514X2 & G0514X3 Labels
MuST maintain the original location and readability of the labels on the machine. If any label is removed or becomes unreadable, REpLAcE that label before using the machine again. contact Grizzly at (800) 523-4777 or www.grizzly.com to order new labels. -84-... -
Page 87: G0514X2B Main
G0514X2B Main -85- G0514X/-X2/-X2B/-X3 (Mfg. Since 2/12) - Page 88 G0514X2B Main parts List REF PART # DESCRIPTION PART # DESCRIPTION PSS01M SET SCREW M6-1 X 10 PN03M HEX NUT M8-1.25 PFS07M FLANGE SCREW M5-.8 X 10 PB124M HEX BOLT M8-1.25 X 90 P0513X003 BUSHING P0513066 KNOB BOLT M10-1.5 X 20 P0513004 LIFTING EYE BOLT M10-1.5 P0513067...
-
Page 89: G0514X2B Fence & Guides
G0514X2B fence & Guides 154-9 154-14 172-14 172-17 154-8 172-13 154-13 172-16 154-5 154-15 172-1 154-4 172-15 154-7 172-11 172-10 172-12 172-6 172-3 154-1 154-11 172-7 172-18 172-8 154-10 172-2 154-2 172-4 172-7 171-4 154-12 154-3 172-5 172-9 154-6 171-2 171-1 9-18 9-10... - Page 90 G0514X2B fence & Guides parts List REF PART # DESCRIPTION REF PART # DESCRIPTION P0514X2006 TRUNNION ASSEMBLY PCAP06M CAP SCREW M6-1 X 25 PWF08M FENDER WASHER 8MM PWF08M FENDER WASHER 8MM PLN04M LOCK NUT M8-1.25 PCAP04M CAP SCREW M6-1 X 10 PCB10M CARRIAGE BOLT M8-1.25 X 85 P0514X2051...
- Page 91 G0514X2B fence & Guides parts List PART # DESCRIPTION PART # DESCRIPTION 152-7 P0513X150-11 ADJUSTMENT SHAFT 171-4 P0514X2B171-4 SCALE 152-8 PSS01M SET SCREW M6-1 X 10 P0514X2B172 FENCE ASSEMBLY 152-9 PCAP01M CAP SCREW M6-1 X 16 172-1 P0514X2B172-1 FENCE 152-10 P0513X150-2 GUIDE POST CONNECTOR 172-2 P0514X2B172-2...
-
Page 92: G0514X2B Labels
MuST maintain the original location and readability of the labels on the machine. If any label is removed or becomes unreadable, REpLAcE that label before using the machine again. contact Grizzly at (800) 523-4777 or www.grizzly.com to order new labels. -90-... -
Page 93: Warranty Card
Would you recommend Grizzly Industrial to a friend? _____ Yes _____No Would you allow us to use your name as a reference for Grizzly customers in your area? Note: We never use names more than 3 times. _____ Yes _____No 10. - Page 94 FOLD ALONG DOTTED LINE Place Stamp Here GRIZZLY INDUSTRIAL, INC. P.O. BOX 2069 BELLINGHAM, WA 98227-2069 FOLD ALONG DOTTED LINE Send a Grizzly Catalog to a friend: Name_______________________________ Street_______________________________ City______________State______Zip______ TAPE ALONG EDGES--PLEASE DO NOT STAPLE...
-
Page 95: Warranty And Returns
WARRANTY AND RETURNS Grizzly Industrial, Inc. warrants every product it sells for a period of 1 year to the original purchaser from the date of purchase. This warranty does not apply to defects due directly or indirectly to misuse, abuse, negligence, accidents, repairs or alterations or lack of maintenance. - Page 96 Buy Direct and Save with Grizzly – Trusted, Proven and a Great Value! ® ~Since 1983~ Visit Our Website Today For Current Specials! ORDER 24 HOURS A DAY! 1-800-523-4777...
Need help?
Do you have a question about the G0514X and is the answer not in the manual?
Questions and answers