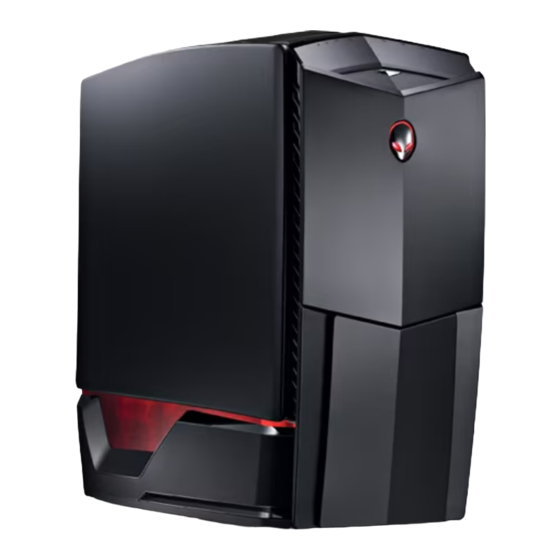
Dell Alienware Area-51 Service Manual
Service manual
Hide thumbs
Also See for Alienware Area-51:
- Service manual (101 pages) ,
- Manual (72 pages) ,
- Specifications (7 pages)
Table of Contents
Advertisement
Advertisement
Table of Contents

Related Manuals for Dell Alienware Area-51


Summary of Contents for Dell Alienware Area-51
- Page 1 ALIENWARE AREA-51 ® SERVICE MANUAL...
- Page 2 Other trademarks and trade names may be used in this manual to refer to either the entities claiming the marks and names or their products. Dell Inc. disclaims any proprietary interest in trademarks and trade names other than its own.
-
Page 3: Table Of Contents
CONTENTS CONTENTS CHAPTER 1: BEFORE YOU BEGIN ......... 6 CHAPTER 4: SHROUDS . - Page 4 CONTENTS CHAPTER 8: FRONT BEZEL ..........44 CHAPTER 13: LIQUID-COOLING ASSEMBLY .
- Page 5 CONTENTS CHAPTER 18: BATTERY ..........87 Removing the Coin-Cell Battery .
-
Page 6: Chapter 1: Before You Begin
CHAPTER 1: BEFORE YOU BEGIN This manual provides procedures for removing and installing the components CHAPTER 1: BEFORE YOU BEGIN in your computer. Unless otherwise noted, each procedure assumes that the CHAPTER 1: BEFORE YOU BEGIN following conditions exist: • You have performed the steps in “Turning Off Your Computer”... -
Page 7: Recommended Tools
CHAPTER 1: BEFORE YOU BEGIN Recommended Tools Turning Off Your Computer The procedures in this document may require the following tools: CAUTION: To avoid losing data, save and close all open files and exit all open programs before you turn off your computer. •... -
Page 8: Before Working Inside Your Computer
CAUTION: Only a certified service technician should perform repairs on CAUTION: To disconnect a network cable, first unplug the cable from your computer. Damage due to servicing that is not authorized by Dell™ your computer and then unplug the cable from the network device. -
Page 9: Chapter 2: Technical Overview
CHAPTER 2: TECHNICAL OVERVIEW CHAPTER 2: TECHNICAL OVERVIEW CHAPTER 2: TECHNICAL OVERVIEW... -
Page 10: Technical Overview
CHAPTER 2: TECHNICAL OVERVIEW Technical Overview WARNING: Before working inside your computer, read the safety information that shipped with your computer. For additional safety best practices information, see the Regulatory Compliance Homepage at www.dell.com/regulatory_compliance. -
Page 11: System Board Components
CHAPTER 2: TECHNICAL OVERVIEW System Board Components 12 V power connector (PWR1) internal USB header (USB1) 4 5 6 CPU socket internal USB header (USB2) CPU-fan connector (CPUFAN1) internal USB header (USB3) memory-module connector (DIMM1) 18 IEEE 1394 header (1394_1) memory-module connector (DIMM2) S/PDIF header (SPDIF_IN) memory-module connector (DIMM3) -
Page 12: Master I/O Board Components
CHAPTER 2: TECHNICAL OVERVIEW Master I/O Board Components fan connector (FANCONN1) PCI-fan connector (PCI_FAN1) hard-drive fan connector (HDD_FAN2) hard-drive fan connector (HDD_FAN1) system-board USB header (MB_USB1) bluetooth-module connector (BLUETOOTH) wireless-module connector (WIRELESS) -
Page 13: Chapter 3: Chassis
CHAPTER 3: CHASSIS CHAPTER 3: CHASSIS CHAPTER 3: CHASSIS... - Page 14 WARNING: Do not operate your equipment with any cover(s) (including side panels, bezels, filler brackets, front-panel inserts, etc.) removed. CAUTION: Only a certified service technician should perform repairs on your computer. Damage due to servicing that is not authorized by Dell™ is not covered by your warranty.
-
Page 15: Removing The Left Side-Panel
CHAPTER 3: CHASSIS Removing the Left Side-Panel Follow the instructions in “Before You Begin” on page NOTE: Ensure that any attached security cable is removed before attempting to lift the release panel. Lift the release panel and open the left side-panel as far as possible. NOTE: Theater lighting turns on automatically when the side panel is opened. -
Page 16: Removing The Right Side-Panel
CHAPTER 3: CHASSIS Removing the Right Side-Panel Follow the instructions in “Before You Begin” on page NOTE: Ensure that any attached security cable is removed before attempting to lift the release panel. Lift the release panel and open the right side-panel as far as possible. NOTE: Theater lighting turns on automatically when the side panel is opened. -
Page 17: Removing The Left Bottom-Panel
CHAPTER 3: CHASSIS Removing the Left Bottom-Panel Follow the instructions in “Before You Begin” on page Remove the left side-panel (see “Removing the Left Side-Panel” on page 15). Disconnect the left bottom-panel cable from the SIDE_LEFT connector on the master I/O board. Press out to release the left bottom-panel clamps that secure the left bottom-panel to the chassis. -
Page 18: Removing The Right Bottom-Panel
CHAPTER 3: CHASSIS Removing the Right Bottom-Panel Follow the instructions in “Before You Begin” on page Remove the right side-panel (see “Removing the Right Side-Panel” on page 16). Disconnect the right bottom-panel cable from the SIDE_RIGHT connector on the master I/O board. Remove the hard-drive fans (see “Removing the Hard-Drive Fan(s)”... -
Page 19: Removing The Chassis-Intrusion Switch
CHAPTER 3: CHASSIS Removing the Chassis-Intrusion Switch Follow the instructions in “Before You Begin” on page Remove the left side-panel (see “Removing the Left Side-Panel” on page 15). Disconnect the chassis-intrusion switch cable from the master I/O board connector. Slide the chassis-intrusion switch towards the top of the computer and then pull it away. -
Page 20: Chapter 4: Shrouds
CHAPTER 4: SHROUDS CHAPTER 4: SHROUDS CHAPTER 4: SHROUDS... - Page 21 CAUTION: Only a certified service technician should perform repairs on your computer. Damage due to servicing that is not authorized by Dell™ is not covered by your warranty. CAUTION: To avoid electrostatic discharge, ground yourself by using a wrist grounding strap or by periodically touching an unpainted metal surface (such as a connector on the back of the computer).
-
Page 22: Removing The Pci Shroud
CHAPTER 4: SHROUDS Removing the PCI Shroud Follow the instructions in “Before You Begin” on page Lift the release panel and open the left side-panel Press the PCI-shroud button to release the PCI shroud and then rotate the PCI shroud away from the computer. To remove the PCI-shroud completely from the chassis: Remove the PCI-shroud clamp screw and lift the PCI-shroud clamp out of the chassis. -
Page 23: Removing The Drive-Bay Shroud
CHAPTER 4: SHROUDS Removing the Drive-Bay Shroud Follow the instructions in “Before You Begin” on page Remove the left side-panel (see “Removing the Left Side-Panel” on page 15). Remove the PCI shroud (see “Removing the PCI Shroud“ on page 22). Disconnect the drive-bay shroud cables from the master I/O board connectors. -
Page 24: Chapter 5: Memory Module(S)
Comprehensive Specifications at support.dell.com for information on the memory supported by your computer. Install only memory modules that are supported by your computer. NOTE: Memory modules purchased from Dell or Alienware are covered under your computer warranty. Your computer has three internally-accessible DDR3 DIMM sockets. - Page 25 CAUTION: Only a certified service technician should perform repairs on your computer. Damage due to servicing that is not authorized by Dell™ is not covered by your warranty. CAUTION: To avoid electrostatic discharge, ground yourself by using a wrist grounding strap or by periodically touching an unpainted metal surface (such as a connector on the back of the computer).
-
Page 26: Removing Memory Module(S)
CHAPTER 5: MEMORY MODULE(S) Removing Memory Module(s) Follow the instructions in “Before You Begin” on page Lift the release panel and open the left side-panel. Locate the memory-module connectors on the system board (see “System Board Connectors“ on page 11). CAUTION: The memory module(s) may become very hot during normal operation. -
Page 27: Replacing Memory Module(S)
CHAPTER 5: MEMORY MODULE(S) Replacing Memory Module(s) Follow the instructions in “Before You Begin” on page Align the notch on the bottom of the memory module with the tab on the memory-module connector. CAUTION: To avoid damage to the memory module, press the memory module straight down into the memory-module connector while you apply equal force to each end of the memory module. - Page 28 CHAPTER 5: MEMORY MODULE(S) As the computer boots, it detects the additional memory and automatically updates the system configuration information. To confirm the amount of memory installed in the computer: Windows Vista ® Click Start Control Panel System and Maintenance. →...
-
Page 29: Chapter 6: Pci And Pci-Express Cards
CHAPTER 6: PCI AND PCI-EXPRESS CARDS CHAPTER 6: PCI AND PCI-EXPRESS CARDS CHAPTER 6: PCI AND PCI-EXPRESS CARDS... - Page 30 CAUTION: Only a certified service technician should perform repairs on your computer. Damage due to servicing that is not authorized by Dell™ is not covered by your warranty. CAUTION: To avoid electrostatic discharge, ground yourself by using a wrist grounding strap or by periodically touching an unpainted metal surface (such as a connector on the back of the computer).
-
Page 31: Removing Pci And Pci-Express Cards
CHAPTER 6: PCI AND PCI-EXPRESS CARDS Removing PCI and PCI-Express Cards Follow the instructions in “Before You Begin” on page Lift the release panel and open the left side-panel. Remove the PCI shroud (see “Removing the PCI Shroud“ on page 22). -
Page 32: Replacing Pci And Pci-Express Cards
CHAPTER 6: PCI AND PCI-EXPRESS CARDS Replacing PCI and PCI-Express Cards Follow the instructions in “Before You Begin” on page Remove the filler bracket to create a card-slot opening (if applicable). NOTE: For information on configuring, customizing, and making internal connections on the card, see the documentation that shipped with the card. -
Page 33: Chapter 7: Drives
CHAPTER 7: DRIVES CHAPTER 7: DRIVES CHAPTER 7: DRIVES... - Page 34 Dell or Alienware. NOTE: If you are installing a hard drive from a source other than Dell or Alienware, you need to install an operating system, drivers, and utilities...
-
Page 35: Removing Optical Drive(S)
CHAPTER 7: DRIVES Removing Optical Drive(s) Follow the instructions in “Before You Begin” on page Press the AlienHead to lower the drive panel. drive panel 2 AlienHead... - Page 36 CHAPTER 7: DRIVES Lift the release panel and open the left side-panel. Disconnect the power cable and the data cable from the back of the optical drive. Pull the securing tab on the optical-drive bracket and slide the optical drive out through the front of the computer.
-
Page 37: Replacing Optical Drive(S)
CHAPTER 7: DRIVES Replacing Optical Drive(s) Follow the instructions in “Before You Begin” on page Remove the new drive from its packaging. Save the original packaging for storing or shipping the optical drive. Remove the optical-drive bay filler, if applicable: Pull the securing tab on the optical-drive bracket and slide the optical-drive bay filler out through the front of the computer. -
Page 38: Removing The Media Card Reader
CHAPTER 7: DRIVES Removing the Media Card Reader Follow the instructions in “Before You Begin” on page Press the AlienHead to lower the drive panel. drive panel 2 AlienHead... - Page 39 CHAPTER 7: DRIVES Lift the release panel and open the left side-panel. Disconnect the FlexBay cable from the back of the Media Card Reader. Pull the securing tab on the FlexBay bracket and slide the Media Card Reader out through the front of the computer. FlexBay cable 3 securing tab Media Card Reader...
-
Page 40: Replacing The Media Card Reader
CHAPTER 7: DRIVES Replacing the Media Card Reader Follow the instructions in “Before You Begin” on page Remove the new Media Card Reader from its packaging. Save the original packaging for storing or shipping the Media Card Reader. Remove the FlexBay filler, if applicable: Pull the securing tab on the FlexBay bracket and slide the FlexBay filler out through the front of the computer. -
Page 41: Removing Hard Drive(S)
CHAPTER 7: DRIVES Removing Hard Drive(s) Follow the instructions in “Before You Begin” on page Lift the release panel and open the right side-panel. Press the hard-drive release tabs simultaneously and slide the hard drive towards the top and out of the computer. hard-drive release tabs (2) 2 hard drive... - Page 42 CHAPTER 7: DRIVES If you are removing a solid-state drive (SSD): Remove the four screws that secure the SSD to the hard-drive bracket. Slide and lift the SSD out of the hard-drive bracket. screws (4) 3 SSD hard-drive bracket...
-
Page 43: Replacing Hard Drive(S)
CHAPTER 7: DRIVES Replacing Hard Drive(s) Follow the instructions in “Before You Begin” on page NOTE: See the documentation that shipped with your new hard-drive to verify that it is configured for your computer. If you are replacing an SSD: Replace the SSD in the hard-drive bracket. -
Page 44: Chapter 8: Front Bezel
CHAPTER 8: FRONT BEZEL CHAPTER 8: FRONT BEZEL CHAPTER 8: FRONT BEZEL... -
Page 45: Front Bezel
CAUTION: Only a certified service technician should perform repairs on your computer. Damage due to servicing that is not authorized by Dell™ is not covered by your warranty. CAUTION: To avoid electrostatic discharge, ground yourself by using a wrist grounding strap or by periodically touching an unpainted metal surface (such as a connector on the back of the computer). -
Page 46: Removing The Front Bezel
CHAPTER 8: FRONT BEZEL Removing the Front Bezel Follow the instructions in “Before You Begin” on page Remove the left side-panel (see “Removing the Left Side-Panel” on page 15). Remove the right side-panel (see “Removing the Right Side-Panel” on page 16). Disconnect the front-bezel cables from the master I/O board connectors. -
Page 47: Chapter 9: Fans
CHAPTER 9: FANS CHAPTER 9: FANS CHAPTER 9: FANS... - Page 48 CAUTION: Only a certified service technician should perform repairs on your computer. Damage due to servicing that is not authorized by Dell™ is not covered by your warranty. CAUTION: To avoid electrostatic discharge, ground yourself by using a wrist grounding strap or by periodically touching an unpainted metal surface (such as a connector on the back of the computer).
-
Page 49: Removing The Pci Fan
CHAPTER 9: FANS Removing the PCI Fan Follow the instructions in “Before You Begin” on page Remove the left side-panel (see “Removing the Left Side-Panel” on page 15). Remove the drive-bay shroud (see “Removing the Drive-Bay Shroud” on page 23). Disconnect the PCI-fan cable from the PCI_FAN1 connector on the master I/O board (see “Master I/O Board Connectors”... -
Page 50: Replacing The Pci Fan
CHAPTER 9: FANS Replacing the PCI Fan Pull to detach the four rubber grommets that secure the PCI fan to the PCI-fan shroud. Follow the instructions in “Before You Begin” on page Orient the PCI-fan cable downward and replace the PCI fan in the PCI-fan shroud. -
Page 51: Removing The Hard-Drive Fan(S)
CHAPTER 9: FANS Removing the Hard-Drive Fan(s) Follow the instructions in “Before You Begin” on page Remove the left side-panel (see “Removing the Left Side-Panel” on page 15). Remove the PCI shroud (see “Removing the PCI Shroud“ on page 22). If you are removing the left hard-drive fan, remove the power supply (see “Removing the Power Supply”... -
Page 52: Replacing The Hard-Drive Fan(S)
CHAPTER 9: FANS Replacing the Hard-Drive Fan(s) Follow the instructions in “Before You Begin” on page Replace the hard-drive fan in the hard-drive fan shroud. Replace the two screws that secure the hard-drive fan to the hard-drive fan shroud. Push the hard-drive fan into the chassis until the hard-drive fan handle clicks into place. -
Page 53: Chapter 10: Active-Venting Assembly
CHAPTER 10: ACTIVE-VENTING ASSEMBLY CHAPTER 10: ACTIVE-VENTING ASSEMBLY CHAPTER 10: ACTIVE-VENTING ASSEMBLY... - Page 54 CAUTION: Only a certified service technician should perform repairs on your computer. Damage due to servicing that is not authorized by Dell™ is not covered by your warranty. CAUTION: To avoid electrostatic discharge, ground yourself by using a wrist grounding strap or by periodically touching an unpainted metal surface (such as a connector on the back of the computer).
-
Page 55: Removing The Active-Venting Assembly
CHAPTER 10: ACTIVE-VENTING ASSEMBLY Removing the Active-Venting Assembly Follow the instructions in “Before You Begin” on page Remove the left side-panel (see “Removing the Left Side-Panel” on page 15). Remove the right side-panel (see “Removing the Right Side-Panel” on page 16). Disconnect the active-venting assembly cables from the connectors on the master I/O board. -
Page 56: Replacing The Active-Venting Assembly
CHAPTER 10: ACTIVE-VENTING ASSEMBLY Replacing the Active-Venting Assembly Follow the instructions in “Before You Begin” on page Replace the active-venting assembly on the chassis. Replace the six screws (three on each side) that secure the active-venting assembly to the chassis. Replace the active-venting panels. -
Page 57: Chapter 11: Top I/O Panel
CHAPTER 11: TOP I/O PANEL CHAPTER 11: TOP I/O PANEL CHAPTER 11: TOP I/O PANEL... - Page 58 CAUTION: Only a certified service technician should perform repairs on your computer. Damage due to servicing that is not authorized by Dell™ is not covered by your warranty. CAUTION: To avoid electrostatic discharge, ground yourself by using a wrist grounding strap or by periodically touching an unpainted metal surface (such as a connector on the back of the computer).
-
Page 59: Removing The Top I/O Panel
CHAPTER 11: TOP I/O PANEL Removing the Top I/O Panel Follow the instructions in “Before You Begin” on page Remove the left side-panel (see “Removing the Left Side-Panel” on page 15). Remove the right side-panel (see “Removing the Right Side-Panel” on page 16). - Page 60 CHAPTER 11: TOP I/O PANEL Remove the active-venting assembly (see “Removing the Active-Venting Assembly” on page 55). Disconnect the top I/O panel cables from the system board connectors and remove the cables from their routing guides. Remove the four screws that secure the top I/O panel to the chassis. Pull the top I/O panel off the chassis.
-
Page 61: Replacing The Top I/O Panel
CHAPTER 11: TOP I/O PANEL Replacing the Top I/O Panel Follow the instructions in “Before You Begin” on page Replace the top I/O panel on the chassis. Replace the four screws that secure the top I/O panel to the chassis. Route the top I/O panel cables through their routing guides and connect the cables to the system board connectors. -
Page 62: Chapter 12: Bluetooth Module
CHAPTER 12: BLUETOOTH MODULE CHAPTER 12: BLUETOOTH MODULE CHAPTER 12: BLUETOOTH MODULE... -
Page 63: Bluetooth Module
CAUTION: Only a certified service technician should perform repairs on your computer. Damage due to servicing that is not authorized by Dell™ is not covered by your warranty. CAUTION: To avoid electrostatic discharge, ground yourself by using a wrist grounding strap or by periodically touching an unpainted metal surface (such as a connector on the back of the computer). -
Page 64: Removing The Bluetooth Module
CHAPTER 12: BLUETOOTH MODULE Removing the Bluetooth Module Follow the instructions in “Before You Begin” on page Remove the left side-panel (see “Removing the Left Side-Panel” on page 15). Disconnect the Bluetooth ® -module cable from the BLUETOOTH connector on the master I/O board (see “Master I/O Board Connectors” on page 12). Loosen the thumbscrew that secures the Bluetooth module to the chassis. -
Page 65: Replacing The Bluetooth Module
CHAPTER 12: BLUETOOTH MODULE Replacing the Bluetooth Module Follow the instructions in “Before You Begin” on page Replace the Bluetooth module in the chassis. Tighten the thumbscrew that secures the Bluetooth module to the chassis. Connect the Bluetooth-module cable to the BLUETOOTH connector on the master I/O board (see “Master I/O Board Connectors”... -
Page 66: Chapter 13: Liquid-Cooling Assembly
CHAPTER 13: LIQUID-COOLING ASSEMBLY CHAPTER 13: LIQUID-COOLING ASSEMBLY CHAPTER 13: LIQUID-COOLING ASSEMBLY... - Page 67 CAUTION: Only a certified service technician should perform repairs on your computer. Damage due to servicing that is not authorized by Dell™ is not covered by your warranty. CAUTION: To avoid electrostatic discharge, ground yourself by using a wrist grounding strap or by periodically touching an unpainted metal surface (such as a connector on the back of the computer).
-
Page 68: Removing The Liquid-Cooling Assembly
CHAPTER 13: LIQUID-COOLING ASSEMBLY Removing the Liquid-Cooling Assembly Follow the instructions in “Before You Begin” on page Remove the left side-panel (see “Removing the Left Side-Panel” on page 15). Disconnect the liquid-cooling assembly cable from the liquid-cooling assembly. Push the release latch towards the back of the computer to release the liquid-cooling assembly from the chassis. -
Page 69: Replacing The Liquid-Cooling Assembly
CHAPTER 13: LIQUID-COOLING ASSEMBLY Replacing the Liquid-Cooling Assembly Follow the instructions in “Before You Begin” on page Replace the liquid-cooling assembly in the chassis and rotate the liquid-cooling assembly upwards until it snaps into place. Connect the liquid-cooling assembly cable to the liquid-cooling assembly. Replace the left side-panel (see “Replacing the Left Side-Panel”... -
Page 70: Chapter 14: Processor
CHAPTER 14: PROCESSOR CHAPTER 14: PROCESSOR CHAPTER 14: PROCESSOR... - Page 71 CAUTION: Only a certified service technician should perform repairs on your computer. Damage due to servicing that is not authorized by Dell™ is not covered by your warranty. CAUTION: To avoid electrostatic discharge, ground yourself by using a wrist grounding strap or by periodically touching an unpainted metal surface (such as a connector on the back of the computer).
-
Page 72: Removing The Processor
CHAPTER 14: PROCESSOR Removing the Processor Follow the instructions in “Before You Begin” on page Remove the left side-panel (see “Removing the Left Side-Panel” on page 15). Remove the PCI shroud (see “Removing the PCI Shroud“ on page 22). Remove the liquid-cooling assembly (see “Removing the Liquid-Cooling Assembly”... -
Page 73: Replacing The Processor
CHAPTER 14: PROCESSOR Replacing the Processor Follow the instructions in “Before You Begin” on page Unpack the new processor, being careful not to touch the underside of the processor. CAUTION: You must position the processor correctly in the socket to avoid permanent damage to the processor and the computer when you turn on the computer. - Page 74 CHAPTER 14: PROCESSOR CAUTION: Ensure that you apply new thermal grease. New thermal grease is critical for ensuring adequate thermal bonding, which is a requirement for optimal processor operation. Apply the new thermal grease to the top of the processor. Replace the liquid-cooling assembly (see “Replacing the Liquid-Cooling Assembly”...
-
Page 75: Chapter 15: Master I/O Board
CHAPTER 15: MASTER I/O BOARD CHAPTER 15: MASTER I/O BOARD CHAPTER 15: MASTER I/O BOARD... - Page 76 CAUTION: Only a certified service technician should perform repairs on your computer. Damage due to servicing that is not authorized by Dell™ is not covered by your warranty. CAUTION: To avoid electrostatic discharge, ground yourself by using a wrist grounding strap or by periodically touching an unpainted metal surface (such as a connector on the back of the computer).
-
Page 77: Removing The Master I/O Board
CHAPTER 15: MASTER I/O BOARD Removing the Master I/O Board Follow the instructions in “Before You Begin” on page Remove the left side-panel (see “Removing the Left Side-Panel” on page 15). Remove the PCI shroud (see “Removing the PCI Shroud“ on page 22). -
Page 78: Replacing The Master I/O Board
CHAPTER 15: MASTER I/O BOARD Replacing the Master I/O Board Follow the instructions in “Before You Begin” on page Replace the master I/O board tray in the chassis. Replace the screw that secures the master I/O board tray to the chassis. Route and connect the cables that you removed from the master I/O board. -
Page 79: Chapter 16: System Board
CHAPTER 16: SYSTEM BOARD CHAPTER 16: SYSTEM BOARD CHAPTER 16: SYSTEM BOARD... -
Page 80: System Board
CAUTION: Only a certified service technician should perform repairs on your computer. Damage due to servicing that is not authorized by Dell™ is not covered by your warranty. CAUTION: Do not perform the following steps unless you are familiar with hardware removal and replacement. -
Page 81: Removing The System Board
CHAPTER 16: SYSTEM BOARD Removing the System Board Follow the instructions in “Before You Begin” on page Remove the left side-panel (see “Removing the Left Side-Panel” on page 15). Remove the PCI shroud (see “Removing the PCI Shroud“ on page 22). -
Page 82: Replacing The System Board
CHAPTER 16: SYSTEM BOARD Replacing the System Board Follow the instructions in “Before You Begin” on page Replace the system-board tray in the chassis. Replace the two screws that secure the system-board tray to the chassis. Route and connect the cables that you removed from the system board. Replace the processor (see “Replacing the Processor”... -
Page 83: Chapter 17: Power Supply
CHAPTER 17: POWER SUPPLY CHAPTER 17: POWER SUPPLY CHAPTER 17: POWER SUPPLY... -
Page 84: Power Supply
CAUTION: Only a certified service technician should perform repairs on your computer. Damage due to servicing that is not authorized by Dell™ is not covered by your warranty. CAUTION: To avoid electrostatic discharge, ground yourself by using a wrist grounding strap or by periodically touching an unpainted metal surface (such as a connector on the back of the computer). -
Page 85: Removing The Power Supply
CHAPTER 17: POWER SUPPLY Removing the Power Supply Follow the instructions in “Before You Begin” on page Remove the left side-panel (see “Removing the Left Side-Panel” on page 15). Remove the PCI shroud (see “Removing the PCI Shroud“ on page 22). -
Page 86: Replacing The Power Supply
CHAPTER 17: POWER SUPPLY Replacing the Power Supply Follow the instructions in “Before You Begin” on page Replace the power supply in the chassis and partially slide it towards the front of the computer. Connect the power-supply cable connector to the power supply. Slide the power supply completely into the chassis. -
Page 87: Chapter 18: Battery
CHAPTER 18: BATTERY CHAPTER 18: BATTERY CHAPTER 18: BATTERY... - Page 88 CAUTION: Only a certified service technician should perform repairs on your computer. Damage due to servicing that is not authorized by Dell™ is not covered by your warranty. CAUTION: To avoid electrostatic discharge, ground yourself by using a wrist grounding strap or by periodically touching an unpainted metal surface (such as a connector on the back of the computer).
-
Page 89: Removing The Coin-Cell Battery
CHAPTER 18: BATTERY Removing the Coin-Cell Battery Record all the screens in system setup (see “System Setup” on page 93) so that you can restore the correct settings after the new battery has been installed. Follow the instructions in “Before You Begin” on page Lift the release panel and open the left side-panel. -
Page 90: Replacing The Coin-Cell Battery
CHAPTER 18: BATTERY Replacing the Coin-Cell Battery Follow the instructions in “Before You Begin” on page Insert the new battery (CR2032) into the socket with the side labeled “+” facing up, and press the battery into place. Replace the PCI shroud (see “Replacing the PCI Shroud” on page 22). -
Page 91: Removing The Theater-Lighting Batteries
CHAPTER 18: BATTERY Removing the Theater-Lighting Batteries Follow the instructions in “Before You Begin” on page Lift the release panel and open the left side-panel. Open the theater-lighting battery-compartment door. Remove the two theater-lighting batteries. 1 theater-lighting theater-lighting battery- batteries (2) compartment door... -
Page 92: Replacing The Theater-Lighting Batteries
CHAPTER 18: BATTERY Replacing the Theater-Lighting Batteries Follow the instructions in “Before You Begin” on page Insert the two new batteries (rechargeable AA, NiMH type) in the theater- lighting battery compartment. Close the theater-lighting battery-compartment door. Close the left side-panel. Connect your computer and devices to electrical outlets, and then turn them on. -
Page 93: Chapter 19: System Setup
CHAPTER 19: SYSTEM SETUP CHAPTER 19: SYSTEM SETUP CHAPTER 19: SYSTEM SETUP... -
Page 94: System Setup
CAUTION: Only a certified service technician should perform repairs on your computer. Damage due to servicing that is not authorized by Dell™ is not covered by your warranty. CAUTION: To avoid electrostatic discharge, ground yourself by using a wrist grounding strap or by periodically touching an unpainted metal surface (such as a connector on the back of the computer). -
Page 95: Overview
CHAPTER 19: SYSTEM SETUP Overview Entering System Setup Use System Setup to: Turn on (or restart) your computer. While your computer is booting, press <F2> immediately before the • Change the system configuration information after you add, change, or operating system logo appears to access System Setup. remove any hardware in your desktop. -
Page 96: System Setup Options
CHAPTER 19: SYSTEM SETUP System Setup Options System Information CPU Speed Displays the processor speed. NOTE: The items listed in this section may or may not appear exactly as listed depending on your computer model and installed devices. Current QPI Displays the QPI speed. - Page 97 CHAPTER 19: SYSTEM SETUP Standard CMOS Features Boot Configuration Features 1st Boot Device IDE Master Displays the IDE master drive integrated in your Displays the first boot device. computer. 2nd Boot Device Displays the second boot device. IDE Slave Displays the IDE slave drive integrated in your Hard Disk Drives Sets the hard drive boot priority.
- Page 98 CHAPTER 19: SYSTEM SETUP Integrated Devices Power Management Setup USB Functions Suspend Mode Allows you to enable or disable the Sets the energy-saving mode of the integrated USB controller. ACPI function. HD Audio Controller AC Recovery Allows you to enable or disable the Sets what action the computer takes integrated audio controller.
- Page 99 CHAPTER 19: SYSTEM SETUP Frequency/Voltage Control Advance DRAM Configuration Submenu Memory-Z CPU Core (Non-Turbo) Ratio Displays the ratio between the Opens submenu to display the SPD processor core clock and the FSB configuration for each memory frequency. module. Advance DRAM Configuration Advanced Memory Settings Allows you to toggle to Manual mode Allows you to access the Advance...
- Page 100 CHAPTER 19: SYSTEM SETUP Advance DRAM Configuration Submenu Overclock Configuration Submenu tRRD Turbo Mode TDP Limit Displays RAS to RAS delay (editable in Allows you to program the power Override Manual Mode). thresholds for the processor while in turbo mode. tRTP Displays Read to Precharge Command Delay (editable in Manual Mode).
- Page 101 CHAPTER 19: SYSTEM SETUP BIOS Security Features Change Supervisor Password Allows you to set or change the supervisor password. Change User Password Allows you to set or change the user password. You cannot use the user password to make change to the BIOS settings.
-
Page 102: Clearing Cmos Settings
CHAPTER 19: SYSTEM SETUP Clearing CMOS Settings NOTE: This procedure does not clear or reset system and setup passwords. Follow the instructions in “Before You Begin” on page Remove the left side-panel (see “Removing the Left Side-Panel” on page 15). Remove the PCI shroud (see “Removing the PCI Shroud“... -
Page 103: Flashing The Bios
Select Your Product Model list. Select the product model number in the Visit support.dell.com. NOTE: If you have selected a different model and want to start over Select your country and language. again, click Start Over on the top right of the menu.
Need help?
Do you have a question about the Alienware Area-51 and is the answer not in the manual?
Questions and answers