
Related Manuals for Kenmore 580.71082


Summary of Contents for Kenmore 580.71082
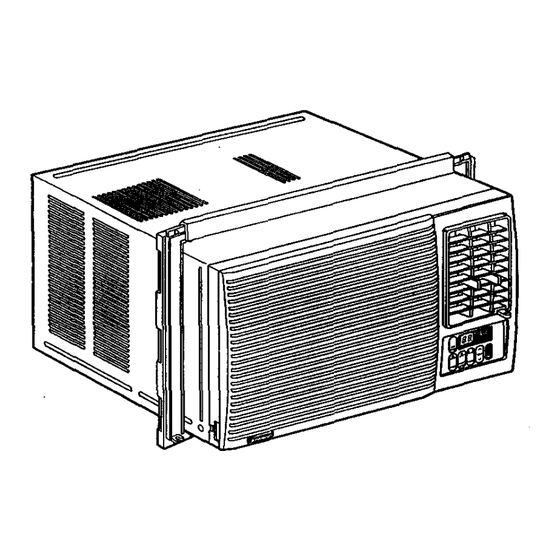
- Page 1 Owner's Manual Manual del Propietario ® ROOM AIR CONDITIONER ACONDICIONADOR DE AIRE DE VENTANA Model, Modelo 580.71082 Sears, Roebuck and Co., Hoffman Estates, IL 60t_R_l./ www.sears.com...
-
Page 2: Table Of Contents
Features ..........TABLE OF CONTENTS ......2 Using the Air Conditioner ....... 10 WARRANTY ..........Display ........... SAFETY ............. Remote Control ........Important Safety Instructions ...... 3 MAINTENANCE ........ELECTRICAL REQUIREMENTS ..4 Air Filter Cleaning ........INSTALLATION ........Air Conditioner Cleaning ......13 Installation Requirements ...... -
Page 3: Safety
IMPORTANT SAFETY INSTRUCTIONS The safety instructions below will tell you how to use your room air conditioner to avoid harm to yourself or damage to your ROOM AIR CONDITIONER. FOR YOUR SAFETY Do not store or use gasoline or other flammable Avoid fire hazard or electric vapors and liquids in the vicinity of this or any other shock. -
Page 4: Electrical Requirements
OBSERVE ALL LOCAL CODES AND ORDINANCES. DO NOT, UNDER ANY CIRCUMSTANCES, REMOVETHEPOWERSUPPLYCORD GROUND PRONG. ELECTRICAL GROUND IS REQUIRED ON THIS APPLIANCE. A 115-volt 60 Hz, AC only, 15A fused and " Electrical Shock Hazard properly grounded electrical supply is required. Plug into a grounded 3 prong outlet. -
Page 5: Installation
INSTALLATION REQUIREMENTS INSTALLATION HARDWARE Your air conditioner will install into standard double hung windows with actual clear opening widths of 22 to 36 inches (559mm to 915mm) (FIG. 1). Lower sash must open sufficiently to allow a clear vertical opening of 15 inches (381mm). Side louvers and the rear of the air conditioner must have clear air space to allow enough airflow through the condenser for heat removal. -
Page 6: Installation
INSTALLATION Insert the side curtain (ITEM A) into the upper guide and lower guide of the air conditioner. Fasten Pick a location which will allow you to blow the cold the curtains to the unit with screws (ITEM E). air into the area you want. Windows used for installation must be strong enough to support the weight of the air conditioner. - Page 7 _J_ Select the position that will place the sift supports near the outermost point on sill (FIG. 10), Attach the sill supports to the cabinet track hole closest to the selected position using screw (ITEM E). FIG. 14 ITEM E Lc,'._ guide DRAINAGE Be sure to insert the drain pipe into base pan before...
-
Page 8: Removal From Window
Top of wood strip should be approximately 3/4" []FRONT INSTALLATION higher than the storm window frame to help condensation to drain properly to the outside. Install the front grille onto the cabinet as follows: • Install a second wood strip (approximately 6" long by - Hook upper tabs of front gdlle into slots on the 1V2"... -
Page 9: Operation
HOW AND WHY ompressor Your room air conditioner provides the following The modern high efficiency functions to make hot weather living more compressor may have a high comfortable: pitched hum or pulsating • Cools and circulates room air. noise that cycles on and off. •... -
Page 10: Features
USING THE AIR CONDITIONER FEATURES To reduce the risk of fire, electric shock, or injury to persons, read the important SAFETY instructions section before operating this appliance To begin operating the air conditioner after installation, follow these steps: 1. Plug in the air conditioner.(To prevent electrical hazards, do not use an extension cord or an adapter plug.) -
Page 11: Display
DISPLAY REMOTE CONTROL FAN SPEED SIGNAL RECEIVER • Everytime you push this button, it advancesthesetting as follows: POWER {High(F3) --*Low(F1) -_ Med(F2) -" High(F3)} • To turn the air conditioner ON, push the button. To turn theair conditioner OFF, push the button again. •... -
Page 12: Remote Control
REMOTE CONTROL Precaution; The Remote Control will not operate properly if strong light shines on the sensor window of the Air Conditioner or if there are obstacles between the Remote Control and the Air Conditioner. Everytime you push button, you will hear beep sound from the Air Conditioner. POWER •... -
Page 13: Maintenance
AIR FILTER CLEANING HOW TO REMOVE THE FRONT GRILLE The Air Filter will become dirty as it removes dust from the inside air, It should be washed at least • Open the inlet grille downward. every 2 weeks. If the Air Filter remains furl of dust. the air flow will decrease and the cooling capacity •... -
Page 14: Troubleshooting
BEFORE CALLING FOR SERVICE Check the following list to be sure a service call is really necessary. A quick reference to this manual may help you avoid an unneeded service call. THE AIR CONDITIONER WILL NOT OPERATE Check if... Then... Wall plug disconnected. - Page 15 -15-...
-
Page 16: Repair Parts
Room Air Conditioner To order Parts call Toll Free Model No, 580.71082100 1-800-4-MY-HOME'(I-800-469-4663) CAUTION: Use the Kenmore part number on all orders, no___tt the illustration number. CABINET & FRONT GRILLE ASSY 01/01 - 16 -... - Page 17 580.71082100 CAUTION: Use the Kenmore part number on all orders, no__tt the illustration number. CABINET & FRONT GRILLE ASSY POS, NO PART NO DESCRIPTION 1 - A 3530A10029A FRONT GRILLE 2 - A 3530A10030A INLET GRILLE 3 - A 5231A20004J...
- Page 18 580,71082100 CAUTION: Use the Kenmore part number on all orders, not the illustration number. CONTROL BOX ASS'Y 11-B 12-B 13-B 01/01 - 18 -...
- Page 19 580.71082100 CAUTION: Use the Kenmore part number on all orders, _ the illustration number. CONTROL BOX ASS'Y POS. NO PART NO DESCRIPTION 2H00677P POWER CORD ASS'Y 4H01254A CLIP, CORD 6631AR3843N CONNECTOR ASS'Y 6323A20003D THERMISTOR ASS'Y 6631AQ3201B WIRE ASS'Y 6120AR2359V CAPACITOR...
- Page 20 580.71082100 CAUTION: Use the Kenmore part number on all orders, not the illustration number. AIR HANDLING & CYCLE PARTS 12-C 19-C 11-C 13-C 10-C 18-C 15-C 16-C 01/01 - 20 -...
- Page 21 580.71082100 CAUTION: Use the Kenmore part number on all orders, not the illustration number. AIR HANDLING & CYCLE PARTS POS. NO PART NO DESCRIPTION 1 - C 3041'A30005D BASE PAN WELD ASS'Y 2- C 5238A10001A AIR GUIDE 3 - C...
- Page 22 580,71082100 CAUTION: Use the Kenmore part number on all orders, not the illustration number. COMPRESSOR PARTS 14-D 10-D 11-D 01/01 - 22 -...
- Page 23 580.71082100 CAUTION: Use the Kenmore part number on all orders, not the illustration number. COMPRESSOR PARTS DESCRIPTION POS. NO PART NO ISOLATOR, COMP 5040AR4195A COMPRESSOR 5416A20013B 4810AR4155A BRACKET, WASHER HEXAGON NUTS 1NHA0801206 GASKET 4986A30001A OVERLOAD PROTECTOR 6750A30001A TERMINAL COVER 3550A30048A...
- Page 24 580.71082100 CAUTION: Use the Kenmore part number on all orders, no.._jt the illustration number. INSTALLATION KIT ASS'Y 01/01 - 24 -...
- Page 25 580.7108210O CAUTION: Use the Kenmore part number on all orders, not the illustration number. INSTALLATION KIT ASS'Y POS. NO PART NO DESCRIPTION 1 - E 4959AR3402A SIDE CURTAIN ASS'Y 2 - E 4959AR3402B StDE CURTAIN ASS'Y 3 - E 4810AR3240A...
Need help?
Do you have a question about the 580.71082 and is the answer not in the manual?
Questions and answers