Advertisement
Quick Links
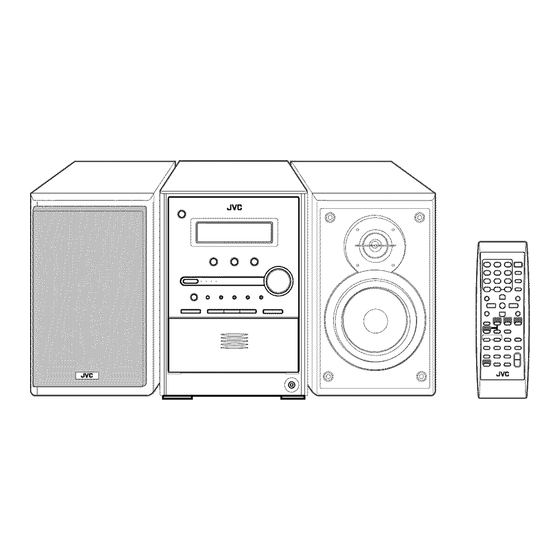
JVC
COMPACT
COMPONENT
SYSTEM
FS-S77B/FS-S77S
mConsists
of CA-FSS77
and SP-UXS77B/SP-UXS77S
ooo
0
o
e
e
e
D I G I T
A L
AUDIO/VmDEO 3D-PhONIC
INSTRUCTIONS
For Customer
Use:
Enter below the Model No, and Serial No,
which are located
either on the rear, bot-
tom or side of the cabinet,
Retain
this
information
for future reference,
Model No,
Serial No,
GVT0131-001A
[J]
Advertisement

Related Manuals for JVC FS-S77B


Summary of Contents for JVC FS-S77B
- Page 1 COMPACT COMPONENT SYSTEM FS-S77B/FS-S77S mConsists of CA-FSS77 and SP-UXS77B/SP-UXS77S D I G I T AUDIO/VmDEO 3D-PhONIC For Customer Use: Enter below the Model No, and Serial No, INSTRUCTIONS which are located either on the rear, bot- tom or side of the cabinet, Retain this information...
- Page 2 Warnings, Cautions and Others Mises en garde, precautions et indications diverses CAUTION--STANDBY/ON button! Disconnect the mains plug to shut the power off completely (all lamps and indications go off). The STANDBY/ON (.b/I button in any position does not disconnect the mains line. CAUTION: TO REDUCE THE RISK...
- Page 3 For U.S.A. For Canada/pour le Canada This equipment has been tested and found to CAUTION: TO PREVENT ELECTRIC SHOCK, comply with the limits for a Class B digital device, MATCH WIDE BLADE OF PLUG TO WIDE SLOT, pursuant to part 15 of the FCC Rules. These limits FULLY INSERT.
- Page 4 1 CLASS 1 LASER PRODUCT 2 CAUTION: Do not open the top cover. There are no user serviceable parts inside the unit; leave all servicing to qualified service personnel. 3 CAUTION: Visible and invisible laser radiation when open and interlock failed or defeated.
- Page 5 Introduction ............On-Screen Disc Operations ........Precautions ................On-screen Bar Inl_rmation ..........How' to Read This Manual ..........Operations Using the On-screen Bar ......... Operations on the CONTROL Screen ....... Getting Started ............Timer Operations ..........Step 1: Unpack ..............Step 2: Prepare the Remote Control ........
- Page 6 • If you are not going to operate the System for an extended e!eeau!;10n period of time, unplug the AC power cord from the wall Installation outlet. • Install in a place which is level, dry amt neither too hot nor If anything goes wrong, unplug the AC power cord and toocokl between...
- Page 7 S!ep I:;Un_a After unpacking, check to be sure that you have all the following items. The number in parentheses irrdicates quantity of each piece supplied. • FM arrtenna • AM loop antenna • Remote control ( 1) • Composite video cord (1) •...
- Page 8 3: HOoku If you need more detailed information, see page 6. Illustrations of the input/output terminals below are typical examples. When you connect other components, refer also to their manuals since the terminal names actually printed on the rear AM loop antenna (supplied) may vary.
- Page 9 i_!ii!iiii_ii_ii!!i_i!_!i_!_i_i i_!i!iiiiiiiiiiiii!!i!i_!_i_i_i ;_!i_iii!iiiiiili!i!!ii!ii!i!i_i_i_ i_i!iiii_ili!ii!:i_i!iiiiiiiii_i;_ i_iiii_i!i!ii!_i_ii!ii!ii!ii_i_i_! i_!_!iiiii!ii!ii!i!!i!i!ii!;!_i_ ¸' _ !ii!i!i!iiiili!ii!!i!!i!ii_iii_i i_:!_i!i_i!ii!i!!!!!!!i!iii!i!i!;_! i_ii!i!iiiiiii_ii!i!!ii!ii? i_;!_i_iiii!iiii!i_iiiiiiii;_ i_;ii!iiiiiiiiii_iiiii!ii!i_!i_i_i i_iiii_i!i!ii!_i_ii!ii!ii!ii_i_;i i_iiiiiiiiiiiil;i!iiii!!!i!il;;i ' i_iii_ii_iii!ii!i_!ii!ii!ili!i_!_i _ii_ilili!iiiiiiii!iiiii!i!!!!_!i_!_i i_!ii!i!iii!ii!i!!!ii!i!iliiii!_!_i i_!!i!i!i_iiiiii!iiiii!ii!iiii!i!i_i i_;ii!iiiiii!!!ii!!i!i!iiiiiiii!ili; ¸¸ i _i_ii!ii_iiiii_i:iii_i!_i!ii!_i_;_i_i _i,_i_i_ii!iiiii!_iii!i_iiiiii!i!;i i_i_ii_iiiiili!iiiiiiiiiiiiii!i_i_i_i _i!!i_i_iiiiiliiiii!i!i!iiiiii_i_,_ ¸i_i_i!iiii!iiiiiiiiii!i!:!i_i!i;; _ i_!_i!iiiiiiiiii!!i!i!!!i_!_!_ii_ ;_ii_iiiiiiii_iiiiiiii_iiiiiii_ i_ii_iiiiiiii_iiiiiiii_iii i_ii_iiiiiiii_iii!iii i_!iliiiiiiiiiiiii Forbetter FlVl/AMreception AM loop antenna ÷ Keep it connected.
- Page 10 To connectthe AV COIVlPU LINKcords To assembleand connectthe AM loopantenna To assemble the AM loop antenna This system allows you to use JVC's TV with simple operations; by starting playing back a disc, the TV automatically turns on arrd changes...
- Page 11 DVD Vide0--digital audio formats DiSc The System can play back tile following digital audio formats. This unit has been designed to play back tile following discs: • Linear PCM: Uncompressed digital audio, the same Video Region format used for CDs and most studio masters. Disc Type Mark (Logo) Format...
- Page 12 DiSplay Ihdi_at_s The indications on the display teach you a lot of things while you are operating the System. Before operating the System, be familial" with when and how the indicator illuminates on the display. 3D PHONIC indicator [] jD sc tray indicators •...
- Page 13 Indicationson the main displaywhile operatinga disc • DVD Vkteo: • DVD Video: Total title no. Chapter no. Elapsed playing time ..q ,.,-,.c,_ f'Lf • By pressing DISPLAY, you can show tire current title arrd chapter nmnbers for a few seconds. •...
- Page 14 In this manual, the operation using the remote control is mainly explained; however, you can use the buttons and controls on the main unit if they have the same similar) name and marks. 10 keys -- Turn on the power. 3DPHONIC The STANDBY/ON lamp oil the main unit lights ill...
- Page 15 Select a preset number for the station you store. EisteninO t_ the:: R_di_ Examples: Toselecttheband(FMor AM) To select preset number 5, press To select preset number FM '_ AM q press +10, then 5. To select preset number press +10, +10, then 10. To tune in to a station While FM or AM is selected...
- Page 16 On-screen guide icons P!ayingBa@ abide During DVD Video playback, the following icons may Before operating a disc, be familiar how a disc is recorded. appear on the TV screen: • DVD Video comprises of"Titles" which includes "Chapters," DVD Audio/MP3/WMA comprise At the beginning of a scene containing multi-...
- Page 17 .9 Select an item on the disc menu. To locate an item directly > You can select a title/chapter/track directly and start ENTER playback. • For DVD Video, you carl select a title before starting playback, while you can select a chapter after starting playback.
- Page 18 Adje_liaO t hevolume Remote control iiiiiii! You can adjust the volume level from level 0 (VOL MIN) to level 50 (VOL MAX). VOLUME DISPLAY VOLUME DVD LEVEL _SET To drop the volume ilr a moment ENTER £, _._, ,/_ £ 5,/ FADE To restore the volume, press again, or MUTING...
- Page 19 6hahginUt_e :OjspiayB right_eS_ ii_we!!i_i;_; ii_ ¸(_ii!ili!i!i!ii!ii!i)i_ ¸_i_ii!i!iiiii!ii!ii!ii!ii? _iii!iiiii!i!ii!ii!ii!i!!i!!_!!ii_i_ i_iiiiiiiiiii:iiiiii!i!i!i!_!_;_i i_iliiiiiiii_ii!ii!ii!i!i!_i_iii:_ ¸¸ i _!i_ii!ii!ii!i!ii!)ii:? _iii!i!!i!!i!!i!!i!iliiii!ii!i_iii_ _(iiiii!i_iiiii_iiiii!i!!!i!iiiiii_i_! You can dim tire display window. The DVD sound is sometimes recorded at a lower level than for other discs and sources. You carl set the irrcrease level t'or DIM 1_ DIM 2 ---] IM OFF*-...
- Page 20 To adjust the picture tone 8ettl g !he 610¢k :;: :: 1 Select "USERI" or "USER2." Without setting the built-in clock, you cannot use Daily • Follow steps 1 and 2explained on page 15. Timers (see page 29) and Sleep Timer. Select a parameter you want to adjust.
- Page 21 To turn off the unit after playback is over--Auto Standby A.STANDBY nceled '.,\ "÷ When Auto Standby is ill use, the A.STANDBY indicator lights oil the display. When disc play stops, the A.STANDBY indicator starts flashing. If no operation is done for about 3 minutes while the indicator is flashing,...
- Page 22 sele tiso the Seuhd raCk For DVD Video: While playing back a chapter contaiuiug audio languages, you call select the language to listen to. For DVD Audio: While playing back a track contaiuiug audio channels, you call select the audio channel to listen to.
- Page 23 Sele_tidg the8_b!RleLanguage SeleCting t heV!ewAngle _):; <? <; =;> %¸¸¸;¸¸¸¸ For DVD Video: While playing back a chapter containing While playing back a chapter (of DVD Video) containing subtitles in different languages, you can select the subtitle nmlti-view arrgles, you can view the same scene from language to display on the TV screen.
- Page 24 2 Select slow motion speed. S_le_tinO B_w_ab]_S!ill_icI_re_ SLOW- SLOW+ While playing back a track (of DVD Audio) linked Forward slow motion starts. browsable still pictures (BSP), you can select the still picture (turn the page) to be shown on the TV screen. •...
- Page 25 iiiiiiii i!l i{ilil;i il i ii _ iiiiiiil Remote control iiiiiiil ,_ogra_;P!_y iiiiiiil iiiiiiil iiiiiiil You can arrange the playing order of the chapters or tracks iiiiiiil (up to 99) before you start playback. iiiiiiil iiiiiiil iiiiiiil Before starting playback, activate Progranr Play.
- Page 26 Start playback. _laying _t RandOm Random Pla_: > Playback starts in the order you You carl play the chapters or tracks of all loaded discs at have progranmled. random. • Rmrdom Play cannot be used for some DVDs, Before starting playback, activate Random...
- Page 27 PlayingRepeated Iy > Repeats all discs in all tray or all programmed tracks. • You carl also select tire repeat mode using tire on-screen Repeats tire current chapter/track, bar (see page 25). Repeat Play GiN. Repeats tire current title/group. 1DISC You can repeat playback.
- Page 28 iiiiiiii You can check the disc information (except for MP3/WMA/ iiiiiiii iiiiiiii JPEG disc) and use some functions through the on-screen iiiiiiii bar. iiiiiiii iiiiiiii iiiiiiii 10 keys Disc type iiiiiiii iiiiiiii iiiiiiii Playback information iiiiiiii iiiiiiii Indication Meanings iiiiiiii Mbps Current transfer...
- Page 29 Operations USin_ th_Ohscreen Ba_ For detailed operations of tire lbllowing fuuctions, see also "Operations Using the On-screen Bar" oil the left, Ex.: Selecting a subtitle (French) for DVD Vkteo: Changing the time information While a disc is selected as the som-ee... You can change the time informatiou ill the on-screen 1 Display...
- Page 30 Time Search Select the repeat mode you want. You can move to a particular point by specifying tile elapsed Repeats all discs or all programmed playing time from tile beginning. track. While playing (without PBC for SVCD/VCD), display Repeats a desired portion (see next the on-screen...
- Page 31 Enter the desired chapter/track number. Examples: The CONTROL screen automatically appears on the TV Q_ _' Q'..To select chapter/track 5, press screen when you load an MP3, WMA, or JPEG disc. You can search for and play the desired tracks through ..
- Page 32 To repeat slide-show for JPEG To move the highlight bar between group list and track list While playing or before starting playback,.. i:iiilPii!i_ i¸ i! ii_ Moves tile bar to the track list, q; GR. ---* _IDISC---] Canceled<------- q;:ALL Moves tile bar to the group list.
- Page 33 8!ttiigi!elTi eriii >iiili i ii Using Daily Timer, you can wake up with your favorite nrusic, You carl store three Daily Timer settings; however, you can activate only one of the timers at a time. • To exit from the timer setting, press CLOCK/TIMER iiiiiil STANDBY/...
- Page 34 @ Set the hour then the minute for off-time. To turn off the Timer after its setting is done (3) Select the playback source--"TUNER FM," Since Daily Timer is activated at the same time everyday, "TUNER AM," "DISC," or "AUX." you may need to cancel it oil some particular days,...
- Page 35 iiiiiiiii!ii!!ilil;i{{{{{{{iiiii_ fiperati g > iiiiiiil Remote control iiiiiiil You can use the Setup Menus only when a disc is selected iiiiiiil iiiiiiil as the source and its playback is not yet started. iiiiiiil iiiiiiil Ex.: Selecting "STILL PICTURE" for "FILE TYPE": iiiiiiil iiiiiiil...
- Page 36 6 Finish the setting. • PICTURE Setup Menu ENTER You can select the desired optkms concerning a picture monitor screen. 7 Repeat steps 3 to 4 to set other items on the same Setup Menu. Repeat steps 2 to 4 to set other items on another Setup Menu.
- Page 37 PICTURESOURCE • AUDIOSetup Menu You can obtain optimal picture quality by selecting You can adjust tire sound settings of the System. appropriate option--picture source type (eiflaer video source or film source). Select one of the foUowing: AUTO: Normally select this. When playing back a disc corm_ining both video...
- Page 38 D. RANGECOMPRESSION AV COMPULINKMODE You can compress the dynamic range (the difference When connecting tire System to a JVC's TV with tile AV between the loudest sound and the softest sound) to enjoy a COMPU LINK remote control system, select the proper...
- Page 39 5 Select "COUNTRY (X)DE," then display the pop-up Bes|ric_i,g |heRe_ie_ window. @e ehtalLoek > ENTER You can restrict playback of DVD Video containiug violent scenes and those unsuitable for your family members. Once you have set the rating level, such violent scenes (for which a higher level than you set is assigned) may be skipped...
- Page 40 To release Parental Locktemporarily To change the setting When you set a strict rating level, some discs may not be Display the PARENTAL LOCK sub menu. played back at all. When you try to play such a disc, tile steps 1 to 4of "To set Parental •...
- Page 41 - This System can play back MP3/WMA files with the eaNi Mbrea i9 S St extension code <.mp3>, <.wma> or <.jpg> (regardless the letter case_pper/lower). Getting Started (see pages 3 to 6) - It is recommended that you make each MP3 file at a Changing the Scanning Mode...
- Page 42 On-ScreenDiscOperations (see pages 24 to 28) MP3/WMA/JPEG groups/tracks configuration • For JPEG files playback... This System plays back the tracks as follows. It is recommended that you record a file at 640 x 480 resolution. (If a file has been recorded at a resolution Hierarchy more than 640 x 480, it will take a long time to be...
- Page 43 To remove the speaker grilles Maihtenan e To get the best perlbrmance of the System, keep your discs and mechanism clean. Handlingdiscs • When removing the disc from its case, hold it at the edge while pressing the center hole lightly. Speaker •...
- Page 44 MP3/WMA or JPEG tracks are not played back. T_osble_hO_]i_O => The irrserted disc nmy includes both type of tracks (MP3/WMA files arrd JPEG files). In this case, you can If you are having a problem with your System, check dais list only play back the files selected by the "FILE TYPE"...
- Page 45 Langhag_c_deEist @ @ ,@ ,:_ii_iiiiiiii_iiiiiiiiiiiiiiii_i_i,_i ,:_ii_iiiiiiii_iii!iiiiiiiiiiiii_i_ ,_!ilili!iiiiiiiiiiiii!i!i!_!!_ii_ _,_!!ii!i!!i!i!!iiiiiiiiiii!i_i_i_i_ @ @ @ ,@ ,:_ii_iiiiiiii_iiiiiiiiiiiiiiii_i_i ,:_ii_iiiiiiii_iii!iiiiiiiiiiiii _i!ii!iiiiili!iiiiiiiiiiiiii ,@,@ _i!!i!iiiiiii Javanese Slovenian Afar Samoan Abkhazim_ Georgian Kazakh Shona Afrikaans Greenla_dic Somali Ameharic Cmnbodian Albanian Arabic Kannada Serbian Assamese Korem_ (KOR) Siswati Aymara Kashmiri Sesotho Azerbaijani Kurdish...
- Page 46 ntff/Ar Li t , !!ii!i!!i!i!!iiiiiiiiiii!i i i i @ @ @ ,@ ,: #iiiiiiii i i, i ,: ii iiiiiiii;iii!iiiiiiiiiiiii i i!ii!iiiiili!iiiiiiiiiiiiii:i : , ,@,@ @ ,@ ,@ ,@ , !ilili!iiiiiiiiii <ii:iii! Denmark Jordan Andorra Dominica United Arab Emirates Japan Dominican Republic Kenya Afghmlistan...
- Page 47 Sweden Nepal Trinidad and Tobago Nauru Tuvalu Sing@ore Saint Helena Niue Taiwan Slovenia New Zealand Tanzania. United Republic Oman Ukraine Svalbard and Jan Mayen Slovakia Panama Uganda Sierra Leone Peru United States Minor Outlying Islands San Marino French Polynesia United States Senegal P@ua...
- Page 48 Remote control 1O, 30 6,11,13,15,19_21,26_28,35,36 15, 16, 29, 30 16, 22, 29 13, 15, 16, 20, 22, 25 28, 29 31, 35 10, 12, 22 10 11 11-13, 12, 20, 22, 28 10,14 ::::::::;: 10, 12, 10, 11 Remote sen...
- Page 49 General S_e_ilicati_ns AC120V 60Hz Power requiremem: Power consulnption: 85 W (at operation) Amplifier section 15 W (on standby) Output Power: 2.0 W (with deactivating the clock LOW: 25 W per channel, min. RMS, driven into 4 f_ indication) at 1 kHz with no more than 10% total Dimensions (approx.): 175 mmx...
- Page 50 JVC Factory Service Center, * name and location of which will be given to you by the toll-free number.
- Page 51 Authorized Service Centers QUALITY SERVICE HOW TO LOCATE YOUR JVC SERWCE CENTER TOLL FREE: 1 (800) 537-5722 http://wwwjvc.com Dear Customer, In order to receive the most satisfaction from your purchase, please read the instruction boomer before operatin 9 the unit...
- Page 52 "rl ".,4 "-4 ".,4 ".,4 "U VICTOR COMPANY OF JAPAN. LIMITED 0204AIMMDWJEM 6_b 2 004 VICTOR COMPANY OF JAPAN, LIMITED...
Need help?
Do you have a question about the FS-S77B and is the answer not in the manual?
Questions and answers