Table of Contents
Advertisement
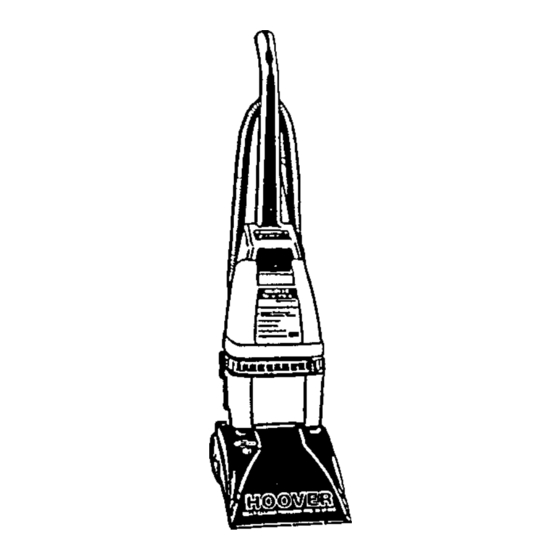
SUPREME
DELUXE
ULTRA
SteamVac
TMWith Attached
Tools And Automatic
Tool
Conversion
SteamVacs
with the automatic
tool conversion
feature were first introduced
in mid-1997.
Fig. 1
Characteristics
of the three types:
Supreme:
No rotating brushes
Deluxe:
Five rotating
brushes (for carpet only).
Ultra:
Five rotating brushes for carpet and a
powered
hand nozzle for upholstery.
These are the third generation
of Steam Vats made
by Hoover
for the domestic
market.
5 OUNCES/
15Oral
Easy, One-handed
tankremoval
liJ
All models
have:
• 1 gallon tanks, solution and recovery
• 8 foot hoses
• Quick cord release (back of handle)
• Tool/floor
mode indicator Fig. 2
• Automatic
tool conversion
• 16 oz. pre-cleaner-spray
bottle
• 16 oz. carpet/upholstery
detergent
• Bare floor cleaning tool, fits front of nozzle. Fig. 3
• Upholstery
nozzle
• 1 Speed motor
• Measuring
eup/eap on solution tank.Fig. 4
• Over flow float in recovery tank
• Foot operated
on and off switch
• One handed recovery tank removal. Fig. 5
10/97
Advertisement
Table of Contents

Related Manuals for Hoover SteamVac supreme


Summary of Contents for Hoover SteamVac supreme
- Page 1 Five rotating brushes for carpet and a powered hand nozzle for upholstery. DELUXE These are the third generation of Steam Vats made ULTRA by Hoover for the domestic market. SUPREME All models have: • 1 gallon tanks, solution and recovery •...
- Page 2 Deluxe and Ultra models have 5 mlcllocking rotating brushes. Fig. 6 Tile brushes are driven by an air turbine pOWeled Fig. 7 TURBINE Rotation of tile brush can be viewed though a cleai cover on the hood. The Speed of the brush depends on air flow and is adjustable...
- Page 3 Key components of the SteamVac Ultra are shown ir the cut away views on the next page. Refer to the Hoover Service Manual for repair proce dures and the Microfiche Parts Catalog, purple head- ROTATING er for spare parts.
- Page 4 HOSE SOIM_ON TANK MEASURING SOLI.rrION CI_/CAP TRIGGER CLEAN TANK RECOVERY TANK HANDLE HANDLE TANK SOLUTION CONTROL BARE H.f)OR TOOL RESERVOIR PUMP BRUSH BLOCK CORD HOOK ON/OFF PEDAL 10/97...
- Page 5 FROM PUMP FROM PUMP 10/9"/...
- Page 6 SERVICE INSTRUCTIONS CARPET CLEANING MACHINE STEAMVAC Service Support 10/97...
- Page 7 Latch Seal Duct Svatch Button Hose Motor Cover / Valve Assembly Seal Motor • Seal • Actuator Arm Switch Pedal Attachment Cord Whee_ Brush Bloct( Assembly...
- Page 8 Upper Control Hand_P°wered Tool_ Lower SWitCh Rod Tool Holder S_alo Relief Lower Handle Solution Tube Cover Float , Trigger Recovery Tank Lid Foam F_ter Recovery Tank...
- Page 9 I. General then drawn up through the valve and into the recovery tank where the air and water The SteamVac with Automated Tool separated, A float and foam filter prevent Conversion is a self contained extractor designed recovery tank from being overfilled.
- Page 10 B. Cap Assembly 1. Twist off to remove (Fig. 2) SPRING.-._ WASHER7_ VALVE SE*L--C Fig. 3A VALVE STEM -_ The cupped end of the valve seal faces downward upon reassembly. To reassemble valve: Fig. 2 1. Slide valve assembly into valve seat through 2.
- Page 11 D. Upper Handle Assembly For models other than those with the Powered Hand Tool, steps 1 and 2 are omitted. 1. Remove two bolts and slide handle off (Fig. 6) E. Recovery Tank 1. Release handle to lowest position, (R.H. Pedal).
- Page 12 G. Hood H. Hose 1. Hose Connection 1. Remove agitator speed actuator button. 2. Remove (2) screws (Fig. 10). a. Flex tab (Fig. 12) to free hose connection valve. Screw _crew Fig. 10 Fig. 12 3. Carefully pry inward on rear panels of hood to release (Fig.
- Page 13 I. Hose Service 2. Slide control arm off of valve and release from The hose is replaced as an assembly. To service lever and spring. grip end: 3. Remove turbine control arm and spring 1. Remove the two screws in the hand grip and assem by depressing tab on turbine (Fig.
- Page 14 2. Remove (2) screws located at front of turbine. 3. To lift out of position flex outer walls of main body to clear tabs. 3. Disconnect hose from turbine and lift out of position. 4. Feed tubes through motor cover and remove. M.
- Page 15 O. Brush Block Assembly (Deluxe/Ultra 2. Disconnect leads and snap switch out of _osition. Models) To remove brush block assembly simply squeeze 3. The switch pedal can be removed once the trunnion is lifted. block at tabs shown in Fig. 18 and slip brush block assembly out of position.
- Page 16 U. Motor Seal T. Reservoir Assembly The motor seal is positioned below the motor as Release two clips and remove from cradle shown. (Fig. 27) lower handle (Fig. 25) Fig. 27 Fig. 25 V. Standpipe Seal The reservoir is replaced as an assembly which 1.
- Page 17 IV. Troubleshooting check list - Steam Vac w/Automated tool conversion The following is a guide to aid in determining the origin of a problem for which these models could conceivably be brought in for service. Problem Possible Cause Possible Solution A.
- Page 18 Troubleshooting check list - Steam wlAutomated tool conversion The following is a guide to aid in determining the origin of a problem for which these models could conceivably be brought in for service. Possible Solution Possible Cause Problem Refill and check operation D.
- Page 19 Troubleshooting Guide SteamVac w/Automated Tool Conversion...
- Page 20 The following is a guide to aid in determining the origin of a problem for which these models could conceivably be brought in for service.. Possible Solution Problem Possible Cause Check cord for proper connections Unit not firmly plugged in. A.
- Page 21 D.Unitwon't 1. Solution tankempty Refill and check operation 2 Poppet v alvemalfunctioning. Check and replace - located in bottom pump. of solution tank (nospray fromhose) 3 Solution tankopening c logged Clean and check operation 4 Handle notlocked intoupright p osition Raise handle and check operation 5 Reservoir assembly c logged.
Need help?
Do you have a question about the SteamVac supreme and is the answer not in the manual?
Questions and answers
Hoover SteamVac Deluxe w/ 5-Rotating Brushes Model no. F5864-900 How do I clean it?
To clean the Hoover SteamVac Deluxe Model F5864-900 with 5-rotating brushes:
1. Prepare the Machine:
- Disconnect the cleaner from the electrical outlet.
- Place the handle in the upright, locked position.
- Remove the clean solution tank by pressing down on the handle and pulling forward.
2. Fill the Solution Tank:
- Use 5 ounces of Hoover Carpet/Upholstery Detergent for carpet, stairs, or upholstery.
- Use 5 ounces of Hoover Bare Floor Cleaner for bare floors (do not use on carpet or upholstery).
- Fill the tank according to instructions on pages 7 and 8.
3. Before Cleaning:
- Read “Before you begin cleaning” instructions on page 9.
- If cleaning over area rugs or carpet, move them or place waterproof material underneath.
4. Check Brush Operation:
- Ensure the brush speed selector is not set to OFF.
- Make sure the handle is not in the upright position during use.
- Clean the brush indicator screen if needed.
5. Cleaning Process:
- Turn on the machine to activate the 5 rotating brushes.
- Apply the cleaning solution as the machine moves over the surface.
6. After Cleaning:
- Use the nozzle clean-out tool to remove debris if needed.
- Slide the tool into the nozzle and clear out any blockage.
- Wipe the outside of the machine with a cloth dampened in warm water and mild detergent.
- Do not use solvents or petroleum-based products.
7. For Small Liquid Spills:
- It can pick up spills up to 1 gallon or 1/4 inch in depth on carpet, upholstery, or bare floors.
Always follow all safety and usage instructions for proper operation.
This answer is automatically generated