Table of Contents
Advertisement
Available languages
Available languages
BRIGGS & STRATTON
Before using this product, read this manual and follow all
Safety Rules and Operating
Instructions.
Models / Hodelos
030252
030297
PRECAUCION
Antes de utilizar el producto,
lea este manual y siga todas
las P,eglas de Seguridad
e Instrucdones
de Uso.
01
BRIGGS
& STRATTON
POWER
PRODUCTS
GROUP,
LLC
JEFFERSON,WISCONSIN,
U.S.A.
8
Manual
No.
197929GS
Revision
I (I 1/10/2005)
Advertisement
Table of Contents

Related Manuals for Briggs & Stratton XL4000


Summary of Contents for Briggs & Stratton XL4000
- Page 1 BRIGGS & STRATTON Models / Hodelos 030252 030297 PRECAUCION Before using this product, read this manual and follow all Antes de utilizar el producto, lea este manual y siga todas Safety Rules and Operating Instructions. las P,eglas de Seguridad e Instrucdones de Uso.
- Page 2 SAVE THESE INSTRUCTIONS TABLE OF CONTENTS SAFETY RULES Safety Rules ........Know Your Generator ......This is the safety alert symbol. [tis used to alert you to potential personal iniury hazards. Assembly ........Obey all safety messages that follow this Operation ........
- Page 3 WARNING WARNING Operate generator ONLY outdoors. WHEN ADDING OR DRAINING FUEL Turn generator OFF and let it coo[ at [east 2 minutes before Keep exhaust gas from entering a confined area through windows, doors, vend[at]on intakes or other openings. removing fuel cap. Loosen cap slowly to relieve pressure in tan[<.
- Page 4 CAUTION WARNING DO NOT tamper with governed speed. Generator supplies correct rated frequency and voltage when running at governed WHEN ADJUSTING OR MAKING REPAIRSTO¥OUR spee& GENERATOR DO NOT modify generator in am/way. Disconnect the spar[< plug wire from the spar[< plug and place the wire where it cannot contact spark plug.
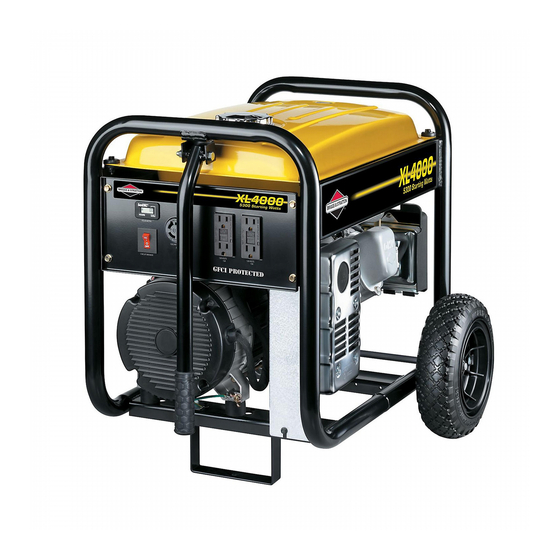
- Page 5 KNOWYOUR GENERATOR Read this operator's rnanuam and safety fumes before operating your generator. Compare the illustrations with your generator, to famiIhrize yourself with the locations of various controls and adjustments, Save this manuaJ for future reference, FuelTan[< Hour Heter Valve Rocker Switch Double Pole...
- Page 6 Fuel ASSEMBLY NOTE: This gasoline engine is certified to operate on Your generator requires some assembly and is ready for gasoline. Exhaust Emission Control System: EP1 (Engine use after it has been properly serviced with the recommended oil and fuel. Modifications).
- Page 7 USING THE GENERATOR Generator Location Generator Clearance System 6; round WANNmNG The generator has a system ground that connects the generator frame components to the ground terminals on the AC output receptacles.The system ground is connected Keep at least 5 ft. (152 cm) clearance on all sides of generator to the AC neutral wire (see '°Equipment Description", including overhead.
- Page 8 OPERATING WARNmNG Starting Engine Disconnect all electrical loads from generator. following start instruction steps in numerical order: btake sure unit is on a level surface. DO NOT touch hot surfaces and avoid hot exhaust gases, Allow equipment to coo[ before touching. iMPORTANT: Failure to start and operate unit on a level...
- Page 9 Creating a Temporary Shelter $to$ Engine Turn OFF and unplug ALL electrical loads from [n an emergency, use the original shipping carton. generator panel receptacles. NEVER start or stop engine Cut off top carton flaps and one long side of carton with electrical devices plugged in and turned ON.
- Page 10 Start generator as described in the section "Starting [ 20/240 Volt AC, 20 Amp Locking the Engine", then place carton over generator. Keep at Receptacle least 5 ft. (152 cm) clearance on all sides of generator including overhead with shelter in place.
- Page 11 CAUTmON DO NOT use any outlets on the circuit. Call or take your generator to a local service centen If the GFCI trips by itself at any time, reset and test the outlet. Jf the reset button does pop out when test button...
- Page 12 DON'T OVERLOAD Plug in and turn on the next load. Again, permit the generator to stabilize. Repeat steps 4 and 5 for each additional load. NEVER add more loads than the generator capacity.Take special care to consider surge loads in generator capacity, C acity as described...
- Page 13 SPECIFICATIONS NOTE: DO NOT use a garden hose to clean generator. _¢ater can enter engine fuel system and cause problems. Starting Wattage ..... 5,300 _Vatts addition, if water enters generator through cooling air slots, VVattage ......4,000 _/atts some of the water will be retained in voids and cracks of Rated AC Load Current...
- Page 14 Engine Storage See engine operator's manual for instructions. The generator should be started at least once every seven days and allowed to run at least 30 minutes. If this cannot Other Storage Tips be done and you must store the unit for more than 30 days, o To prevent gum from forming in fuel system or on use the following guidelines to prepare...
- Page 15 TROUBLESHOOTING Problem Cause Reset circuit breaker. of the circuit breakers is open. Fault in generator. Contact Authorized service facility. No AC output is available, Poor connection or defective cord Check repair. generator is running° set. device that is in Connect another Connected device...
- Page 17 Effective September 1, 2004 replaces a[[ undated Warranties and a[[ Warranties dated before September 1, 2004 L[MmTED WARRANTY Briggs & Stratton Power Products Group, LLC will repair or replace, free of charge, any part(s) of the equipment that is defective in material or workmanship or both.
- Page 18 CONSERVE ESTAS [NSTRUCC[ONES TABLA DE CONTEN[DOS REGLAS DE SEGUR[DAD Reg[as De Seguridad ........ 18-20 Este es e[ simbo[o de a[erta de seguridad. Sirve Conozca Su Generador ........ para advertir a[ usuario de un posib[e riesgo para Mont.aie ..........su integridad fisica.
- Page 19 ADVERTENCmA ADVERTENCmA Opere el generador SOLAHENTE a[ aire libre. CUANDO ANADA COMBUSTIBLE O VACiE EL DEP6SmTO Asegu]rese de que los gases de escape no puedan entrar por ventanas, puertas, tomas de aire de vendHad6n u otras aberturas en un espado Apague eHgenerador (position...
- Page 20 ADVERTENCmA PRECAUCmON NO cambie ninguna veHocidad decerminada. EH generador suminiscra una frecuencia y un voHcaiecaHificado cuando funciona a una veHocidad determinada. CUANDO A]USTE O FiAGA REPARACmONES A SU GENERADOR NO modifique aHgenerador en ninguna forma. Siempre desconecte eHaHambrede Habuiia y coH6queHo donde no PRECAUCmON pueda encrar en concacco con Habuiia.
- Page 21 CONOZCA $U GENERADOR EA ESTE MANUAL OPERARIOY LAS REGLAS DE $EGURIDAD ANTES DE OPERAR $U GENERADORo Compare [as i[ustradones con su Generador para fami[iarizarse con [as ubicaciones de los diferentes contro[es y ajustes, Conserve este manual para referendas futuras, Tanque de[ Combustible Concador de HaHora V_.[vu[a de Combustible Aceite...
- Page 22 HONTAJE Agregue Combustible Su generador requiere de dertos procedimientos de montaie y NOTA: Este motor estk certificado para funcionar con gasolina. solo estar_t [isto para ser utilizado despues de habeHe Sistema de control de emisiones de gases de escape: suministrado servicio con el combustible y aceite recomendados,...
- Page 23 OEL GENERADOR Ubicaci6n deU Generador Espacio Libre AIrededor Generador Tierra deU Sistema ADVERTENCmA ERgenerador dispone de una conexi6n a qerra del sistema que conecta los componentes del basddor a bs terminales de derra de bs enchufes hembra de salida de CA. La qerra del sistema es_ conectada al came de CA neutro que, a su vez, es_...
- Page 24 OPERANDO EL GENE DOR ADVER'rENCIA Endenda eU Motor Desconect.e todas hs cargas electricas de[ generadon Use hs siguient.es instrucdones para encender, paso por paso, en orden numedco_ AsegOrese de que [a unidad est_ en una superfide piana. INPORTANTE: Si [a unidad no se arranca y ut.ihza en una superfide plana, se pueden produdr probRemas de arranque y de...
- Page 25 Parado De[ Motor Desconecte TODAS hs cargas el6ctricas de los tomaco- rrientes de[ panel de[ generador, NUNCA de arranque detenga el motor con los dispositivos electricos conectados 7 ENCENDIDOS. Deje que el motor fundone sin cargas por algunos minutos para estabilizar hs temperaturas internas de[ motor 7 el generadom:...
- Page 26 [201240 VoUdos AC, 20 Amperios, ADVERTENCmA Recept_cu[o de Seguridad Use un tap6n NEHA L14-20 con este recept_culo. Conecte ]uego de cable de 4 ahmbres, dasificado corno 250Vokios AC a 20Arnperios (o mayor) (Figura {3). Usted puede usar el rnisrno cable de 4-ahrnbres si phnea trabaiar con una carga de 120%kios.
- Page 27 NOTA: Si el disyuntor bipolar sa[ta, [as tomas domes se Si [a prueba de[ GFC[ es satisfactoria, restab[ezca desconectan. a[imentaci6n presionando firmemente el bot6n "Reset" hasta el rondo de forma que guede sujeto. Si el enchufe GFCi Use cada recept_cu[o para operar 120Vokios AC, de fase send[h, se rearma...
- Page 28 SOBRECARGUE GENE DOR Conecte y encienda [a pr6xima carga. De nuevo, permita que el generador se estabi[ice. Capacidad los pasos 4 y 5 para cada carga adiciona[ Repita que usted tenga. Usted debe asegurarse que su generador puede proveer sufidente vataje calificado (cuando est6 fundonando) y de carga NUNCA...
- Page 29 ESPECmFmCACmONES NOTA: NO recomendamos el uso de mangueras de jardin para [impiar e[ generador. E[ agua podria introducirse en e[ sistema de Vataje que empieza ..... 5,300 Vatios (5.3 [@_v') combustible de[ motor y causar prob[emas°Adem_s, si e[ agua se Vata[e .......
- Page 30 ALNACENANmENTO A[macenando e[ Motor E[ generador deber_, ser encen@do a[ menos una vez cada siete Consuke e[ manua[ de[ operario de[ motor para [as instrucciones d[as 7 deber_, dejar[o funcionar a[ menos durante 30 minutos. de c6mo preparar adecuadamente e[ motor para su no puede hacer esto y debe almacenar [a unidad por m_s de a[macenamiento.
- Page 31 DIAGNO$ITICO$ DE AVERiA$ Accion Prob[emo Causa E[ interruptor autom_tico de drcuito Reposicione el interruptomt esti abierto, Revise y repare, Conexi6n mar o defectuosa de.[ ]uego de cabRes, E[ motor est_ fundonando pero exist÷ samida de AC disponsibme° Conecte otro dispositivo que este E[ dispositivo conectado...
- Page 32 Fecha de entrada en vigor: t de Septiembre de 2004. Sustituye a todas las garanNas sin fecha y alas de fecha anterior al 1 de Septiembre de 2004 GARANTiA LmMmTADA Briggs & Stratton Power Products Group, LLC reparara o sustituira sin cargo alguno cualquier componente del equipo que presente defectos de materiales y/o mano de obra.
Need help?
Do you have a question about the XL4000 and is the answer not in the manual?
Questions and answers