
Related Manuals for Petsafe Elite Little Dog IN-GROUND FENCE PIG00-10773


Summary of Contents for Petsafe Elite Little Dog IN-GROUND FENCE PIG00-10773
- Page 1 Model Number PIG00-10773 elite little dog in-ground fence ™ operating and training guide Please read thIs eNtIre GuIde before beGINNING...
- Page 2 Important Safety Information Explanation of Attention Words and Symbols used in this guide This is the safety alert symbol. It is used to alert you to potential personal injury hazards. Obey all safety messages that follow this symbol to avoid possible injury or death.
- Page 3 This PetSafe In-Ground Fence is not a solid barrier. This system is ® ™ designed to act as a deterrent to remind pets by Static Correction to remain in the boundary established. It is important that you reinforce training with your pet on a regular basis.
- Page 4 • Plug the Surge Protector into a grounded (3-prong) outlet that is within 5 feet of the Fence Transmitter. ALWAYS use a grounded (3-prong) outlet to ensure maximum protection. • Do not remove the ground prong from the Surge Protector plug.
-
Page 5: Table Of Contents
— essentials that influence memories for a lifetime. If you have any questions about our products or training your pet, please visit our website at www.petsafe.net or contact our Customer Care Center at 1-800-732-2677. -
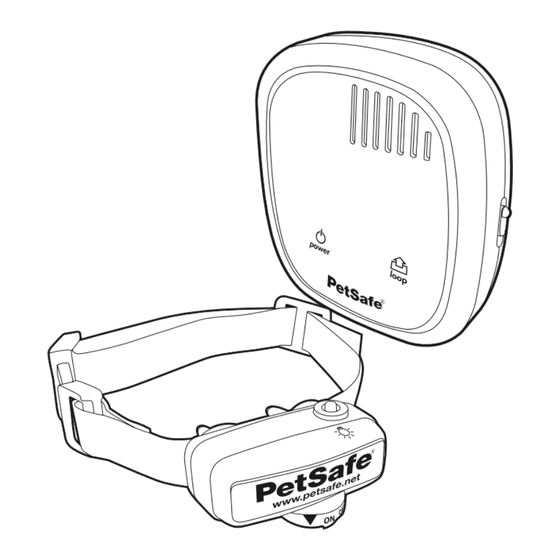
Page 6: Components
• Ground rod and clamp • Waterproofing compound (e.g. silicone caulk) • PVC pipe or water hose • Circular saw with masonry blade • Staple gun • Non-metallic collar and leash Fence installation and training help: www.petsafe.net Customer Care Center 1-800-732-2677... -
Page 7: How The System Works
Want professional installation help? Invisible Fence Brand installers will come to your home ® and install your new PetSafe System for an additional cost. Contact your local dealer at ® 1-877-866-DOGS (3647) or visit our website at www.invisiblefence.com for more information. -
Page 8: Operating Guide
Operating Guide Step Locate the Fence Transmitter Place the Fence Transmitter: • In a dry, well ventilated, protected area (1A, 1B). • In an area where temperatures do not fall below freezing (e.g., garage, basement, shed, closet). • Secured to a stationary surface using the mounting hardware. A mounting template is included on the back of this guide • At least 3 feet from large metal objects or appliances as these items may interfere with the signal consistency (1C). -
Page 9: Sample Layouts
B, B to C, C to D, D to E, E to A, twist the wires from A back to the Fence Transmitter. See the “Install the Boundary Wire” section for more information on attaching the wire to a fence. www.petsafe.net... - Page 10 Double Loop A Double Loop must be used when you are not establishing the Boundary Zone on all sides of your property. When using a Double Loop, the Boundary Wire must be separated by a minimum of 5 FEET to avoid canceling the signal. Remember that a Double Loop will require twice as much wire.
-
Page 11: Position The Boundary Wire
Surge Protector. If your layout includes a Secondary Loop to protect TWISTED WIRES landscaping, pool or garden areas, connect the twisted BOUNDARY WIRE WATERPROOF SPLICE wire between the Perimeter Loop and the Secondary CORRECT Loop. INCORRECT www.petsafe.net... - Page 12 To Splice or Repair the Boundary Wire If you need additional Boundary Wire to expand your wire loop, you will need to splice the wires together. Note the 3/8" 3/8" locations of all splices for future reference. Strip approximately ⁄ inch of insulation off the ends of the Boundary Wires to be spliced (3D).
-
Page 13: (Usa And Canada)
(3-prong) outlet to ensure maximum protection. • Do not remove the ground prong from the Surge Protector plug. Do not use a 3-prong plug to 2-prong outlet converter. Doing so will make the Surge Protector ineffective against surges or spikes. www.petsafe.net... - Page 14 Turn the power OFF to the outlet that the Surge Protector Fence Transmitter and Fence Transmitter will be plugged into. Loop Power Transmitter Adapter We recommend that, if Boundary Power possible, use the outlet center LP-4100 Wire Jack Terminals screw that holds the cover plate in place to secure the Red Loop Tabs Black...
-
Page 15: Connect The Wires To The Fence Transmitter (Australia & New Zealand)
You will have to reset the GFCI or RCD to restore power to the system. For added protection, when unused for long periods of time or prior to thunderstorms, unplug from the wall outlet and disconnect the loop boundary wires. This will prevent damage to the transmitter due to surges. www.petsafe.net... -
Page 16: Prepare The Receiver Collar
Be sure to discard the used battery properly. A replacement PetSafe battery can be found at many retailers. Contact the ® Customer Care Center or visit our website at www.petsafe.net to locate a retailer near you. Static Correction and Battery Test Feature When the RFA-188 Battery Module is first installed in the Receiver, the red LED will flash the current correction level setting (1-5). -
Page 17: Function And Response Table
Low Static Correction Timid 3 Red Flashes Medium Static Correction Timid or Average 4 Red Flashes Medium High Static Average or Correction High Energy 5 Red Flashes High Static Correction High Energy Flashes 1 Red flash Low Battery every 20 seconds www.petsafe.net... -
Page 18: Set The Boundary Width And Test The Receiver Collar
Step Set the Boundary Width and Test the Receiver Collar With the Boundary Wire in place and properly connected, it is time to set the containment field and test the system. The Receiver Collar should NOT be on your dog when the system is tested. Note: The Receiver Collar is waterproof, which can make the tone hard to hear. - Page 19 (6G). If you are satisfied that your system is functioning properly, you are ready to start burying the Boundary Wire. If the Receiver Collar did not tone or the Test Light did not flash, see the “Troubleshooting” section. www.petsafe.net...
-
Page 20: Install The Boundary Wire
3. Use a blunt tool such as a wooden paint stick to push the Boundary Wire into the trench. Be careful not to damage the Boundary Wire insulation. To Attach the Boundary Wire to an Existing Fence The Boundary Wire of the PetSafe Elite Little Dog In-Ground Fence can be ®... -
Page 21: Place The Boundary Flags
Note: If you cannot hear the beep, see the Test Light Instructions in Step 6. To prevent an unintended corection, after the Boundary Flags have been placed, be sure to set the static correction on the Receiver Collar back to level 1 Tone Only. www.petsafe.net... -
Page 22: Fit The Receiver Collar
Step Fit the Receiver Collar Important: The proper fit and placement of your Receiver Collar is important for effective training. The Contact Points must have direct contact with your pet’s skin on the underside of his neck. Please read and follow the instructions in this manual. Proper fit of the collar is important. - Page 23 To Re-Thread the Collar Slide Buckle The slide buckle prevents the collar from becoming loose around your pet’s neck. Ridges The ridges must be facing up; the collar will slip if it is not properly threaded. www.petsafe.net...
-
Page 24: Training Guide
Important: Proper training of your pet is essential to the success of the PetSafe Elite Little Dog In-Ground Fence . Read this section completely before ® ™ beginning to train your pet. Remember that the PetSafe Elite Little Dog In- ® Ground Fence is not a solid barrier. ™... -
Page 25: Days 2 Thru 4 - Continue Boundary Awareness
Static Correction, increase the Static Correction Level by 1. Watch for slight reactions at first such as ears up, head turned, looking at the ground. 4. Stay at the same flag until your pet resists going into the Static Correction Zone. www.petsafe.net... -
Page 26: Days 5 Thru 8 - Distraction Phase
Phase Days 5 thru 8 - Distraction Phase Perform three training sessions per day, each lasting 10 to 15 minutes. Goal: To train your pet to stay within the Pet Area with distractions outside of the Pet Area. Setup: • Program the Static Correction Level on the Receiver Collar to level 2 or higher depending on the reaction results from days 2 thru 4. -
Page 27: Days 9 Thru 14 - Unleashed Supervision
You may initially need to convince your pet to leave the Pet Area with a food treat and lots of praise. Note: You may also carry your pet out of the Pet Area. Congratulations! You have now successfully completed the training program. www.petsafe.net... -
Page 28: Accessories
Accessories To purchase additional accessories for your PetSafe Elite Little Dog In-Ground Fence ® ™ contact the Customer Care Center at 1-800-732-2677 or visit our website at www.petsafe.net to locate a retailer near you. Component Part Number Battery RFA-188 Power Adapter for the Fence Transmitter (USA and Canada) -
Page 29: Troubleshooting
10 feet of electrical wires, neighboring containment systems, telephone wires, television or antenna cables, or satellite dishes. • If a neighboring containment system may be causing an inconsistent signal, move the Boundary Wire farther away from the neighboring containment system. www.petsafe.net... -
Page 30: Additional Information
• The system should only be used with healthy pets. Contact your veterinarian if you have concerns about the medical condition of your pet (medication, pregnant, heart conditions, etc.). • The PetSafe Elite Little Dog In-Ground Fence is for residential use only. -
Page 31: System Test
14. When testing is complete, return the Boundary Control Switch and the Boundary Width Control setting to their original position. 15. Repeat the Boundary Width testing from Step 6 on Page 18 until you achieve the desired Boundary Width between 12 to 20 feet. www.petsafe.net... -
Page 32: Transmitter Loop Test (Usa And Canada)
Transmitter Loop Test (USA and Canada) The Transmitter Loop Test is a simple test to determine the cause of a “Boundary Wire Broken or Disconnected” alarm indication. You will need a short 10 foot piece of Boundary Wire with ⁄ inch of insulation stripped from both ends. -
Page 33: Wire Break Location Test
Product. Buyer assumes all risks and liability from the use of this Product. 5. Modification of Terms and Conditions Radio Systems Corporation reserves the right to change the terms, conditions and ® notices under which this Product is offered. www.petsafe.net... -
Page 34: Compliance
Monday - Friday 10:30 AM - 7 PM This product has the benefit of a limited manufacturer’s warranty. Details of the warranty applicable to this product and its terms can be found at www.petsafe.net and/or are available by sending a stamped addressed envelope to PetSafe Ltd. - Page 35 www.petsafe.net...
-
Page 36: Mounting Template
Layout Grid Mounting Template Drill Here 3.000" (7.62 cm) Drill Here Radio Systems Corporation ® 10427 PetSafe Way Knoxville, TN 37932 1-800-732-2677 www.petsafe.net Protected by US Patents 6,538,617, 7,541,937, and D531,117. 400-1414 ©2007 Radio Systems Corporation...
Need help?
Do you have a question about the Elite Little Dog IN-GROUND FENCE PIG00-10773 and is the answer not in the manual?
Questions and answers