Table of Contents
Advertisement
Instruction
Manual
I CRRFTSMRN°I
32cc/1.9 cu.in. 2-Cycle
GASOLINE
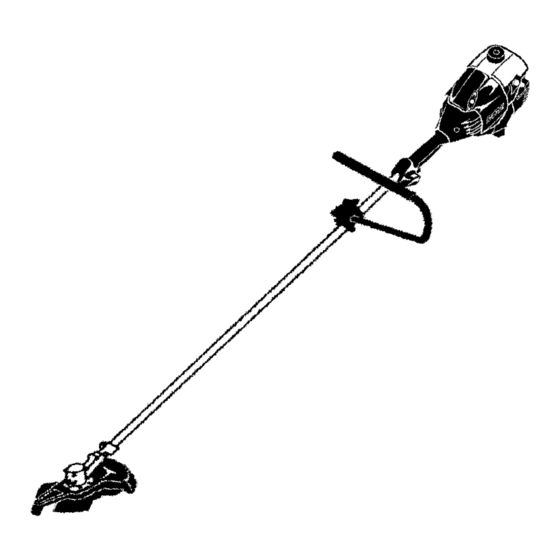
BRUSHWACKER
®
Model No.
358.795180
•
Safety
•
Assembly
•
Operation
•
Maintenance
•
Parts List
•
Espa_ol
For Occasional
Use Only
DANGER:
Read and follow all Safety
Rules and Operating
Instructions
before first use of this product.
For answers
to your questions
about this product:
Call 7 am-7
pm, Mon.-Sat.,
or 10 am-7
pm, Sun.
1-800-235-5878
<Hours listed are Central Time)
Sears,
Roebuck
and Co., Hoffman
Estates,
IL 60179 U.S.A.
530088128
12/3/01
Advertisement
Table of Contents

Subscribe to Our Youtube Channel
Summary of Contents for Craftsman BRUSHWACKER 358.795180
- Page 1 Instruction Manual I CRRFTSMRN°I 32cc/1.9 cu.in. 2-Cycle GASOLINE BRUSHWACKER ® Model No. 358.795180 • Safety • Assembly • Operation • Maintenance • Parts List • Espa_ol For Occasional Use Only DANGER: Read and follow all Safety Rules and Operating Instructions before first use of this product.
- Page 2 Back Cover FULL TWO YEAR WARRANTY ON CRAFTSMAN ® GAS POWERED BRUSHWACKER ® BLADED TRIMMER. For two years from the date of purchase, when this Craftsman Gas Powered Brushwacker is maintained, lubricated, and tuned up according to the operating and maintenance...
- Page 3 Keep cutting line at the proper length. ® • Use only Craftsman <_brand replace- ment line. Never use wire, rope, string, etc. • Install required shield properly before using the unit. Use the metal shield for all metal blade use. Use the plastic...
- Page 4 • Keep o thers away w hen m aking car- • Stop the unit before carrying buretor adjustments. • Keep muffler away from your body • Use only recommended Craftsman • Allow the engine to cool and secure accessories and replacement parts.
- Page 5 CARTON CONTENTS Handlebar Check carton c ontents against the fol- lowing list. Model 358.795180 • Brushcutter • Blade Shield Screws (4) • Cupped Washer • Large Nut for installing Blades • Hex Wrench • Metal Shield Rotate handlebar/clamp counter- • Plastic Shield clockwise toward engine until •...
- Page 6 CONFIGURING YOUR U NIT You can configure your u nit u sing a cutting head f orgrass a nd light weeds, oraweed b lade f orcutting ,,t-Gearbox grass, weeds, and brush u pto1/2 inch indiameter. To assemble your l_,_/--- Dust Cup unit, gotothe section forthe desired configuration and follow the instruc-...
- Page 7 NOTE: Remove the trimmer head INSTALLATION OF THE METAL BLADE and plastic shield before attaching metal shield and installing one of the _/L WARNING: Wear protective weed blades. To remove the trimmer head, push in locking lever and hold. gloves when handling or performing maintenance on the blade to avoid inju- Rotate trimmer head until the locking ry.
- Page 8 space between the blade and the dust Gearbox cup or the retaining washer. 7. Push in locking lever and hold. Shield 8. Rotate blade nut until the locking lever falls into one of the grooves in the dust cup. Dust Cu Threaded Shaft _¢/...
- Page 9 2-cycle air-cooled en- fuel) gine oil. We recommend Craftsman brand synthetic oil. Mix gasoline and oil at a ratio of 40:1. A 40:1 ratio is ob- tained by mixing 3.2 ounces of oil with 1 Position gallon of unleaded gasoline.
- Page 10 NOTE: If engine has not started, pull starter rope 5 more pulls. If engine still does not run, it is probably flooded. STARTING A FLOODED ENGINE Flooded engines can be started by placing the choke lever in the OFF CHOKE position; then, pull the rope to clear the engine of excess fuel.
- Page 11 Do not r un the engine atahigher speed than necessary. The cutting line will c ut Trimming efficiently when t he engine isrun atless than full t hrottle. Atlower speeds, there isless e ngine noise a nd vibration. cutting line will l ast l onger and will b e less l ikely to %reid"...
- Page 12 • Cut only at full throttle. The blade will Sweeping have maximum cutting power and is less likely to bind or stall. • "Feed" the blade deliberately not too rapidly. The blade can thrust away if it is fed too rapidly. •...
- Page 13 MAINTENANCE SCHEDULE WARNING: Disconnect the spark plug before performing maintenance except for carburetor adjustments. CARE & MAINTENANCE TASK WHEN TO PERFORM Before each use Check for loose fasteners and parts Before each use Check for damaged or worn parts After each use Inspect and clean unit and decals Clean air filter Every 5 hours of operation...
- Page 14 LINE REPLACEMENT Carburetor adjustment is critical and if • Always use Craftsman replacement done improperly can permanently line. damage the engine as well as the car- buretor. If you require further assis- Choose the line size best suited for tance or are unsure about performing the job at hand.
- Page 15 Run engine at least 5 min- lated area where fuel vapors cannot utes after adding stabilizer. reach sparks or open flames from Craftsman 40:1,2-cycle engine oil (air water heaters, electric motors or cooled) is already blended with fuel switches, furnaces, etc.
- Page 16 TROUBLESHOOTING TABLE WARNING: Always stop unit and disconnect spark plug before perform- ing all of the recommended remedies below except remedies that require operation of the unit. TROUBLE CAUSE REMEDY 1. See "Starting a Flooded Engine" in Engine will not 1.
- Page 17 struction manual. Sears recommends for replacement as required mainte- that y ou retain all r eceipts covering nance shall be warranted for the period maintenance onyour small off-road en- of time up to the first scheduled replace- gine, but S ears cannot deny w arranty ment point for that part.


Need help?
Do you have a question about the BRUSHWACKER 358.795180 and is the answer not in the manual?
Questions and answers