Table of Contents
Advertisement
Available languages
Available languages
PERATOR'S MAN
AL
T
®
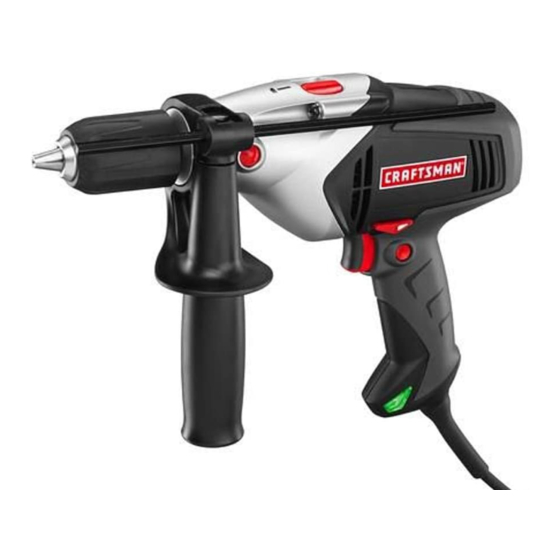
1/2 in. HAMMER DRILL
VARIABLE SPEED/REVERSIBLE
DOUBLE iNSULATED
TALADRO DE PERCUSI6N
DE 13 mm (1/2 pulg.)
VELOCIDAD VARIABLE/ROTACI6N
INVERTIBLE
DOBLE AISLAMIENTO
Model No.
315.101371
A
WARNING:
To reduce the risk
of injury, the user must read and
understand the operator's manual
before using this product.
A
ADVERTENCIA:
Para reducir el
riesgo de lesiones, el usuario debe leer
y comprender el manual del operador
antes de usar este producto.
Customer
Help Line: 1-800-932-3188
Tel_fono de atenciOn al consumidor:
1-800-932-3188
Sears Brands Management,
3333 Beverly
Rd,, Hoffman
Estates,
IL 60179 USA
Visit the Craftsman
web page: www.sears.com/craftsman
Visite el sitio web de Craftsman: www.sears.com/craftsman
987000-102
9-9-10 (REV:01)
Save this
manual
for future
reference
Guarde
este manual
para futuras
consulta
C
Advertisement
Table of Contents

Related Manuals for Craftsman 315.101371


Summary of Contents for Craftsman 315.101371
- Page 1 Tel_fono de atenciOn al consumidor: 1-800-932-3188 Sears Brands Management, 3333 Beverly Rd,, Hoffman Estates, IL 60179 USA Visit the Craftsman web page: www.sears.com/craftsman Visite el sitio web de Craftsman: www.sears.com/craftsman Save this manual for future reference 987000-102 Guarde este manual para futuras...
- Page 2 Parts Ordering / Service ......Back page CRAFTSMAN ® ONE YEAR LIMITED WARRANTY FOR ONE YEAR from the date of purchase, this product is warranted against any defects in material or workmanship. With proof of purchase, defective product will be replaced free of charge.
-
Page 3: Work Area Safety
WARNING! Read aii instructions. Failure to follow [] Remove any adjusting key or wrench before turning the power tool on. A wrench or a key left attached to all instructions listed below may result in electric a rotating part of the power tool may result in personal shock, fire and/or serious injury. - Page 4 SERVICE When servicing a power tool, use only identical replacement parts. Follow instructions in the Have your power tooJ serviced by a qualified repair Maintenance section of this manual. Use of person using only identical replacement parts. unauthorized parts or failure to follow Maintenance This will ensure that the safety of the power tool is instructions may create a risk of shock or injury.
-
Page 5: Symbols
Thefollowing signal w ordsandmeanings a reintended to explain the levels ofriskassociated w iththis product. SYMBOL SIGNAL MEANING Indicates an imminently hazardous situation, which, if not avoided, will DANGER: result in death or serious injury. Indicates a potentially hazardous situation, which, if not avoided, could WARNING: result in death or serious injury. -
Page 6: Double Insulation
DOUBLE INSULATION EXTENSION CORDS Double insulation is a concept in safety in electric power When using a power tool at a considerable distance from tools, which eliminates the need for the usual three-wire a power source, be sure to use an extension cord that has grounded power cord. -
Page 7: Product Specifications
PRODUCTSPECIFICATIONS Chuck ............in. Keyless Blows Per Minute (BPM) ......0-16,000/min. Switch ........Variable Speed/Reversible Input ........V, 60 Hz, AC only, 6Amps No Load Speed ......... 0-1,000 r/rain. (RPM) Net Weight ............. 5.02 Ibs. KNOW YOUR HAMMER DRILL KEYLESS CHUCK See Figure 1, page L The keyless chuck allows you to hand-tighten... - Page 8 PACKING LiST UNPACKING This product has been shipped completely assembled. Hammer Drill with Auxiliary Handle Assembly [] Carefully remove the product and any accessories from Depth Stop Rod the box. Make sure that all items listed in the packing Carrying Case list are included.
- Page 9 [] Rotate the chucksleeve counterclockwise to openthe CAUTION:Toprevent g eardamage, always allow chuckjaws. the chuckto cometo a complete stopbefore chang- ingthedirection of rotation. [] Remove t hedrillbit. [] Release the spindle lock. Tostopthe drill,release theswitchandallowthe chuckto cometo a complete stop. USING THE AUXILIARY HANDLE...
-
Page 10: Metal Drilling
[] Depress t hevariable speed switch. prevent the drill bit from slipping off-center as the hole is started. [] Pushinandholdthelock-onbutton,located onthe sideofthehandle. [] When drilling metals, use a light oil on the drill bit to [] Release t hevariable speedswitch. keep it from overheating. -
Page 11: General Maintenance
Only the parts shown on the parts list are intended to be WARNING: When servicing, use only identical repaired or replaced by the customer. All other parts Craftsman replacement parts. Use of any other parts should be replaced at a Sears Service Center. may create a hazard or cause product damage. - Page 13 CRAFTSMAN HAMMER DRILL - MODEL NUMBER 315.101371 SEENOTE NOTE: The assembly shown represents an important part of the Double Insulated System. To avoid the possibility of alteration or damage to the System, service should be performed by your nearest Sears Repair Center. Contact your nearest Sears Retail Store for Service Center information.
-
Page 14: Parts List
_" CRAFTSMAN HAMMER DRILL - MODEL NUMBER 315.101371 The model number will be found on a plate attached to the motor housing. Always mention the model number in all correspondence regarding your HAMMER DRILL or when ordering repair parts, SEE BACK... - Page 16 RIGHT FORMACORRECTA A - Drill bit (broca) B - Chuck jaws (mordazas del portabrocas) C - Keyless chuck (portabrocas de apriete sin Ilave) D - Spindle lock button (boton del seguro del husillo) A - Auxiliary handle (mango auxiliar) B - Drilling/hammer mode selector (selector de modalidad de taladrado) C- Levels (niveles) D - Direction of rotation selector [forward/reverse] (selector de sentido de rotacion [adelante / atr_s])
- Page 17 F_[g. g A - Mallet (mazo de goma) B - Hex key (llave hexagonal) C - Chuck (portabrocas) A - Drilling depth (profundidad de taladrado) B - To decreasedrilling depth (para disminuir la profundidad de taladrado) C - To increasedrilling depth (para aumentar la profundidad de taladrado) D - Depth stop clamp (abrazadera limitadora de profundidad)
- Page 18 Evite un arranque accidental de la unidad. AsegSrese iADVERTENCIA! Lea todas las instrucciones. de que el interruptor est_ en la posici6n incumplimiento de las instrucciones que se ofrecen apagado antes de conectar la herramienta. Portar a continuaci6n puede causar descargas el_ctricas, las herramientas el_ctricas...
- Page 19 bien afilados, tienen menos probabilidad de trabarse en la s6lo piezas de repuesto id_nticas. De esta manera se pieza de trabajo y son m_s f_ciles de controlar. mantiene )a seguridad de )a herramienta e)_ctrica. Utilice la herramienta el_ctrica, los accesorios y brocas, iADVERTENC(A! Para reducir el riesgo de lesiones,...
-
Page 20: S[Mbolos
Lassiguientes p alabras d ese_alizaci6n y sussignificados tienenporobjetoexplicar l osniveles deriesgo relacionados conesteproducto. SIMBOLO SEI_AL SIGNIFICADO Indica una situaci6n peligrosa inminente, la cual, si no se evita, causar_ PELIGRO: la muerte o lesiones graves. Indica una situaci6n peligrosa posible, la cual, si no se evita, puede ADVERTENCIA: causar la muerte o lesiones graves. -
Page 21: Cables De Extension
DOBLE AISLAMIENTO CABLES DE EXTENSION El doble aislamiento, una caracter[stica de seguridad de Si media una distancia importante entre la herramienta las herramientas el_ctricas, elimina la necesidad de usar el_ctrica y la fuente de voltaje, aseg0rese de que el cable el tradicional cable el_ctrico de tres conductores de extensi6n que utilice tenga la capacidad suficiente conexi6n a tierra. -
Page 22: Especificaciones Del Producto
ESPECIFICACIONES DEL PRODUCTO Portabrocas .... 13 mm (1/2 pulg.), de apriete sin Ilave Golpes por minuto (GPM) ......De 0 a 16 000 Corriente de entrada ..120 V, 60 Hz, 6 A, sOlo corr. alt. Interruptor ..... Velocidad variable y rotaciOn invertible Peso neto .......... -
Page 23: Lista De Empaquetado
DESEMPAQUETADO LISTA DE EMPAQUETADO Este producto se empaca completamente armado. Taladro de percusi6n con sistema de mango auxiliar Extraiga cuidadosamente de la caja el producto y los Barra limitadora de profundidad accesorios. Compruebe que est_n presentes todos Estuche art[culos enumerados en la lista de empaquetado. - Page 24 C()MO ESCOGER LA TALADRADO DE PERCUSI()N Para detener el taladro, suelte el interruptor de velocidad variable y espere a que el portabrocas se detenga DE TALADRADO NORMAL completo. Vea la figura 5, pggina ft. NOTA: El taladro no funcionar_ si el selector de rotaci6n Para escoger el tipo de taladrado, ponga el selector...
- Page 25 Asegure la pieza de trabajo en una prensa de banco, impedir que la broca abandone el punto inicial. Aumente o con prensas de mano, para evitar que rote al girar la la velocidad a medida que la broca penetra en el material. broca.
-
Page 26: Mantenimiento
ADVERTENCIA: Para dar servicio a la herramienta, de piezas pueden set reparados o cambiados pot el utilice solamente piezas de repuesto Craftsman consumidor. Todas las piezas restantes deben set id_nticas. El empleo de piezas diferentes puede reemplazadas en un centro de servicio Sears. - Page 28 Your Home For expert troubleshooting and home solutions advice: www.managemyhome.com For repair - in your home - of all major brand appliances, lawn and garden equipment, or heating and cooling systems, no matter who made it, no matter who sold it! For the replacement parts, accessories owner's manuals that you need to do-it-yourself.
Need help?
Do you have a question about the 315.101371 and is the answer not in the manual?
Questions and answers