Table of Contents
Advertisement
Available languages
Available languages
Quick Links
Download this manual
See also:
Manual
Advertisement
Table of Contents

Subscribe to Our Youtube Channel
Related Manuals for Frigidaire Professional PL36WC40EC


Summary of Contents for Frigidaire Professional PL36WC40EC
- Page 1 PROFESSIONAL SERIES Model PL36WC40EC ENGLISH ........2 FRAN(_AmS........ 10...
- Page 2 INTENDED FOR DOMESTIC COOKING ONLY _, WARNING TO REDUCE THE RISK OF FIRE, ELECTRIC SHOCK, OR iNJURY TO PERSONS, OBSERVE THE FOLLOWING: 1. Use this unit only in the manner intended by the manufacturer. If you have questions, contact the manufacturer at the address or telephone number listed in the warranty.
-
Page 3: Operation
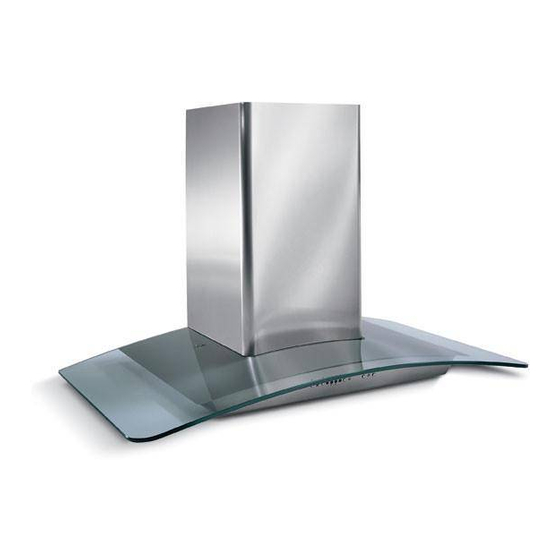
OPERATION Controls The hood is operated using the (5) push-buttons located at eye-level, on the front edge of the hood. The light switch turns the halogen lights on and off. Push the light switch once to turn the lights ON - push a second time to turn the lights ON to a brighter level - push a third time to turn the lights OFF. -
Page 4: Maintenance
MAINTENANCE Proper maintenance of the Range Hood will assure proper performance of the unit. Grease Filters The grease filters should be cleaned frequently. Use a warm detergent solution. Grease filters are dishwasher safe. See "INSTALL FILTERS" section for removal and installation instructions. Non-Ducted Recireulation Filter... - Page 5 INSTALL THE DUCTWORK ROOF CAR CAUTION: To reduce the risk of fire, use only metal ductwork. 1. Decide where the ductwork will run between the hood and the outside. ROUND DUCT 2. A straight, short duct run will allow the hood to perform most efficiently. 3.
-
Page 6: Install Flue Mounting Bracket
iNSTALL FLUE MOUNTING BRACKET (DUCTED AND NON-DUCTED HOODS) 1. Assemble the flue mounting bracket, adjusting outside width as shown. See Figure 8. 2. Carefully center the mounting bracket directly over the range hood location. 3. Secure the bracket assembly to the ceiling using (2) 4.8x38mm mounting screws and drywall anchors (Fig. 9). Make sure the bracket is pushed into the corner, tight against the wall and centered over the hood. -
Page 7: Install The Hood
PREPARE THE HOOD (NON - DUCTED HOODS ONLY) Note: The following materials must be purchased separately for non-ducted recirculation installations. Non - Ducted Recirculation Kit, Model 5304447635. 5" diameter duct. 1. Remove the tape on the electrical system plate; place the electrical system plate on the hood (use a protection). Fig. 12 2. - Page 8 9.Carefully place thedecorative flueonthehood.Fig.I6. - Onducted installation inrooms w ith8-foot c eilings, t heairvents areconcealed. Install thefluewiththeairvents down. non-ducted installations in rooms with 8-foot ceilings, the air vents are exposed. Install the flue with the air vents up. - On ducted and non-ducted installations in rooms with 9-foot ceilings, the vents are exposed.
-
Page 9: Limited Warranty
LIMITED WARRANTY Your range hood is protected by this warranty WARRANTY THROUGH AUTHORIZED CONSUMER WiLL PERIOD SERVICERS WILL: RESPONSIBLE FOR: FULLONE-YEAR ! One year from origina_ Pay all costs for repairing or replacing any parts of this Costs of service cells that are WARRANTY j purchase date. - Page 10 SEULEIVlENT POUR UTILISATION DOMESTIQUE ,_ _, AVERTISSEMENTS POUR REDUIRE LIES RISQUES D'INCENDIE, DE DECHARGES ELECTRIQUES OU DE DOMMAGES PERSONNES, OBSERVEZ LES INSTRUCTIONS SUIVANTES: 1. N_uti_isez_etapparei_que_mme_e_aestindiquepar_e_nst_u_teur.Siv_usave_despr_b_emes_nta_tez_efabriquantM_ad_esse ou au numero detelephone indiques dans la garantie. 2. Avant de pourvoir &l'entretien ou au nettoyage de votre appareil, eteignez-le au tableau des commandes ou bloquez letableau...
- Page 11 FONCTIONNEMENT Commandes Votre hotte fonctionne grace au× (5) boutons sur lesquels vous devez appuyer et qui se trouvent a. la hauteur de vos yeux, sur le devant de votre hotte. Le bouton de la iurniere alIume et eteint les tampes halogenes. En pressant 1 fois la touche, la lumiere s'a!lume au I _' niveau;...
-
Page 12: Entretien
ENTRETIEN Un bon entretien de votre hotte garantira une excellente performance. Fiitres a graisse Les filtres a graisse devront _tre frequemment nettoyes. Utilisez une solution b. base de detergent tiede. Les filtres b. graisse peuvent aller au lave-vaisselle. Voir la section " INSTALLATION DES FILTRES "... -
Page 13: Installation
INSTALLATION DU SYSTEME D'EVACUATION COUVERCLE TOIT ATTENTION: Pour r_duire ies risques d'incendie, n'utilisez que des tuyaux en m_tal. TUYAU ROND 1. Decidez oQ le tuyau rond dolt _tre installe, entre votre hotte et I'exterieur. 2. Un tuyau droit et court permettra b. votre hotte de fonctionner d'une fagon plus efficace. - Page 14 iNSTALLATiON ETRIER DE SUPPORT (HOTTES CARENEES OU NON CARENEES) 1. Assemblez le support de fixation du carneau en reglant la largeur exterieure comme indique. Fig. 8. 2. Centrez soigneusement le support de fixation directement sur I'emplacement destine a la hotte. 3.
- Page 15 PREPARATION DE LA HOTTE (CONFIGURATION NON CARE-NE-E) Remarque • Le mat@iel dolt _tre achete separement pour des installations non carenees. Kit de recirculation non carene, modele 5304447635. Conduit de 5" de diametre. 1. Enlevez le ruban adhesif sur le panneau du systeme electrique; placez le panneau du systeme electrique sur la hotte (utilisez une protection).
-
Page 16: Installation Des Filtres
9.Placez p recautionneusement lecarneau d ecoratif surlahotte (Fig.16). - Pour l eshottes c ar6n6es, !orsque leplafond e stde8',lesprises d 'airducarneau sup@ieur sont d issimulees. Installez Iecarneau avec lesprises d 'airverslebas. -Pour l eshottes n oncar_n6es, Iorsque leplafond e stde8',tesprises d 'airducarneau sup@ieur seront visibles une fois installees. -
Page 17: Garantie Limitee
GARANTIE LIMITEE Votre hotte est protegee par cette garantie PERIODE DE AU TRAVERS DE NOS AGENTS LE CONSOMMATEUR SERA GARANTIE AGR_:ES, NOUS : RESPONSABLE DE : GARANTIE D'UN AN Un an & partir de la date Paierons tousles frais de reparation ou de remplacement Frais d'appets techniques qui d'aehat d'odgine de toute piece de eet appareit defectueuse en terme de sont repertories eomme etant DE... - Page 18 SERVICE PARTS MODEL PL36WC40EC KEY NO. PART NO. DESCRiPTiON B08087294 Grease Filter B02300233 Motor Capacitor BE3348100 Electrical System Plate B03295005 Terminal Box B02300891 Halogen Lamp Bulb B03292357 Control Board Box BWO000027 Control Boards + Trimming B03294033 Control Board Cover BWO000019 Blower B02310203 Motor...
- Page 19 LISTE PIECES DE RECHANGE MODELE PL36WC40EC PART N. DESCRIPTION B08087294 Filtre _.graisse Condensateur B02300233 BE3348100 Panneau du syst_me 61ectrique BoTte borne B03295005 B02300891 Lampe halog&ne B03292357 Botte installation electrique BW0000027 Circuit imprim6 commandes + Enjoliveur B03294033 Couvercle botte installation electrique BW0000019 Convoyer Moteur...
- Page 20 SERVICE PARTS - LISTE PIECES DE RECHANGE MODEL PL36WC40EC 38{B03292357_ ____ 151 L__j ........62 B02300674 B02300782 ..............223 ......• 99043735A 04307455/1 - 20 -...
Need help?
Do you have a question about the Professional PL36WC40EC and is the answer not in the manual?
Questions and answers