
Related Manuals for Frigidaire PL36WC50EC


Summary of Contents for Frigidaire PL36WC50EC
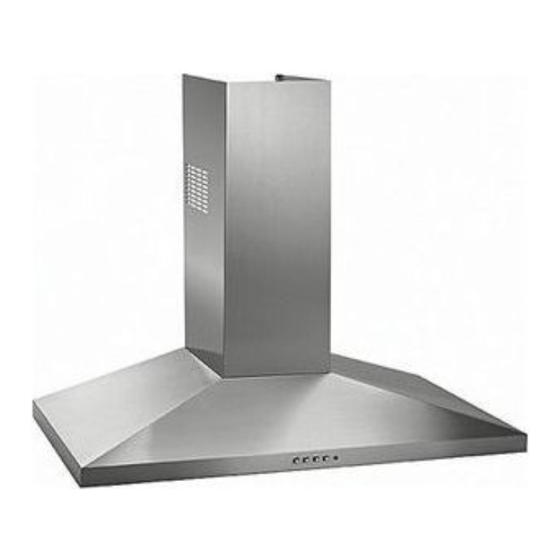
- Page 1 PL36WC50EC Model ENGLISH...3 FRANÇAIS...12 99043841A...
-
Page 2: To Reduce The Risk Of Fire, Electric Shock, Or Injury To Persons, Observe The Following
READ AND SAVE THESE INSTRUCTIONS INTENDED FOR DOMESTIC COOKING ONLY WARNING TO REDUCE THE RISK OF FIRE, ELECTRIC SHOCK, OR INJURY TO PERSONS, OBSERVE THE FOLLOWING: 1. Use this unit only in the manner intended by the manufacturer. If you have questions, contact the manufacturer at the address or telephone number listed in the warranty. -
Page 3: Operation
OPERATION Controls The hood is operated using the (4) push-buttons located at eye-level, on the front edge of the hood. The light switch turns the halogen lamps on and off. The blower on-low / off switch turns the blower on to its lowest running speed. The blower must be turned on using this switch. -
Page 4: Prepare The Hood
PREPARE THE HOOD Unpack hood and check contents. You should receive: 1 - Hood 1 - Decorative Flue Assembly 1 - Parts Bag containing: 1 - Mounting Bracket 1 - Discharge Collar 1 - Flue Mounting Bracket 8 - Mounting Screws (4.8 x 38mm Pan Head) 4 - Mounting Screws (3.9 x 9.5mm Pan Head) 2 - Mounting Screws (3.9 x 6mm Flat Head) 8 - Drywall Anchors... -
Page 5: Install The Ductwork
INSTALL THE DUCTWORK (DUCTED HOODS ONLY) CAUTION: To reduce the risk of fire, use only metal ductwork. 1. Decide where the ductwork will run between the hood and the outside. 2. A straight, short duct run will allow the hood to perform most efficiently. 3. -
Page 6: Install Flue Mounting Bracket
INSTALL FLUE MOUNTING BRACKET (DUCTED AND NON-DUCTED HOODS) 1. Assemble the flue mounting bracket, adjusting outside width as shown. See Figure 7. 2. Carefully center the mounting bracket directly over the range hood location. 3. Secure the bracket assembly to the ceiling using (2) 4.8x38mm mounting screws and drywall anchors (Fig. 8). Make sure the bracket is pushed into the corner, tight against the wall and centered over the hood. -
Page 7: Install The Hood
PREPARE THE HOOD (NON - DUCTED HOODS ONLY) Note: The following materials must be purchased separately for non-ducted recirculation installations. Non - Ducted Recirculation Kit, Model DFKTWC50EC. 5” diameter metal duct. 1. Discard discharge collar supplied with the hood. Install the 5” to 6” adapter supplied with the Non-Ducted Recirculation Kit. -
Page 8: Make Electrical Connections
MAKE ELECTRICAL CONNECTIONS WARNING: Electrical wiring must be done by a qualified person(s) in accor- dance with all applicable codes and standards. This range hood must be properly grounded. Turn off electrical power at service entrance before wir- ing. 1. Remove the wiring box cover. Remove a knockout from the wiring box. 2. -
Page 9: Install Filters
INSTALL FILTERS (DUCTED AND NON-DUCTED HOODS) 1. To remove the GREASE filter, push in on the metal latch tab and tilt filter downward to remove. 2. To install the GREASE filter, align rear filter tabs with slots in the hood. Depress the metal latch tab, push filter into position and release. - Page 10 Service under this warranty must be obtained by contacting Electrolux at the addresses or phone numbers below. This warranty only applies in the USA and Canada. In the USA, your appliance is warranted by Electrolux Major Appliances North America, a division of Electrolux Home Products, Inc. In Canada, your appliance is warranted by Electrolux Canada Corp.
-
Page 11: Service Parts
SERVICE PARTS - LISTE PIECES DE RECHANGE MODELS PL36WC50EC KEY No. DESCRIPTION (ENGLISH ) Grease Filter Motor Capacitor Wiring Plate Lamp Bulb Blower Motor Blower Wheel Rubber Washer Blower Mounting Cover Filter support Cable Discharge Collar Logo Wiring Box Wiring Box Cover... - Page 12 SERVICE PARTS - LISTE PIECES DE RECHANGE MODEL PL36WC50EC - 22 -...
Need help?
Do you have a question about the PL36WC50EC and is the answer not in the manual?
Questions and answers