Table of Contents
Advertisement
Quick Links
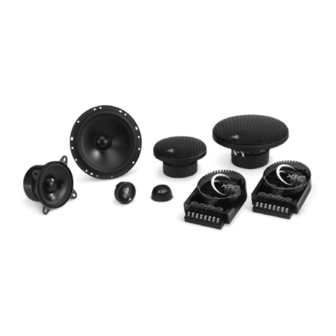
XR653-CS
6.50-inch (160 mm) 3-Way Component Speaker System
o w n e r ' s m a n u a l
Thank you for choosing JL Audio Evolution XR Coaxials for your
automotive sound system. With proper installation, your new
speakers will deliver years of listening pleasure.
We strongly recommend that you have your new Evolution speakers
installed by your authorized JL Audio dealer. The installation
professionals employed by your dealer have the necessary tools and
experience to disassemble your interior panels, install your new
speakers and reassemble your vehicle properly. Also, keep in mind
that your warranty coverage extends to 1 year if your system is
installed or approved by your authorized JL Audio dealer. If you
prefer to perform your own installation, please read this instruction
manual completely before beginning the process.
Advertisement
Table of Contents

Related Manuals for JL Audio XR653-CS


Summary of Contents for JL Audio XR653-CS
- Page 1 6.50-inch (160 mm) 3-Way Component Speaker System o w n e r ’ s m a n u a l Thank you for choosing JL Audio Evolution XR Coaxials for your automotive sound system. With proper installation, your new speakers will deliver years of listening pleasure.
-
Page 2: Included Hardware
• Two XR653-CSxo 3-Way Crossover networks mounting surface. Also check for any potential obstacles, such as window tracks and motors, wiring harnesses, etc. Check both sides of the car, many cars are not symmetrical! • Always wear protective eyewear. JL AUDIO XR653-CS... -
Page 3: Wiring Diagram
Should this occur while listening to the audio system, simply reduce the volume for a few seconds and the protection circuit will reset itself automatically. JL AUDIO XR653-CS... -
Page 4: Speaker Placement Considerations
If you are unsure about any of mounting location, look at both sides of the car to these issues, contact your authorized JL AUDIO make sure that this location is clear on both sides. dealer for installation assistance. - Page 5 Hand-tighten the screws evenly to avoid bending door. If you are unsure about any part of this the speaker frame! process, please contact your authorized JL AUDIO Break off small pieces of the supplied butyl dealer for installation help. adhesive putty and place them on the inside of each Double check the clearance for both speakers grille tray.
- Page 6 If you are unsure about any part of this process, please contact your JL AUDIO dealer for installation help. Double check the clearance for both speakers before proceeding.
- Page 7 Frame Adaptors with no grille tray. This can be useful for applications where a custom grille is being fabricated and will result in a smaller overall mounting diameter than the standard tab- mount system. Install as shown here: JL AUDIO XR653-CS...
-
Page 8: Tweeter Installation
Run speaker wires from the tweeter output of the crossover to the desired tweeter mounting locations, observing the same precautions as mentioned in the woofer installation section. Terminate the wires with the supplied 2.8 mm male crimpable connectors. JL AUDIO XR653-CS... -
Page 9: Flush Mount Installation
Experiment with different angles until you arrive at the best solution. The swivel/rotation feature will not operate with the surface mount system. SURFACE MOUNT ASSEMBLY: FLUSH-MOUNT DISASSEMBLY: Use the supplied tools as shown to release the tweeter element from the flush-mount cup. JL AUDIO XR653-CS... -
Page 10: Installation Notes
INSTALLATION NOTES: JL AUDIO XR653-CS... - Page 11 JL AUDIO XR653-CS...
- Page 12 (90) days from the original date of purchase. The warranty term is extended to one (1) year if installation is performed or approved by an authorized JL AUDIO dealer (proof of installation or approval required on purchase receipt).
Need help?
Do you have a question about the XR653-CS and is the answer not in the manual?
Questions and answers