Advertisement
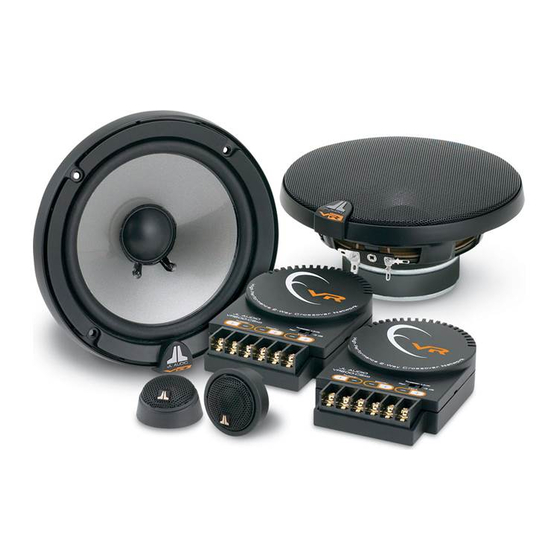
VR600-CSi
6-inch (150 mm) 2-Way Component System
o w n e r s m a n u a l
Thank you for choosing a JL Audio Evolution VR Component System
for your automotive sound system. With proper installation, your
new speakers will deliver years of listening pleasure.
We strongly recommend that you have your new Evolution speakers
installed by your authorized JL Audio dealer. The installation
professionals employed by your dealer have the necessary tools and
experience to disassemble your interior panels, install your new
speakers and reassemble your vehicle properly. Also, keep in mind
that your warranty coverage doubles to 2 years if your system is
installed by your authorized JL Audio dealer. If you prefer to perform
your own installation, please read this instruction manual
completely before beginning the process.
Advertisement
Table of Contents

Related Manuals for JL Audio VR600-CSi


Summary of Contents for JL Audio VR600-CSi
- Page 1 Also, keep in mind that your warranty coverage doubles to 2 years if your system is installed by your authorized JL Audio dealer. If you prefer to perform your own installation, please read this instruction manual...
-
Page 2: Getting Started
• Two 1-inch (25 mm) machine screws • Eight Mounting Clips • Two 5.2 mm female crimpable connectors • Two 2.8 mm female crimpable connectors • Four 2.8 mm male crimpable connectors • Four black nylon wire ties JL AUDIO VR600-CSi... -
Page 3: Speaker Placement
For this reason, they are generally more desirable than higher mounting locations. Higher mounting locations will usually result in extreme near-side soundstage bias which compromises the stereo listening experience. JL AUDIO VR600-CSi... - Page 4 Hand-tighten the screws evenly to avoid bending the speaker frame! your connections. If you are unsure about any of these issues, contact your JL AUDIO dealer for installation assistance. Your new speakers have been designed to install, without modifications, into most vehicles that accept a 6-inch (150 mm) speaker.
- Page 5 Air leaks will cause a severe degradation in sound door. If you are unsure about any part of this quality. Seal any air leaks with silicone, rope caulk or process, please contact your JL AUDIO dealer for similar sealant material. installation help.
-
Page 6: Crossover Network
Make sure that you do not attach the crossovers to a moving part or to any part that may interfere with pedal operation, gear shift operation, steering, or airbag deployment. For wiring instructions, refer to the diagram on page 2 & 3 of this manual. JL AUDIO VR600-CSi... -
Page 7: Tweeter Installation
Run speaker wires from the tweeter output of the crossover to the desired tweeter mounting locations, observing the same precautions as mentioned in the woofer installation section. Terminate the wires with the supplied 2.8 mm male crimpable connectors. JL AUDIO VR600-CSi... - Page 8 All warranty returns should be sent to JL AUDIO freight prepaid through an authorized JL AUDIO dealer and must be accompanied by proof of purchase (a copy of the original sales receipt.) Direct returns from consumers or non-authorized dealers will be refused unless specifically authorized by JL AUDIO with a valid return authorization number.
Need help?
Do you have a question about the VR600-CSi and is the answer not in the manual?
Questions and answers