Oki C110 Instruction Manual
C110 user guide (english)
Hide thumbs
Also See for C110:
- Manual do usuário (117 pages) ,
- Guías del usuario manual (115 pages) ,
- User manual (115 pages)
Table of Contents
Advertisement
Advertisement
Table of Contents

Related Manuals for Oki C110


Summary of Contents for Oki C110
- Page 1 C110 User’s Guide 59318501 my.okidata.com...
-
Page 2: Trademark Information
The most up-to-date drivers and manuals are available from the web site: http://www.okiprintingsolutions.com. Trademark Information Oki is a registered trademark of Oki Electric Industry Company Ltd. Apple, Macintosh and Mac OS are registered trademarks of Apple Computers Inc. Hewlett-Packard, HP, and LaserJet are registered trademarks of Hewlett-Packard Company. - Page 3 ! If it gets into the eyes, flush with large amounts of water for at least 15 minutes keeping eyelids open. Seek medical attention. Spillage Spillages should be treated with cold water and soap to help reduce risk of staining skin or clothing. 3 - C110 User’s Guide...
-
Page 4: Table Of Contents
3 Remote Panel Utility ....... . . 24 Working with the Remote Panel Utility ..........25 Introduction ..................25 Opening the Remote Panel Utility............ 25 Using the Remote Panel Utility ............25 Closing the Remote Panel Utility............28 4 - C110 User’s Guide... - Page 5 7 Troubleshooting ........82 Introduction ................... 83 Preventing Media Misfeeds..............84 Understanding the Media Path ............. 85 5 - C110 User’s Guide...
- Page 6 8 Specifications ........107 Printer Specifications ................. 108 Consumable Life Expectancy Chart............ 110 User-Replaceable Consumables ..........110 Service-Replaceable Consumables..........110 6 - C110 User’s Guide...
-
Page 7: Introduction
Introduction 7 - C110 User’s Guide... -
Page 8: Getting Acquainted With Your Printer
496 mm (19.5") 396 mm (15.6") 100 mm (3.9") Front View 127 mm (5.0") 380 mm (14.9") 100 mm 100 mm (3.9") (3.9") 707 mm (27.8") Side View 8 - C110 User’s Guide... -
Page 9: Printer Parts
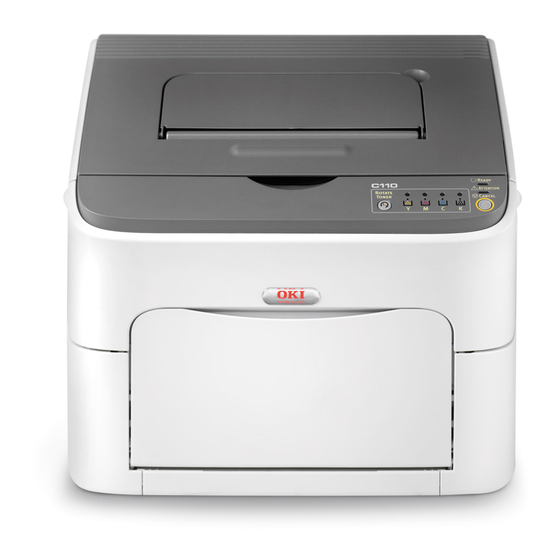
Front View 1—Output tray 2—Control panel 3—Front cover 4—Tray 1 (Multipurpose tray) 5—Top cover 6—Fuser unit 7—Fuser separator levers 8—Fuser cover lever 9—Imaging cartridge 10—Toner cartridge 9 - C110 User’s Guide... -
Page 10: Rear View
Rear View 1—Power switch 2—Power connection 2—USB port 10 - C110 User’s Guide... -
Page 11: The Control Panel
When lit, the toner in the corresponding color is empty. In addition, printer warnings and errors may be indicated by combinations of the various types of signals used by the indicators in the control panel (indicator messages). 11 - C110 User’s Guide... -
Page 12: The Rotate Toner Key
The printer enters Change Toner mode. Note For details on replacing a toner cartridge, refer to “Replacing a Toner Cartridge” on page 47. Note To return to normal operation mode from Change Toner mode, press the Cancel key. 12 - C110 User’s Guide... -
Page 13: The Cancel Key
No more media in the tray " Media other than that set in the printer driver was fed into the printer Note For details on the error messages, refer to “Indicator Messages” on page 86. 13 - C110 User’s Guide... -
Page 14: Cancelling A Print Job
While data is being processed or printed (the green Ready indicator is blinking), hold down the Cancel key for more than 5 seconds to cancel the print job. Both the Ready and Attention indicators blink when the print job is cancelled. 14 - C110 User’s Guide... -
Page 15: The Printer Driver And Utility Cd
For details, refer to “Working with the Remote Panel Utility” on page 25. Documentation Use/Benefit User’s Guide (this manual) This manual provides details on general daily operations, such as using the drivers and control panel and replacing consumables. 15 - C110 User’s Guide... -
Page 16: System Requirements
" CD drive " I/O interface USB Revision 2.0 and USB Revision 1.1 compliant port Note The USB cable is not included with the machine. Note This printer cannot be used as a shared printer. 16 - C110 User’s Guide... -
Page 17: Using The Printer Driver
Using the Printer Driver 17 - C110 User’s Guide... -
Page 18: Selecting Printer Driver Defaults
Printers directory. Right-click the icon for this printer, and select Print- ing Preferences. Select the Basic tab. Select the default settings for your printer, such as the default media format you use. Click Apply. Click OK to exit from the Printing Preferences dialog box. 18 - C110 User’s Guide... -
Page 19: Uninstalling The Printer Driver
From the Start, Program menu, choose the item that contains the printer utilities, and then Uninstall. When the Uninstall dialog box appears, select the printer to be deleted, and then click Uninstall button. The printer driver will be uninstalled from your computer. 19 - C110 User’s Guide... -
Page 20: Displaying Printer Driver Settings
Right-click the icon for this printer and select Printing Preferences. Windows 2000 From the Start menu, select Settings, and then click Printers to display the Printers directory. Right-click the icon for this printer and select Printing Preferences. 20 - C110 User’s Guide... -
Page 21: Printer Driver Settings
When this button is clicked, it changes to the Printer View button. Note This button does not appear on the Watermark, Quality and Version tabs. " Watermark View Click the button to display a preview of the watermark. 21 - C110 User’s Guide... -
Page 22: Basic Tab
" Print several pages of a document on the same page (N-up printing) " Print a single copy for enlargement and print several pages " Rotate the print image 180 degrees " Specify image shift settings Note Double-Sided printing is not available with this printer. 22 - C110 User’s Guide... -
Page 23: Overlay Tab
" Control the darkness of an image (Brightness) " Adjust the saturation of printed image (Saturation) " Adjust the sharpness of the printed image (Sharpness) Version Tab " The Version Tab allows you to view information about the printer driver. 23 - C110 User’s Guide... -
Page 24: Remote Panel Utility
Remote Panel Utility 24 - C110 User’s Guide... -
Page 25: Working With The Remote Panel Utility
Change Toner:Used when replacing a toner cartridge. Select this mode, and then click the Rotate Toner button to switch the printer to the Change Toner mode. (Refer to “Replacing a Toner Cartridge” on page 47.) 25 - C110 User’s Guide... - Page 26 If On is selected, the next print job is sent if a paper size error occurred in the printer, the error is automatically cancelled, and the next print job is performed. Calibration " Start—Performs the calibration operation. 26 - C110 User’s Guide...
-
Page 27: User Service Tab
"Print Pattern 1", and a color test pattern can be printed with "Print Pattern 2". Download—Downloads the current printer settings and displays them in the utility. Upload—Sends the current utility settings to the printer. 27 - C110 User’s Guide... -
Page 28: Closing The Remote Panel Utility
(The utility is not closed.) Double-click the icon to open the Remote Panel Utility window again. Note Wait at least 5 seconds before opening the Remote Panel Utility again after it has been closed. 28 - C110 User’s Guide... -
Page 29: Media Handling
Media Handling 29 - C110 User’s Guide... -
Page 30: Print Media
Custom, Maximum* 8.5 x 14.0 216.0 x 356.0 Notes:* With thick stock The minimum size is 3.6 x 7.25 inch (92.0 x 184.0 mm). The maximum size is 8.5 x 11.7 inch (216.0 x 297.0 mm). 30 - C110 User’s Guide... -
Page 31: Types
" Cold-water-transfer paper " Pressure sensitive " Designed specifically for inkjet printers (such as superfine paper, glossy film, and postcards) " Already been printed on by another printer, copier, or fax machine 31 - C110 User’s Guide... -
Page 32: Thick Stock
Thick Stock 2: 161 to 209 g/m (42.7 to 55.6 lb bond) DO NOT use thick stock that is " Mixed with any other media in the trays (as this will cause printer misfeeding) " 32 - C110 User’s Guide... -
Page 33: Labels
Check your application documentation for more information on printing labels. Capacity Tray 1 Up to 50 label sheets, depending on their thickness Orientation Face up Driver Media Labels Type Use label sheets that are " Approved for laser printers 33 - C110 User’s Guide... -
Page 34: Letterhead Stationery
Try printing your data on a sheet of plain paper first to check placement. Capacity Tray 1 Up to 50 sheets, depending on their size and thickness Orientation Face up Driver Letterhead Media Type 34 - C110 User’s Guide... -
Page 35: Postcards
Coated " Designed for inkjet printers " Precut or perforated " Preprinted or multicolored Note If the postcard is warped, press on the warped area before putting it in Tray 1. " Folded or wrinkled 35 - C110 User’s Guide... -
Page 36: Printable Area
If you choose a standard format, you may lose part of your image (due to printable area constraints). If you can custom-size your page in your application, use those sizes given for the printable area for optimum results. 36 - C110 User’s Guide... -
Page 37: Loading Media
Note When refilling media, first remove any media remaining in the tray. Stack it with the new media, even the edges, then reload it. CAUTION Do not mix media of different types and sizes, as this will cause media misfeeds. 37 - C110 User’s Guide... -
Page 38: Tray 1 (Multipurpose Tray)
For details on the types and sizes of media that can be printed from Tray 1, refer to “Print Media” on page 30. Loading Plain Paper Open Tray 1. Note If there is media in Tray 1, remove it. Slide the media guides to provide more space between them. 38 - C110 User’s Guide... - Page 39 Note Do not load paper above mark. Up to 200 sheets (80 g/m [21 lb]) of plain paper can be loaded into the tray at one time. Slide the media guides against the edges of the paper. 39 - C110 User’s Guide...
-
Page 40: Other Media
Loading Label Sheets/Letterheads/Postcards/Thick Stock Open Tray 1. Note If media has been loaded into Tray 1, remove all media from the tray. Slide the media guides to provide more space between them. 40 - C110 User’s Guide... - Page 41 Load the media face up in the tray. Note Up to 50 sheets can be loaded into the tray at one time. Slide the media guides against the edges of the media. 41 - C110 User’s Guide...
-
Page 42: Output Tray
100 sheets (A4/Letter) of 80 g/m (21 lb) paper. Note If the media is stacked too high in the output tray, your printer may experience media misfeeds, excessive media curl, or static buildup. 42 - C110 User’s Guide... -
Page 43: Media Storage
Avoid moisture, excessive humidity, direct sunlight, excessive heat (above 35°C [95°F]), and dust. " Avoid leaning against other objects or placing it in an upright position. Before using stored media, do a trial printing and check print quality. 43 - C110 User’s Guide... -
Page 44: Replacing Consumables
Replacing Consumables 44 - C110 User’s Guide... -
Page 45: Toner Cartridges
If you get toner in your eyes, wash it out immediately with cool water and consult a doctor. Important! For the best results, use only genuine Oki toner cartridges. Storing and Handling Toner Cartridges: " Keep toner cartridges In their packaging until you’re ready to install them. - Page 46 Do not hold, stand or store cartridges on their ends or turn them upside down; the toner inside the cartridges may become caked or unequally distributed. " Keep toner cartridges away from salty air and corrosive gases such as aerosols. 46 - C110 User’s Guide...
-
Page 47: Replacing A Toner Cartridge
The indicator for the toner cartridge that was moved so that it can be replaced lights up. Note To exit Change Toner mode, press the Clear key. Open the front cover. 47 - C110 User’s Guide... - Page 48 Check that the toner cartridge to be replaced has been moved to the front. Note You can identify the toner cartridge by the color of the handle. Pull down the handle on the toner cartridge until the toner cartridge is unlocked and moves out slightly toward you. 48 - C110 User’s Guide...
- Page 49 CAUTION Dispose of the empty toner cartridge according to your local regulations. Do not burn the toner cartridge. For details, refer to “General Information” on page 45. Unpack the new toner cartridge. 49 - C110 User’s Guide...
- Page 50 Note Make sure that the toner roller cover is securely attached before shaking the toner cartridge. Remove the cover from the toner roller. Note Do not touch or scratch the toner roller. 50 - C110 User’s Guide...
- Page 51 Note Before inserting the toner cartridge, make sure that the color of the toner cartridge to be installed is the same as the label on the toner cartridge carousel. Important! Do not touch the contact indicated in the illustration. 51 - C110 User’s Guide...
-
Page 52: Replacing All Toner Cartridges At The Same Time
Replacing All Toner Cartridges at the Same Time CAUTION Be careful not to spill toner while replacing a toner cartridge. If toner spills, immediately wipe it off with a soft, dry cloth. 52 - C110 User’s Guide... - Page 53 Note The printer must complete a calibration cycle (less than 2 minutes) after a toner cartridge has been replaced. If you open the top or front cover before the printer is reset, the calibration stops, then starts over again after the cover is closed. 53 - C110 User’s Guide...
-
Page 54: Imaging Cartridges
Imaging Cartridges Replacing the Imaging Cartridge Important! For the best results, use only genuine Oki imaging cartridges. Open the top cover. Note If there is paper in the output tray, remove it, and then fold up the output tray before opening the top cover. - Page 55 Do not touch the PC drum and the transfer belt on the imaging cartridge. Slowly insert the new imaging cartridge vertically, and then push it slightly down toward you to finish installing the imaging cartridge. 55 - C110 User’s Guide...
- Page 56 (less than 2 minutes) after the imaging cartridge has been replaced. If you open the top or front cover before the printer is reset, the calibration stops, then starts over again after the cover is closed. 56 - C110 User’s Guide...
-
Page 57: The Fuser Unit
The Fuser Unit Replacing the Fuser Unit Important! For optimum print quality and performance, use only a genuine Oki fuser unit for your specific printer type. Turn off the machine and disconnect the power cord. WARNING! There are extremely hot parts within the machine. Before... - Page 58 Push the blue handles back as far as possible. Grab the blue handles and lift the fuser unit to remove it. 58 - C110 User’s Guide...
- Page 59 Important! Do not touch the matching connectors of the fuser unit and the machine. Prepare a new fuser unit. Note Be careful not to touch the surface of the fuser roller. 59 - C110 User’s Guide...
- Page 60 Pull the fuser separator levers forward as far as pos- sible. Remove the fuser separator material, and then return the fuser separator levers to their original positions. 60 - C110 User’s Guide...
- Page 61 Be careful not to touch the paper exit sensor and the surface of the fuser roller in the fuser unit. While lifting the fuser unit with the blue handles (one on each side), vertically insert the fuser unit. 61 - C110 User’s Guide...
- Page 62 Important! Do not touch the paper exit sensor on the fuser unit. Important! Do not touch the matching connectors of the fuser unit and the machine. 62 - C110 User’s Guide...
- Page 63 After the fuser unit is firmly installed, flip the blue handles down toward you. Carefully close the top cover. Reconnect the power cord, and turn on the machine. 63 - C110 User’s Guide...
-
Page 64: Maintenance
Maintenance 64 - C110 User’s Guide... -
Page 65: Maintaining The Printer
Avoid using abrasive or corrosive solutions or solutions that contain solvents (such as alcohol and benzene) to clean the printer. " Always test any cleaning solution (such as mild detergent) on a small inconspicuous area of your printer to check the solution’s performance. 65 - C110 User’s Guide... - Page 66 " When lifting the printer, grasp the areas shown in the figure . 15 kg 33 lbs " If you get toner on your skin, wash it off with cool water and a mild soap. 66 - C110 User’s Guide...
-
Page 67: Cleaning The Printer
Cleaning the Printer CAUTION Be sure to turn off the printer and unplug the power cord before cleaning. However, be sure to turn on the printer when cleaning the print head window. 67 - C110 User’s Guide... -
Page 68: Exterior
Exterior Control Panel EADY EADY TTENTION TTENTION OTATE OTATE ONER ONER ANCEL ANCEL Ventillation Grill Exterior Housing 68 - C110 User’s Guide... -
Page 69: Interior
Grab the handle and lift it up slightly to the back, and then slowly pull the imaging cartridge out vertically. 69 - C110 User’s Guide... - Page 70 Do not leave the imaging cartridge removed for more than 15 minutes, and do not place the removed imaging cartridge in a location where it would be exposed to direct light (such as sunlight). 70 - C110 User’s Guide...
- Page 71 The area around the fuser unit is extremely hot. Touching anything other than the indicated levers may result in burns. If you get burned, immediately cool the skin under cold water, and then seek professional medical attention. 71 - C110 User’s Guide...
- Page 72 Be careful not to touch the surface of the transfer roller (1, bottom view). Slowly insert the imaging cartridge vertically, and then push it slightly down toward you to finish reinstalling the imaging cartridge. 72 - C110 User’s Guide...
-
Page 73: Cleaning The Print Head Window
Open the front cover. Note Before opening the front cover, open Tray 1 if it is not already open. The magenta toner cartridge has been moved to the position from where it can be replaced. 73 - C110 User’s Guide... - Page 74 Note When the magenta toner cartridge is removed, a gap is created within the printer so that the print head window can easily be cleaned. Important! Do not touch the contact indicated in the illustration. 74 - C110 User’s Guide...
- Page 75 Grab the handle and lift it up slightly to the back, and then slowly pull the imaging cartridge out vertically. 75 - C110 User’s Guide...
- Page 76 Do not leave the imaging cartridge removed for more than 15 minutes, and do not place the removed imaging cartridge in a location where it would be exposed to direct light (such as sunlight). 76 - C110 User’s Guide...
- Page 77 The area around the fuser unit is extremely hot. Touching anything other than the indicated levers may result in burns. If you get burned, immediately cool the skin under cold water, and then seek professional medical attention. 77 - C110 User’s Guide...
- Page 78 Be careful not to touch the surface of the transfer roller (1, bottom view). Slowly insert the imaging cartridge vertically, and then push it slightly down toward you to finish reinstalling the imaging cartridge. 78 - C110 User’s Guide...
- Page 79 Close the top cover. Press the Clear key. The blinking of all indicators stop, and the magenta toner indicator lights The toner cartridges rotate within the printer. After the toner cartridges have finished rotating, open the front cover. 79 - C110 User’s Guide...
- Page 80 Align the shaft on each end of the toner cartridge with its holders, and then insert the cartridge. Important! Do not touch the contact indicated in the illustration. 80 - C110 User’s Guide...
- Page 81 Press in the magenta toner cartridge until it locks into place. Close the front cover. 81 - C110 User’s Guide...
-
Page 82: Troubleshooting
Troubleshooting 82 - C110 User’s Guide... -
Page 83: Introduction
84 Understanding the Media Path page 85 Indicator Messages page 86 Clearing Media Misfeeds page 90 Solving Problems with Media Misfeeds page 98 Solving Other Problems page 99 Solving Problems with Printing Quality page 101 83 - C110 User’s Guide... -
Page 84: Preventing Media Misfeeds
Loading more than one type/size/weight of media in a tray at the same time. " Overfilling the trays. " Allowing the output tray to overfill (the output tray has a 100-sheet capacity—misfeeding may occur if you allow media to accumulate more than 100 sheets at one time). 84 - C110 User’s Guide... -
Page 85: Understanding The Media Path
Understanding the Media Path Understanding the printer’s media path will help you locate media misfeeds. 1 Output tray 2 Imaging cartridge 3 Toner cartridge carousel 4 Tray 1 5 Fuser unit 85 - C110 User’s Guide... -
Page 86: Indicator Messages
Ready Attention Condition Action indicator indicator (green) (orange) Power off None Slow blinking Off Energy save mode None Ready to print None Blinking Processing data None Printing Initializing (power on) None Canceling a print job 86 - C110 User’s Guide... -
Page 87: Warning Messages
If the error is not corrected, turn off the printer. After a few seconds, turn on the printer. Slow Imaging cartridge end Replace the imaging blinking cartridge. * Differs depending on the toner status. 87 - C110 User’s Guide... -
Page 88: Error Messages
After a few seconds, turn on the printer. Blinking Front cover or top Close the front cover and cover is open. top cover. The imaging Install the imaging cartridge is not cartridge. installed. 88 - C110 User’s Guide... -
Page 89: Service Message
(green) (orange) (orange) Rapid Rapid All blinking Fatal error Turn off the printer. After blinking blinking a few seconds, turn on the printer. If the problem persists, contact your vendor or authorized service provider. 89 - C110 User’s Guide... -
Page 90: Clearing Media Misfeeds
If you get toner in your eyes, wash it out immediately with cool water and consult a doctor. If, after clearing the media misfeed, the misfeed message in the control panel persists, open and close the printer’s covers. This should clear the misfeed message. 90 - C110 User’s Guide... -
Page 91: Clearing Procedures
Grab the handle and lift it up slightly to the back, and then slowly pull the imaging cartridge out vertically. 91 - C110 User’s Guide... - Page 92 Do not leave the imaging cartridge removed for more than 15 minutes, and do not place the removed imaging cartridge in a location where it would be exposed to direct light (such as sunlight). 92 - C110 User’s Guide...
- Page 93 The area around the fuser unit is extremely hot. Touching anything other than the indicated levers may result in burns. If you get burned, immediately cool the skin under cold water, and then seek professional medical attention. 93 - C110 User’s Guide...
- Page 94 Remove any misfed media. Note Raise the fuser unit cover and remove the media. 94 - C110 User’s Guide...
- Page 95 Do not touch the paper exit sensor on the fuser unit. Important! Decreased print quality may result if the surface of the transfer roller is touched. Be careful not to touch the surface of the transfer roller. 95 - C110 User’s Guide...
- Page 96 Return the fuser separator levers to their original positions. Slowly insert the imaging cartridge vertically, and then push it slightly down toward you to finish reinstalling the imaging cartridge. 96 - C110 User’s Guide...
- Page 97 Carefully close the top cover. 97 - C110 User’s Guide...
-
Page 98: Solving Problems With Media Misfeeds
See “Print Media” on page 30 misfeeding. (wrong size, thickness, type, etc.) is being used. The media feed roller Clean the media feed roller. is dirty. For more details, refer to “Interior” on page 69. 98 - C110 User’s Guide... -
Page 99: Solving Other Problems
The job is very complex. Wait. No action needed. A toner cartridge for a Install a genuine Oki toner cartridge different region or an approved for your specific printer. unapproved toner cartridge is installed. Blank pages One or more of the toner Check the toner cartridges. - Page 100 The media feed roller or fuser Check them for damage. If necessary, unit is defective. contact Technical Support with the error information. Unsupported media (wrong See “Print Media” on page 30 size, thickness, type, etc.) is being used. 100 - C110 User’s Guide...
-
Page 101: Solving Problems With Printing Quality
If it is damaged, color. defective. replace it. The imaging cartridge Remove the imaging cartridge and may be defective. check for damage. If it is damaged, replace it. 101 - C110 User’s Guide... - Page 102 If it is damaged, lightly stained; defective. replace it. there is The imaging cartridge Remove the imaging cartridge and insufficient gloss may be defective. check for damage. If it is damaged, of the printed replace it. image. 102 - C110 User’s Guide...
- Page 103 See “Print Media” on page 30 comes off when (wrong size, thickness, rubbed. type, etc.) is being used. Media type is set When printing labels, postcards, thick incorrectly. stock, or letterheads, specify the appropriate media type in the printer driver. 103 - C110 User’s Guide...
- Page 104 Replace it with a new toner cartridge. The imaging cartridge is Remove the imaging cartridge and defective. check for damage. If it is damaged, replace it. 104 - C110 User’s Guide...
- Page 105 If it is damaged, page- defective. replace it. to-page variation. The media is moist from Remove the moist media and replace it humidity. with new, dry media. 105 - C110 User’s Guide...
- Page 106 If it is damaged, or has poor color replace it. density. If the problem is not resolved, even after all of the above have been performed, contact Technical Support with the error information. 106 - C110 User’s Guide...
-
Page 107: Specifications
Specifications 107 - C110 User’s Guide... -
Page 108: Printer Specifications
120 V, 50 to 60 Hz 220 to 240 V, 50 to 60 Hz Power consumption 120 V: 970 W or less 220 to 240 V: 1020 W or less Energy Saver Mode: 14 W or less 108 - C110 User’s Guide... - Page 109 Standby: 32 dB or less External dimensions Height: 275 mm (10.8") Width: 396 mm (15.6") Depth: 380 mm (14.9") Weight 13 kg (without consumables) 15 kg (with consumables) Interface USB 2.0 compliant Standard memory 16 MB 109 - C110 User’s Guide...
-
Page 110: Consumable Life Expectancy Chart
In addition, the life will be affected by the temperature and humidity of the operating environment. Service-Replaceable Consumables Item Average Life Expectancy Transfer roller 50,000 pages 110 - C110 User’s Guide...
Need help?
Do you have a question about the C110 and is the answer not in the manual?
Questions and answers
Ready and attention flashing yellow, y constant yellow, m,c,K flash every 4 seconds
When the Oki C110 printer shows a flashing Ready and Attention indicator, it indicates a warning or error. A constant yellow light for Y means the yellow toner is empty. Flashing every 4 seconds (slow blinking) for M, C, and K indicates those toner colors are low. The combination means yellow toner must be replaced, and the other colors will need replacement soon.
This answer is automatically generated
@Mr. Anderson Thank you for your help, all cartridges have been replaced yet I now have a flashing ready and attention light going on and nothing will print at all. What could be the problem now? What have i missed ?
Replaced all toner cartridges, when turned on green ready light comes on and after it clicks through to be ready the ready light and attention light flash yellow and will not print anything. what is wrong now?.
When the green Ready light and the orange Attention light both flash rapidly on an Oki C110, it indicates a fatal error. You should turn off the printer, wait a few seconds, and turn it back on. If the problem continues, contact your vendor or authorized service provider.
This answer is automatically generated