Oki C110 User Manual
Hide thumbs
Also See for C110:
- Manual do usuário (117 pages) ,
- Guías del usuario manual (115 pages) ,
- Manual de l'utilisateur (112 pages)
Table of Contents
Advertisement
Quick Links
Advertisement
Table of Contents

Subscribe to Our Youtube Channel
Related Manuals for Oki C110


Summary of Contents for Oki C110
- Page 1 C110 User’s Guide...
-
Page 2: Preface
Copyright © 2009 Oki Europe Ltd. All rights reserved. Oki is a registered trademark of Oki Electric IndustryCompany Ltd. Oki Printing Solutions is a trademark of Oki Data Corporation. Energy Star is a trademark of the United States Environmental Protection Agency. -
Page 3: Emergency First Aid
15 minutes keeping eyelids open. Seek medical attention. Spillages should be treated with cold water and soap to help reduce risk of staining skin or clothing. Importer to the EU/authorised representative Oki Europe Limited (trading as Oki Printing Solutions) Blays House Wick Road Egham... -
Page 4: Table Of Contents
Contents Preface......................x-1 Emergency first aid ..................x-2 Importer to the EU/authorised representative ..........x-2 Environmental information ................x-2 1 Introduction ....................1-1 Getting Acquainted with Your Printer ............1-2 Space Requirements................... 1-2 Printer Parts ....................1-3 Front View..................... 1-3 Rear View ..................... - Page 5 About the Printer Driver and Utility CD/DVD ..........1-9 System Requirements ................. 1-10 2 Using the Printer Driver ................2-1 Selecting Printer Driver Defaults ..............2-2 Uninstalling the Printer Driver ..............2-3 Windows Vista/XP/Server 2003/2000 ........... 2-3 Displaying Printer Driver Settings ............... 2-3 Windows Vista ..................
- Page 6 Solving Problems with Media Misfeeds ............. 7-18 Solving Other Problems ................7-20 Solving Problems with Printing Quality ............ 7-22 A Appendix ......................A-1 Technical Specifications ................A-2 Printer......................A-2 Consumable Life Expectancy Chart............A-3 User-Replaceable .................A-3 Service-Replaceable ..................A-4 Index ........................I-1 Oki contact details ..................I-3 Contents...
-
Page 7: Contents
Contents... -
Page 8: Introduction
Introduction... -
Page 9: Getting Acquainted With Your Printer
Getting Acquainted with Your Printer Space Requirements To ensure easy operation, consumable replacement and maintenance, adhere to the recommended space requirements detailed below. 496 mm (19.5") 396 mm (15.6") 100 mm (3.9") Front View 127 mm (5.0") 380 mm (14.9") 100 mm 100 mm (3.9") -
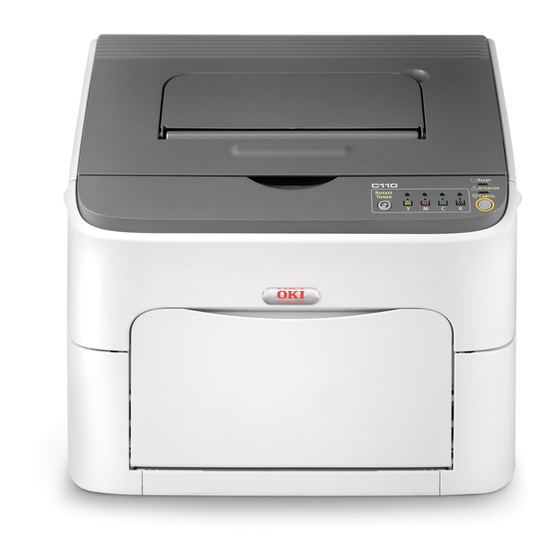
Page 10: Printer Parts
Printer Parts The following drawings illustrate the parts of your printer referred to through- out this guide, so please take some time to become familiar with them. Front View 1—Output tray 2—Control panel 3—Front cover 4—Tray 1 (Multipurpose tray) 5—Top cover 6—Fuser unit 7—Fuser separator levers 8—Fuser cover lever... -
Page 11: Rear View
Rear View 1—Power switch 2—Power connection 3—USB port Getting Acquainted with Your Printer... -
Page 12: About The Control Panel
About the Control Panel 1—Ready indicator 2—Attention indicator EADY EADY TTENTION TTENTION 3—Rotate Toner key OTATE OTATE ONER ONER ANCEL ANCEL 4—Toner indicators 5—Cancel key About the Indicators The indicators use five types of signals: Slow blinking—1 blink every 2 seconds Blinking—1 blink per second Rapid blinking—2 blinks per second Each of the indicators has the following basic meaning. -
Page 13: About The Rotate Toner Key
About the Rotate Toner KEY The Rotate Toner key allows you to switch the printer from normal operation mode to Change Toner mode, Eject All Toner mode or Print Head Cleanup mode. The mode that the printer enters depends on how long the Rotate Toner key is held down. -
Page 14: When Cleaning The Print Head Window
When cleaning the print head window Hold down the Rotate Toner key for 5 seconds to 10 seconds. The printer enters Print Head Cleanup mode. For details on cleaning the print head window, refer to “Cleaning the Print Head Window” on page 6-8. To return to normal operation mode from Print Head Cleanup mode, refer to “Cleaning the Print Head Window”... -
Page 15: Cancelling A Print Job
If any of the errors listed above occur, press the Cancel key to continue the print job. Cancelling a Print Job You can cancel a print job that is currently being processed. While data is being processed or printed (the green Ready indicator is blink- ing), hold down the Cancel key for more than 5 seconds to cancel the print job. -
Page 16: About The Printer Driver And Utility Cd/Dvd
About the Printer Driver and Utility CD/DVD Drivers Use/Benefit Windows Vista/XP/Server 2003/ These drivers give you access to all of 2000 the printer features. For details, refer to“Displaying Printer Driver Settings” Windows Vista/XP/Server 2003 for on page 2-3. 64bit For details on the installation of the drivers, refer to the Installation Guide. -
Page 17: System Requirements
System Requirements Personal computer Pentium II: 400MHz or higher Operating System Microsoft Windows Vista Home Basic/Home Premium/Ultimate/Business/ Enterprise, Windows Vista Home Basic/Home Premium/ Ultimate/Busi- ness/Enterprise x64 Edition, Windows XP Home Edition/Professional (Service Pack 2 or later), Windows XP Professional x64 Edition, Windows Server 2003, Windows Server 2003 x64 Edition, Windows 2000 (Service Pack 4 or later) Free hard disk space... -
Page 18: Using The Printer Driver
Using the Printer Driver... -
Page 19: Selecting Printer Driver Defaults
Selecting Printer Driver Defaults Before you start working with your Printer, you are advised to verify and change the default printer driver settings if necessary. Choose the driver’s properties as follows: – (Windows Vista) From the Start menu, select Control Panel, and then click Hardware and Sound to select Printers. -
Page 20: Uninstalling The Printer Driver
Uninstalling the Printer Driver This section describes how to uninstall the printer driver if necessary. You must have administrator privileges in order to uninstall the printer driver. If the User Account Control window appears when uninstalling on Win- dows Vista, click the Allow button or the Continue button. Windows Vista/XP/Server 2003/2000 Close all applications. -
Page 21: Windows 2000
Windows 2000 From the Start menu, select Settings, and then click Printers to display the Printers directory. Right-click the icon for this printer and select Printing Preferences. Displaying Printer Driver Settings... -
Page 22: Printer Driver Settings
Printer Driver Settings Common Buttons The buttons described below appear on each tab. Click to exit the Properties dialog box, saving any changes made. Cancel Click to exit the Properties dialog box without saving any changes made. Apply Click to save all changes without exiting the Properties dialog box. Help Click to view the help. -
Page 23: Basic Tab
When this button is clicked, it changes to the Printer View button. This button appears only when the Watermark tab is selected. Quality View Click the button to display a sample of the settings selected in the Quality tab. When this button is clicked, it changes to the Printer View button. This button appears only when the Quality tab is selected. -
Page 24: Overlay Tab
Overlay Tab Be sure to use overlays with print jobs with a media size and orienta- tion that matches the overlay form. In addition, if settings have been specified for “N-up” in the printer driver, the overlay form cannot be adjusted to match the specified set- tings. - Page 25 Printer Driver Settings...
-
Page 26: Remote Panel Utility
Remote Panel Utility... -
Page 27: Working With The Remote Panel Utility
Working with the Remote Panel Utility Introduction The Remote Panel Utility shows information about the current status of the printer and allows you to specify various settings such as the time until the printer enters Energy Save mode. In order to use the Remote Panel Utility, install it after installing the printer driver. - Page 28 Change Toner: Used when replacing a toner cartridge. Select this mode, and then click the Rotate Toner button to switch the printer to the Change Toner mode. (Refer to “Replacing a Toner Cartridge” on page 5-4.) Eject All Toner: Used when replacing all toner cartridges at the same time.
-
Page 29: User Service Tab
User Service Tab Top Adjustment—Allows the vertical print position to be finely adjusted. Left Adjustment—Allows the horizontal printer position to be finely adjusted. Transfer Power—Set the 2nd Transfer voltage for the Media type. Service's Choice GDI Timeout—Specifies the amount of time until communication with the printer times out. -
Page 30: Media Handling
Media Handling... -
Page 31: Print Media
Print Media Specifications Media Media Size Inch Millimeter 8.2 x 11.7 210.0 x 297.0 B5 (JIS) 7.2 x 10.1 182.0 x 257.0 5.9 x 8.3 148.0 x 210.0 Legal 8.5 x 14.0 215.9 x 355.6 Letter 8.5 x 11.0 215.9 x 279.4 Statement 5.5 x 8.5 139.7 x 215.9... -
Page 32: Types
Types Before purchasing a large quantity of special media, do a trial printing with the same media and check the print quality. Keep media on a flat, level surface in its original wrapper until it is time to load it. Plain Paper (Recycled Paper) Capacity Tray 1... -
Page 33: Thick Stock
Layered Adhesive Folded, creased, curled, embossed, warped, or wrinkled Perforated, three-hole punched, or torn Too slick, too coarse, or too textured Different in texture (roughness) on the front and back Too thin or too thick Stuck together with static electricity Composed of foil or gilt;... -
Page 34: Envelope
Envelope Print on the front (address) side only. Some parts of the envelope consist of three layers of paper—the front, back, and flap. Anything printed in these lay- ered regions may be lost or faded. You can print continuously with envelope. However, this could affect the media feed, depending on the media quality and printing environment. -
Page 35: Label
Label A sheet of labels consists of a face sheet (the printing surface), adhesive, and a carrier sheet: The face sheet must follow the plain paper specification. The face sheet surface must cover the entire carrier sheet, and no adhe- sive should come through on the surface. -
Page 36: Letterhead
Letterhead You can print continuously with letterhead. However, this could affect the media feed, depending on the media quality and printing environment. If problems occur, stop the continuous printing and print one sheet at a time. Try printing your data on a sheet of plain paper first to check placement. Capacity Tray 1 Up to 50 sheets, depending on their size and... -
Page 37: Printable Area
Folded or wrinkled Printable Area The printable area on all media sizes is up to 4.0 mm (0.157") from the edges of the media. Each media size has a specific print- Printable able area (the maximum area on which Area the machine can print clearly and with- out distortion). -
Page 38: Envelopes
Envelopes Envelopes can only be printed on their front sides (side where the recipient’s address is written). In addition, printing on the front side in the area overlap- ping the back flap cannot be guaranteed. The location of this area differs depending on the envelope type. -
Page 39: Loading Media
Loading Media How do I load media? Take off the top and bottom sheets of a ream of paper. Holding a stack of approx- imately 200 sheets at a time, fan the stack to prevent static buildup before inserting it in a tray. Note Although this printer was designed for printing on a wide range of media types, it is not intended to print exclusively on a single media... - Page 40 Slide the media guides to pro- vide more space between them. Load the paper face up in the tray. Do not load paper above mark. Up to 200 sheets (80 g/m [21 lb]) of plain paper can be loaded into the tray at one time.
-
Page 41: Other Media
Slide the media guides against the edges of the paper. Other Media When loading media other than plain paper, set the media mode (Envelope, Labels, Letterhead, Postcard, Thick Stock 1, or Thick Stock 2) in the driver for optimum print quality. Loading Envelopes Open Tray 1. - Page 42 Slide the media guides to pro- vide more space between them. Load the envelopes flap side down in the tray. Before loading enve- lopes, press them down to make sure that all air is removed, and make sure that the folds of the flaps are firmly pressed, other- wise the envelopes may become wrinkled or a...
-
Page 43: Loading Label Sheets/Letterheads/Postcards/Thick Stock
Loading Label Sheets/Letterheads/Postcards/Thick Stock Open Tray 1. If media has been loaded into Tray 1, remove all media from the tray. Slide the media guides to pro- vide more space between them. Load the media face up in the tray. Up to 50 sheets can be loaded into the tray at one time. - Page 44 Slide the media guides against the edges of the media. Loading Media 4-15...
-
Page 45: Output Tray
Output Tray All media is fed out facing down into the output tray on top of the printer. This tray has a capacity of approximately 100 sheets (A4/Letter) of 80 g/m (21 lb) paper. If the media is stacked too high in the output tray, your printer may experience media misfeeds, excessive media curl, or static buildup. - Page 46 Replacing Consumables...
-
Page 47: Replacing Consumables
If you get toner in your eyes, wash it out immediately with cool water and consult a doctor. Note Use of non-OKI consumables may void your warranty if any damage is found to be caused by such consumables. Replacing Consumables... - Page 48 Keep toner cartridges: In their packaging until you’re ready to install them. In a cool, dry location away from sunlight (due to heat). The maximum storage temperature is 35° C (95° F) and the maximum storage humidity is 85% (noncondensing). If the toner cartridge is moved from a cold place to a warm, humid place, condensation may occur, degrading print quality.
-
Page 49: Replacing A Toner Cartridge
Replacing a Toner Cartridge Note Be careful not to spill toner while replacing a toner cartridge. If toner spills, immediately wipe it off with a soft, dry cloth. When the toner is empty, the toner indicator lights up. Follow the procedure described below to replace the toner cartridge. - Page 50 Open the front cover. Before opening the front cover, open Tray 1 if it is not already open. Check that the toner cartridge to be replaced has been moved to the front. You can identify the toner cartridge by the color of the handle. Pull down the handle on the toner cartridge until the toner cartridge is unlocked and moves...
- Page 51 Note Do not touch the contact indicated in the illustration. Note Dispose of the empty toner cartridge according to your local regulations. Do not burn the toner cartridge. For details, refer to “About Toner Cartridges” on page 5-2. Prepare a new toner cartridge. Shake the cartridge a few times to distribute the toner.
- Page 52 Remove the cover from the toner roller. Do not touch or scratch the toner roller. Align the shaft on each end of the toner cartridge with its hold- ers, and then insert the car- tridge. Before inserting the toner cartridge, make sure that the color of the toner car- tridge to be installed is the same as the label on...
- Page 53 Note Do not touch the contact indicated in the illustration. Press in the toner cartridge until it locks into place. Close the front cover. To replace the toner car- tridge for another color, after the front cover has been closed, check that the indicator for the toner to be replaced is lit (if necessary, press the...
-
Page 54: Replacing All Toner Cartridges At The Same Time
Press the Cancel key to reset the printer and clear the indicator message. The printer must complete a calibration cycle (less than 2 minutes) after a toner cartridge has been replaced. If you open the top or front cover before the printer is reset, the calibration stops, then starts over again after the cover is closed. -
Page 55: Replacing The Imaging Cartridge
Replacing the Imaging Cartridge Note Use of non-OKI consumables may void your warranty if any damage is found to be caused by such consumables. Open the top cover. If there is paper in the output tray, remove it, and then fold up the out- put tray before opening the top cover. - Page 56 Prepare the new imaging cartridge. Note Do not touch the PC drum and the transfer belt on the imaging cartridge. Slowly insert the new imaging cartridge vertically, and then push it slightly down toward you to finish installing the imaging cartridge.
- Page 57 Carefully close the top cover. The printer must complete a calibration cycle (less than 2 minutes) after the imaging cartridge has been replaced. If you open the top or front cover before the printer is reset, the calibration stops, then starts over again after the cover is closed.
-
Page 58: Replacing The Fuser Unit
Replacing the Fuser Unit For optimum print quality and performance, use only a genuine Oki fuser unit for your specific printer type. Turn off the machine and discon- nect the power cord. Note There are extremely hot parts within the machine. Before replacing... - Page 59 Push the blue handles back as far as possible. Grab the blue handles and lift the fuser unit to remove it. Note Do not touch the matching connectors of the fuser unit and the machine. 5-14 Replacing Consumables...
- Page 60 Prepare a new fuser unit. Be careful not to touch the surface of the fuser roller. While lifting the fuser unit with the blue handles (one on each side), vertically insert the fuser unit. Replacing Consumables 5-15...
- Page 61 Note Do not touch the paper exit sensor on the fuser unit. Note Do not touch the matching connectors of the fuser unit and the machine. 5-16 Replacing Consumables...
- Page 62 After the fuser unit is firmly installed, flip the blue handles down toward you. Carefully close the top cover. Reconnect the power cord, and turn on the machine. Replacing Consumables 5-17...
- Page 63 5-18 Replacing Consumables...
-
Page 64: Maintenance
Maintenance... -
Page 65: Maintaining The Printer
Maintaining the Printer CAUTION Read all caution and warning labels carefully, making sure to follow any instructions contained in them. These labels are located on the inside of the printer’s covers and the interior of the printer body. Handle the printer with care to preserve its life. Abuse handling may cause damage and void your warranty. - Page 66 Do not leave the printer’s covers open for any length of time, especially in well-lit places; light may damage the imaging cartridge. Do not open the printer during printing. Do not tap media stacks on the printer. Do not lubricate or disassemble the printer. Do not tilt the printer.
-
Page 67: Cleaning The Printer
Cleaning the Printer CAUTION Be sure to turn off the printer and unplug the power cord before cleaning. However, be sure to turn on the printer when cleaning the print head window. Exterior Control Panel Ventilation Grille EADY EADY TTENTION TTENTION OTATE OTATE... -
Page 68: Interior
Interior Cleaning the Media Feed Roller Open the top cover. If there is paper in the output tray, remove it, and then fold up the out- put tray before opening the top cover. Grab the handle and lift it up slightly to the back, and then slowly pull the imaging cartridge out vertically. - Page 69 Note Do not touch the PC drum on the imaging cartridge. Position the removed imaging cartridge horizontally as shows in the illustration at the right. Be sure to keep the imaging cartridge horizontal and place it where it will not become dirty. Do not leave the imaging cartridge removed for more than 15 minutes, and do not place the...
- Page 70 CAUTION The area around the fuser unit is extremely hot. Touching anything other than the indicated levers may result in burns. If you get burned, immediately cool the skin under cold water, and then seek professional medical attention. Note Decreased print quality may result if the surface of the BOTTOM transfer roller is touched.
-
Page 71: Cleaning The Print Head Window
Slowly insert the imaging car- tridge vertically, and then push it slightly down toward you to fin- ish reinstalling the imaging car- tridge. Carefully close the top cover. Cleaning the Print Head Window Use either operation described below to switch the printer to Print Head Cleanup mode. - Page 72 Open the front cover. Before opening the front cover, open Tray 1 if it is not already open. The magenta toner cartridge has been moved to the position from where it can be replaced. Pull down the handle on the toner cartridge until the toner cartridge is unlocked and moves out slightly toward you.
- Page 73 Note Do not touch the contact indicated in the illustration. Close the front cover. The toner cartridge rotate within the printer. After the toner cartridges have finished rotating and all indica- tors on the control panel begin blinking, open the top cover. 6-10 Cleaning the Printer...
- Page 74 Grab the handle and lift it up slightly to the back, and then slowly pull the imaging cartridge out vertically. Note Do not touch the PC drum on the imaging cartridge. Position the removed imaging cartridge horizontally as shows in the illustration at the right.
- Page 75 Clean the print head window by wiping it with a soft, dry cloth. BOTTOM VIEW CAUTION The area around the fuser unit is extremely hot. Touching anything other than the indicated levers may result in burns. If you get burned, immediately cool the skin under cold water, and then seek professional medical attention.
- Page 76 Note Decreased print quality may result if the surface of the BOTTOM transfer roller is touched. VIEW Be careful not to touch the surface of the transfer roller. Slowly insert the imaging car- tridge vertically, and then push it slightly down toward you to fin- ish reinstalling the imaging car- tridge.
- Page 77 Close the top cover. Press the Cancel key. The blinking of all indicators stop, and the magenta toner indicator lights up. The toner cartridges rotate within the printer. After the toner cartridges have finished rotating, open the front cover. 6-14 Cleaning the Printer...
- Page 78 Align the shaft on each end of the toner cartridge with its hold- ers, and then insert the car- tridge. Note Do not touch the contact indicated in the illustration. Cleaning the Printer 6-15...
- Page 79 Press in the magenta toner car- tridge until it locks into place. Close the front cover. 6-16 Cleaning the Printer...
-
Page 80: Troubleshooting
Troubleshooting... -
Page 81: Introduction
Introduction This chapter provides information to aid you in resolving printer problems you may encounter, or at least guide you to the proper sources for help. Preventing Media Misfeeds page 7-3 Understanding the Media Path page 7-4 Indicator Messages page 7-5 Clearing Media Misfeeds page 7-10 Solving Problems with Media Misfeeds... -
Page 82: Preventing Media Misfeeds
Preventing Media Misfeeds Make sure that... Media matches the printer specifications. Media is flat, especially on the leading edge. The printer is on a hard, flat, level surface. You store media in a dry location away from moisture and humidity. You always adjust the media guides in Tray 1 after inserting the media (a guide that is not properly adjusted can cause poor print quality, media mis- feeds, and printer damage). -
Page 83: Understanding The Media Path
Understanding the Media Path Understanding the printer’s media path will help you locate media misfeeds. 1 Output tray 2 Imaging cartridge 3 Toner cartridge carousel 4 Tray 1 5 Fuser unit Understanding the Media Path... -
Page 84: Indicator Messages
Toner near empty Prepare the new blinking toner cartridge. Blinking An unapproved toner Install a genuine cartridge is installed. Oki toner car- tridge. Rapid The installed toner Install a genuine blinking cartridge is of an Oki toner car- unapproved type. - Page 85 Ready Attention Toner Condition Action indicator indicator indicator (green) (orange) (orange) Blinking Toner out Replace the toner cartridge. This message appears when Printing can the Toner Out continue, Stop in the however, Remote Panel the printing Utility is set to results are Off.
-
Page 86: Error Messages
Error Messages These messages indicate errors which you must correct before a print job can continue or the printer status return to “Ready”. Ready Attention Toner Condition Action indicator indicator indicator (green) (orange) (orange) Rapid Toner out Replace the toner blinking cartridge. - Page 87 Ready Attention Toner Condition Action indicator indicator indicator (green) (orange) (orange) Slow Memory full Press the Cancel blinking key. If the error is not corrected, turn off the printer. After a few seconds, turn on the printer. Blinking Front cover or top Close the front cover is open.
-
Page 88: Service Message
Service Message This message indicates a more serious fault that can only be corrected by a customer service engineer. Ready Attention Toner Condition Action indicator indicator indicator (green) (orange) (orange) Rapid Rapid All blinking Fatal error Turn off the blinking blinking printer. -
Page 89: Clearing Media Misfeeds
Clearing Media Misfeeds To avoid damage, always remove misfed media gently, without tearing it. Any pieces of media left in the printer, whether large or small, can obstruct the media path and cause further misfeeds. Do not reload media that has misfed. Note The image is not fixed on the media before the fusing process. -
Page 90: Clearing Procedures
Clearing Procedures Open the top cover. If there is paper in the output tray, remove it, and then fold up the out- put tray before opening the top cover. Grab the handle and lift it up slightly to the back, and then slowly pull the imaging cartridge out vertically. - Page 91 Note Do not touch the PC drum on the imaging cartridge. Position the removed imaging cartridge horizontally as shows in the illustration at the right. Be sure to keep the imaging cartridge horizontal and place it where it will not become dirty. Do not leave the imaging cartridge removed for more than 15 minutes, and do not place the...
- Page 92 Push the fuser separator levers back as far as possible. CAUTION The area around the fuser unit is extremely hot. Touching anything other than the indicated levers may result in burns. If you get burned, immediately cool the skin under cold water, and then seek professional medical attention.
- Page 93 Remove any misfed media. Raise the fuser unit cover and remove the media. 7-14 Clearing Media Misfeeds...
- Page 94 Note Do not touch the paper exit sensor on the fuser unit. Note Decreased print quality may BOTTOM result if the surface of the VIEW transfer roller is touched. Be careful not to touch the surface of the transfer roller. Clearing Media Misfeeds 7-15...
- Page 95 Return the fuser separator levers to their original positions. Slowly insert the imaging car- tridge vertically, and then push it slightly down toward you to fin- ish reinstalling the imaging car- tridge. 7-16 Clearing Media Misfeeds...
- Page 96 Carefully close the top cover. Clearing Media Misfeeds 7-17...
-
Page 97: Solving Problems With Media Misfeeds
Solving Problems with Media Misfeeds Frequent misfeeds in any area indicate that area should be checked, repaired, or cleaned. Repeated misfeeds may also happen if you’re using unsupported print media. Symptom Cause Solution Several The front edges of Remove the media and even up the sheets go the media are not front edges, then reload it. - Page 98 Symptom Cause Solution Media is Envelopes are facing Load the envelopes in Tray 1 so the misfeeding. the wrong way in flaps are facing down. Tray 1. If the flaps are on the long edge (Envelope C6 and Envelope DL), load the envelopes with the flap edge toward the machine and the flap side facing down.
-
Page 99: Solving Other Problems
The job is very com- Wait. No action needed. plex. A toner cartridge for a Install a genuine Oki toner cartridge different region or an approved for your specific printer. unapproved toner cartridge is installed. Blank pages One or more of the Check the toner cartridges. - Page 100 Symptom Cause Solution Not all pages The Cancel key was Make sure no one pressed the Cancel print. pressed. key while your job was printing. The tray is empty. Check that the trays are loaded with media, in place, and secure. A document is printed Print the overlay file using a suitable with an overlay file...
-
Page 101: Solving Problems With Printing Quality
Solving Problems with Printing Quality Symptom Cause Solution Nothing is One or more of the Remove the toner cartridges and printed, or toner cartridges may check if any is damaged. there are be defective. blank spots The imaging cartridge Remove the imaging cartridge and on the may be defective. - Page 102 Symptom Cause Solution Image is too The print head win- Clean the print head window. light; there is dow is dirty. low image The media is moist Remove the moist media and replace density. from humidity. with new, dry media. There is not much Replace the toner cartridge.
- Page 103 Symptom Cause Solution The print or One or more of the Remove the toner cartridges and color density toner cartridges may check for damage. If it is damaged, is uneven. be defective or low. replace it. The imaging cartridge Remove the imaging cartridge and is defective.
- Page 104 Symptom Cause Solution There are One or more of the Remove the toner cartridges and toner toner cartridges are check for damage. If it is damaged, smudges or defective or installed replace it. residual incorrectly. images. There are The media path is Print several blank sheets and the toner dirty with toner.
- Page 105 Symptom Cause Solution Image The print head win- Clean the print head window. defects. dow is dirty. A toner cartridge may Remove the toner cartridges and be leaking. check for damage. If it is damaged, replace it. A toner cartridge may Remove the toner cartridge with the be defective.
- Page 106 Symptom Cause Solution The color The imaging cartridge Remove the imaging cartridge and has a poor is defective. check for damage. If it is damaged, reproduction replace it. or has poor color density. If the problem is not resolved, even after all of the above have been per- formed, contact Technical Support with the error information.
- Page 107 7-28 Solving Problems with Printing Quality...
-
Page 108: A Appendix
Appendix... -
Page 109: Technical Specifications
Technical Specifications Printer Type Desktop full color laser beam printer Printing system Dual laser diode with polygon mirror Developing system Mono component development system Fusing system Heat roller system 1200 dpi × 600 dpi or Resolution 600 dpi × 600 dpi First print Monochrome: 13 seconds for A4, Letter (plain paper) -
Page 110: Consumable Life Expectancy Chart
Power supply 120 V, 50 to 60 Hz 220 to 240 V, 50 to 60 Hz Power consumption 120 V: 970 W or less 220 to 240 V: 1020 W or less Energy Saver Mode: 14 W or less Amperage 120 V: 8.2 A or less 220 to 240 V: 4.4 A or less Acoustic Noise... -
Page 111: Service-Replaceable
The values shown for the toner cartridge and imaging cartridge indi- cate the number of pages for simplex printing using A4/Letter-size media with 5% coverage. The actual life may differ (be shorter) depending on the printing condi- tions (coverage, paper size, etc.), differences in the printing method, such as continuous printing or intermittent printing (when print jobs of one page are often printed), or the type of paper used, for example, thick paper. - Page 112 Index Index Warning Messages ....7-5 Basic tab ........2-6 Labels ........... 4-6 Layout tab ........2-6 Consumables Letterhead ........4-7 Fuser unit ........5-13 Loading media ......4-10 Imaging cartridge ......5-10 Toner cartridge ......5-2 Control panel ........1-5 Maintenance ......... 6-2 Media Clearing misfeeds ....
- Page 113 Letterhead ........4-7 Setting ........2-5 Plain paper ........4-3 Uninstalling ......... 2-3 Postcard ........4-7 Thick stock ........4-4 Misfeed problems .......7-18 Quality tab ........2-7 Clearing ........7-10 Media path ........7-4 Preventing ........7-3 Remote Panel Utility Closing ........3-4 Opening ........3-2 Output tray ........4-16 Using ..........
-
Page 114: Index
8551, Japan Fax:(64) 9 477 0549 http://www.comworth.co.nz Tel:(81) 3 5445 6158 Fax:(81) 3 5445 6189 Oki Data(S) P Ltd. Malaysia Rep Office http://www.okidata.co.jp Suite 21.03, 21st Floor Menara IGB, Mid Valley City, Oki Data (Singapore) Pte. Ltd. Lingkaran Syed Pura 59200,... - Page 115 07102801 iss.1...
Need help?
Do you have a question about the C110 and is the answer not in the manual?
Questions and answers