
Subscribe to Our Youtube Channel
Related Manuals for Napoleon GOURMET GRILLS


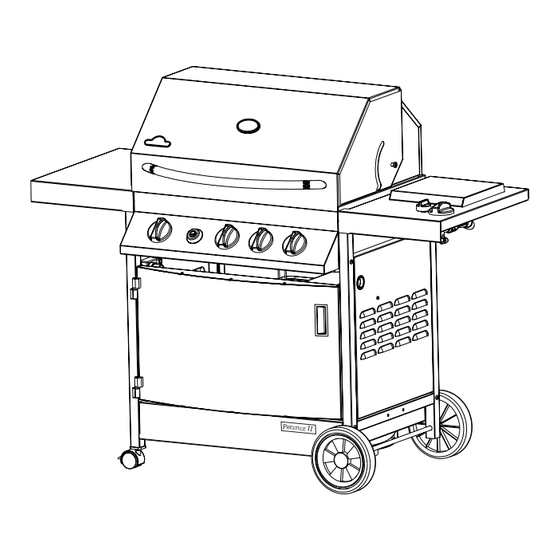
Summary of Contents for Napoleon GOURMET GRILLS
- Page 1 SERIAL / SÉRIE #______________________ PTSS450RSB RETAIN THIS MANUAL FOR FUTURE REFERENCE GARDER CE LIVRE POUR RÉFÉRENCES FUTURES...
-
Page 2: Table Of Contents
TABLE OF CONTENTS General Instructions Page # Assembly Instructions Page # Warranty Cart Assembly General Information Wheel Assembly Important Do's and Don'ts Chassis Assembly Gas Hook-up Instructions Grease Tray and Drip Pan Assembly Leak Testing Instructions Installing Sear Plates, Grills, and Warming Rack Bottom Shelf Placement Sides and Rear Cart Panel Installation Operating Instructions... -
Page 3: Warranty
NAPOLEON gas grills are manufactured under the strict Standard of the world recognized ISO 9001-2000 Quality Assurance Certificate. NAPOLEON products are designed with superior components and materials, and are assembled by trained craftsmen who take great pride in their work. The burner and valve assembly are leaktested and test-fired at a quality test station, and thoroughly inspected by a qualified technician before packaging and shipping to ensure that you, the customer, receive the quality product you expect from NAPOLEON. -
Page 4: General Information
GENERAL INFORMATION THIS GAS BARBECUE IS CERTIFIED UNDER CANADIAN AND AMERICAN NATIONAL STANDARDS, CAN/CGA-1.6-M95 AND ANSI Z21.58 -1995 RESPECTIVELY FOR OUTDOOR GAS GRILLS AND SHOULD BE INSTALLED to conform with local codes. In absence of local codes, install to the current CAN1-B149.2 Propane Installation Code in Canada or to the National Fuel Gas Code, ANSI Z223.1 in the United States. -
Page 5: Gas Hook-Up Instructions
GAS HOOK-UP INSTRUCTIONS CYLINDER CONNECTION: Ensure that the gas regulator hose is kink free. Remove the cap or plug from the cylinder fuel valve. Insert the black QCC1 regulator nipple onto the QCC1 fuel valve. Hand tighten clockwise. A leak test must be performed annually, and each time a cylinder is hooked up, or if a part of the gas system is replaced. -
Page 6: Lighting Instructions
LIGHTING INSTRUCTIONS Open lid. CENTRE BURNER LEFT BURNER Ensuring burner controls are in the off position, turn on the gas supply valve. REAR RIGHT IGNITOR LIGHTING PORT BURNER BURNER HOLES Main Burner Lighting Side Burner Lighting Back Burner Lighting Turn left burner control Open burner cover. -
Page 7: Cooking Instructions
COOKING INSTRUCTIONS When lit for the first time, the gas grill will emit a slight odour. This is a normal temporary condition caused by the "burn-in" of internal paints and lubricants used in the manufacturing process and will not occur again. Simply run the main burners on high for approximately ½... -
Page 8: Maintenance Instructions
CLEANING THE OUTSIDE OF THE GAS GRILL - Do not use abrasive cleaners to clean any stainless steel parts. Exterior grill surfaces should be cleaned while warm to the touch, with warm soapy water. To clean stainless surfaces, use a stainless steel cleaner or a non-abrasive cleaner. -
Page 9: Troubleshooting
BURNER - The burner is made from heavy wall 304 stainless steel, but due to the extreme heat and corrosive environment, surface corrosion will occur. Use a brass wire brush to remove surface corrosion. Clean any blocked ports using an opened paper clip. -
Page 10: Ordering Replacement Parts
Problem Possible Causes Solution Flames lift away from Improper air shutter adjust- Close air shutter slightly according to combustion air burner, accompanied by ment. adjustment instructions. the smell of gas, and pos- sibly difficulties in lighting. Burner will not light with the Loose electrode or switch Check that electrode wires are firmly pushed onto the igniter, but will light with a... - Page 11 TABLE DES MATIÈRES TABLE DES MATIÈRES Instructions générales Page # Instructions d'assemblages Page # Garantie 1. Montage du Chariot Information générale 2. Montage des Roues Quoi faire et ne pas faire 3. Montage du Châssis Instructions de branchement du gaz 4.
-
Page 12: Garantie
Les grils à gaz NAPOLÉON sont fabriqués conformément aux normes strictes du Certificat d’assurance de qualité mondialement reconnues ISO 9001-2000. Les produits NAPOLÉON sont conçus avec des composantes et des matériaux de qualité supérieure, assemblés par des artisans qualifiés qui sont fiers de leur travail. Le brûleur et le montage de la soupape subissent un test de détection de fuites et d’allumage à... -
Page 13: Information Générale
INFORMATION GÉNÉRALE CE GRIL À GAZ EST CERTIFIÉ SELON LES NORMES NATIONALES CANADIENNES ET AMÉRICAINES, CAN/CGA-1.6- M95 ET AINSI Z21.58 - 1995 RESPECTIVEMENT POUR DES GRILS À GAZ POUR L’EXTÉRIEUR ET SON INSTALLATION DEVRAIT ÊTRE CONFORME AUX CODES LOCAUX. En l’absence de codes locaux, installez selon les normes courantes CAN1-B149.2 du code d’installation de Propane au Canada ou selon les normes ANSI Z223.1 du “National Fuel Gas”... -
Page 14: Instructions De Branchement Du Gaz
INSTRUCTIONS DE BRANCHEMENT DU GAZ RACCORD DE LA BONBONNE: Assurez-vous que le tuyau du régulateur de gaz est sans anomalie. Enlevez les bouchons sur la soupape de gaz à la bonbonne. Connectez le régulateur QCC1 sur la soupape de gaz QCC1. Serrez à la main dans le sens des aiguilles d’une montre. -
Page 15: Instructions D'allumage
INSTRUCTION D’ALLUMAGE Ouvrez le couvercle BOUTON D'ALLUMEUR BRLEUR DE Fermez tous les boutons de GAUCHE contrôle des brûleurs, ouvrez la soupape d’alimentation en gaz lentement. BRLEUR D'ARRIERE ACCESS BRLEUR BRLEUR D'ALUMAGE DE CENTRE DE DROITE Allumage du Allumage du Allumage du brûleur latéral. -
Page 16: Instructions D'opération
INSTRUCTIONS D’OPÉRATION Lorsqu’il est allumé pour la première fois, le gril dégagera une légère odeur. Ceci est un phénomène normal et temporaire causé par l’évaporation des peintures et lubrifiants internes utilisés dans le processus de fabrication et ne se reproduira pas. Allumez simplement votre gril sur “high”... -
Page 17: Instructions D'entretien
NETTOYAGE DU TIROIR D’ÉGOUTTEMENT: Sortez le tiroir d’égouttement pour en faciliter le nettoyage. Il devrait être nettoyé fréquemment (à toutes les 4 ou 5 utilisations) afin d’éviter une accumulation de graisse. La graisse et les jus tombent dans le tiroir d’égouttement qui se trouve sous la cuve du gril et coulent pour aller s’accumuler dans le récipient à graisse jetable qui se situe sous le tiroir d’égouttement. -
Page 18: Guide De Dépannage
BOYAU - Vérifiez l’usure, coupures, craquelures ou s’il est fondu. Si vous découvrez une de ces défectuosités, n’utilisez pas votre gril. Faites remplacer la pièce par votre détaillant NAPOLEON ou par un installateur qualifié. BRLEUR - Le brûleur est fait d’acier inoxydable 304, mais en raison de la chaleur extrême et d’un environnement corrosif, il se produira une corrosion de surface. -
Page 19: Commandes De Pièces De Rechanges
Problème Causes Probables Solution Les flammes se détachent Mauvais ajustement des volets Fermez légèrement les volets d’air selon les instructions du brûleur, accompagnées d’air. d’ajustement des volets d’air. d’une odeur de gaz et possiblement une difficulté d’allumage. Mauvais contact des fils de Vérifiez que les fils de l'électrode sont solidement enfoncés Le brûleur ne s’allume pas avec l’allumeur mais... -
Page 20: Montage Du Chariot
STAINLESS STEEL PARTS MAY HAVE A PROTECTIVE PLASTIC COATING, REQUIRED FOR THE MANUFACTURING PROCESS. PLEASE REMOVE THIS COATING BEFORE OPERATING THE UNIT. LES PIÈCES EN ACIER INOXYDABLE PEUVENT ÊTRE RECOUVERTES D'UNE PELLICULE DE PROTECTION, NÉCESSAIRE DURANT LE PROCÉDÉ DE FABRICATION. VOUS DEVEZ ENLEVER CETTE PELLICULE AVANT DE FAIRE FONCTIONNER L'APPAREIL. -
Page 21: Montage Du Châssis
START ALL SCREWS BEFORE TIGHTENING ENGLIGNEZ TOUTS LES VIS DE LES RESSERRES N570-0018 (1/4-20 X 1-3/4") -
Page 22: Installation Des Plaques De Cuisson, Grils Et Étagère
N305-0027 N305-0026 N520-0001 N570-0057 (1/4-20 X 1/2") N450-0008 (1/4-20) N735-0003 (1/4) -
Page 23: Installation Du Panneau Du Chariot - Arrière Et Latéral
START ALL SCREWS. DO NOT TIGHTEN. COMMENCEZ LES VIS. NE SERREZ PAS. 12 X N570-0017 (1/4-20 X 1/2") N570-0026 (#14 X 1/2") -
Page 24: Assemblage De Porte D'avant
W570-0042 (#10-24 X 3/8") N570-0022 (#8-32 X 3/8") N080-0070 N570-0042 (#10-24 X 3/8") N450-0009 (#10-24) -
Page 25: Montage Du Brûleur Latéral
N570-0022 (#8-32 X 3/8") -
Page 26: Installation De La Bouteille De Propane
TO GAS SUPPLY À L'ARRIVÉE DE GAZ... - Page 29 x - standard *P - propane units only *P - appareils propane seulement x - compris *N - natural gas units only *N- appareils gaz naturel seulement AC - accessory AC - accessoires NOTES...
- Page 31 NAPOLEON APPLIANCE CORPORATION ACCESSORIES / PARTS ORDER FORM FAX TO: 1-705-727-4282 PLEASE PRINT CLEARLY CUSTOMER NAME: DATE: ADDRESS: MODEL #: SERIAL #: TELEPHONE: VISA OR MASTERCARD #: EXPIRY DATE: QUANTITY PRODUCT NUMBER DESCRIPTION TAXES SHIPPING CHARGES MAY APPLY...
Need help?
Do you have a question about the GOURMET GRILLS and is the answer not in the manual?
Questions and answers