Table of Contents
Advertisement
Quick Links
Advertisement
Chapters
Table of Contents

Related Manuals for CDA WF250SS


Summary of Contents for CDA WF250SS
-
Page 3: Table Of Contents
CONTENTS INSTALLATIONS MANUAL 1 / SAFETY INSTRUCTIONS • Important warnings __________________________________________ 2 / INSTALLING YOUR DISHWASHER • Free-standing appliances ____________________________________ • Built-in appliances __________________________________________ • Sound-Proofing seals ________________________________________ • Appliances built-in under a hob ________________________________ • Levelling by adjusting the feet ________________________________ •... -
Page 4: Safety Instructions
1 / SAFETY INSTRUCTIONS • IMPORTANT WARNINGS Important : After unpacking your appliance, make sure that it has not suffered any damage during trans- port. Never connect up a damaged appliance. If your appliance is damaged, please contact your dealer. Danger : If your appliance operates incorrectly, disconnect it (pull out the plug) or switch off the cir- cuit concerned and close the water supply tap. -
Page 5: Installing Your Dishwasher
2 / INSTALLING YOUR DISHWASHER • FREE-STANDING APPLIANCES You can use the top of the appliance as a worktop. Do not position your dishwasher too close to a heat source; otherwise the trim around the top could be damaged. • BUILT-IN APPLIANCES •... -
Page 6: Sound-Proofing Seals
2 / INSTALLING YOUR DISHWASHER • SOUND-PROOFING SEALS To improve the built-in appliance’s sound- proofing, fit the sound-proofing seals (depen- ding on the model). ( on Fig. 05) If the recess is bigger, stick on seal using the adhesives provided. Fig. -
Page 7: Connecting To The Water Supply
2 / INSTALLING YOUR DISHWASHER • CONNECTING TO THE WATER SUPPLY This dishwasher can be supplied with cold water or hot water up to a maximum of 60°C. When supplying with hot water, check that your original hose allows such connection 0 0 . -
Page 8: Draining Away The Waste Water
2 / INSTALLING YOUR DISHWASHER • DRAINING AWAY THE WASTE WATER You can connect the end of the drain hose to: - A ventilated U-bend (Fig. 9) or - A sink U-bend (Fig. 9) or - The edge of the sink, using the special plastic 15 cm maxi hook provided (depending on the model) (Fig. -
Page 9: Connecting To The Electricity Supply
2 / INSTALLING YOUR DISHWASHER • ELECTRICAL CONNECTION The appliance must be at a standstill when Your dishwasher complies with European connecting to the electricity supply circuit. Directives 73/23/EEC (Low Voltage Directive) and 89/336/EEC (Electromagnetic Compatibility) Before connecting your appliance, ensure as modified by Directive 93/68/EEC. - Page 10 NOTES...
- Page 11 CONTENTS CONTENTS INSTRUCTION MANUAL 1/ FOR THE USER’S ATTENTION • Safety instructions ______________________________________ • Environmental protection ________________________________ • Economical, environmentally friendly washing ________________ 2/ DESCRIPTION OF YOUR APPLIANCE • General presentation of the dishwasher ____________________ • Presentation of the control panel __________________________ 3/ INFORMATION ______________________________________________ 4/ WHAT TO DO BEFORE FIRST USING THE MACHINE •...
-
Page 12: 1/ For The User's Attention
If your appli- — Place detergents out of children’s reach and ance is damaged, please contact CDA do not put any detergent in the machine until Customer Care. -
Page 13: Environmental Protection
— If the machine malfunctions due to other causes than those mentioned in this booklet, disconnect the machine (remove the plug) or break the circuit concerned and contact CDA Customer Care. ENVIRONMENTAL PROTECTION •... -
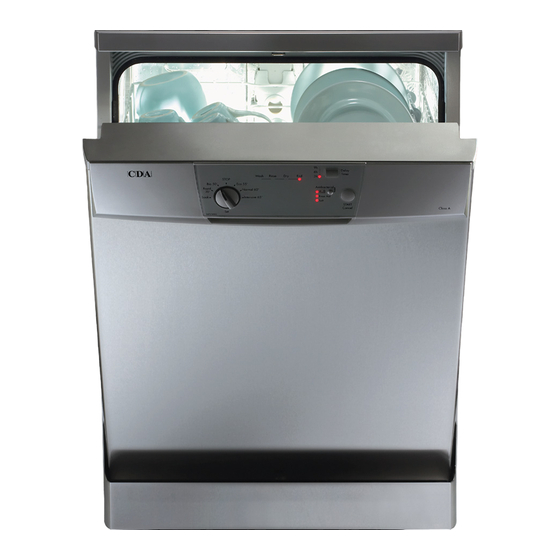
Page 14: 2/ Description Of Your Appliance
2/ DESCRIPTION OF YOUR APPLIANCE • GENERAL PRESENTATION OF THE DISHWASHER Fig. 01 Removable top Regenerating salt tank Upper basket Waste filter Washing products dispenser Main filter oversize plate barrier Rinsing product dispenser Lower sprinkler arm Description plate (Model number ) Advice: This user’s guide is applicable to several models. -
Page 15: Presentation Of The Control Panel
2/ DESCRIPTION OF YOUR APPLIANCE • PRESENTATION OF THE CONTROL PANEL Delay Timer Wash Rinse STOP Bio 50° Eco 55° Antibacterial Rapid Normal 60° Rinse Aid Soak Intensive 65° Salt START Cancel Class A Select WF250SS Fig. 02 Selector switch (3 functions): Start / Cancel: Briefly press this but- •... -
Page 16: 3/ Information
3/ INFORMATION Important: Important: Never use normal washing-up liquid. To obtain impeccable washing and drying results from your dishwasher without any marks, you must set it carefully using the water softening system, which utilises rege- For ease of use and in certain water nerating salt. -
Page 17: 4/ What To Do Before First Using The Machine
4/ WHAT TO DO BEFORE FIRST USING THE MACHINE • MEASURE THE WATER HARDNESS AND SELECT THE TYPE OF DETER- GENT: TRADITIONAL OR MULTI-PURPOSE In one simple action, you can test the your water’s lime content using the testing strip supplied with your dishwasher. -
Page 18: 5/ Detergent Products And Adjusting The Water Softener
5/ DETERGENT PRODUCTS AND ADJUSTING THE WATER SOFTENER • FOR TRADITIONAL PRODUCTS • Your machine must be specially adjusted to use traditional products. • To adjust the water softener using the control panel: Turn the selector switch to “ “ S S e e l l e e c c t t ” ” . The six indicators’ lights Delay Timer come on, meaning you are in adjustment mode. -
Page 19: For Multi-Purpose Products
5/ DETERGENT PRODUCTS AND ADJUSTING THE WATER SOFTENER • FOR MULTI-PURPOSE PRODUCTS : USING THE BUTTON • Your machine can be specially adjusted to use multi-purpose products if the water hardness is less than 25°F. Tip: Your dishwasher’s button adjusts to the wide range of multipurpose products. It has two possible settings, which you access via the Select. -
Page 20: 6/ Filling With Regenerating Salt
6/ FILLING WITH REGENERATING SALT • Filling with regenerating salt (Fig 06) Filling with salt is essential for providing a good wash without marks. It regenerates the resins that soften the water, by removing its lime content (unless the mains water supply is soft enough). -
Page 21: 7/ Filling With Rinse Aid
7/ FILLING WITH RINSE AID • Filling with rinse aid (Fig. 07) Important : Only use a rinse aid designed for dish- washers. The rinse aid ensures your items shine and are well dried. When first putting the machine into service, fill the tank until the level is flush with the top of the adjustment lever. -
Page 22: 8/ Your Dishwasher's Equipment
8/ YOUR DISHWASHER’S EQUIPMENT Very important Items not suitable for washing in a dishwasher: - Wooden cutting boards - Stainless steel utensils or plastic utensils that are not heat-resistant - Copper or pewter items - Glued crockery and cutlery - Cutlery with wooden, horn or mother-of-pearl handles - Antique or hand-painted porcelain When purchasing crockery, glasses or cutlery, ensure that it is dishwasher-safe •... -
Page 23: The Upper Basket
8/ YOUR DISHWASHER’S EQUIPMENT • THE UPPER BASKET This basket is particularly designed to take glasses, cups, ramekins, small salad bowls, bowls and saucers. Arrange your items methodically to save on space (arranging glasses, cups or bowls together). You can also arrange cups, ladles, etc. on the folding cup racks (Fig. -
Page 24: The Cutlery Basket
8/ YOUR DISHWASHER’S EQUIPMENT • THE CUTLERY BASKET The cutlery basket slides to allow flexible loading. It can be placed anywhere in the lower basket. You can therefore make a variety of loads depending on the items (Fig. 12). If your cutlery items or your dishes are too large, alter the height setting for the upper basket. -
Page 25: 9/ Your Dishwasher's Safety Systems
9/ YOUR DISHWASHER’S SAFETY SYSTEMS • Locked programme access While the programme is running, the programme selection switch is automatically locked and can- not be changed. It will unlock automatically when the programme ends or is cancelled. • Anti-overflow system This system activates the drain pump automatically if the water in the tank reaches an abnormal level. -
Page 26: 10/ Washing Programmes Table
10/ WASHING PROGRAMMES Mixed Mixed Mixed I I T T E E M M T T Y Y P P E E ( ( p p o o r r c c e e l l a a i i n n , , p p a a n n s s , , c c u u t t - - V V e e r r y y s s h h o o r r t t 3 3 0 0 - - m m i i n n u u t t e e Very short cycle N N o o r r m m a a l l l l y y d d i i r r t t y y... - Page 27 10/ WASHING PROGRAMMES Mixed Mixed Resistant N N o o r r m m a a l l l l y y d d i i r r t t y y N N o o r r m m a a l l l l y y d d i i r r t t y y V V e e r r y y d d i i r r t t y y A large amount of A normal amount of...
-
Page 28: 11/ Programming
11/ PROGRAMMING Delay Timer Wash Rinse STOP Bio 50° Eco 55° Antibacterial Rapid Normal 60° Rinse Aid Soak Intensive 65° Salt START Cancel Class A Select WF250SS Fig. 02 Advice: Consult the Programmes table on the preceding pages to determine the programme you need for the type of items, the quantity and the amount of food residue. -
Page 29: 12/ Cleaning Your Appliance
12/ CLEANING YOUR APPLIANCE • CLEANING THE WASTE FILTERS ➀ ➀ The filtration system consists of several elements: - - The waste filter - - The large main filter - - The micro filter ➁ ➁ The filters are located in the centre of the tub and must be washed regularly to obtain opti- mum washing results. - Page 30 12/ CLEANING YOUR APPLIANCE • Periodically Every 3 or 4 months, in order to remove any deposits, run a special maintenance programme, with- out any items in the machine, using a special dishwasher cleaning product. Important : Keep this product out of children’s reach. •...
-
Page 31: 13/ If Operating Abnormalities Occur
13/ IF OPERATING ABNORMALITIES OCCUR • SUMMARY OF THE FAULTS d01: water supply fault (tap) d07: overflow / anti-leak fault d02: draining fault d08: sprinkling distribution fault d03: heating fault d11: pressure sensor fault d04: temperature fault d12: filling fault (water inlet detection system) d05: fault –... - Page 32 13/ IF OPERATING ABNORMALITIES OCCUR • THE INDICATOR LIGHTS Problem Possible auses What to do? The salt light does not go out - No salt or an insufficient quan- - Refill the tank and wait for the tity of salt in the tank to trigger cycle to end.
- Page 33 13/ IF OPERATING ABNORMALITIES OCCUR Problem Possible auses What to do? The appliance will not restart - Door opened during a - Wait for the time delay to end washing cycle. (controlled internally by the appliance). The appliance does not drain - The cover has not been remo- - Remove the cover.
- Page 34 13/ IF OPERATING ABNORMALITIES OCCUR • POOR WASHING RESULTS... Problem Possible auses What to do? White marks - Chalky film (removable with - Check that there is salt in the (identify what type) vinegar). tank (light unlit = OK). - Check the water hardness at the tap and that the water sof- tener is set correctly.
-
Page 35: Poor Drying Results
13/ IF OPERATING ABNORMALITIES OCCUR • POOR OPERATION Problem Possible auses What to do? Constant filling - Drain hole situated too low for - Drain wand has fallen on the the appliance (Cf. table fault floor. d012). - The filters and drain outlets are - Remove and clean the filters A lot of waste on the large filter blocked... - Page 36 13/ AFTER-SALES SERVICE INTERVENTION WORK • • Any intervention work on your appliance must be performed by a qualified professional approved by the manufacturer. When you call, please mention the full reference for your appliance (model, type and serial number). This information is shown on the description plate (see Fig.
-
Page 37: 14/ Indications For The Testing Laboratories
14/ INDICATIONS FOR THE TESTING LABORATORIES • Details common to all models — Washing capacity - - - - - - - - - - - - - - - - - - - - - - - - - - - - - - - - - - - - 12 standard place settings —... - Page 38 14/ INDICATIONS FOR THE TESTING LABORATORIES N N O O K K N N O O K K O O K K 3 3 3 3 3 3 2 3 3 3 3 3 2 1 8 8 8 1 1 1 2 2 2 8 8 5 4 4 4...
Need help?
Do you have a question about the WF250SS and is the answer not in the manual?
Questions and answers