Table of Contents
Advertisement
Advertisement
Table of Contents

Subscribe to Our Youtube Channel
Related Manuals for CycleOps 100 PRO


Summary of Contents for CycleOps 100 PRO
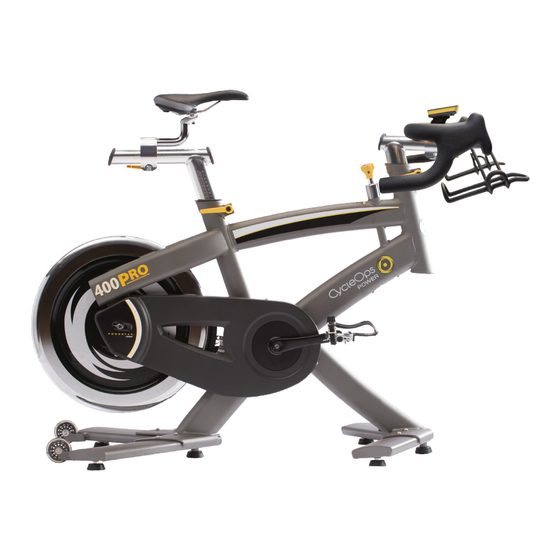
- Page 1 CycleOps Pro Series Indoor Cycles User Guide 400 Pro 300 Pro 200 Pro 100 Pro Deutsche Anweisungen www.cycleops.com/userguide Istruzioni italiane www.cycleops.com/userguide Nederlandse instructies www.cycleops.com/userguide Norsk instruksjoner www.cycleops.com/userguide...
-
Page 2: Table Of Contents
10. WArrANTy....................13 CHAPTER 1: bEfoRE bEginning Congratulations on choosing the CycleOps Pro Series indoor cycle! The CycleOps Pro Series indoor cycle takes cycling to the next level as the only indoor cycle to fit, feel and ride like an outdoor bike. - Page 3 CHAPTER 2: UnPACking THE CyClEoPs PRo sERiEs indooR CyClE Place the box upright and cut the plastic binding straps. Lift the top of the box to expose the indoor cycle and packaging. Remove all parts from the box including foam inserts. Ensure all the following parts are included:...
-
Page 4: Indoor Cycle Assembly
CHAPTER 3: indooR CyClE AssEmbly Attach Stabilizer Feet Rear stabilizer Front stabilizer Rear stabilizer Front stabilizer 1. Note the difference between the front 2. Attach the rear stabilizer to the rear of 3. Attach the front stabilizer to the front and rear stabilizers. -
Page 5: Attach Seat
Attach Seat A seat has been included with the CycleOps Pro Series indoor cycle. If desired, the indoor cycle can accommodate an off-the-shelf seat to personalize the fit, feel and ride. In some instances, a shorter seat post clamp is required for individuals under five feet tall. -
Page 6: Level The Indoor Cycle
Seat Seat Seat post Seat post End cap clamp Seat post clamp 4. Attach seat to seat post clamp. 5. Loosen the 6mm bolt and place seat rails 6. Secure the plastic end cap to the seat within the clamp. Adjust to desired seat post using two end cap screws with the placement using 6mm Allen wrench. -
Page 7: Attach Pedals
CHAPTER 4: gEnERAl UsE The CycleOps Pro Series indoor cycle is easy to use. Adjust the seat and handlebar to alter the ride position. Adjust resistance to change pace/cadence. Adjust Seat... -
Page 8: Adjust Handlebar
Control Resistance (100 pro, 200 pro, 300 pro only) The CycleOps Pro Series indoor cycle allows the user full control over resistance by adjusting the resistance knob. Lower resistance levels enable the pedals to turn at a faster (less diffi cult) pace/cadence. Higher resistance levels enable the pedals to turn at a slower (more diffi cult) pace/cadence. -
Page 9: Common Adjustments
CHAPTER 5: Common AdJUsTmEnTs Replace Speed Sensor Battery (200 Pro only) Over time, the lithium battery in the speed sensor will need to be changed. See Preventative Maintenance for when to replace. 1. Using a 4mm Allen wrench, remove the 2. -
Page 10: Replace Hub Batteries
Over time, the batteries that power the electronics in the hub will need to be changed. See Preventative Maintenance for when to replace. The CycleOps Pro Series indoor cycle uses two AA batteries. The battery cap is split to make this task as easy as possible. -
Page 11: Adjust Flywheel/Chain Tension
Adjust Flywheel/Chain Tension Over time and after substantial use, the chain on the CycleOps Pro Series indoor cycle will stretch. Adjusting the tension/align- ment is a diffi cult task and improper adjustment can lead to premature chain/cog wear. It is recommended this task be done with assistance from an authorized indoor cycle dealer. -
Page 12: Adjust Brake Pad
CHAPTER 6: PREVEnTATiVE mAinTEnAnCE Performing necessary preventative maintenance is key to keeping the CycleOps Pro Series indoor cycle in proper working condi- tion. Following the recommended maintenance procedures will help extend the life of the CycleOps Pro Series indoor cycle. -
Page 13: Electronics
• Replace batteries in hub or sensor. CHAPTER 7: ElECTRoniCs The CycleOps Pro Series indoor cycle (200 Pro, 300 Pro and 400 Pro) includes the Joule display. Visit www.cycleops.com for more information regarding Joule. Some specific information relevant to the CycleOps Pro Series indoor cycle includes:... -
Page 14: Radio Frequency (Rf) Interference
CHAPTER 9: imPoRTAnT PRECAUTions It is the responsibility of the owner to ensure that all users of this CycleOps Pro Series indoor cycle are adequately informed of all warnings and precautions. For questions regarding this guide, contact Customer Service at the number listed on the back panel of this guide. -
Page 15: Warranty
Trademarks Saris Cycling Group, Inc , CycleOps and the PowerTap logo, are all registered trademarks of Saris Cycling Group, Inc. All other prod- uct, brand, or trade names used in this guide may be trademarks or registered trademarks of their respective owners.
Need help?
Do you have a question about the 100 PRO and is the answer not in the manual?
Questions and answers