Advertisement
Indoor Cycle Assembly Service Manual
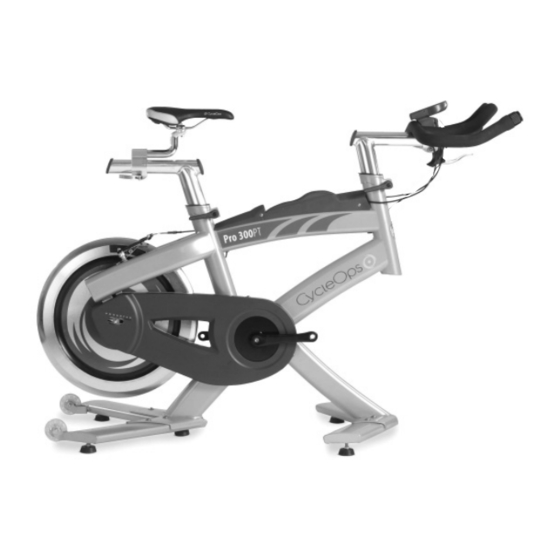
Comp 200E and Club Pro 300PT
CHAPTERS:
1. UNPACKING THE CYCLEOPS INDOOR CYCLE.......1
2. BIKE ASSEMBLY.............................................................1
Attach Stabilizer Feet
Attach Handlebars
Seat Assembly
Attach Pedals
Attach Console Bracket and Console
Leveling the Bike
3. COMMON ADJUSTMENTS........................................5
Flywheel Adjustment
Replacing Hub Batteries
Brake Adjustment
Replacing Brake Pads
Replacing Resistance Knob
4. LUBRICATION................................................................9
5. RF INTERFERENCE......................................................11
6. WARRANTY..................................................................11
1
Advertisement
Table of Contents

Related Manuals for CycleOps Club Pro 300PT


Summary of Contents for CycleOps Club Pro 300PT
- Page 1 Indoor Cycle Assembly Service Manual Comp 200E and Club Pro 300PT CHAPTERS: 1. UNPACKING THE CYCLEOPS INDOOR CYCLE...1 2. BIKE ASSEMBLY...1 Attach Stabilizer Feet Attach Handlebars Seat Assembly Attach Pedals Attach Console Bracket and Console Leveling the Bike 3. COMMON ADJUSTMENTS...5...
-
Page 2: Bike Assembly
CHAPTER 1:UNPACKING THE CYCLEOPS INDOOR CYCLE Place the box upright and cut the plastic binding straps. Lift the top of the box to expose the Indoor Cycle (IC) and packaging. Remove all parts from the box and foam inserts and ensure all the following parts are included:... - Page 3 A. Open the quick-release lever and slide the seat clamp assembly onto the seat tube. The clamp should be pointing towards the front of the CycleOps IC. Slide the clamp assembly all the way forward to allow access to the clamp. The seat clamp assembly is secured to the seat post tube via a quick-release lever.
- Page 4 “L” spindle is reverse threaded. Step 5: Attach Console Bracket and Console Bracket When fi rst setting up the CycleOps IC you must attach the console bracket to the bike. To do this, follow the instructions below: Place bracket onto the handlebars as shown.
- Page 5 Leveling the bike Once the above assembly instructions have been followed, move the bike to where it will be used and level it properly. To level the bike, adjust the leveling feet underneath the stabilizers until there is no rocking or movement of the bike. Leveler Lock You can secure the feet by tightening the leveler locks.
-
Page 6: Chapter 3: Common Adjustments
Chain tension/Flywheel Alignment Over time, the chain on your CycleOps IC will stretch due to the load applied to it. The following instructions will aid you in prop- erly tensioning the chain and aligning the fl ywheel in the frame of the CycleOps IC. CAUTION: Improper chain adjustment will cause premature wear and may void the warranty. - Page 7 Replacing Hub Batteries Pro 300PT (AA type) Over time, the batteries that power the electronics in the hub will need to be changed. The split battery cap on the Club Pro 300PT fl ywheel was designed to make this task as easy as possible. When it is necessary to change the hub batteries, follow these steps: Replacing Sensor Batteries Comp 200E Over time, the 3 volt lithium battery in the speed/cadence sensor in the COMP 200E indoor cycle will need to be changed.
- Page 8 Brake Adjustment Aligning Brake Pads When aligning the brake pads after replacement or after adjusting the fl ywheel, use the following guidelines for accurate alignment: Ensure the pads sit parallel to the smooth part of the fl ywheel. Cable adjustment (under bottle cage) Proper adjustment of the cables on the sliding splitter should look like this (Fig 1) In the event you need to adjust the cables, use the following steps: Fig 1...
- Page 9 Replacing Brake Pads The brake pads on the IC are made of a consumable felt material. Over time, the pads will wear out and need to be replaced. Follow these steps to replace your brake pads: With a 5mm Allen wrench, loosen the cable holding wire on the right hand side brake arm.
-
Page 10: Chapter 4: Lubrication
Pull the old resistance knob out of the handlebar. Insert cable through the hole in the slider and through brass cable stop. See CABLE ADJUSTMENT for instructions on properly adjusting the resistance cable. CHAPTER 4: LUBRICATION Chain Over time, the chain on your indoor cycle will require additional lubrication. It is recommended that you lube the chain every six months to maximize chain life. - Page 11 • Handlebar Tube • Stabilizers **Never use abrasive cleaning liquids or petroleum-based solvents when wiping down the bicycle. Inspection/Adjustment: Inspect the CycleOps IC for any loose parts, nuts, bolts, etc. Pay special attention to the following: • Pedals • Seat Assembly bracket •...
-
Page 12: Chapter 5: Rf Interference
CHAPTER 5: RF INTERFERENCE: If during use you are experiencing wireless drop out this is due to frequency interference. Wireless Internet access points, microwaves, cordless phones, or other wireless devices may cause frequency interference. To mitigate the chance of interference set wireless access points to the lowest channel possible, and keep bikes away for interfering devices. To change the channel on your access point, please consult your manufacturers documentation or your technology staff.
Need help?
Do you have a question about the Club Pro 300PT and is the answer not in the manual?
Questions and answers