Table of Contents
Advertisement
Advertisement
Table of Contents

Related Manuals for Hitachi HDR255


Summary of Contents for Hitachi HDR255
-
Page 2: Table Of Contents
Contents Features • DVB Features ..............1 Accessories ............1 • 200 Channels Safety Precautions ..........2 • DVB 7 days event information (7 days EPG) Power..............2 • TV scart (with RGB and CVBS support) SOME DOS AND DON'TS ON THE SAFE USE OF •... -
Page 3: Safety Precautions
• Should any solid object or liquid fall into the cabinet, Safety Precautions unplug the apparatus and have it checked by qualified Power personnel before operating it any further. • Always use the provided AC adaptor. • Operate only from the power source specified on Apparatus shall not be exposed to dripping or the AC adaptor. -
Page 4: Some Dos And Don'ts On The Safe Use Of Equipment
SOME DOS AND DON'TS ON THE SAFE USE OF EQUIPMENT This equipment has been designed and manufactured to meet international safety standards but, like any electrical equipment, care must be taken if you are to obtain the best results and safety is to be assured. ************** DO read the operating instructions before you attempt to use the equipment. -
Page 5: Overview Of The Remote Control
Overview of the Remote Control English - 4 -... -
Page 6: Connections
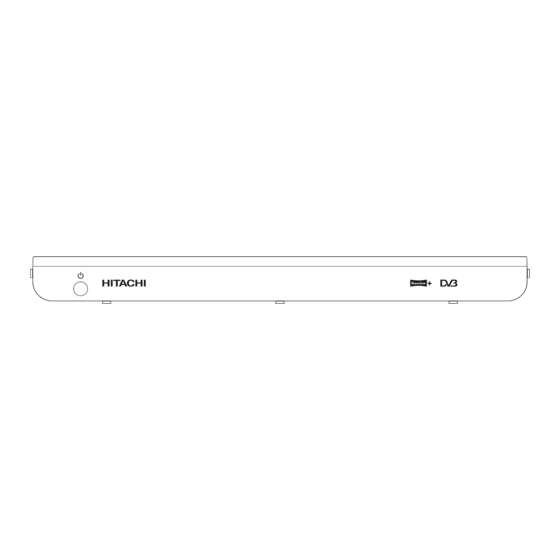
Connections FRONT VIEW Rating label NOTE: The rating label is at the bottom of the device. BACK VIEW 1.ANTENNA IN : Aerial input 2.AERIAL OUT : Connect to your TV 3.OPTICAL AUDIO : Optical Digital Audio Output 4.TV SCART : TV SCART connection 5. -
Page 7: Remote Control
Remote Control First open the battery cover on the underside of the remote control. Put in both batteries 1.5Volt (RO3/AAA) referring to the imprinted symbols (+/-) in the battery case and put on the battery cover again. While using the remote control, direct it towards the front side of the receiver. If the remote control does not work or the chosen function does not work, the batteries are most probably exhausted and they should be replaced as soon as possible. -
Page 8: Power Connection
Power Connection IMPORTANT: The set-top box is designed to operate on 12 V DC. For this, an adaptor is used which gives 12 V voltage. Connect this adaptor to a system that supplies 220-240V AC,50Hz. • After unpacking, allow the set-top box to reach the ambient room temperature before you connect the set to the mains Power On-Off Connect all cables before plugging into the mains. -
Page 9: Main Interface
Menu System Main Interface Main menu is accessed by pressing the MENU key When the box is switched on from stand-by mode for on the remote control. Navigate with “ ”/“ ” keys the first time or after first time installation, the following among the menus and press OK to activate menus. -
Page 10: Deleting Channels
Navigating the Entire Channel List Setting Favourites In the channel table “ ”/“ ” moves the selection to the previous or next .To exit menu and watch a specific channel highlight it using, “ ”/“ ” then press OK key while the “SELECT”... - Page 11 only program names and dates are displayed. Across programme. This option operates like the RECORD the bottom of the screen there is an info bar showing all button. the available commands which are listed below. RED BUTTON (SHRINK) : make the info boxes To cancel an already set recording, highlight that smaller.
- Page 12 OK button again. You can set a reminder for future Record/Cancel: Sets recordings for the selected programs. programme. If you press it again, the recording will be cancelled. To cancel an already set reminder, highlight that programme and press the OK button and select OK: Pressing this button will save the latest changings the option “Delete Reminder”.
-
Page 13: Timers
This is automatically worked out after the start and Timers end times have been entered. Playback: permit or block playback for other users.”use parental settings” is default. Change /Delete: permit or prohibit any modifications for other users. When a timer Start time is reached, the receiver starts to record the desired program, then when the end time is reached, the record stops. -
Page 14: Play Options
Play Options: Here, only the “Start recording at” and “ Stop recording at” options are active. If you have alrady separated recording, you could select any chapter to begin Play from start: Plays the recording from the with the archiving and stop it. If it is not separated beginning. -
Page 15: Chapter Options
Chapter Options Because the PVR has a Twin Tuner it is possible to During playback of a recording, if you press the MENU record two events and watch two programmes at the button, you will get to the “Chapter Options” menu. The same time. -
Page 16: Format Disk
option is set to “INCLUDED”, unplayed recordings damage to the HDD itself or its content, failure of the WILL be deleted. disk to operate, or recording of noise. • Do not subject the Recorder to any vibration or Format Disk impact. -
Page 17: Configuration
• Even if you delete a programme, the remaining Configuration amount may not increase by the amount of deleted You can configure the settings of your set top box. time. When recording new video, record with an extra Select Configuration from Setup menu and press margin in the amount of remaining space. -
Page 18: Scan Encrypted
To save the recent changes and exit; press the MENU button. Scan Encrypted Use“ ”/“ ” buttons to go to the Scan Encrypted Channels option. Use “ ”/“ ” buttons to toggle YES or NO the searching for encrypted channels. Receiver Upgrade Menu Lock In menu lock you can set locking for All Menus, or the... -
Page 19: Installation
• Audio: by pressing “ ”/“ ” keys change the audio language. • Subtitle: alter the subtitle language with “ ”/“ ” keys. The chosen language will be seen in subtitles. • Guide: by pressing “ ”/“ ” keys change the guide When there are no channels stored in the box;... -
Page 20: Time Shifting(Pause Live Recording)
• Pressing a number key will activate a small digit comence. The duration of Timeshift can be adjusted entry window on the left upper corner of the screen. from Recordings in the Configuration menu (See After a digit is entered, the box will stay for 2 seconds 5.1.RECORDINGS). -
Page 21: Notes
in widescreen format to closer emulate the cinema Notes experience, but some programmes such as news POWER: The receiver should be plugged into a 220- bulletins are 4:3. To help get the most from both TV set 240 V AC 50Hz supply only. and programme when a widescreen film is watched on a standard TV, or a standard broadcast is viewed on a LEADS: Ensure the power supply lead, and all other... -
Page 22: General Troubleshooting
General troubleshooting PROBLEM POSSIBLE PROBLEM WHAT TO DO Check If the main cable is not The Led indicator does not glow Main cable is not connected plugged into the power socket Check the Aerial and scart No picture or sound No signal or weak signal connections The digital set-top box... -
Page 23: General Characteristics
GENERAL CHARACTERISTICS Supply Voltage 220 - 240 V AC ~ 50Hz Input Frequency 470Mhz-862Mhz Maximum Power consumption 18 W Standby Power Consumption Operating temperature 5ºC to +45ºC Storage temperature -15ºC to +55ºC Humidity 25 to 75 % rel Physical dimensions 360x280x48 mm Weight 2820 g... -
Page 24: Hard Disk
TUNERS 1 xRF In IEC-type, female (75Ohm) 1 x RF Out (loop through) IEC-type, male (75Ohm) HARD DISK Hard Disk capacity 250 GB FRONT PANEL Display : 7 segment led display Remote Control Keys On / Off, PR+ / PR- AUDIO Output 2 Vrms, 0 dBfs / Z = 10 kohm... - Page 25 English - 24 -...
Need help?
Do you have a question about the HDR255 and is the answer not in the manual?
Questions and answers
How to open disc tray