Table of Contents
Advertisement
Quick Links
Notice
Updating or revising this manual or making any changes to the information herein will
be initiated when the company deems it necessary. The company reserves the right
to take the above-mentioned actions and is under no obligation to notify any person of
such actions in advance or afterwards.
1998
Trademarks
MS-DOS, Microsoft Windows, and Microsoft Mouse are registered trademarks of
Microsoft Corporation.
IBM PC, OS/2, PS/2, EGA, and VGA are registered trademarks of International
Business Machines, Inc.
Intel, Pentium are trademarks of Intel Corporation.
SystemSoft is a registered trademark of SystemSoft Corp.
Sound Blaster Pro is a trademark of Creative Labs, Inc.
Duracell is a registered trademark of Duracell Inc.
Photo CD is a trademark of Eastman Kodak Company.
Other brand and product names are trademarks and/or registered trademarks of their
respective companies.
1
Advertisement
Table of Contents

Subscribe to Our Youtube Channel
Related Manuals for EUROCOM 6200-A DeskNote


Summary of Contents for EUROCOM 6200-A DeskNote
- Page 1 Notice Updating or revising this manual or making any changes to the information herein will be initiated when the company deems it necessary. The company reserves the right to take the above-mentioned actions and is under no obligation to notify any person of such actions in advance or afterwards.
- Page 2 12 months from the date of purchase by the end user. Upon written notice of any defect in the computer hardware supplied to Eurocom Corporation within the warranty period, Eurocom Corporation shall, at its option, replace or repair any hardware portion of the system that it determines to contain defective material or faulty workmanship.
- Page 3 3. Package well. Use the original shipping container and packing materials if possible. 4. Provide your complete name, address, telephone number and fax so we can contact you if required.
-
Page 4: Important Safety Instructions
Important safety instructions Please read and follow these important instructions. 1. Follow all warnings and instructions marked on this product. 2. Unplug this product from the wall outlet before cleaning it or connecting peripheral devices. 3. Use a damp cloth with mild soap to clean this product. Do not apply cleaner directly to the unit. -
Page 6: Table Of Contents
Table of Content Chapter 1: Getting Started Overview........................9 Getting Started ......................10 Specifications....................10 Operating Environment ................11 Basic Operation.......................12 Power ......................12 AC Power..................12 Internal Battery Power..............13 Duracell Smart Battery at Retail.........14 Recharged by AC Power............14 Second Battery Power (Option)............15 Duracell Smart Battery at Retail.........16 Recharged by AC Power............16 Setup and Operation..................17 Open the Top Cover/Display Panel..........17... - Page 7 Chapter 2: The System Overview ........................19 Description .......................20 LED Indicators ....................20 Power Switch Button..................20 Microphone 20 System Status LCD Bar................21 Top-Front View.....................23 LCD Panel ..................23 System Status LCD Bar..............23 Dual Stereo Speakers..............23 Trackpad Pointing Device...............23 Windows 95 Keyboard ..............23 Right View ....................25 Right -Side Stand ................25 Microphone -in Jack................25 Line-in Jack..................25...
- Page 8 Cursor Control Keys.................36 Embedded Numeric Keypad ............37 Hot Keys ....................38 Expanded Display Mode .............38 Display Type .................38 Contrast Control ..............38 Brightness Control..............38 Volume Control..............38 Suspend Mode..............38 New Keys for Windows 95..............39 Application Key ..............39 Windows Keys ..............39 Storage Disks......................40 3.5” Floppy Drive ................41 2.5”...
- Page 9 Chapter 3: Utilities Overview........................53 Power On Self-Test (POST)..................53 POST Messages - Normal operation ............54 POST Messages - Error Detected.............55 System Configuration Utility (SCU) ................56 Invoking the System Configuration Utility...........56 Working with the Menu Bar of the SCU .............57 Working with the Pull-Down Menu of the SCU ..........58 Features of the System Configuration Utility..........59 System Menu ..................59 Devices Menu...................60...
-
Page 10: Chapter 1: Getting Started
Chapter One: Getting Started Overview This chapter provides a short introduction and tutorial that will familiarize you with the Notebook Computer system and get you up and running quickly. It provides: A first look at the system. Basic information you need to know before you operate the system for the first time. -
Page 11: Getting Started
Getting Started Specifications The state-of-the-art Notebook Computer offers a host of features specially designed to enhance performance and usability: Architecture PCI local bus 2.1 Intel Pentium 75/90/100/120/133/150/166/200 MHz BIOS Plug & Play 1.0a 256KB flash ROM Second Memory 256KB synchronous cache DRAM DIMMs for two banks 8MB up to 72MB (8/16/32/40MB) -
Page 12: Operating Environment
Operating Environment Thanks to the Notebook Computer’s ability to run on battery power, its compactness in size, and lightweight, it can be conveniently operated wherever the temperature and humidity are comfortable enough for you to work. If you properly care for the Notebook Computer, it will provide many years of reliable service. -
Page 13: Basic Operation
Basic Operation Power Before using the Notebook Computer, you must supply it power. If this is the first time the Notebook Computer is operated, you should use the AC power source since the internal battery pack may have self-discharged during shipment. AC Power The Notebook Computer features a universal, auto-switching power adapter. -
Page 14: Internal Battery Power
Internal Battery Power The Notebook Computer is equipped with an internal, rechargeable battery pack, which provides hours of continuous, portable operation. Proper care is required for optimum performance: Do not attempt to disassemble the battery under any circumstances. The battery may explode if exposed to fire or high temperatures. Avoid short circuit the battery by the metal terminals (+, -). -
Page 15: Duracell Smart Battery At Retail
Duracell Smart Battery at Retail You may replace with a Duracell Smart Battery, available at retail outlets around the world, to accurately indicate a fuel gauge of the predicted available charge for the present state information. Recharged by AC Power The system’s battery pack will recharge whenever the system is plugged into the AC power supply, regardless if the system is being operated or not. -
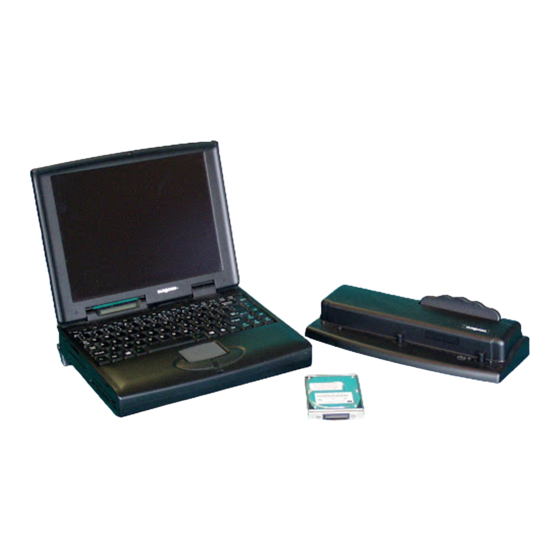
Page 16: Second Battery Power (Option)
Second Battery Power (Option) The Second Battery comes designed, in addition to the system’s internal one, to prolong the battery life for the unit’s portable use. You may need to replace the floppy disk out of the 3.5” drive bay with the Second Battery pack for longer power life. -
Page 17: Duracell Smart Battery At Retail
Duracell Smart Battery at Retail You may replace with Duracell Smart Battery, available at retail outlets around the world, to accurately indicate a fuel gauge of the predicted available charge for the present state information. Recharged by AC Power The Second battery is charged the same way you do the internal one. -
Page 18: Setup And Operation
Setup and Operation Open the Top Cover/Display Panel The Notebook Computer’s display panel is integrated into the system’s top cover, which locks shut for transportation. Open the top cover as follows: 1. Slide the top cover clasp right to unlatch it. 2. - Page 19 Clasp Power switch button...
-
Page 20: Chapter 2: The System
Chapter Two: The System Overview The Notebook Computer has many advanced features to help you with your computing work. This chapter describes each of the Notebook Computer’s hardware features in detail and shows you how to use them. It covers: A description of the system unit and its features. -
Page 21: Description
Description LED Indicators Two LED indicators are integrated to alert you of the system’s power status. Color of Light Status Green System power on (either by AC or by battery) Battery in charge Orange Battery in charge when system power on Color of Light Status Green... -
Page 23: System Status Lcd Bar
System Status LCD Bar The Notebook Computer features a LCD panel bar to display the system’s operation status. AC Power in Use The system is using AC power for operation. Battery Low Flash The battery power is reaching a critically low level. -
Page 25: Top-Front View
Top-Front View Opening the hinged top cover of the system unit will reveal the followings: LCD Panel This is the Notebook Computer’s flat panel display. It is VGA compatible and driven by a PCI local bus controller for high performance. System Status LCD Bar The LCD panel bar will display the system status indicating the respective concerned icons. - Page 26 LCD panel Dual Stereo speakers LCD bar Windows 95 keyboard Trackpad and buttons...
-
Page 27: Right View
Right View On the right side panel, you will find the followings: Right-Side Stand Slide this stand outward (together with the left-side stand) to adjust the viewing angle. Microphone-in Jack This audio port accepts sound source to record or to playback when externally connected microphone is used instead of the built-in one. - Page 28 PC card Type III Infrared Headphone Line-in Microphone-in CD-ROM drive Ventilation Right-side stand...
-
Page 29: Rear View
Rear View The rear panel of the Notebook Computer offers several ports for the electrical connection to peripheral devices. DC-in Socket This socket is where the Notebook Computer’s universal AC/DC power adapter is connected to the system. To disconnect the power adapter, pull the plug (not the cord) directly back. - Page 30 DC-in socket Expansion port CRT port Parallel port Serial port RCA jack MIDI/Game port PS/2 port...
-
Page 31: Left View
Left View The left side of the Notebook Computer features the followings: Left-Side Stand Slide this stand outward (together with the right-side stand) to adjust the viewing angle. Battery Latch Sliding the battery latch upward will unload the battery pack. PC Card Type II Slot The PC Card slot will accommodate a Type II format for system expansion capability. - Page 32 Battery latch PC card Type II 2.5” hard disk drive Left-side stand Internal battery pack 3.5” floppy diskette drive...
-
Page 33: Operation
Operation Hardware Configuration Disconnect all power supply both AC adapter and battery pack before work on any hardware setting. The system is upgradable with a wide range of speed and voltages of the Intel Pentium processors. Speed of CPU Pentium 75 MHz 90 MHz 100 MHz... - Page 34 Heat sink & fan for CPU Power of CPU MPEG Card (option)
-
Page 35: Tv Output
TV-Output Select the TV standard for video output if a TV set is connected. NTSC S1-1 S1-2 S1-3 S1-4 RAM Configuration The system features an expandable Dynamic RAM in small outline DIMM (Dual In-line Memory Module) package. DIMM 0 (64 bit) DIMM 1 (64 bit) RAM Size (1Mx16)x4... - Page 36 DIMM 0 DIMM 1...
-
Page 37: The Keyboard
The Keyboard The Notebook Computer utilizes an 86 key keyboard detachable for various language versions. It is laid out slightly differently from a standard AT keyboard, but it offers all of the same functions plus some special specific features of the system. -
Page 38: System Function Key
System Function Key Located on the bottom-left edge of the Notebook Computer keyboard is a Fn key. It is a special key only found on the Notebook Computer and it is used for operation of: The PgUp, PgDn, Home, End keys. The embedded numeric keypad. -
Page 39: Embedded Numeric Keypad
Embedded Numeric Keypad The colored keys in the middle of the keyboard are capable of providing numeric keypad functions. Press the NumLock key to lock the numeric keypad. The NumLock indicator will be displayed on the system status LCD bar. Press the Fn key with the keys of the embedded numeric keypad to operate with the colored number and symbol keys. -
Page 40: Hot Keys
Hot Keys Located along the top of the keyboard are 12 numbered “F” keys. The functions of these “F” keys are defined as the followings: Comment: Expanded Display Mode The aspect ratio of display panels is not the same as CRT monitors. -
Page 41: New Keys For Windows 95
New Keys for Windows 95 Application Key When the user presses the unmodified Application key, the application brings up the Context menu (a pop-up menu) at the current selection, much as pressing the right mouse button does in some applications today. Pressing the Application key does not disturb the current cursor position. -
Page 42: Storage Disks
Storage Disks The Notebook Computer comes equipped with several data storage drives: 3.5” Floppy Drive. 2.5” Hard Drive. 5.25” CD-ROM Drive. - Page 43 3.5” Floppy Drive and Diskettes The Notebook Computer’s floppy diskette drive is labeled drive A: It is capable of starting the system when a bootable diskette is placed in it. The floppy diskette drive comes designed to be removable for the desired replacement in the 3.5”...
- Page 44 Inserting/Removing Diskettes With the label side up, and the metal shutter toward the disk drive, gently insert the diskette into the drive until the diskette is properly seated. To remove the diskette from the drive, press the ejection button on the top-right side of the drive and remove the diskette.
-
Page 45: Hard Disk Drive
2.5” Hard Diskette Drive The 2.5” hard diskette drive supports the LBA mode, which overcomes the capacity of 528MB constraint as well as high performance data transfer rate at speed up to 16.6 MB/second. The system will automatically configure the hard disk parameters for any supported IDE drive. -
Page 47: 5.25" Cd-Rom Drive
5.25” CD-ROM Drive An IDE 5.25” CD-ROM drive is internally mounted in the system, using the tray loading mechanism for ease of use. The CD-ROM drive provides the performance required for the multimedia applications in a variety of disc types, such as CD-DA, CD-ROM (Mode-1, Mode-2), CD-ROM XA Mode-2 (Form-1, Form-2), Multi-session Photo CD, and CD-I, Video CD compatible. -
Page 48: Pc Cards Slots
PC Card Slots The Notebook Computer includes the expansion slots for a variety of PC Cards. Type III x 1 (equivalent to Type II x 2) on the right panel. Slot 0 located on the lower socket. Slot 0 supports the Zoomed Video (ZV) port, a direct connection between a PC card and a VGA controller. - Page 49 Configuring and Operating PC Cards The Notebook Computer’s PC Card socket requires the use of software drivers, and the device specific drivers, to control the operation of the socket and any PC Cards inserted into it. All slots may be used to install: LAN.
-
Page 50: Audio System
Audio System The audio system is compatible with Sound Blaster Pro, Microsoft Windows Sound System, MPU-401 and General MIDI. It features the 16-bit stereo recording and playback, FM synthesizer and Wave Table synthesizer to deliver superior audio. Trackpad Pointing Device The Trackpad pointing device, internally wired to PS/2, allows you to conveniently take advantage of software that requires a mouse whenever you are away from your desk. -
Page 51: Lcd Panel
LCD Panel The Notebook Computer’s features the LCD panel display. You may use the Utility diskette Video Drivers for required mode. PCI local bus controller. 2MB video DRAM. Capability to support 800x600 (SVGA) resolution DSTN/TFT display. Super-VGA resolution output to an external monitor. Ability to output the video to other video display device: VGA monitor (CRT) or RGB projector. -
Page 52: Power Management
Power Management The Notebook Computer provides users with power management to manage power consumption while maintain optimal system performance. Standby Mode Standby Mode is the device level power management. Most controllable peripheral devices, such as hard disk and LCD display, will be powered off. If the STANDBY timer expires before any system a ctivity is detected, the system will change from Standby Mode to Suspend Mode. -
Page 53: System Resume
System Resume The system operation can be returned from exactly where it was suspended when a resume event occurs. However, the system may not resume successfully from the Suspend Mode when connected to some external devices, such as PC Card. Resume from Suspend-to-Memory Mode The system may be resumed from Suspend-to-Memory mode by: Resume alarm time (hour/minute) -
Page 54: Advanced Power Management
Advanced Power Management The system provides the Advanced Power Management (APM) support to further reduce power consumption especially for battery operation. The installation of Advanced Power Management (APM) varies depending on the Operating System (OS) and the software application you are using. Refer to their respective manuals for detailed information. -
Page 55: Chapter 3: Utilities
Chapter 3: Utilities Overview The Notebook Computer has several built-in software utilities to help you get the most from the system hardware. This chapter discusses: The Power-On-Self-Test (POST). The System Configuration Utility (SCU). Power On Self Test (POST) The BIOS performs a series of power-on-self-test (POST) to diagnose hardware errors when the system first starts up. -
Page 56: Post Messages - Normal Operation
POST Messages - Normal Operation If no configuration errors are detected, the system will be operated after the POST process is completed. You may press the Spacebar key to skip the memory test. System PCI BIOS for SiS-510X Version 1.01.26 Copyright 1983 - 1996 SystemSoft Corp. -
Page 57: Post Messages - Error Detected
POST Messages - Error Detected If a configuration is detected as a non-fatal error, a WARNING message will be displayed. You should either press F1 key to continue, or press Ctrl-Alt-S key combination to enter the System Configuration Utility. System PCI BIOS for SiS-510X Version 1.01.26 Copyright 1983 - 1996 SystemSoft Corp. -
Page 58: System Configuration Utility (Scu)
System Configuration Utility (SCU) The System Configuration Utility (SCU) is a ROM-based configuration utility that displays the system’s configuration status and provides users with a tool to set their system parameters. The settings are stored in non-volatile battery-backed CMO S RAM which saves the information even when the power is turned off, and retains that when the system is turned back on. - Page 59 Working with the Menu Bar of System Configuration Utility Press simultaneously the Ctrl-Alt-S key combination to enter the menu bar of the System Configuration Utility. Action Keys Used Description Activate menus Activate the System Configuration Utility. Select menu bar item Left arrow ( ) Move to a menu bar item on the left.
- Page 60 Working with the Pull-Down Menu of System Configuration Utility When the desired menu bar item is highlighted, press the Enter key to enter the pull- down menu for values setting. Action Keys Used Description Select pull-down menu item Down arrow ( ) Move to the next pull-down menu item.
-
Page 61: Features Of The System Configuration Utility
Features of the System Configuration Utility System Menu Clicking an option will enable the specific capability. Item Setting Function Date and Time Day/month/year Sets the current date and time. Hour/minute/second Fast Boot Initializes and quickly boot the system in a few seconds by passing certain diagnostic tests. -
Page 62: Devices Menu
Devices Menu Clicking an option will enable the specific capability. Item Setting Function Diskette Drive None Specifies a drive type 1.44MB for diskette drive A. Hard Disk 1 Disk Type None No hard disk is installed in the system. Custom Modifies the values for cylinders, heads, sectors per track, landing zone, write pre-... - Page 63 Item Setting Function LPT Port Port setting None Specifies the LPT 378H port configuration. 278H 3BCH Port definition SPP mode Standard Parallel Port. EPP mode Enhanced Parallel Port. ECP mode Extended Capabilities Port. IRQ setting IRQ5 Specifies IRQ IRQ7 configuration. ECP DMA setting DMA1 Specifies ECP DMA...
-
Page 65: Power Menu
Power Menu Clicking an option will enable the specific capability. Item Setting Function Power Management Power saving mode Disabled Disables the system’s power saving features. Battery only Enables the system’s power saving features only during battery operation. Always on Enables the system’s power saving features during either battery or AC operation. -
Page 67: Exit Menu
Exit Menu Clicking an option will enable the specific capability. Item Function Save and Reboot Saves the current settings and reboots the system. Exit (No Save) Exits the SCU without saving any of the current changes. Default Settings Changes the current setup to the system default values.
Need help?
Do you have a question about the 6200-A DeskNote and is the answer not in the manual?
Questions and answers