Table of Contents
Advertisement
Quick Links
Advertisement
Table of Contents

Related Manuals for EUROCOM Tornado F5 Series


Summary of Contents for EUROCOM Tornado F5 Series
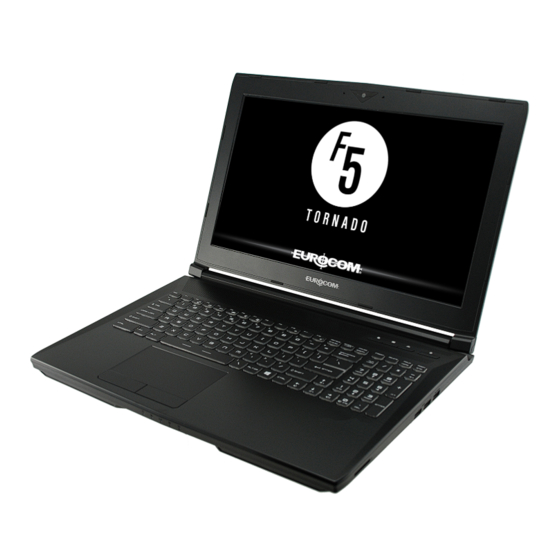
- Page 1 Tornado F5 Series Preface...
-
Page 2: Table Of Contents
Content 1. Preface ..............1-1 Trademarks ......................1-4 Revision History ....................1-4 FCC-B Radio Frequency Interference Statement ..........1-5 FCC Conditions ....................1-5 CE Conformity ....................1-5 Battery Regulations .................... 1-6 WEEE Statement ....................1-6 Upgrade and Warranty ..................1-7 Safety Instructions ..................... - Page 3 Battery ......................3-4 How to Set Up a Power Plan in Windows 10 .............3-6 Choose or Customize a Power Plan ..............3-6 Create Your Own Power Plan ................3-8 How to Use the Touchpad ................3-10 About HDD and SSD ..................3-11 About M.2 SSD Slot ..................3-11 How to Connect the Internet ................
-
Page 4: Trademarks
Trademarks All trademarks are the properties of their respective owners. Revision History ▶ Version: 4.1 ▶ Date: 01, 2017... -
Page 5: Fcc-B Radio Frequency Interference Statement
FCC-B Radio Frequency Interference Statement This equipment has been tested and found to comply with the limits for a Class B digital device, pursuant to part 15 of the FCC rules. These limits are designed to provide reasonable protection against harmful interference in a residential installation. -
Page 6: Battery Regulations
Battery Regulations European Union: Batteries, battery packs, and accumulators should not be disposed of as unsorted household waste. Please use the public collection system to return, recycle, or treat them in compliance with the local regulations. Taiwan: For better environmental protection, waste batteries should be collected separately for recycling or special disposal. -
Page 7: Upgrade And Warranty
Upgrade and Warranty Please note that certain components, such as memory modules, HDD, SSD, ODD, and Bluetooth/WiFi combo card, etc., preinstalled in the product may be upgradable or replaceable by user’s request depending on the models users purchased. For any further information on the product users purchased, please contact the local dealer. -
Page 8: Safety Instructions
Safety Instructions Read the safety instructions carefully and thoroughly. All cautions and warnings on the equipment or user’s manual should be noted. Keep the notebook away from humidity and high temperature. Lay the notebook on a stable surface before setting it up. Do not cover the ventilators of the notebook to prevent the notebook from overheating. - Page 9 • Make sure the power voltage is within safety range and has been adjusted properly to the value of 100~240V before connecting the equipment to the power outlet. • Always unplug the AC power cord before installing any add-on card or module to the equipment. •...
- Page 10 1-10...
-
Page 11: Introductions
Tornado F5 Series Introductions... -
Page 12: Unpacking
Congratulations on becoming an user of this notebook, the finely designed notebook. You will have a delightful and professional experience in using this exquisite notebook. We are proud to tell users that this notebook is thoroughly tested and certified by our reputation for unsurpassed dependability and customer satisfaction. -
Page 13: Product Overview
Product Overview This section provides the description of basic aspects of the notebook. It will help you to know more about the appearance of this notebook before using it. Please be aware that the figures shown here are for reference only. Top-open View The figure of top-open view and description shown below will lead you to browse the main operating area of your notebook. - Page 14 1. Webcam/ Webcam LED/ Internal Microphone • This built-in webcam can be used for picture taking, video recording or conferencing, and so on. • Webcam LED indicator, next to the webcam, glows when webcam function is activated; LED goes out when this function is turned off. •...
- Page 15 4. Keyboard The built-in keyboard provides all the functions of a full-sized keyboard. Refer to How to Use the Keyboard for details. 5. Stereo Speakers This notebook may be equipped with built-in stereo speakers which deliver the high quality sound, and supports the HD audio technology.
-
Page 16: Front Side View
Front Side View 1. Status LED Drive Activity Indicator LED blinks when the system is accessing the internal storage drives. Wireless LAN (WiFi) • LED glows when Wireless LAN (WiFi) function is enabled. WLAN(WiFi) • LED goes out when this function is disabled. Battery Status •... -
Page 17: Right Side View
Right Side View 1. Card Reader The built-in card reader supports various types of memory cards. Check the Specifications for details. 2. USB 3.0 Port/ Super Charger USB Port USB 3.0, the SuperSpeed USB, delivers the higher interface speeds for connecting various devices, such as storage devices, hard drives, or video cameras, and offers more advantages over high-speed data transferring. -
Page 18: Left Side View
Left Side View 1. Kensington Lock This notebook provides a Kensington lock hole, which allows users to secure the notebook in place. 2. Audio Port Connectors Line In Used for an external audio device. Line Out A connector for speakers. Microphone Used for an external microphone. -
Page 19: Rear Side View
Rear Side View 1. RJ-45 Connector The Ethernet connector, with bandwidths 10/100/1000 Mbps, is used to connect a LAN cable for network connection. 2. HDMI Connector HDMI (High-Definition Multimedia Interface) technology is the industry-leading interface and de-facto standard connecting high-definition (HD) and ultra high- definition (UHD) equipment. -
Page 20: Bottom Side View
Bottom Side View 1. Woofer Speaker The woofer speaker is to reproduce low-pitched audio frequency. 2. Battery Reset Hole Whenever the system firmware (EC) is upgraded or the system hangs, please 1) power off the notebook; 2) remove the AC power; 3) use a straightened paperclip to insert this hole for 10 sec;... -
Page 21: How To Use The Keyboard
How to Use the Keyboard This notebook provides a full functioned keyboard. To ensure that the keyboard will be functional properly, it is a must to install SCM application before using the keyboard function keys. Windows Key You can find the Windows Logo key on the keyboard which is used to perform Windows-specific functions, such as opening the Start menu and launching the shortcut menu. -
Page 22: Quick Launch Keys
Quick Launch Keys Use the [Fn] combination keys on the keyboard to activate the specific applications or tools. With the help of these keys, users will be able to do work more efficiently. • Press both Fn and F4 keys to launch the User Defined application. -
Page 23: Enter Sleep Mode
Enter Sleep Mode Force the computer into sleep state (depending on the system configuration). Press the Power button to wake up the system from sleep state. Switch Display Switch the display output mode between the LCD, external monitor and both. Use Multiple Monitors If users connect an additional monitor to the notebook, the system will automatically detect the external monitor... -
Page 24: Adjust The Sound Level Of The Speaker
Adjust the Sound Level of the Speaker Increase the built-in speaker’s volume. Decrease the built-in speaker’s volume. Mute the built-in speakers. Adjust the Brightness Level of the Keyboard Backlight Increase the brightness level of the keyboard backlight LEDs. Decrease the brightness level of the keyboard backlight LEDs. -
Page 25: Specifications
Specifications The specifications listed here is reference only, and may change without notice. The actual products sold are different from areas. Physical Characteristic Dimension 390 (W) x 266 (D) x 39.8 (H) mm Weight 2.85 kg Package CPU Processor Type Intel Quad/ Dual Core Mobile Processor ®... - Page 26 Storage HDD form factor 2.5" HDD M.2 SSD (NVMe PCI-e/SATA) I/O Port x 3 (version 3.0) x 1 SuperPort (Type C) (optional) Mic-in Headphone-out x 1 (S/PDIF-Out supported) RJ45 HDMI Mini-DisplayPort Card Reader x 1 (SD/ MMC) Communication Port Supported Wireless LAN Supported Bluetooth...
-
Page 27: How To Get Started
Tornado F5 Series How To Get Started... -
Page 28: Begin To Use The Notebook
Begin to Use the Notebook For a new user of this notebook, we would like to suggest you follow the illustrations below to begin to use the notebook. -
Page 29: How To Use The Notebook Comfortably
How to Use the Notebook Comfortably If you are a beginner to the notebook, please read the following instructions to assure your own safety, and make yourself comfortable during the operations. ▶ Good illumination is essential in the work area. ▶... -
Page 30: How To Manage Power Supply
How to Manage Power Supply This section provides users basic safety precautions to take when using an AC/DC adapter and battery power properly. AC/DC Adapter Ensure that your notebook is connected to an AC power source via the AC adapter before turning it on for the first time. - Page 31 ▶ Battery charging behavior To optimize battery life and avoid a sudden power loss, read the tips below: • Suspend system operation if the system will be idle for a while or shorten the suspend timer’s time period. • Turn off the system if you won’t be using it for a period of time. •...
-
Page 32: How To Set Up A Power Plan In Windows 10
How to Set Up a Power Plan in Windows 10 A power plan is a collection of hardware and system settings that manages how your computer uses and conserves power. Power plans can save energy, maximize system performance, or balance energy conservation with performance. The default power plans —... -
Page 34: Create Your Own Power Plan
Create Your Own Power Plan You can create your own power plan and customize it as your requirement. However, it will be recommended to use ECO Engine power saving function to optimize the battery life while using this notebook. Please refer to the section of System Control Manager (SCM) in the Notebook Software Application Manual for details. -
Page 36: How To Use The Touchpad
How to Use the Touchpad The touchpad integrated in your notebook is a pointing device that is compatible with standard mouse, allowing you to control the notebook by pointing the location of the cursor on the screen. ▶ Configure the Touchpad You can customize the pointing device to meet your personal needs. -
Page 37: About Hdd And Ssd
▶ Point and Click When you have moved and placed the cursor over an icon, a menu item or a command that you want to execute, simply tap slightly on the touchpad or press the left button to select. This procedure, called as point and click is the basics of operating your notebook. -
Page 38: How To Connect The Internet
How to Connect the Internet Wireless LAN Wireless LAN is a wireless broadband connection that allows you to connect to the Internet without using any cables. Follow the instructions below to set up a Wireless LAN connection. ▶ Wireless LAN Connection 1. - Page 39 ▶ Check the Wireless LAN status When Airplane mode is enabled, Wireless LAN connection will be turned off. Before setting up a Wireless LAN connection, make sure that Airplane mode is turned off. 1. Go to the desktop. Find the icon in the lower-right corner of the task bar and click on it to unfold the settings menu.
-
Page 40: Wired Lan
Wired LAN Using cables and network adapters to connect to the Internet. Before setting up the connection of Dynamic IP/PPPoE or Broadband (PPPoE) or Static IP, contact your Internet Service Provider (ISP) or network administrator for assistance of setting up Internet connection. - Page 41 3-15...
- Page 42 ▶ Broadband (PPPoE) Connection 1. Go to the desktop. Find the icon in the lower-right corner of the task bar, right click on it to select [Open Network and Sharing Center]. 2. Select [Set up a new connection or network] under [Change your networking settings].
- Page 43 3-17...
- Page 44 ▶ Static IP Connection 1. Follow the previous steps 1 to 4 in Dynamic IP/PPPoE Connection. 2. Select [General] tab and click [Use the following IP address] and [Use the following DNS server addresses]. You will be asked to fill the IP address, Subnet mask, and Default gateway, and then click [OK].
-
Page 45: How To Set Up Bluetooth Connection
How to Set Up Bluetooth Connection Bluetooth pairing is a process in which two Bluetooth devices communicate with each other through an established connection. Activating Bluetooth Connection ▶ Checking the Bluetooth status When Airplane mode is enabled, Bluetooth connection will be turned off. Before setting up a Bluetooth connection, make sure that Airplane mode is turned off. - Page 46 3-20...
- Page 47 ▶ Pairing the Bluetooth devices 1. Go to the desktop. Find the [Bluetooth] icon in the lower-right corner of the task bar and click on it. 2. Choose [Add a Bluetooth Device]. 3. Select one Bluetooth connection from the network list. 4.
- Page 48 3-22...
-
Page 49: How To Connect External Devices
How to Connect External Devices This notebook may be equipped with various connecting I/O (input/output) ports, such as USB, HDMI, DisplayPort, and mini DisplayPort. Users will be able to connect diverse peripheral devices to the notebook. To connect these devices, refer to the instruction manuals of each device first, and then connect the device to the notebook. -
Page 50: How To Select Boot Mode In Bios
How to Select Boot Mode in BIOS 1. Power on the system. As soon as the first logo screen appears, press the DEL key immediately and enter the BIOS menu. 2. Move the cursor to [Boot] tab, and select [Boot mode select] in Boot Configuration.
Need help?
Do you have a question about the Tornado F5 Series and is the answer not in the manual?
Questions and answers