Table of Contents
Advertisement
Introduction . . . . . . . . . . . . . . . . . . . . . . . . . . . . . . . . . . . . . . . . . . . . .2
What's in the Box? . . . . . . . . . . . . . . . . . . . . . . . . . . . . . . . . . . . . . . . .2
Studiophile BX5 Features . . . . . . . . . . . . . . . . . . . . . . . . . . . . . . . . . . .2
Front and Rear Panel Features . . . . . . . . . . . . . . . . . . . . . . . . . . . . . . .4
Rear Panel . . . . . . . . . . . . . . . . . . . . . . . . . . . . . . . . . . . . . . . . . . .4
Front Panel . . . . . . . . . . . . . . . . . . . . . . . . . . . . . . . . . . . . . . . . . .6
Installation . . . . . . . . . . . . . . . . . . . . . . . . . . . . . . . . . . . . . . . . . . . . . .6
Precautions . . . . . . . . . . . . . . . . . . . . . . . . . . . . . . . . . . . . . . . . . .6
XLR Balanced Connection . . . . . . . . . . . . . . . . . . . . . . . . . . . . . . .7
Setting the EQ Switches . . . . . . . . . . . . . . . . . . . . . . . . . . . . . . . . . . . .8
Setting the Acoustic Space Switch . . . . . . . . . . . . . . . . . . . . . . . . . . . .10
Appendix A - Technical Specifications . . . . . . . . . . . . . . . . . . . . . . . . .12
Technical Support & Contact Information . . . . . . . . . . . . . . . . . . . . . .14
Your BX5 Warranty . . . . . . . . . . . . . . . . . . . . . . . . . . . . . . . . . . . . . .15
Users Manual
. . . . . . . . . . . . . . . . . . . . . . . . . . . . . . . . . . . . . . . . .11
. . . . . . . . . . . . . . . . . . . . . . . . . . . . . . .13
. . . . . . . . . . . . . . . . . . . . .7
Advertisement
Table of Contents

Related Manuals for M-Audio Studiophile BX5


Summary of Contents for M-Audio Studiophile BX5
-
Page 1: Table Of Contents
Studiophile BX5 Users Manual Introduction ..........2 What’s in the Box? . -
Page 2: Studiophile Bx5
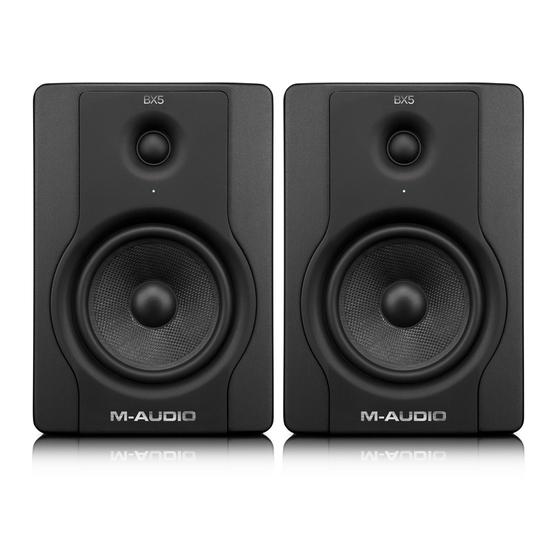
This system delivers a wide range frequency response by employing two extraordinary drivers and unique crossover technology licensed by M-Audio. It boasts a stable and balanced low-mid frequency response along with a defined mid- and high- frequency response as well. - Page 3 2. Tweeter By employing a specially developed 1-inch silk dome with magnetic shielding, the tweeter can deliver distortion-free original sound and offer extremely natural response. It minimizes reaction time by using fabric silk for excellent delivery, and also minimizes resonance by adapting a unique internal damping technology. 3.
-
Page 4: Front And Rear Panel Features
Front and Rear Panel Features Rear Panel 1. XLR INPUT: This jack accepts XLR input connections with either balanced or unbalanced wiring. The input wiring of an XLR connector should be as follows: XLR PIN 1 Signal ground (Shield) XLR PIN 2 Signal positive (+) XLR PIN 3 Signal negative (–) - Page 5 The TRS input is summed through a balanced input amplifier with the XLR input, allowing both inputs to be used simultaneously. Input specifications apply to both. 3. PRODUCT LABEL: This label contains the model and serial number information. 4. VENT PORT: This port aids in reproduction of very low frequencies by discharging frequencies below 60 Hz.
-
Page 6: Front Panel
Front Panel The front panel houses the Power LED, which indicates whether the speakers (amplifier) power is on or off. Installation For optimal performance of the BX5, please read the following thoroughly and carefully prior to installation. Precautions Handling: Please do not touch the speaker cones.The BX5 set is packaged in the box tightly, so your attention is required when taking the monitors out of the box. -
Page 7: Xlr Balanced Connection
Correct Power Operation: Since the BX5 contains its own amplifier, it must be connected to a power outlet using the detachable AC cable provided. Before connecting power, please make sure that the Voltage-Select Switch located on the speaker’s rear panel is set to the appropriate position, as described in the rear-panel features list appearing earlier in this manual. -
Page 8: Connecting To Preamp, Computer Or Game Console Outputs
Connecting to Preamp, Computer or Game Console Outputs Before connecting, make sure the output device’s power has been turned off. Plug the XLR balanced, TRS balanced or TS unbalanced cable to the corresponding output connectors of a pre-amplifier, computer or game console. Setting the EQ Switches Low Cutoff: This 3-position switch sets the Low Cutoff frequency, selecting between 56Hz, 80Hz and 100Hz. - Page 9 Mid-Boost:This 2-position switch selects between the “In” and “Out” Mid-Boost modes.The Out mode produces a flat midrange response for normal monitoring conditions, while In will move the sound stage forward toward your listening position. 'Mid-Boost In' High-Freq:This 3-position switch selects High Frequency compensation with -2dB, 0dB or +2dB.The 0dB (normal) position produces flat response for use in most common applications.
-
Page 10: Setting The Acoustic Space Switch
Setting the Acoustic Space Switch The Acoustic Space switch is a 3-position switch used to select the "Acoustic Space" in which the speaker is placed—Half Space (speakers against wall, 0dB position), Three-Quarter Space (speakers in corners or close to wall, -2dB position), or Full Space (speakers away from wall, -4dB position). -
Page 11: Placing The Bx5
Placing the BX5 Placing the speakers is one of the most important procedures in order to monitor sound accurately. To monitor with the BX5s performing to their maximum capability, an appropriate listening environment and correct placement are required. Please refer to the following for correct BX5 placement. 1. -
Page 12: Appendix A - Technical Specifications
Appendix A - Technical Specifications Type: Two-way studio reference LF Driver: 5-inch dia., magnetically-shielded with curved mineral-filled polypropylene cone, high temperature voice coil and damped rubber surround HF Driver: 1-inch dia., magnetically-shielded with natural silk dome Frequency Response: 56Hz - 20kHz Crossover Frequency: 3.0kHz LF Amplifier Power: 38W HF Amplifier Power: 38W... -
Page 13: Appendix B - Block Diagram
Appendix B - Block Diagram... -
Page 14: Technical Support & Contact Information
For additonal help, contact M-Audio Technical Support by telephone (626-445-7556, 9-5 PST M-F), by fax (626-445-8407) or by e-mail (techsupt@m-audio.com). If you have any questions, comments or suggestions about this or any M-Audio product, we invite you to contact us directly at: M-AUDIO U.S. -
Page 15: Your Bx5 Warranty
In the event that repair is required, a Return Authorization number must be obtained from M-AUDIO. After this number is obtained, the unit should be shipped back to M-AUDIO in a protective package with a description of the problem and the Return Authorization clearly written on the package. - Page 16 Notes: BX5-111402...
Need help?
Do you have a question about the Studiophile BX5 and is the answer not in the manual?
Questions and answers