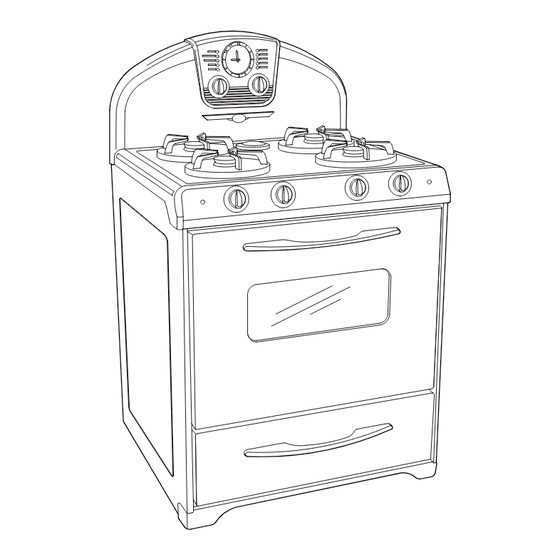
Elmira Stove Works 1954 Installation And Operating Instructions Manual
Electric, gas/electric combos and gas ranges
Hide thumbs
Also See for 1954:
- Features and specifications (1 page) ,
- Installation and operating instructions manual (32 pages) ,
- Installation and operating instructions for (32 pages)
Table of Contents
Advertisement
Quick Links
Installation and Operating Instructions for
NORTHSTAR
Electric Ranges
(Model 1954)
Gas/Electric Combos
(Model 1955)
Gas Ranges
(Model 1956)
12
BY
Thank you for purchasing a Northstar Retro Range.
You have purchased a quality, world-class product.
Years of engineering experience have gone into its manufacturing.
To ensure that you will enjoy many years of trouble-free
operation, we have developed this User Guide.
It is full of valuable information on how to operate and maintain
your range properly and safely. Please read it carefully.
#1704-4
Advertisement
Table of Contents

Related Manuals for Elmira Stove Works 1954


Summary of Contents for Elmira Stove Works 1954
- Page 1 Years of engineering experience have gone into its manufacturing. To ensure that you will enjoy many years of trouble-free operation, we have developed this User Guide. It is full of valuable information on how to operate and maintain your range properly and safely. Please read it carefully. #1704-4...
-
Page 2: Table Of Contents
BEFORE USING YOUR RANGE READ THIS BOOK CAREFULLY If you received a damaged range: Immediately contact the dealer that sold you the range. Before you request service: Check Troubleshooting. It lists causes of minor operating problems that you may be able to correct yourself. -
Page 3: Aluminum Foil
6 of this manual. Failure to follow these instruc- tions could result in serious electric hazard, risk of fire, and/or personal injury. Models 1954 and 1955 are equipped with a 240 volt, standard range power cord & plug. See page 4 for amp ratings of each model. -
Page 4: Important Instructions
SAFETY INSTRUCTIONS – GAS Important Instructions Do not use range as a heater. Never use the range as a kitchen heater. Prolonged use of the range without adequate ventilation can be hazardous. Oven controls and top burners... -
Page 5: Installing Your Range
Check with a qualified electrician if you are in doubt as to whether the metal chassis of range is earth-grounded. Copies of the standards listed may be obtained from:... -
Page 6: Minimum Clearances To Combustibles
Place rack in oven. Place level on rack, first side to side, then front to back. If the range is not level, adjust leveling legs up or down with pliers or your fingers until range is level. NOTE: Oven must be level for satisfactory baking performance. -
Page 7: Surface Elements
The control can be turned to any setting to provide the exact heat required. NOTE: The “Push to Turn Safety Control Knobs” on the range are designed for child safety and to prevent accidental operation. Before using your glass cooktop for the first time: turn the elements on MAX without a pan for 5 to 8 minutes or until smoking stops. -
Page 8: Care And Cleaning
Do not use pans extending more than one inch beyond element, except while canning. See figure 8. Figure 8 Small diameter pans waste energy and spillage can flow onto element. This increases chance of fire and burns. Use non-stick coated cookware, for easier clean up. Glass or pyroceram pans should be used only as the manufacturer describes. -
Page 9: Ga Cooktop
& front grate fingers. First make sure that grates are positioned on burners correctly. Turn both front & back burners on to correct frying temperature. Warning: Do not use two griddles on a range as damage to the top can occur. CANNING For best results, use a flat bottom, heavy gauge canner. -
Page 10: Gas Burner Cleaning
Top Burners Your gas range is equipped with “state of the art” “Sealed Gas Burners” and an “Auto-Reignition System”. The sealed gas burners spread the heat evenly across the bottom of the cooking utensil and provide infinite heat control. The auto-reignition system senses when a burner flame has gone out and will automatically reignite that burner. -
Page 11: Manual Shutoff
Install a manual shutoff valve in the gas line, in an accessible location, near the unit. Know where the gas valve is so you can shut off the gas to the range quickly. Suitable pipe thread sealant must be used which is approved for use with “LP”/Natural gas. - Page 12 • Pull top forward about 2" then lift front. Raise the service stay on each side to hold the top up. • On the back right of the range unscrew the nut on top of the regulator. • Reverse the white insert pin by pulling it out of the cap, reverse it, then snap it back into the cap.
-
Page 13: Oven Conversion Model 1956
A. PLASTIC COVER B. GAS PRESSURE REGULATOR CAP WITH SOLID END FACING OUT C. GAS PRESSURE REGULATOR CAP WITH HOLLOW END FACING OUT D. WASHER E. GAS PRESSURE REGULATOR CAP Conversion of Regulator to “LP” on Model 1956 (gas oven) •... -
Page 14: Setting Minute Timer
If the “low” flame needs to be adjusted: Standard Burner Adjustment The flame can be adjusted using the adjustment screw in the center of the valve stem. The valve stem is located directly underneath the control knob. 1. Remove the control knob. 2. -
Page 15: Delayed Bake
BAKE OR BROIL Turn Selector switch to bake or broil. Set oven thermostat to desired temperature. Preheating oven on bake normally takes about 15 minutes, indicator cycle light will go out when oven has reached temperature. The Broiler takes about 3 minutes to preheat. -
Page 16: M Aintenance & M Inor R Epairs
2. Replace the oven lights with a #4452166 15W appliance bulb. These bulbs are available from a Whirlpool/ KitchenAid dealer or from Elmira Stove Works. 3. All cabinet lights are the rectangular 12 volt 5 watt variety as shown below. -
Page 17: G As T Roubleshooting
Setting the Temperature Turn the warmer thermostat knob to the desired setting. Temperatures can range from 80 degrees to 225 degrees. WARNING: Food Poisoning Hazard! Do not let food sit for more than one hour before or after cooking. Doing so can result in food poisoning or sickness. -
Page 18: Cooking Tip
• Use narrow strips of foil to shield pie crust edges from further browning in drawer. • Place tent-shaped foil loosely over meat or poultry to prevent dryness and further browning while in the drawer. • The use of aluminum foil to cover foods may cause moisture to collect and drip into the drawer. -
Page 19: Convection Broiling
Roasting tips • Roast meats fat-side up in a shallow pan using a roasting rack. • Use a roasting pan that fits the size of the food to be roasted. Meat juices may overflow the sides of a pan that is too small. -
Page 20: Oven Rack Positions
NOTE: Opening the oven door will cause heat loss, longer cooking times and unsatisfactory baking or roasting results. Rely on your timer. Oven Rack Positions Your oven has five rack positions. Rack position 1 is the lowest position, or closest to the bottom of the oven. Rack position 5 is the highest position, or farthest from the bottom of the oven. -
Page 21: Standard Oven Meat Roasting Chart
STANDARD OVEN MEAT ROASTING CHART - Roast at oven temperature of 325 *For chicken, set the oven temperature to 350 Preheating is not needed. - Place roasting pan on rack position 1 or 2. See page 19 for rack positions. MEAT Beef rolled rib... -
Page 22: Baking Chart
STANDARD OVEN BAKING CHART Food Oven Temperature Breads, yeast 375 ° F • loaf 400 ° F • rolls, pan Breads, quick 450 ° F • biscuits 400 ° F • muffins 450 ° F • popovers 425 ° F •... -
Page 23: Introduction To Convection Cooking
INTRODUCTION TO CONVECTION COOKING Welcome to convection cooking, the ultimate culinary technique that uses fan-circulated hot air to efficiently create delicious meals with appetite appeal. Air Flow The secret to convection cooking lies in maintaining a consistent temperature throughout the oven during the cooking process. -
Page 24: Convection Baking And Roasting
sure to leave at least one inch (2.5 cm) of space between the individual pans, and the diagram shown here indicates which convection feature and rack position you should be using for that particular recipe. At the Convection setting, the center element surrounding the fan at the rear of the oven is on. -
Page 25: Convection Yeast Bread Baking Chart
Whether your family’s preference leans toward delicious snack muffins or a hearty fruit and nut loaf, your convection range makes baking their favourites easy and rewarding! Using a preheated oven will ensure quick breads are completely cooked in the center and delicately browned outside. -
Page 26: Convection Quick Breads Baking Chart
CONVECTION QUICK BREADS BAKING CHART Set Cooking Selections to: TRUE CONVECTION SIZE OF FOOD BAKING DISH Yeast Breads Muffins Single Pan Multiple Pans Biscuits Single Sheet Multiple Sheets Fruit & Nut Loaf Pan Loaves 8" x 4" (21 cm x 12 cm) CONVECTION DESSERT BAKING CHART Set Cooking Selections to: TRUE CONVECTION SIZE OF... - Page 27 BLACK...
-
Page 28: Cleaning Guide
SERVICING RANGE UNDER COOK TOP (Servicing should be done by a person knowledgeable in appliance service.) Disconnect power to range. Open oven door and remove it. See removal instructions on page 16. With a Philips Driver, undo the 2 screws holding the top down. Pull top forward about 2"... -
Page 29: Roubleshooting
If your range should fail to operate, review the following list before calling for service. Note: Most electrical clock malfunctions can be corrected by turning the power off to the range for about 15 seconds. (Clock and Control will reset itself). - Page 30 NOTES:...
- Page 31 NOTES:...
-
Page 32: Serial Number
Abuse, accident, alteration or misuse will void this warranty. Neither Elmira Stove Works nor the dealer is liable for any damages or claims resulting from failure of the range or from service delays beyond their control.
Need help?
Do you have a question about the 1954 and is the answer not in the manual?
Questions and answers