Elmira Stove Works 1955 Installation And Operating Instructions Manual
Electric, gas/electric combos and gas ranges
Hide thumbs
Also See for 1955:
- Features and specifications (1 page) ,
- Installation and operating instructions manual (32 pages) ,
- Installation and operating instructions for (32 pages)
Table of Contents
Advertisement
Quick Links
Installation and Operating Instructions for
NORTHSTAR
Electric Ranges
Gas/Electric Combos
Gas Ranges
12
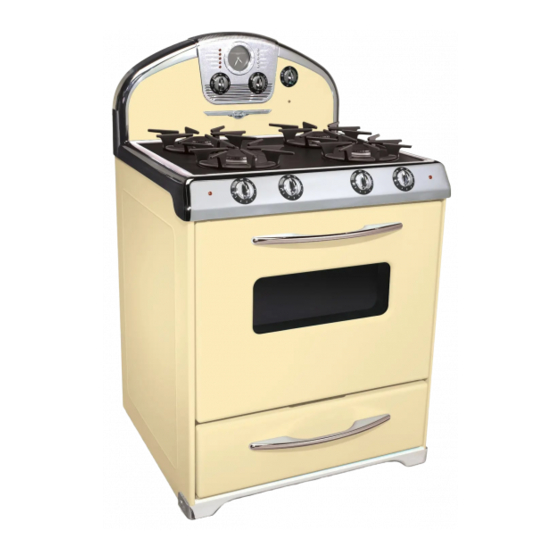
Thank you for purchasing a Northstar Retro Range.
You have purchased a quality, world-class product.
Years of engineering experience have gone into its manufacturing.
To ensure that you will enjoy many years of trouble-free
operation, we have developed this User Guide.
It is full of valuable information on how to operate and maintain
your range properly and safely. Please read it carefully.
(Model 1954)
(Model 1955)
(Model 1956)
BY
#1704-4
Advertisement
Table of Contents
Troubleshooting

Related Manuals for Elmira Stove Works 1955


Summary of Contents for Elmira Stove Works 1955
- Page 1 To ensure that you will enjoy many years of trouble-free operation, we have developed this User Guide. It is full of valuable information on how to operate and maintain your range properly and safely. Please read it carefully. (Model 1955) #1704-4...
-
Page 2: Table Of Contents
6 of this manual. Failure to follow these instruc- tions could result in serious electric hazard, risk of fire, and/or personal injury. Models 1954 and 1955 are equipped with a 240 volt, standard range power cord & plug. See page 4 for amp ratings of each model. -
Page 3: Btu's
A covered element, when turned on, could result in a burn or damage to the element. Do not use range as a heater. Never use the range as a kitchen heater. Prolonged use of the range without adequate Frying ventilation can be hazardous. -
Page 4: Ooktop
This range may be installed with adjacent surfaces touching the base cabinets and the back flush with the back wall. Models 1955 and 1956 gas ranges require a CGA/AGA approved stainless steel gas flex line or a flexible copper coil 1/2" in diameter and at least three feet long so the range can be moved for service. -
Page 5: Optional Griddle
& front grate fingers. First make sure that grates are positioned on burners correctly. Turn both front & back burners on to correct frying temperature. Warning: Do not use two griddles on a range as damage to the top can occur. CANNING For best results, use a flat bottom, heavy gauge canner. -
Page 6: Gas Burner Cleaning
Know where the gas The Oven Vent valve is so you can shut off the gas to the range quickly. Suitable pipe thread sealant must be used which is approved for use with “LP”/Natural gas. Be sure to use this thread sealant on all pipe connections. -
Page 7: Oven Conversion Model 1956
• Shut off gas supply before • On the back right of the range unscrew the nut on top of converting to L.P. gas. the regulator. • Make all conversions before turning gas supply valve •... -
Page 8: Delayed Bake
If the “low” flame needs to be adjusted: Standard Burner Adjustment The flame can be adjusted using the adjustment screw in the center of the valve stem. The valve stem is located directly underneath the control knob. If flame needs to be adjusted: 1. -
Page 9: Maintenance & Minor Repairs
2. Replace the oven lights with a #4452166 15W appliance bulb. These bulbs are available from a Whirlpool/ KitchenAid dealer or from Elmira Stove Works. 3. All cabinet lights are the rectangular 12 volt 5 watt variety as shown below. -
Page 10: Convection Cooking Tips
Roasting tips CONVECTION COOKING TIPS • Roast meats fat-side up in a shallow pan using a roasting rack. (For Convection Models) • Use a roasting pan that fits the size of the food to be To learn how to use your convection oven to the best roasted. -
Page 11: Using Aluminum Foil In The Oven
For Proper Cooking, Do not cover the broiler grid with foil. Poor drainage of grease may result in a fire. Follow These Guidelines: When using aluminum foil for non-convection cooking to • When using one rack, place the rack so the top of the catch spillovers from pies or casseroles, follow these food will be centered in the oven. -
Page 12: Convection Meat Roasting Chart
STANDARD OVEN BAKING CHART Approximate Food Food Oven Cooking Time Temperature (Minutes) Breads, yeast Miscellaneous 375 ° F • loaf 30-40 • apples, baked 400 ° F • rolls, pan 12-15 • beans, baked Breads, quick • custard, cup 450 ° F •... -
Page 13: Convection Poultry Roasting Chart
Whether your family’s preference leans toward delicious snack muffins or a hearty fruit and nut loaf, your convection range makes baking their favourites easy and rewarding! Using a preheated oven will ensure quick breads are completely cooked in the center and delicately browned outside. -
Page 14: Convection Quick Breads Baking Chart
CONVECTION QUICK BREADS BAKING CHART Set Cooking Selections to: TRUE CONVECTION SIZE OF RACK FOOD BAKING DISH POSITION Yeast Breads Muffins Single Pan Multiple Pans 1, 3, 5 Biscuits Single Sheet Multiple Sheets 1, 3, 5 Fruit & Nut Loaf Pan Loaves 8"... -
Page 15: Cleaning Guide
If your range should fail to operate, review the following list before calling for service. Note: Most electrical clock malfunctions can be corrected by turning the power off to the range for about 15 seconds. (Clock and Control will reset itself). - Page 16 NOTES: NOTES:...
-
Page 17: Ervice
Abuse, accident, alteration or misuse will void this warranty. Neither Elmira Stove Works nor the dealer is liable for any damages or claims resulting from failure of the range or from service delays beyond their control.
Need help?
Do you have a question about the 1955 and is the answer not in the manual?
Questions and answers