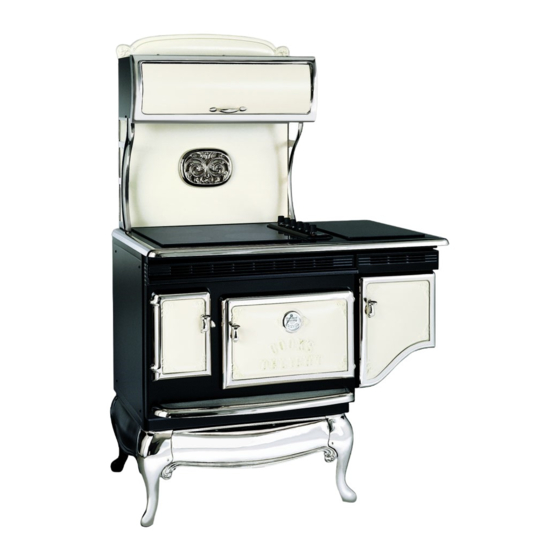
Elmira Stove Works Antique 1855 Installation And Operating Instructions Manual
Electric and gas ranges, gas/electric combos
Hide thumbs
Also See for Antique 1855:
- Installation and operating instructions manual (40 pages) ,
- Installation and operating instructions for (40 pages) ,
- Specification sheet (1 page)
Table of Contents
Advertisement
Quick Links
Installation and Operating Instructions for
ELMIRA STOVE WORKS
Electric Ranges
Gas/Electric Combos
Gas Ranges
Exhaust fan must be operating while back burners
NOTE: Thermometer on oven door is decorative only; it is not functional.
Thank you for purchasing an Elmira Stove Works range.
You have purchased a quality, world-class product.
Years of engineering experience have gone into its manufacturing.
To ensure that you will enjoy many years of trouble-free operation,
we have developed this User Guide.
It is full of valuable information on how to operate and maintain
your range properly and safely. Please read it carefully.
are on and/or oven is self cleaning.
(Models 1850 & 1855)
(Models 1865, 1870 & 1875)
(Models 1860 & 1867)
1 1
1604–16
Advertisement
Table of Contents

Related Manuals for Elmira Stove Works Antique 1855


Summary of Contents for Elmira Stove Works Antique 1855
- Page 1 NOTE: Thermometer on oven door is decorative only; it is not functional. Thank you for purchasing an Elmira Stove Works range. You have purchased a quality, world-class product. Years of engineering experience have gone into its manufacturing.
- Page 2 Attention: Do not line the oven bottom with any type of liners, foil or cookware. Do not cook on the oven bottom. Permanent damage to the oven bottom will result! Install gas line and electric receptacle behind stove six inches off floor in center of opening.
-
Page 3: Table Of Contents
GAS RANGE WARNING • Do not try to light any appliance. WARNING: If the information in this • Do not touch any electrical switch; do not use any manual is not followed exactly, a fire or phone in your building. explosion may result causing property •... -
Page 4: Safety Instructions
SAFETY INSTRUCTIONS Allow elements and burner surfaces to cool before cleaning. If a wet sponge or cloth is used to wipe spills on a hot cooking area, be careful to avoid steam burn. Some (All Models) cleaners can produce noxious fumes if applied to a hot IMPORTANT! Save these instructions for the local surface. -
Page 5: Btu's
Plastics Service Do not repair or service any part of the range unless All plastics are vulnerable to heat, although some will specifically recommended in this manual. All other withstand higher temperatures than others. Keep all servicing should be referred to a qualified technician. plastics away from parts of the range which may become Disconnect the range from wall receptacle (or fuse) before slightly more than warm when the range is in operation. -
Page 6: Gas
• Attach the ringed terminal of the green or bare copper wire Note: The metal chassis of the range MUST be earth- to the range body with the green ground screw. grounded in order for the control panel and burner spark •... -
Page 7: A Mperage R Equirements S Afety I Nstructions I Nstalling Y Our R Ange
bottom wood or metal cabinets are protected by not Type of Gas less than 1/4” thick flame retarding millboard covered Natural and LP Gas (propane). Ranges are factory with not less than No. 28MSG sheet steel, 0.015” thick assembled for natural gas unless otherwise specified and stainless steel, 0.024”... -
Page 8: H Ood
INSTALLING YOUR EXHAUST HOOD 44 1/4" Duct Your Elmira range is equipped with a 350 CFM exhaust 15 3/8" fan located in the warming cabinet. This fan can be vented directly to the outside or, with the use of the #1442 Charcoal Filter (included) can recirculate purified exhaust air into the Nickel 62 1/4"... -
Page 9: Ooktop
SMOOTH TOP ELECTRIC COOKTOP Tools and Materials Required • Hammer, Pliers, Tape measure Surface Elements • Sabre saw or keyhole saw • #8 x 1/2” sheet metal screws to secure duct Controls • 3-1/4” x 10” duct, length according to your installation Control knobs must be •... - Page 10 • Do not cook directly on the ceramic cooktop. The Turning burners off surface of the cooktop can be damaged, and will be more • Touch OFF difficult to clean. • Hot lights are provided in the glass of all smooth top ranges.
- Page 11 • Clean unit with a damp clean paper towel. To remove 3. Use cleaner-conditioner, and finally wipe the cooktop more stubborn spots, use a slightly dampened non- clean with a paper towel or damp cloth. impregnated plastic or nylon pad specially made for If after the use of recommended materials there are some non-stick utensils.
-
Page 12: Optional
Solid elements take longer than coil elements to reach the Energy Tips set temperature but they retain heat for longer periods of Use cookware with tight-fitting lids, and flat bottoms time after being turned off. which completely cover the heated portion of the element. Solid elements are easier to clean up, because the cooking Watch foods when bringing them to cooking temperatures surface is sealed against spills. -
Page 13: Gas Burner Cleaning
Top Burners NOTE: Low adjustment will not effect flame heights at other settings. If a top burner flame has been adjusted too Your gas range is equipped with “state of the art” “Sealed low, the electronic ignitor may start to spark while burner Gas Burners”... -
Page 14: O Ven V Ent - G As
4. If ports are clogged, clean with a straight pin. Do not ANSI Z223.1 latest edition or in Canada, CAN/CGA B149 enlarge or distort port. Do not leave anything stuck installation codes. See page 4 for electrical requirements. in the ports when replacing black porcelain burner Gas Piping to Range base. - Page 15 A match should never be used when testing for leaks. All fittings have been tightened and tested at the factory. If a leak is detected, tighten the fitting. Don’t use pipe dope on factory fittings. RANGE CONVERSION TO “LP” Models 1865, 1870 & 1875 (Gas Top Models) All our ranges are factory set to burn natural gas unless “LP”...
- Page 16 B. Replacing rangetop orifices: Tools required to replace orifices. Small adjustable wrench. 1. Remove the lift off burner cap. 2. With the small adjustable wrench, unscrew the brass venturi and remove. 3. Unscrew the natural gas orifices in each of the top burners using the 7 mm nut driver included with orifice kit.
- Page 17 OVEN CONVERSION Check Operation of Oven Broil Burner MODELS 1860 & 1867 1. Close the oven door. To Convert Oven Bake Burner 2. Touch “Broil” and “Start”. 1. Access from left side as you are facing back of range. The oven burner should light within 8 seconds, under certain conditions it may take the burner up to 50 to 60 2.
-
Page 18: Important Oven Control Information
HIDDEN BAKE 7 Functions are activated by the touch of a finger. The electronic control generates a beep to confirm that your message has been received. Your electric oven features a hidden bake element. There is no visible element inside the oven; it is located 8 If the control will not function and there is a glowing underneath oven floor. -
Page 19: Oven Control Recalibration
OVEN CONTROL CALIBRATION 5 To cancel the timer before the end of the set time, touch TIMER then touch STOP. The indicator light will shut off. The maximum length that the timer may be set is 19 hours OPERATION 59 minutes. The oven control may be recalibrated up to 30 degrees hotter or cooler. -
Page 20: Automatic Timed Bake
6 Touch INCREASE or DECREASE until desired stop AUTOMATIC TIMED BAKE, time is displayed. CONVECTION BAKE OR CONVECTION The longest delay time which may be set is 11 hours 59 1 Touch BAKE, CONVECTION BAKE or CONVECTION. A temperature of 350°F (175°C) for bake or 325°F (160°C) minutes. -
Page 21: Safety Measures
4 Touch STOP to cancel the self-clean program. The self- CONTROL PANEL LOCK clean indicator shuts off. The “SC “ will go off when the oven temperature falls below 550°F (290°C), at this The oven control can be locked to prevent children from time the oven door will unlock. -
Page 22: Before You Start
Before You Start Porcelain Enamel Porcelain enamel is glass fused on metal and may crack or chip with misuse. It is acid resistant, not acid proof. All spillovers, especially acid, milk, tomato or sugar spillovers, should be wiped up immediately with a dry cloth. -
Page 23: Lubrication & Minor Service
These oven bulbs are G9 Phillips 25 watt, 120 volt coated with long-lasting, non-fading textured enamel. This Halogen, available from Elmira Stove Works. treatment is far more durable than paint and less fragile 1. Before replacing bulbs make sure oven is off and cool. -
Page 24: Ervice
SERVICE CONVECTION COOKING TIPS (For Convection Models) Service must be performed by a knowledgeable service person. To learn how to use your convection oven to the best advantage, refer to Convection Cooking on page 26. If in doubt about how to handle service, call the factory for help at: 1-800-295-8498. -
Page 25: Roasting Chart
STANDARD OVEN MEAT ROASTING CHART ° - Roast at oven temperature of 325 ° *For chicken, set the oven temperature to 350 Preheating is not needed. - Place roasting pan on rack position 1 or 2. See page 28 for rack positions. APPROXIMATE MEAT APPROXIMATE... -
Page 26: Baking Chart
STANDARD OVEN BAKING CHART Approximate Approximate Food Oven Cooking Time Food Oven Cooking Time Temperature (Minutes) Temperature (Minutes) Breads, yeast Miscellaneous 375 ° F • loaf 30-40 375 ° F • apples, baked 50-60 400 ° F • rolls, pan 12-15 300 °... -
Page 27: Convection Broiling
• Use a roasting pan that fits the size of the food to be 4. Place food on a cold pan to prevent sticking. If the rack roasted. Meat juices may overflow the sides of a pan that is hot, grease it or grease the food. is too small. -
Page 28: Oven Rack Positions
Oven Rack Positions RACK FOOD POSITION Frozen Pies 1 or 2 Angel and bundt cakes, most quick breads, yeast breads, casseroles, meats Cookies, biscuits, 2 or 3 muffins, cakes, non frozen pies Using Aluminum Foil in the Oven Your oven has five rack positions. Rack position 1 is the lowest position, or closest to the bottom of the oven. -
Page 29: Onvection C Ooking
INTRODUCTION TO CONVECTION COOKING Welcome to convection cooking, the ultimate culinary Preheating technique that uses fan-circulated hot air to efficiently When preheating the oven is specified in a recipe, normal create delicious meals with appetite appeal. time is approximately 10 minutes. Air Flow BROIL ELEMENT Multi-Level Convection Cooking... - Page 30 heat up. At the Convection/Bake setting, the lower element Bakeware Selection will be in use. Rack positions number from 1 at the bottom Bakeware with lower sides allows for constant air circulation to 5 at the top. around all surface areas of food, for more even cooking. High- sided casserole dishes and bread pans should be positioned Convection Baking and Roasting on the lower racks in the oven where they will benefit from...
- Page 31 CONVECTION POULTRY ROASTING CHART Set Cooking Selections to: TRUE CONVECTION INTERNAL APPROXIMATE OVEN TEMPERATURE APPROXIMATE COOKING TIME RACK TEMPERATURE OF POULTRY FOOD WEIGHT PER LB. (500g) POSITION NOT PREHEATED WHEN COOKED Chicken, Whole 3 - 5 lb. 20-25 min 325°F/160°C 185°F/85°C (1.5 - 2.2 kg) Parts, Quarters...
- Page 32 CONVECTION QUICK BREADS BAKING CHART Set Cooking Selections to: TRUE CONVECTION PREHEATED APPROXIMATE SIZE OF RACK OVEN COOKING FOOD BAKING DISH POSITION TEMPERATURE TIME Yeast Breads Muffins Single Pan 375°F/190°C 18-25 min Multiple Pans 1, 3, 5 18-25 min Biscuits Single Sheet 425°F/220°C 8 min...
-
Page 33: Iring D Iagram
17 RED 18 RED 23 BLACK 33 WHITE EXHAUST #33 WHITE 21 BLACK # 2 WHITE #32 BLACK #31 BLACK # 3 BLACK BLOWER #15 BLACK #28 BLACK #30 WHITE 12 WHITE BLACK 10C CONV. FAN RED 13 RED 25 14 RED #22 BLACK 16 BLACK... -
Page 34: Leaning Uide
CLEANING GUIDE Part What To Use How To Clean • Soft sponge • Turn knobs to OFF and pull straight off control panel. Control Knobs • Warm, soapy water • Wash, rinse and dry thoroughly. Do not soak. • Replace knobs. Make sure all knobs point to OFF. Do Not Use steel wool or abrasive cleaners. -
Page 35: Roubleshooting
RANGE TROUBLESHOOTING This section is designed to help you save the cost of a service call. However, you may still need assistance or service. When calling for service, you will need to provide a complete description of the problem, your appliance’s complete model and serial numbers and the purchase or installation date (see Warranty). -
Page 36: Arts Of Our Ange
PARTS OF YOUR RANGE 1. Exhaust Blower ............#1540 36. Cabinet Brackets – Right ..........#1079 Cabinet Brackets – Left ..........#1080 2. Cabinet Door Spring ............ #1591 37. Casting, Side Skirt (Right or Left) ......#1057 4A. Clock Control Power Board - 120 V ......#1489 38. - Page 37 PARTS OF YOUR RANGE (2004 & LATER)
- Page 38 NOTES:...
-
Page 40: Arranty
1-800-295-8498 WARRANTY Your range is warranted by Elmira Stove Works to be free from defects in material and workmanship for a period of one year from the date of purchase. Elements, burners and smooth tops are warranted for five years.
Need help?
Do you have a question about the Antique 1855 and is the answer not in the manual?
Questions and answers