
Related Manuals for Hanna Instruments HI 2400


Summary of Contents for Hanna Instruments HI 2400
- Page 1 Instruction Manual HI 2400 Microprocessor Dissolved Oxygen Bench Meter w w w. h a n n a i n s t . c o m...
-
Page 2: Table Of Contents
If the repair is not covered by the warranty, you will be notified of the charges incurred. If the instrument is to be returned to Hanna Instruments, first obtain a Returned Goods Authori- zation number from the Technical Service department and then send it with shipping costs prepaid. -
Page 3: Preliminary Examination
PRELIMINARY EXAMINATION Remove the instrument from the packing material and examine it carefully to make sure that no damage has occured during shiping. If there is any damage, notify your Dealer or the nearest Hanna Customer Service Center. Each instrument is supplied with: •... -
Page 4: Probe Functional Description
PROBE FUNCTIONAL DESCRIPTION 1. D.O. Probe 2. Protective Cap 3. Watertight Shielded Cable 4. Polypropylene Probe Body 5. Temperature Sensor 6. O-Ring Seal 7. Silver Chloride Anode 8. Platinum Cathode (sensor) 9. Oxygen Permeable Teflon ® Membrane 10. Membrane Cap... -
Page 5: Hi 2400 Functional Description
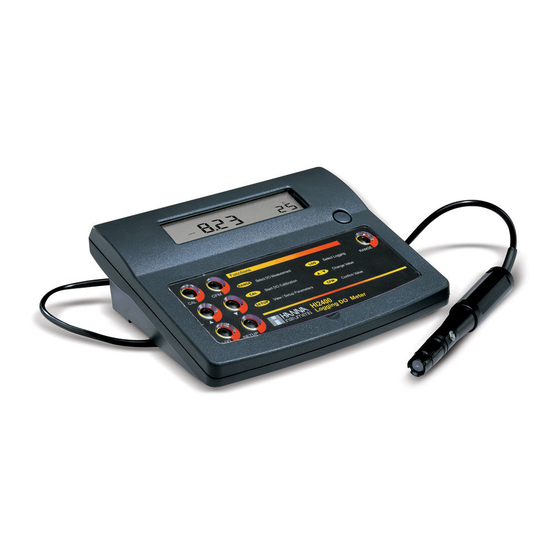
HI 2400 FUNCTIONAL DESCRIPTION Primary LCD Front Panel Secondary LCD Functions Select Logging RANGE Select DO Measurement RANGE Change Value Start DO Calibration SETUP View / Setup Parameters Confirm Value HI2400 Logging DO Meter SETUP Rear Panel POWER PROBE RS232 12VDC 1) Liquid Crystal Display (LCD). -
Page 6: Hi 2400 Specifications
H I 2 4 0 0 SPECIFICATIONS 0 0 . 0 0 . 0 . 0 0 . 0 0 . 0 0 . 0 C º 1 0 . I T U 1 . 0 1 . 0 C ° ±... -
Page 7: Operational Guide
Probes shipped from Hanna Instruments are dry. To hydrate the probe and prepare it for use, connect it to the meter and proceed as follows: 1. - Page 8 INSTRUMENT START-UP • Turn the instrument on by pressing the ON/OFF switch. • All LCD tags are displayed and a beep is generated while the instrument performs self test. g / l TIME DATE INTV NaCl WRONG • After a few seconds “Cond” message appears on the LCD to inform the user that the probe is in auto-conditioning (automatic polarization) mode.
-
Page 9: Temperature Measurements
SALINITY AND ALTITUDE COMPENSATION If the sample contains significant concentration of salinity or if you are performing measurements at an altitude different from sea level, the read out values must be corrected, taking into account the lower degree of oxygen solubility in these situations (see pages 14-16). -
Page 10: Calibration
D . O . C A L I B R A T I O N Calibrate the instrument frequently, especially if high accuracy is required. The instrument can be calibrated in maximum 2 points: 0.0% (zero calibra- tion) and 100.0% (slope calibration). The zero calibration of the HI 2400 is very stable, therefore this procedure needs to be performed only whenever the probe or the membrane is replaced. - Page 11 • Press CAL. The instrument will return to measure- ment mode and will memorize the zero calibration data. For a two-point calibration do not press CAL and follow the procedure below. SLOPE CALIBRATION It is suggested to perform the slope calibration in air. •...
-
Page 12: Temperature Calibration
TEMPERATURE CALIBRATION (for technical personnel only) Each meter has been factory calibrated for temperature with the supplied D.O. probe and is ready for measurements. The D.O. probes are interchangeable and no temperature calibration is needed. If the temperature measurements are not accurate, temperature recalibration should be performed. -
Page 13: Setup
• Immerse the D.O. probe in the second vessel as near as possible to the ChecktempC. Allow a few seconds for the probe to stabilize. • Use the " " or " " key to set the reading on the secondary LCD to that of the hot water. •... - Page 14 The salinity affects the D.O. concentration, decreasing its value. The table below shows the maximum oxygen solubility at various temperatures and salinity levels. n i l y t i ) l / l e v C º F º l / g l / g l / g l / g...
- Page 15 u t i t l , e d s r e t e v o l e v e C º F º 6 . 4 1 . 4 6 . 3 1 . 3 6 . 2 1 . 2 7 .
- Page 16 The altitude affects D.O. concentration, decreasing its value. The table on the previous page reports the maximum oxygen solubility at various temperatures and altitudes. LOGGING INTERVAL SET Press CAL when the logging interval is displayed. The logging interval (1, 15, 30 s, or 1, 2, 5, 15, 30, 60, 120, 180 min) will start blinking.
- Page 17 Press RANGE. The day will start blinking. DATE Press the ARROW keys to change the dispayed value. Press RANGE.The year will start blinking on the secondary LCD. DATE Press the ARROW keys to change the year. Press CFM to save the modified value or press CAL to escape without saving. SERIAL COMMUNICATION BAUD RATE SET Press CAL when the baud rate is displayed.
-
Page 18: Logging
BEEP STATUS SET Press CAL when the beep status is displayed. The beep status (ON or OFF) will start blinking. Press the ARROW keys to change the beep status. Press CFM to save the modified value or press CAL to escape without saving. L O G G I N G This function allows the user to log D.O. - Page 19 To stop the Auto LOG mode press LOG again. The instrument will display for about five seconds the sample number on the primary LCD and the lot number on the secondary LCD. The instrument returns to normal measurement mode. If the log space is full, the “FULL” message will be displayed and no more data will be saved.
-
Page 20: Pc Interface
Note: • Other cables than HI 920010 may use a different configuration. In this case communication between instrument and PC may not be possible. • If you are not using Hanna Instruments HI 92000 software, please see the following instructions. SENDING COMMANDS FROM PC It is also possible to remotely control the instrument with any terminal program. - Page 21 This line makes the computer send a Data Link Escape character, the com- mand expressed as a number or a 3-character sequence and a CR character. Note: All terminal programs that support the ANSI escape sequence, represent the DLE character by the string ‘^P’ and the CR character by the string ‘^M’.
- Page 22 4) Channel #1 status E.g. “1” for ppm logging selected in this lot “0” for ppm logging not selected in this lot 5) Channel #2 status E.g. “1” for % logging selected in this lot “0” for % logging not selected in this lot 6) Channel #3 status E.g.
- Page 23 “3” for 1 minute “4” for 5 minutes “5” for 30 minutes “6” for 60 minutes “7” for 120 minutes “8” for 180 minutes 14) last sample time, min. E.g. “59” for 59 minute 15) last sample time, hour. E.g. “12” for 12 hour 16) last sample time, day.
- Page 24 E.g. send “/ML05” to select lot no. 5. If the lot no. is valid, the meter will send <ACK>, otherwise it will send <CAN>. To set the RS232C baud rate. E.g. send “/BR0” to set the meter to baud rate of 150 send “/BR1”...
-
Page 25: Probe & Membrane Maintenance
PROBE & MEMBRANE MAINTENANCE The oxygen probe body is made of reinforced plastic for maximum durability. A thermistor temperature sensor provides temperature measurements of the sample. Use the protective probe cap when not in use. To replace the membrane or refill with electrolyte, proceed as follows: •... -
Page 26: Accessories
Important In order to have accurate and stable measurements, it is important that the membrane surface is in perfect condition. This semipermeable membrane isolates the sensor elements from the environment but allows oxygen to enter. If any dirt is observed on the membrane, rinse carefully with distilled or deionized water. - Page 27 To avoid electrical shock, do not use this instrument when voltages at the measurement surface exceed 24 VAC or 60 VDC. To avoid damage or burns, do not perform any measurements in microwave ovens. Hanna Instruments reserves the right to modify the design, construction and appearance of its products without advance notice.
- Page 28 SALES AND TECHNICAL SERVICE CONTACTS Australia: Tel. (03) 9769.0666 • Fax (03) 9769.0699 China: Tel. (10) 88570068 • Fax (10) 88570060 Egypt: Tel. & Fax (02) 2758.683 Germany: Tel. (07851) 9129-0 • Fax (07851) 9129-99 Greece: Tel. (210) 823.5192 • Fax (210) 884.0210 Indonesia: Tel.
Need help?
Do you have a question about the HI 2400 and is the answer not in the manual?
Questions and answers