Table of Contents
Advertisement
Advertisement
Table of Contents

Related Manuals for Zanussi ZSF 4143


Summary of Contents for Zanussi ZSF 4143
- Page 1 User manual Dishwasher ZSF 4143...
-
Page 2: Table Of Contents
Thank you for selecting our appliance We wish you lots of enjoyment with your new appliance and we hope that you will consider our brand again when purchasing household appliances. Please read this user manual carefully and keep it throughout the product life cycle as a reference document. -
Page 3: Safety Information
Safety information • Under no circumstances should you attempt In the interest of your safety and to ensure the to repair the machine yourself. Repairs car- correct use, before installing and first using the ried out by inexperienced persons will cause appliance, read this user manual carefully, in- injury or serious malfunctioning. -
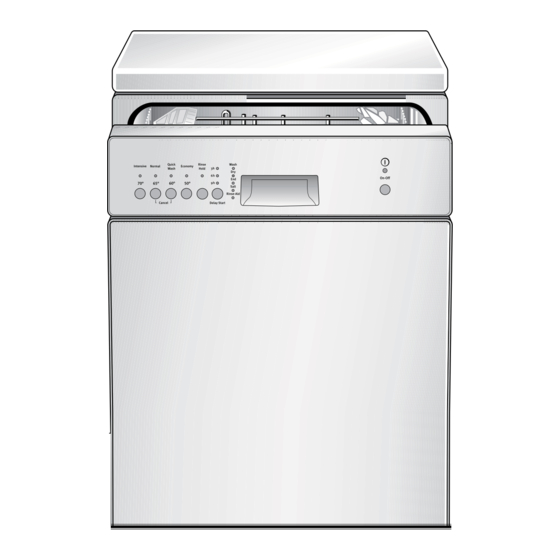
Page 4: Control Panel
Installation or if the control panel, work top or plinth area are damaged such that the inside of the ap- • Check your dishwasher for any transport pliance is freely accessible. Contact your damage. Never connect a damaged ma- local Service Force centre, in order to avoid chine. -
Page 5: Setting Mode
Programme selection buttons Delay start button Indicator lights On/Off button and On/Off indicator light Function buttons Setting mode The appliance is in setting mode when the On/Off in- IMPORTANT! dicator light illuminates and all programme lights are If a programme light is illuminated, the last performed off. -
Page 6: Washing Programmes
Delay start button This option allows the start of the programme to be delayed by 3, 6 or 9 hours. The countdown will de- crease with steps of 3 hours. Before selecting the washing programme, press the On/Off button and then press the Delay start button until the light correspond- ing to 3h, 6h or 9h illuminates. -
Page 7: First Use
Programme Cycle description Intensive 70° Heavy soil. Prewash Crockery, cutlery, pots and pans Main wash 2 intermediate rinses Final rinse Normal 65° Normal soil. Prewash Crockery and cutlery Main wash 1 intermediate rinse Final rinse Light soil. Main wash Quick Wash 60° Crockery and cutlery Final rinse Normal soil. -
Page 8: Set The Water Softener
IMPORTANT! – Fill up the salt and rinse aid container. – Adjust the water hardness setting to the If the drying results are not satisfactory we rec- highest level and perform 1 normal washing ommend that you: programme without loading any dishes. 1. -
Page 9: Filling With Dishwasher Salt
Setting the water softener manually (see table) The water softener is factory set at position 2. Set switch to position 1 or The number of flashes of the End of pro- Setting the water softener gramme light corresponds to the current electronically (see table) level. -
Page 10: Filling With Rinse Aid
Unscrew the cap. Only before filling with Using the funnel provided, salt for the first time, fill pour in the salt until the the salt container with wa- container is filled with salt. ter. IMPORTANT! Immediately start a complete programme. IMPORTANT! Water will overflow from the container as salt is added. -
Page 11: Adjusting The Dosage Of Rinse Aid
IMPORTANT! CAUTION! Top up the rinse aid when the light on the control panel Never fill the rinse aid dispenser with any other sub- illuminates. stances (e.g. dishwasher cleaning agent, liquid deter- gent). This would damage the appliance. Adjusting the dosage of rinse aid Increase the dose if there are drops of water or Reduce the dose if there are whitish streaks on lime spots on the dishes after washing. - Page 12 For washing in the dishwasher the following cutlery and dishes are not suitable: are of limited suitability: • Cutlery with wooden, horn, china or mother-of- • Only wash stoneware in the dishwasher if it is spe- pearls handles. cially marked as being dishwasher-safe by the man- ufacturer.
-
Page 13: Upper Basket
The two rows of prongs on the lower basket can be easily lowered to allow you to load pots, pans and bowls. Load upper basket. Light For taller items, the cup items (plastic bowls etc.) racks can be folded up- must be loaded in the up- wards. -
Page 14: Use Of Detergent
To move to the higher position proceed as follows: 1. Pull out the basket until it stops. 2. Carefully lift both sides upwards until the mecha- nism is engaged and the basket is stable. To lower the basket to the original position proceed as follows: 1. -
Page 15: Unloading The Dishwasher
For programmes with pre- When using detergent Close the lid. wash add an additional tablets: place detergent detergent dose in com- tablets in compartment A. partmentB. Detergent tablets cleaning power during short washing pro- grammes. Therefore, please use long washing Detergent tablets from different manufacturers programmes when using detergent tablets, to dissolve at different rates. -
Page 16: Cleaning The Spray Arms
Clean filters A, B and C Turn the handle about 1/4 Remove filter A from the thoroughly under running turn anticlockwise and re- base of the washing com- water. move filters B and C. partment. Replace the filters and lock by turning the handle clockwise to the stop. -
Page 17: Environmental Concerns
2. Leave the door ajar to prevent the forma- 1. Unplug it. tion of any unpleasant smells. 2. Turn the water tap off. 3. Leave the inside of the machine clean. 3. Remove the water inlet and discharge ho- ses. Frost precautions 4. - Page 18 Switch off the dishwasher, open the door and carry out the following suggested corrective ac- tions. Fault code and malfunction Possible cause and solution The dishwasher does not fill with water. • The water tap is blocked or furred with limescale. Clean the water tap.
-
Page 19: Technical Data
So that you always have these numbers at Mod. : ..... . . hand, we recommend you to make a note of PNC :. -
Page 20: Consumption Values
Consumption values The consumption values are intended as a iations of the power supply and the amount of guide and depends on the pressure and the dishes. temperature of the water and also by the var- Consumption values Programme Programme duration (in Energy consumption (in Water (litres) minutes) -
Page 21: Installation
Upper basket without smaller bowl Upper basket with smaller bowl and Cutlery basket and salad-bowl salad-bowl cup racks: position A Lower basket Installation ers. This dishwasher must be fed with cold WARNING! water. Any electrical and/or plumbing work required to install this appliance should be carried out by a WARNING! qualified electrician and/or plumber or compe-... -
Page 22: Inlet Hose
Inlet hose Connect the inlet hose to a water tap with an external thread of 3/4”. The inlet hose can be turned either to the left or the right to suit the installation by means of the locknut. The locknut must be correctly fitted to avoid water leaks. -
Page 23: Electrical Connection
Electrical connection ble has to be replaced, contact your local Serv- ice Force centre. The plug must be accessible after the appliance CAUTION! has been installed. Safety standards require the appliance to be Never unplug the appliance by pulling on the earthed. - Page 24 To buy accessories, consumables and spare parts at our online shop please visit: www.zanussi-electrolux.co.uk 117968550-00-032008...
Need help?
Do you have a question about the ZSF 4143 and is the answer not in the manual?
Questions and answers