Table of Contents
Advertisement
Advertisement
Table of Contents

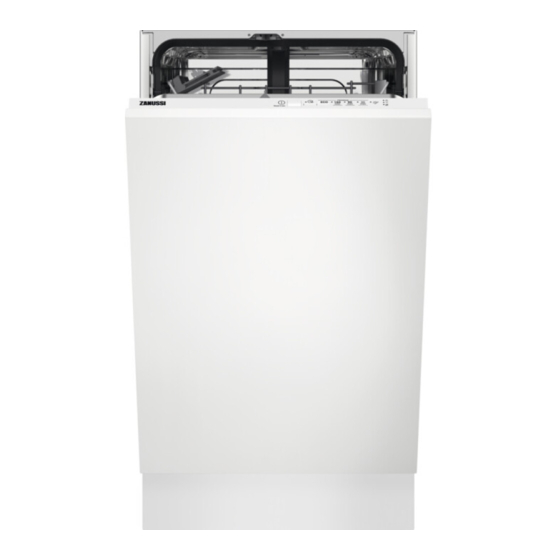
Summary of Contents for Zanussi ZSLN1211
- Page 1 User Manual GETTING STARTED? EASY. ZSLN1211 EN User Manual Dishwasher...
-
Page 2: Safety Information
VISIT OUR WEBSITE TO: Get usage advice, brochures, trouble shooter, service and repair information: www.zanussi.com/support SAFETY INFORMATION Before the installation and use of the appliance, carefully read the supplied instructions. The manufacturer is not responsible for any injuries or damage that are the result of incorrect installation or usage. -
Page 3: Safety Instructions
Do not change the specification of this appliance. • The operating water pressure (minimum and maximum) must be • between 0.5 (0.05) / 8 (0.8) bar (MPa) Follow the maximum number of 9 place settings. • If the supply cord is damaged, it must be replaced by the •... -
Page 4: Water Connection
• Make sure not to cause damage to the mains • Do not drink and play with the water in the plug and to the mains cable. Should the mains appliance. cable need to be replaced, this must be carried •... -
Page 5: Control Panel
Upper spray arms Rinse aid dispenser Lower spray arm Detergent dispenser Filters Cutlery basket Rating plate Lower basket Salt container Upper basket Air vent CONTROL PANEL On/off button / Reset button Programme button Programme indicators Delay button Indicators... - Page 6 INDICATORS Indicator Description Drying phase indicator. It is on when you select a programme with the drying phase. It flashes when the drying phase operates. Salt indicator. It is on when the salt container needs refilling. It is always off while the programme operates.
-
Page 7: Consumption Values
CONSUMPTION VALUES Water Energy Duration 1) 2) Programme (kWh) (min) 0.778 10.5 - 12.8 0.888 - 1.086 9.5 - 11.7 0.713 - 0.871 8.7 - 10.6 0.542 - 0.663 2.9 - 3.6 0.012 - 0.015 1) The pressure and the temperature of the water, the variations of the mains supply, the options, the quan- tity of dishes and the degree of soil can change the values. -
Page 8: The Rinse Aid Empty Notification
Softening hard water increases the consumption of water and energy as well as the programme duration. The higher the level of water softener, the higher the consumption and the longer the duration. Water hardness German degrees French degrees Clarke de- mmol/l Water softener level (°dH) -
Page 9: The Rinse Aid Level
2. Wait until the indicator continues to flash 2. Wait until the indicator continues to flash and the remaining programme indicators are and the remaining programme indicators are off. off. The indicator shows the current setting: The indicator shows the current setting: •... -
Page 10: Before First Use
4. Press the on/off button to confirm the setting. • is off = AirDry is off. • is on = AirDry is on. 3. Press the programme button to change the setting. BEFORE FIRST USE 1. Make sure that the current level of the 5. -
Page 11: Daily Use
3. Remove the spilled rinse aid with an absorbent 4. Close the lid. Make sure that the lid locks into cloth to prevent excessive foam formation. position. DAILY USE 1. Open the water tap. SETTING AND STARTING A PROGRAMME 2. Press the on/off button to activate the Starting a programme appliance. -
Page 12: Hints And Tips
Cancelling the delay start The function comes into operation: Press the on/off button for 3 seconds until the • When the programme is complete. appliance is in programme selection mode. • After 5 minutes if a programme was not started. When you cancel the delay start, you have to set End of the programme the programme again. -
Page 13: Care And Cleaning
WHAT TO DO IF YOU WANT TO STOP USING • Put light or plastic items in the upper basket. MULTI-TABLETS Make sure that the items do not move freely. • Put cutlery and small items in the cutlery basket. Before you start to use separately detergent, salt •... - Page 14 5. Make sure that there are no residues of food or 1. Turn the filter (B) counterclockwise and remove soil in or around the edge of the sump. 6. Put back in place the flat filter (A). Make sure that it is correctly positioned under the 2 guides.
-
Page 15: Cleaning The Lower Spray Arm
CLEANING THE LOWER SPRAY ARM We recommend to clean the lower spray arm regularly to prevent soil from clogging the holes. Clogged holes can cause unsatisfactory washing results. 1. To remove the lower spray arm, pull it upwards. 1. Pull out the upper basket. 2. -
Page 16: Troubleshooting
TROUBLESHOOTING Refer to the below table for information on possible WARNING! Improper repair of the problems. appliance may pose a danger to the With some problems, the dedicated indicator safety of the user. Any repairs must be flashes intermittently to indicate a malfunction and performed by qualified personnel. - Page 17 Problem and alarm code Possible cause and solution The anti-flood device is on. • Close the water tap. • Make sure that the appliance is correctly installed. • The indicator flashes 3 times in- • Make sure the baskets are loaded as instructed in termittently.
- Page 18 THE DISHWASHING AND DRYING RESULTS ARE NOT SATISFACTORY Problem Possible cause and solution Poor washing results. • Use more intensive washing programmes. • Clean spray arm jets and the filter. Refer to "Care and Cleaning". • Refer to "Daily use", "Hints and tips" and basket loading leaflet.
-
Page 19: Technical Information
Problem Possible cause and solution Limescale deposits on the table- • The level of salt is low, check the refill indicator. ware, on the tub and on the in- • The cap of the salt container is loose. side of the door. •... - Page 20 WWW.ZANUSSI.COM/SHOP...


Need help?
Do you have a question about the ZSLN1211 and is the answer not in the manual?
Questions and answers