Table of Contents
Advertisement
Quick Links
Advertisement
Table of Contents

Related Manuals for Zanussi ZSFN121W1


Summary of Contents for Zanussi ZSFN121W1
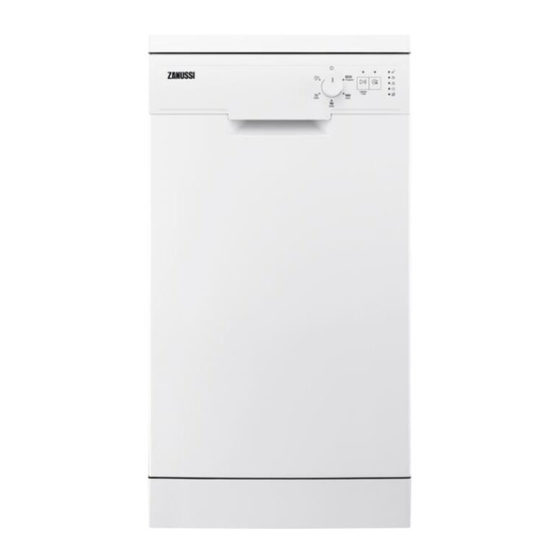
- Page 1 User Manual GETTING STARTED? EASY. ZSFN121W1 EN User Manual Dishwasher...
-
Page 2: Safety Information
VISIT OUR WEBSITE TO: Get usage advice, brochures, trouble shooter, service and repair information: www.zanussi.com/support SAFETY INFORMATION Before the installation and use of the appliance, carefully read the supplied instructions. The manufacturer is not responsible for any injuries or damage that are the result of incorrect installation or usage. -
Page 3: Safety Instructions
Do not change the specification of this appliance. • The operating water pressure (minimum and maximum) must be • between 0.5 (0.05) / 8 (0.8) bar (MPa) Follow the maximum number of 9 place settings. • If the supply cord is damaged, it must be replaced by the •... -
Page 4: Water Connection
WATER CONNECTION status of the appliance. They are not intended to be used in other applications and are not • Do not cause damage to the water hoses. suitable for household room illumination. • Before connection to new pipes, pipes not used •... - Page 5 Worktop Rinse aid dispenser Upper spray arms Detergent dispenser Lower spray arm Cutlery basket Filters Lower basket Rating plate Upper basket Salt container Air vent...
-
Page 6: Control Panel
CONTROL PANEL On/off indicator Start button Programme marker Programme knob Indicators Delay button INDICATORS Indicator Description Drying phase indicator. It is on when you select a programme with the drying phase. It flashes when the drying phase operates. Salt indicator. It is on when the salt container needs refilling. It is always off while the programme operates. -
Page 7: Consumption Values
Programme Type of load Degree of soil Programme phases • Crockery • Normal • Prewash • Cutlery • Lightly dried-on • Wash 50 °C • Pots • Intermediate rinse • Pans • Final rinse 60 °C • Drying • AirDry •... -
Page 8: Information For Test Institutes
Water Energy Duration 1) 2) Programme (kWh) (min) 2.9 - 3.6 0.012 - 0.015 1) The pressure and the temperature of the water, the variations of the mains supply, the options, the quan- tity of dishes and the degree of soil can change the values. 2) The values for programmes other than ECO are indicative only. - Page 9 German degrees French degrees Clarke de- mmol/l Water softener level (°dH) (°fH) grees 43 - 46 76 - 83 7.6 - 8.3 53 - 57 37 - 42 65 - 75 6.5 - 7.5 46 - 52 29 - 36 51 - 64 5.1 - 6.4 36 - 45...
-
Page 10: The Rinse Aid Empty Notification
Make sure that the programme marker on the knob All the consumption values mentioned is set to the on/off position. in this section are determined in 1. To enter the user mode, press and hold . At accordance with the currently the same time turn the knob counterclockwise applicable standard in laboratory until the programme marker indicates the first... -
Page 11: Before First Use
automatically during the drying phase and remains CAUTION! If children have access to ajar. the appliance, we advise to deactivate AirDry. The automatic opening of the door may pose a danger. How to deactivate AirDry The appliance must be in programme selection mode. -
Page 12: How To Fill The Rinse Aid Dispenser
HOW TO FILL THE RINSE AID DISPENSER 4. Carefully shake the funnel by its handle to get the last granules inside. 5. Remove the salt around the opening of the salt container. CAUTION! The compartment (C) is for rinse aid only. Do not fill it with detergent. -
Page 13: Setting And Starting A Programme
2. Put the detergent in the compartment (A). You Cancelling the delay start while the can use detergent in tablets, powder or gel. countdown operates 3. If the programme has a prewash phase, put a 1. Press and hold until the light related to small quantity of detergent on the inner part of the button starts to flash. -
Page 14: Before Starting A Programme
• Soak or slightly scour cookware with firmly WHAT TO DO IF YOU WANT TO STOP USING cooked-on or baked-on food before washing it MULTI-TABLETS in the appliance. Before you start to use separately detergent, salt • Make sure that items in the baskets do not and rinse aid do the following procedure. -
Page 15: Care And Cleaning
After the programme is completed, water can still remain on the inside surfaces of the appliance. CARE AND CLEANING WARNING! Before maintenance, deactivate the appliance and disconnect the mains plug from the main socket. Dirty filters and clogged spray arms decrease the washing results. -
Page 16: Cleaning The Lower Spray Arm
3. To install the spray arm back, press it downwards. 7. Reassemble the filters (B) and (C). 8. Put back the filter (B) in the flat filter (A). Turn it clockwise until it locks. CLEANING THE UPPER SPRAY ARMS We recommend to clean the upper spray arms regularly to prevent soil from clogging the holes. -
Page 17: Troubleshooting
EXTERNAL CLEANING • Clean the appliance with a moist soft cloth. • Only use neutral detergents. • Do not use abrasive products, abrasive cleaning pads or solvents. INTERNAL CLEANING • Carefully clean the appliance, including the rubber gasket of the door, with a soft damp cloth. - Page 18 With some problems, the dedicated indicator flashes intermittently to indicate a malfunction and the alarm code. Problem and alarm code Possible cause and solution You cannot activate the appliance. • Make sure that the mains plug is connected to the mains socket.
- Page 19 Problem and alarm code Possible cause and solution The temperature of the water inside the • Make sure that the temperature of the inlet water appliance is too high or malfunction of the does not exceed 60°C. temperature sensor occurred. •...
-
Page 20: The Washing And Drying Results Are Not Satisfactory
Refer to "Before first use", "Daily WARNING! We do not recommend use", or "Hints and tips" for other using the appliance until the problem possible causes. has been completely fixed. Unplug the appliance and do not plug it in again Once you have checked the appliance, press the until you are certain that it operates start button. -
Page 21: Technical Information
Problem Possible cause and solution Traces of rust on cutlery. • There is too much salt in the water used for washing. Refer to "The water softener". • Silver and stainless steel cutlery were placed together. Avoid to put silver and stainless steel items close together. There are residues of detergent •... -
Page 22: Environmental Concerns
Power consumption Left-on mode (W) Off-mode (W) 0.50 1) Refer to the rating plate for other values. 2) If the hot water comes from alternative source of energy (e.g. solar panels), use the hot water supply to decrease energy consumption. LINK TO THE EU EPREL DATABASE database using the link https://eprel.ec.europa.eu and the model name and product number that you... - Page 24 WWW.ZANUSSI.COM/SHOP...
Need help?
Do you have a question about the ZSFN121W1 and is the answer not in the manual?
Questions and answers