Table of Contents
Advertisement
Available languages
Available languages
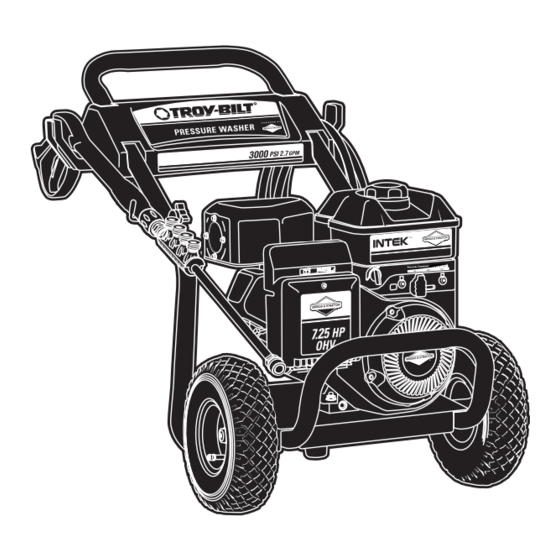
Owner's Manual / Manual del Propietario
Pressure Washer / Lavadora de Presión
Model / Modelo 020209
IMPORTANT: READ SAFETY RULES AND INSTRUCTIONS CAREFULLY
IMPORTANTE: LEYO LA SEGURIDAD LAS ORDENES Y LAS INSTRUCCIONES DETENIDAMENTE
Questions? Preguntas?
Helpline - 1-888-611-6708 M-F 8-5 CT
Troy-Bilt® is a registered trademark of Troy-Bilt, LLC and is used under license to Briggs & Stratton Power Products.
Troy-Bilt® es una marca registrada de Troy-Bilt, LLC y se usa abajo licencia a Briggs & Stratton Power Products.
BRIGGS & STRATTON POWER PRODUCTS GROUP, LLC
JEFFERSON,WISCONSIN, U.S.A.
Printed in USA
Manual No. 194172GS Revision 4 (05/20/2004)
Advertisement
Chapters
Table of Contents

Related Manuals for Troy-Bilt TROY-BILT 020209


Summary of Contents for Troy-Bilt TROY-BILT 020209
- Page 1 Owner’s Manual / Manual del Propietario Pressure Washer / Lavadora de Presión Model / Modelo 020209 IMPORTANT: READ SAFETY RULES AND INSTRUCTIONS CAREFULLY IMPORTANTE: LEYO LA SEGURIDAD LAS ORDENES Y LAS INSTRUCCIONES DETENIDAMENTE Questions? Preguntas? Helpline - 1-888-611-6708 M-F 8-5 CT Troy-Bilt®...
-
Page 2: Table Of Contents
Section Safety Rules TABLE OF CONTENTS SAFETY RULES Safety Rules........2-4 This is the safety alert symbol. -
Page 3: Safety Rules
Section 1: Safety Rules WARNING DANGER Fuel and its vapors are extremely flammable and Running engine gives off carbon monoxide, an explosive. odorless, colorless, poison gas. Fire or explosion can cause severe burns or Some chemicals or detergents may be harmful if death. - Page 4 Section 1: Safety Rules WARNING CAUTION Excessively high or low operating speeds increase risk Running engines produce heat and hot exhaust of injury and damage to pressure washer. gases.Temperature of muffler and nearby areas can reach or exceed 150°F (65°C). •...
-
Page 5: Features And Controls
Features and Controls Section KNOW YOUR PRESSURE WASHER Read this owner’s manual and safety rules before operating your pressure washer. Compare the illustrations with your pressure washer to familiarize yourself with the locations of various controls and adjustments. Save this manual for future reference. Fuel Tank Throttle Lever Accessory Tray... -
Page 6: Assembly
Assembly Section Required Assembly Tools • #2 Phillips Screwdriver ASSEMBLY PREPARING PRESSURE WASHER FOR USE IMPORTANT: Read entire owner’s manual before you attempt to assemble or operate your new pressure washer. If you have any problems with the assembly of your pressure washer or if parts are missing or damaged, call the Remove Pressure Washer From pressure washer helpline at 1-888-611-6708. -
Page 7: Add Engine Oil And Fuel
Section 3: Assembly Secure tray to handle with self tapping screws using a Pinch chemical hose and slide it into metal clip as shown in Figure 5. #2 phillips screwdriver. Ensure screws are tight but not crushing the plastic accessory tray. Figure 5 —... -
Page 8: Assembly
Section 3: Assembly Connect Hose and Water Supply to Run water through garden hose for 30 seconds to clean out any debris.Turn off water. Pump IMPORTANT: DO NOT siphon standing water for the IMPORTANT: To avoid pump damage, you must assemble water supply. -
Page 9: Operation
Operation Section HOW TO USE YOUR Place colored quick connect spray tips in slots on holder that’s attached to nozzle extension (Figure 11). PRESSURE WASHER Figure 11 — Install Spray Tips in Holder If you have any problems operating your pressure washer, please call the pressure washer helpline at 1-888-611-6708. -
Page 10: How To Use Spray Tips
Section 4: Operation 11. Start engine according to instructions given in engine Hang chemical solution bottle on “J” hook and place owner’s manual. Also see operating instructions tag detergent siphoning filter in last slot on left (Figure 14). located on the pressure washer. Place utility brush in the second to last slot on right in tray (Figure 14). -
Page 11: How To Use The Turbo Nozzle
Section 4: Operation Pull back collar on quick–connect and pull current How to Use the Utility Brush spray tip off. Store spray tips in holder provided on the The utility brush allows you to scrub surfaces with water nozzle extension. filtering through the bristles. -
Page 12: Operation
Section 4: Operation Place small filter end of detergent siphoning tube into After you have applied detergent, scour the surface detergent container. and rinse it clean as follows: Apply safety latch to spray gun. CAUTION Remove black chemical nozzle from nozzle extension. Keep the chemical injection tube from coming in contact Select and install desired high pressure nozzle with the hot muffler. -
Page 13: Maintenance
Maintenance Section GENERAL MAINTENANCE WARNING RECOMMENDATIONS The high pressure stream of water that this equipment produces can pierce skin and its underlying tissues, leading to serious injury and The pressure washer warranty does not cover items that have possible amputation. been subjected to operator abuse or negligence.To receive full value from the warranty, the operator must maintain the •... -
Page 14: Nozzle Maintenance
Section 5: Maintenance Detach spray gun and nozzle extension from high Shut off engine and turn off water supply. pressure hose. Detach nozzle extension from spray gun Remove spray tip from end of nozzle extension. and remove o-ring and screen from nozzle extension. Remove in-line filter from other end of nozzle Flush screen, spray gun, and nozzle extension with extension. -
Page 15: Maintenance
Section 5: Maintenance ENGINE MAINTENANCE Figure 23 — Data Tag See the engine owner’s manual for instructions on how to properly maintain the engine. CAUTION Copy Model Number Here Avoid prolonged or repeated skin contact with used motor oil. Copy Revision •... -
Page 16: Storage
Section Storage PREPARING THE UNIT CAUTION FOR STORAGE You must protect your unit from freezing temperatures. • Failure to do so will permanently damage your pump and Water should not remain in the unit for long periods of render your unit inoperable. time. -
Page 17: Troubleshooting
Section Troubleshooting TROUBLESHOOTING Problem Cause Correction Low pressure spray tip installed. Replace spray tip with high pressure spray tip. Water inlet is blocked. Clear inlet. Inadequate water supply. Provide adequate water flow. Inlet hose is kinked or leaking. Straighten inlet hose, patch leak. Pump has following problems: Clogged inlet hose strainer. -
Page 18: Replacement Parts
Exploded Views and Parts Lists Section EXPLODED VIEW AND PARTS LIST — UNIT Item Part # Description Item Part # Description P190156GS BASE 13 88185GS BRUSH, Utility P187602GS HANDLE 14 95457GS CONNECTOR, Garden Hose 187606GS BILLBOARD 15 194004GS KIT, Inlet, Hose, Grdn, Srv 185877GS HOSE 16 190668GS... - Page 19 Section 8: Exploded Views and Parts Lists EXPLODED VIEW AND PARTS LIST — PUMP Item Part # Description Item Part # Description 21 194434GS O-RING 190657GS KIT, CHECK VALVE 22 190639GS SPACER 192914GS KIT, CHEMICAL INJECT 24 190640GS WASHER 194425GS KIT, SEAL OIL 42 190646GS PISTON, Guide...
- Page 20 Sección Reglas de Seguridad TABLA DE CONTENIDOS REGLAS DE SEGURIDAD Reglas De Seguridad ....... . 20-22 Éste es el símbolo de alerta de seguridad.
-
Page 21: Reglas De Seguridad
Sección 1: Reglas de Seguridad PELIGRO ADVERTENCIA Al motor funcionar, se produce monóxido de La gasolina y sus vapores son extremadamente carbono, un gas inodoro y venenoso. inflamables y explosivos. El respirar el monóxido de carbono, producirá El fuego o una explosión pueden causar quemaduras náusea, desmayo o la muerte. - Page 22 Sección 1: Reglas de Seguridad ADVERTENCIA PRECAUCIÓN El lavadora de presión produce un rocío alto de la presión Los motores en funcionamiento producen calor y cuál riesgo de aumentos de la herida y dañe a la unidad. gases de escape a altas temperaturas. La temperatura del silenciador y de las zonas cercanas puede alcanzar •...
-
Page 23: Conozca Su Maquina Lavadora De Presion
Sección Características y Controles CONOZCA SU MAQUINA LAVADORA DE PRESION Lea el manual del propietario y las reglas de seguridad antes de poner en marcha su máquina lavadora a presión. Compare las ilustraciones con su máquina lavadora a presión para familiarizarse con las ubicaciones de los diferentes controles y ajustes. Tanque del Combustible Perilla del Cebador Bandeja Accesoria... -
Page 24: Ensamblaje
Sección Montaje Herramientas Requeridas de la Asamblea • #2 destornillador de phillips MONTAJE PREPARANDO EL LAVADOR A PRESIÓN PARA SU USO IMPORTANTE: Lea totalmente el manual del propietario antes que intente ensamblar u operar su lavador a alta presión. Si usted tiene un problema al ensamblar la unidad o si hacen falta algunas piezas o se encuentran dañadas, llame a la línea directa del Remueva el Lavador a Presión del lavador a alta presión, al 1-888-611-6708. - Page 25 Sección 3: Montaje Coloque el manubrio sobre los soportes del mismo que ya Figure 28 — Deslice Manga Química en el Clip de Metal están adheridos a la unidad principal. Asegúrese de que los orificios en el manubrio estén alineados con los orificios en los soportes del mismo manubrio (Figura 25).
- Page 26 Sección 3: Montaje Conecte la Manguera y el Suministro de Haga correr el agua a través de la manguera de su jardín por 30 segundos para limpiar cualquier escombro que se Agua a la Bomba encuentre en ella. Desconecte el agua. IMPORTANTE: Usted deberá...
-
Page 27: Funcionamiento
Sección Operación CÓMO USAR SU MÁQUINA Figura 34 - Instale Puntas de Rocío en el Poseedor LAVADORA A PRESIÓN Si tiene problemas operando su máquina lavadora a presión, por favor llame a la línea de ayuda para máquinas lavadoras a presión al 1-888-611-6708. - Page 28 Sección 4: Operación Cómo Detener su Máquina Lavadora a Cómo Usar las Puntas de Rocío Presión La conexión rápida de la extensión para boquillas le permite usar cinco puntas de rocío diferentes. Las puntas de rocío tienen • Mueva la palanca variable del control de la presión a la posición "Stop"...
- Page 29 Sección 4: Operación Para una limpieza más efectiva, mantenga la boquilla de Limpieza y Aplicación del Químico rociado de 8 a 24 pulgadas de la superficie de limpieza. Si coloca la boquilla muy cerca, podría dañar la superficie que IMPORTANTE: Utilice químicos diseñados está...
- Page 30 Sección 4: Operación Aplique el detergente sobre la superficie seca, comenzando en Mantenga la pistola de rociado a una distancia segura del área la parte inferior del área y dirigiéndose hacia arriba, utilizando que planea rociar. movimientos largos, parejos y superpuestos. ADVERTENCIA Permita que el detergente penetre de 3 a 5 minutos antes de enjuagar.
-
Page 31: Mantenimiento
Sección Mantenimiento RECOMENDACIONES GENERALES ADVERTENCIA La garantía de la máquina lavadora a presión no cubre los La corriente de agua de alta presión que produce elementos que han sido sujetos a abuso o negligencia por parte este equipo pueden perforar la piel y sus tejidos del operador. -
Page 32: Mantenimiento De La Boquilla
Sección 5: Mantenimiento Retire la pistola y la extensión para boquillas de la manguera Apague el motor y apague el suministro de agua. de alta presión. Retire la extensión para boquillas de la Remueva la puntas de rocío del extremo de la extensión de pistola y retire el anillo 'o' y el colador de la extensión para la boquilla. -
Page 33: Almacenamiento
Sección Sección 5: Mantenimiento Almacenamiento MANTENIMIENTO DEL MOTOR Vacíe el tubo de detergente, colocando el filtro en un envase lleno de agua limpia mientras esté corriendo el agua a baja Consulte el manual del propietario del motor para las presión. Lave por 1 o 2 minutos. instrucciones de cómo mantener adecuadamente el motor. -
Page 34: Diagnosticos De Averías
Sección Diagnosticos de Averías REPARACION DE DAÑOS Problema Causa Solución Está usando la puntas de rocío de baja Cambie la puntas de rocío a una de las presión (negra). tres puntas de rocío de alta presión. La entrada de agua está bloqueada. Limpie la entrada. -
Page 35: Garantia
POLÍTICA PARA EL PROPIETARIO DE EQUIPOS TROY-BILT® Efectiva desde el 12 ro de Noviembre, 2003 GARANTÍA LIMITADA "Troy-Bilt® es una marca registrada de Troy-Bilt, LLC bajo licencia de Briggs & Stratton Power Products. Briggs & Stratton Power Products reparará o sustituirá sin cargo alguno cualquier componente del equipo** que presente defectos de materiales y/o mano de obra. Los gastos de transporte de las piezas enviadas para reparar o sustituir conforme a los términos de esta garantía correrán a cargo del comprador. - Page 36 TROY-BILT® OWNER WARRANTY POLICY Effective November 12, 2003 LIMITED WARRANTY “Troy-Bilt® is a registered trademark of Troy-Bilt, LLC and is used under license to Briggs & Stratton Power Products. Briggs & Stratton Power Products will repair or replace, free of charge, any part, or parts of the equipment** that are defective in material or workmanship or both.Transportation charges on parts submitted for repair or replacement under this warranty must be borne by purchaser.This warranty is effective for the time periods and subject to the conditions provided for in this policy.
Need help?
Do you have a question about the TROY-BILT 020209 and is the answer not in the manual?
Questions and answers