Table of Contents
Advertisement
Quick Links
Advertisement
Table of Contents

Related Manuals for Baumatic Pythagora PI3SS


Summary of Contents for Baumatic Pythagora PI3SS
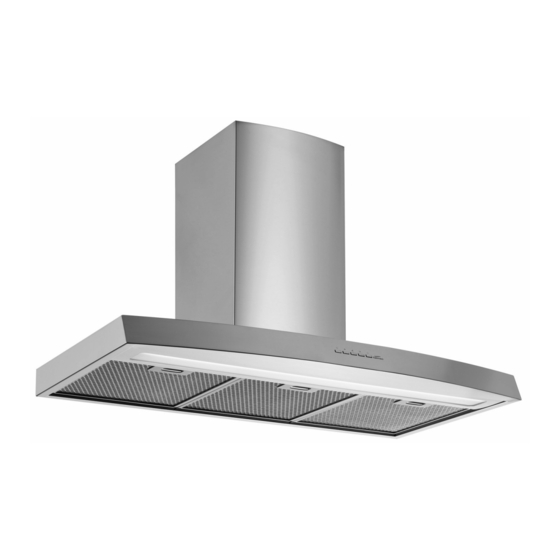
- Page 1 PI3SS Island cooker hood...
- Page 2 User Manual for your Baumatic PI3SS Pythagora 90 cm island cooker hood NOTE : This User Instruction Manual contains important information, including safety & installation points, which will enable you to get the most out of your appliance. Please keep it in a safe place so that it is easily available for future reference;...
-
Page 3: Table Of Contents
Contents Page Environmental note IMPORTANT SAFETY INFORMATION 5 – 7 Specifications of your cooker hood Using your Baumatic cooker hood The control panel The timer button Grease filter maintenance alarm Cleaning your Baumatic cooker hood The grease filters Maintenance Removing and cleaning the grease filters... -
Page 4: Environmental Note
This should be undertaken by a competent person. CONFORMITY TO W.E.E.E. DIRECTIVE o The packaging materials that Baumatic uses are environmentally friendly and can be recycled. o Please discard all packaging material with due regard for the environment. -
Page 5: Important Safety Information
IMPORTANT SAFETY INFORMATION Your safety is of the utmost importance to Baumatic. Please make sure that you read this instruction booklet before attempting to install or use the appliance. If you are unsure of any of the information contained in this booklet, please contact the Baumatic Technical Department. - Page 6 o The edges of the cooker hood are sharp – be mindful of this as you handle your appliance, especially during installation and cleaning. DO NOT CLEAN IN BEHIND THE GREASE FILTER! o If the room where the cooker hood is to be used contains a fuel burning appliance such as a central heating boiler then its flue must be of the sealed or balanced flue type.
- Page 7 o Remember that when in extraction mode, your cooker hood is removing air from the room it is installed in. Ensure that proper ventilation measures are being observed. Note that it removes odours from the room, not steam. o Warning - Always ensure that the cooker hood has been disconnected from the power supply before carrying out any work on the hood, including cleaning and...
-
Page 8: Specifications Of Your Cooker Hood
Specifications of your cooker hood Congratulations on purchasing a Baumatic Cooker Hood! PRODUCT DIMENSIONS: PI3SS Height (mm) 640 - 1212 Width (mm) Depth (mm) Chimney dimensions (mm) 318 (width) x 256 (depth) Your cooker hood is fitted with: o High extraction tangential motor... -
Page 9: Using Your Baumatic Cooker Hood
Using your Baumatic cooker hood The control panel o Make sure that it has been installed by a suitably qualified person, as per the information contained in Baumatic’s installation instructions. o Find the control panel, which is located at the front of the cooker hood. -
Page 10: The Timer Button
Controlling your cooker hood o Use the ON/OFF button to switch the cooker hood on. o Use the plus and minus buttons to regulate the speed that the motor is running at. o The speed level that you have selected will appear on the LCD display. -
Page 11: Cleaning Your Baumatic Cooker Hood
Cleaning your Baumatic cooker hood IMPORTANT: BEFORE CLEANING, ALWAYS ENSURE THAT YOU HAVE SWITCHED YOUR COOKER HOOD OFF AT THE OMNI-POLAR SWITCH, SET AT THE WALL FROM THE CABLE. Cleaning o Clean the external parts of your cooker hood with mild liquid detergent and a new damp cloth. -
Page 12: Maintenance
Maintenance Removing and cleaning the grease filters o Remove the grease filters by lifting up the catch and then pull the filters away from the hood. o Soak the grease filters in hot water and washing up liquid for about an hour. o Rinse them off thoroughly with hot water. -
Page 13: Changing A Fluorescent Bulb
Changing a fluorescent bulb IMPORTANT: BEFORE ATTEMPTING TO CHANGE A FLUORESCENT TUBE, YOU MUST ENSURE THAT YOU HAVE DISCONNECTED THE COOKER HOOD FROM YOUR MAINS SUPPLY. o Prior to touching a fluorescent tube, ensure that it has cooled down. o Unscrew the fixing screws and remove the panel that covers the fluorescent tube that needs replacing. -
Page 14: Fitting The Carbon Filter
Fitting the carbon filter If the appliance is going to be used in recirculation mode then it is necessary to fit a carbon filter. This will help to absorb unpleasant odours caused by cooking. IMPORTANT: BEFORE ATTEMPTING TO FIT OR REMOVE THE CARBON FILTER, YOU MUST ENSURE THAT YOU HAVE DISCONNECTED THE COOKER HOOD FROM YOUR MAINS SUPPLY. -
Page 15: Installation
Installation IMPORTANT: Before installation and usage read all the instructions and make sure that the voltage (V) and the frequency (Hz) indicated on the rating plate are exactly the same as the voltage and frequency of your home. The rating plate can be found behind the grease filters, on the motor. -
Page 16: Before Beginning Installation
We recommend that the appliance is connected by a qualified electrician, who is a member of the N.I.C.E.I.C. and who will comply with the I.E.E. and local regulations. The wires in the mains lead are coloured in accordance with the following UK code: Blue = Neutral, Brown = Live, Green/Yellow = Ground If you only find two wires in the main’s lead (blue and brown), then neither must be connected to the earth terminal. -
Page 17: Extraction Mode Or Recirculation Mode
o Select a flat surface for assembling the cooker hood. Cover that surface with a protective covering and place all cooker hood parts and fittings on it. o Rawlplugs are provided to secure the hood to most types of ceilings. However a qualified technician must verify the suitability of the materials, in accordance with the type of ceiling. -
Page 18: Installing Your Cooker Hood
Installing your cooker hood o We recommend that at least two people install this hood. IMPORTANT: THE MAINS SUPPLY THAT YOUR COOKER HOOD IS CONNECTED TO MUST NOT BE SWITCHED ON UNTIL AFTER THE REST OF THE INSTALLATION PROCESS HAS BEEN COMPLETED. 1) Identify the framework. - Page 19 3) Lift the framework to the ceiling and mark the position of the 4 screw holes that are indicated by the arrows in figure 3. 4) Remove the framework from the ceiling. Using a drill bit with an 8 mm diametre, drill out the holes on the ceiling that you have just marked and insert rawlplugs into them.
- Page 20 7) Lift the chimney section up to the framework and then fasten it to the framework using the 4 x M4 metric screws supplied. The chimney section should be fixed to the existing holes in the framework. IMPORTANT: Do not tighten these screws completely at this stage. IMPORTANT: If you are going to connect the cooker hood to external ducting, then you must follow the “Connecting to external ducting”...
- Page 21 o Raise the upper chimney section to the framework again and retighten the 4 M4 screws. At this stage, they still should not be fully tightened. 12) There are two decorative side pieces (H) that should be used to cover the grooves in the inner chimney section. o Use an appropriate tool to cut the decorative side pieces to your required length.
-
Page 22: Completing The Installation
14) Secure the lower chimney section to the hood with the screws provided. IMPORTANT: Make sure that these screws are fully tightened. Completing the installation The electrical connection should have already been completed at step 11 as per the electrical connection information on pages 15 –... -
Page 23: Installing The Appliance At Minimum Height
Installing the appliance at minimum height 1) If you are installing the product at minimum height, then you need to remove the 10 screws from the framework, including the 2 pre-tightened screws. Separate the inner and outer sections of the framework. -
Page 24: Connecting To External Ducting
It should have a cross section of at least 150 cm² (please note that the ducting hose is not supplied with the appliance but is available from the Baumatic Spares Department). o The maximum distance between the coupling and your discharge outlet can be upto 3 metres long, with one 90 degree bend. -
Page 25: Troubleshooting
Troubleshooting IMPORTANT: If your cooker hood appears not to be operating properly, before contacting the Baumatic Service Department, please refer to the checklist below. My cooker hood will not start. o Check that the hood is connected to the power supply and whether you have selected any of the fan speeds. -
Page 26: Baumatic Ltd. Conditions Of Guarantee
Baumatic appliance. * In addition, your appliance is covered by a 5 year parts warranty. Baumatic Ltd will provide free of charge the parts required to repair the appliance, only if they are fitted by a Baumatic engineer, for any defect that arises due to faulty materials or workmanship within a period of 5 years from the original purchase date. -
Page 27: Contact Details
Headquarters Baumatic Ltd. Baumatic Buildings, 6 Bennet Road, Reading, Berkshire RG2 0QX, United Kingdom Sales Telephone +44 118 933 6900 Sales Fax +44 118 931 0035 Service Telephone +44 118 933 6911 Service Fax +44 118 986 9124 Spares Telephone... - Page 28 28 28...
Need help?
Do you have a question about the Pythagora PI3SS and is the answer not in the manual?
Questions and answers