
Subscribe to Our Youtube Channel
Related Manuals for Avermedia AVerDiGi EB1504 MPEG4/MPEG4


Summary of Contents for Avermedia AVerDiGi EB1504 MPEG4/MPEG4
- Page 1 ® AVerMedia AVerDiGi EB1504 MPEG4/MPEG4 Real Time Security DVR User Manual http://www.avermidea.com http://www.averdigi.com...
- Page 2 The information contained in this documentation is subject to change without notice. In no event will AVerMedia be liable for direct, indirect, special, incidental, or consequential damages arising out of the use or inability to use this product or documentation, even if advised of the possibility of such damages.
- Page 3 WARNING TO REDUCE RISK OF FIRE OR ELECTRIC SHOCK, DO NOT EXPOSE THIS APPLIANCE TO RAIN OR MOISTURE CAUTION IF THERE IS ANY DAMAGE, SHORTAGE OR INAPPROPRIATE ITEM IN THE PACKAGE, PLEASE CONTACT WITH YOUR LOCAL DEALER. WARRANTY VOID UNAUTHORIZED PRODUCT MODIFICATION.
-
Page 4: Table Of Contents
Table of Contents Chapter 1 Introduction ...............1 Package Contents..................2 Features and Specifications ............... 2 Front & Side Panel ..................3 Back Panel....................5 Setting Up the DVR Unit ................5 1.5.1 Installing the Hard Disk................5 1.5.2 Connecting Devices................8 1.5.3 Connecting the Sensor/Relay device............. -
Page 5: Chapter 1 Introduction
Chapter 1 Introduction is a 4-channel stand-alone DVR unit that AVerDiGi EB1504 MPEG4/MPEG4 provides real-time monitoring and digital recording of surveillance video. Up to four video cameras and four sensor devices can be hooked up to this DVR unit. It also provides one audio input and output channel. -
Page 6: Package Contents
Package Contents (1) DVR unit (EB1504 MPEG4 or EB1504 MPEG4 unit) (2) Remote Control (batteries included) (3) Quick Installation Guide (4) Software CD (User Manual included) (5) DVR accessories (including 4 screws and 1 Ω hook) (6) Removable hard disk drawer accessories (with spare screws) (7) Power Cord * The power cord varies depending on the standard power outlet of the country where it is sold. -
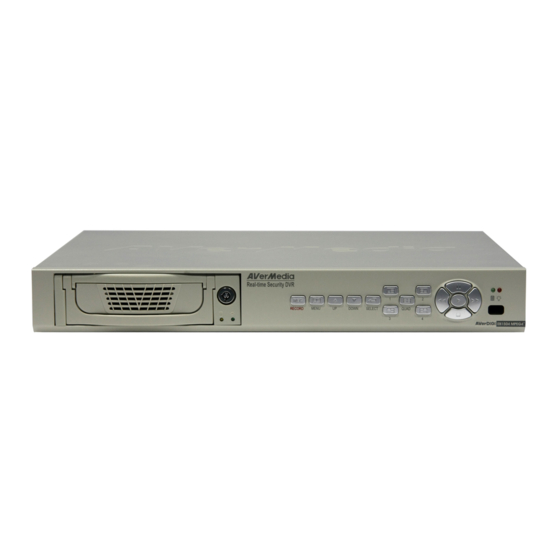
Page 7: Front & Side Panel
Auto-detect NTSC or PAL video system Supports 2 hard drives (not included) Full-screen resolution: Display: 720 x 480 (NTSC), 720 x 576 (PAL) Recording: 720 x 480 (NTSC), 720 x 576 (PAL) Display frame rate: Total of 120/100 fps (NTSC/PAL) Recording frame rate: CIF mode: Total 120/100 fps (NTSC/PAL) D1 mode: Total 60/50fps(NTSC/PAL) - Page 8 Name Function (4) 1/2/3/4/Quad : For ”1” : For “2” : For “3” : For “4” : For “0” If in QUAD record mode, user would not be able to view single channel in full screen Playback/OSD Menu Use the buttons in playback mode to: Control Buttons Display the play list and play the recorded video Wind back the video playback at the speed of 2x,...
-
Page 9: Back Panel
Adjust the jumper setting according to the instructions on the hard disk label. Please set the jumper of hard disk as Master while there is only one hard disk inside the DVR. For hard disk spec, please referring to http://www.avermedia.com/nvd/hardware-recom_eb_c.asp... - Page 10 AVerMedia does not guarantee or provide warranties, explicitly, implied or statutory with respect to the reliability of the hard disk function or its compatibility. In no event AVerMedia shall be liable for damages, with respect to any business interruption of clients, lost profits, loss of programs or other data on your information handling system or otherwise.
- Page 11 7. Unlock the removable hard disk 8. Remove the removable rack cover drawer then pull it out 9. Connect the power connector to the 10. Carefully insert the hard disk in the hard disk (master) removable rack then replace the removable rack cover 11.
-
Page 12: Connecting Devices
1.5.2 Connecting Devices The back panel of the DVR unit, you can connect up to 4 video cameras, 4 sensor devices, 1 alarm device and output video to a TV or CRT/LCD monitor. Connecting the unit to a PC, through USB connection, the bundled software enables you to transfer, playback and segment the video. -
Page 13: Connecting The Sensor/Relay Device
1.5.3 Connecting the Sensor/Relay device The Sensor and Alarm ports enable you to connect (4) sensor inputs and (1) relay outputs. Just connect the external sensor and relay pin directly to the pinhole. Check the table below and locate which pinhole is assigned to sensor input and relay output. -
Page 14: Familiarizing The Remote Control Buttons
Familiarizing the Remote Control Buttons Use the Remote control to operate the OSD menu on surveillance screen. (10) (11) (15) SELECT MENU (12) (14) LEFT RIGHT (13) ▲ FOCUS + ZOOM + DOWN ▼ FOCU S - ZOOM - SPEED + SPEED - RM-H6 Button... - Page 15 Button Function Reverse the video playback at the speed of 2x, 4x 8x or 16x To move the select to left Fast play the video playback at the speed of 2x, 4x 8x or 16x To move the selection to right Stop playing / Stop recording (11) To move the select to down...
-
Page 16: Chapter 2 Operating The Eb Dvr System
Chapter 2 Operating the EB DVR System Using the EB DVR System for the First Time Upon connecting the power, the unit automatically detects the status of the hard disk. The hard disk must be formatted for the first time installed on DVR system. If you are prompt to format the hard disk, press (select) for YES to format the hard disk and... -
Page 17: Playback The Video
D1 (A) CIF(A) Full Screen Preview QUAD Screen Preview When you are in full screen preview, press the following buttons on the remote control and control panel to switch to different channel, or preview all 4 channels: CH2: Camera 2 QUAD: 4-Channel CH1: Camera 1 CH3: Camera 3... - Page 18 ▲ ▼ Use the buttons and select SEARCH TIME. Then press again to make the selection. In the SEARCH TIME, you may now select the date and time from where you want to begin the video playback. Use the buttons to move the selection to the left and right.
-
Page 19: Chapter 3 Osd Navigation Tree
Chapter 3 OSD Navigation Tree The follow figure is an OSD menu tree map. To call out the OSD menu, press on the remote control. MAIN MENU RECORD SCHEDULE RECORD SCHEDULE CAMERA SELECT 00 : 00 - 01 : 00 ALWAYS REC 13 : 00 - 14 : 00 ALWAYS REC... -
Page 20: Menu Function
Menu Function If the unit is currently recording the video, you may have to stop video recording to change the settings. To navigate in the OSD menu, press to call up and exit from the main menu or sub-menu display. Then use the ▲... - Page 21 OSD MENU Description LANGUAGE SETUP : Select from the available language RECORD SCHEDULE RECORD SCHEDULE: 00 : 00 - 01 : 00 ALWAYS REC By default, in 24 hours, the recording schedule is set to 01 : 00 - 02 : 00 ALWAYS REC 02 : 00 - 03 : 00 ALWAYS REC...
- Page 22 OSD MENU Description SUBMENU TIME : PASSWORD CHANGE VIDEO ADJUSTMENT Set the current time. 2006 / 04 / 20 DATE TIME 17 : 54 : 50 AUTO RECORD : AUTO RECORD AUTO SCAN Enable/disable auto continue recording when PASSWORD SETUP AUDIO RECORD interrupted (i.e., power breakdown, video playback or AUDIO MUTE...
- Page 23 OSD MENU Description buttons to select the security combination number. Press button again to make the selection. Repeat till you key in the last number. The factory default password is 111111. Also, user could use number key ( on the remote control to enter each digit of password.
- Page 24 OSD MENU Description SENSOR SETUP SENSOR REC TIME : SENSOR REC TIME 010 SEC ALARM OUT TIME 010 SEC Set the amount of time (in second) to record when the NOT INSTALLED CHANNEL - 1 sensor has been triggered. CHANNEL - 2 NOT INSTALLED CHANNEL - 3 NOT INSTALLED...
-
Page 25: Chapter 4 Using The Usb Playback Console
Chapter 4 Using the USB Playback Console Recommended system requirements Pentium®4 2.4GHZ or above Windows®2000/ XP DDR 256 MB Graphic function must support DirectDraw Audio card or built-in Speaker 1 available USB2.0 port Installing the USB Playback Console To install the USB Playback Console: Place Installation CD into the CD-ROM drive. -
Page 26: Running The Usb Playback Console
Running the USB Playback Console To run the application, click the icon on the PC desktop (10) (11) (17) (12) (13) (16) (14) (15) Name Function Video playback screen To select the video file for playing. The playback application supports *.dvr and *.avf file type. Open File - DVR Recorded File (HD): To playback the recorded video from the hard disk which was recording video on the DVR system. - Page 27 Name Function Select the event you want to playback. The event list only available when user select to playback in DVR Recorded File(HD). Event List Full screen Use the entire area of the screen to only display the video. To return, press the right button of the mouse or ESC on the keyboard.
-
Page 28: To Cut And Save The Portion Of The Recorded Video
Name Function Turn on and off the sound (17) Sound /Sound bar Increase and decrease the volume 4.3.1 To Cut and Save the Portion of the Recorded Video Use the Playback Control buttons or drag the bar on the playback progress bar and pause on where you want to start the cut. -
Page 29: Playback Backup File(*.Dvr)
4.3.3 Playback Backup File(*.dvr) Click Open File button. Select Backup File(*.dvr) and click OK. Locate the backup file folder and click OK. When open the backup video file, just locate the where backup file is located. And then, Playback Date/Time Selection window appears. Select the date and time and click OK. -
Page 30: Chapter 5 Backup Recorded Video File
Chapter 5 Backup Recorded Video File Recommended system requirements Pentium®4 2.4GHZ or above Windows®2000/ XP DDR 256 MB Graphic function must support DirectDraw Audio card or built-in Speaker 1 available USB2.0 port Familiarizing with HDD Backup Application (10) Name Function All recorded video events list No.: the list order number Record: the record type(see also... -
Page 31: To Backup Recorded Video File
Name Function To select the hard disk drive Source Disk Target Path To locate on where user want to save the file Event (%) Display the backup progress rate of event in percentage Total (%) Display the total backup progress rate in percentage Stop Stop backup progress Start... - Page 32 And then, all the recorded video files will list out. Select the event which user wants to backup. Or mark the Select All to select all listed recorded video event Locate on where user wants to save the backup file 10.
-
Page 33: Chapter 6 Imageverification
Chapter 6 ImageVerification Image Verification is a watermark-checking program to identify the authenticity of a saved image (e.g. by snapshot). This program can only verify uncompressed bmp image files. To Run the ImageVerification To run the ImageVerification application, click the Watermark button on USB Playback Console main interface. -
Page 34: Chapter 7 Ienhance
Chapter 7 iEnhance The bundled iEnhance is a video editing tool and can only be used with *.dvr video file. It allows you to adjust the video picture quality, segment and save the desire portion of the video, zoom in and out the image, and print or save the screen shot. You can also save the setting and apply it on other files. -
Page 35: To Use Istable
Name Function (10) History Box List all the actions. (11) Undo Delete the last action. (12) Noise Reduce Adjust the softness and repair the damaged colour. (13) Sharpness Improve the overall image by enhancing edges. This gives the image more depth. (14) Effects Gray Scale: convert the image into black and white (monochrome). - Page 37 Any other cause which does not relate to a product defect. 3. Cartons, cases, batteries, cabinets, tapes, or accessories used with product. 4. AVerMedia does not warrant that this product will meet your requirements; it is your responsibility to determine the suitability of this product for your purpose.
Need help?
Do you have a question about the AVerDiGi EB1504 MPEG4/MPEG4 and is the answer not in the manual?
Questions and answers