Table of Contents
Advertisement
Quick Links
Download this manual
See also:
Use and Care Manual
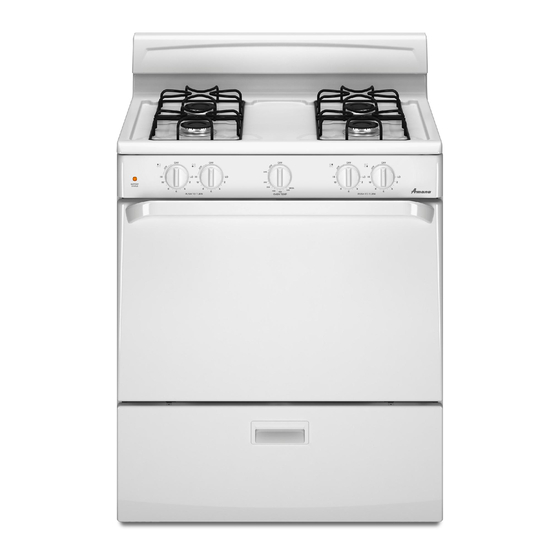
30" (76.2 CM) FREESTANDING GAS RANGES
IMPORTANT:
Installer: Leave installation instructions with the homeowner.
Homeowner: Keep installation instructions for future reference.
W10533016A
INSTALLATION INSTRUCTIONS
with standard clean oven
RANGE SAFETY ........................................................................................................2
INSTALLATION REQUIREMENTS ...........................................................................4
Tools and Parts .......................................................................................................4
Location Requirements...........................................................................................4
Electrical Requirements ..........................................................................................5
Gas Supply Requirements ......................................................................................6
INSTALLATION INSTRUCTIONS .............................................................................7
Unpack Range.........................................................................................................7
Install Anti-Tip Bracket............................................................................................7
Make Gas Connection ............................................................................................8
Verify Anti-Tip Bracket Is Installed and Engaged ...................................................9
Level Range...........................................................................................................10
Installing/Replacing the Battery ............................................................................10
Battery Status Indicator ........................................................................................11
Electronic Ignition System ....................................................................................11
Complete Installation ............................................................................................13
GAS CONVERSIONS...............................................................................................14
LP Gas Conversion ...............................................................................................14
Complete Conversion ...........................................................................................16
Natural Gas Conversion ........................................................................................16
Complete Conversion ...........................................................................................18
Table of Contents
Advertisement
Table of Contents

Related Manuals for Amana AGR3530AAW


Summary of Contents for Amana AGR3530AAW
-
Page 1: Table Of Contents
INSTALLATION INSTRUCTIONS 30" (76.2 CM) FREESTANDING GAS RANGES with standard clean oven Table of Contents RANGE SAFETY ......................2 INSTALLATION REQUIREMENTS ................4 Tools and Parts .......................4 Location Requirements...................4 Electrical Requirements ..................5 Gas Supply Requirements ..................6 INSTALLATION INSTRUCTIONS ................7 Unpack Range......................7 Install Anti-Tip Bracket....................7 Make Gas Connection ....................8 Verify Anti-Tip Bracket Is Installed and Engaged ...........9 Level Range......................10... -
Page 2: Range Safety
RANGE SAFETY Your safety and the safety of others are very important. We have provided many important safety messages in this manual and on your appliance. Always read and obey all safety messages. This is the safety alert symbol. This symbol alerts you to potential hazards that can kill or hurt you and others. All safety messages will follow the safety alert symbol and either the word “DANGER”... - Page 3 In the State of Massachusetts, the following installation instructions apply: Installations and repairs must be performed by a qualified or licensed contractor, plumber, or gasfitter qualified or licensed by the State of Massachusetts. If using a ball valve, it shall be a T-handle type. A flexible gas connector, when used, must not exceed 3 feet.
-
Page 4: Installation Requirements
INSTALLATION REQUIREMENTS Tools and Parts Location Requirements Gather the required tools and parts before starting installation. IMPORTANT: Observe all governing codes and ordinances. Do Read and follow the instructions provided with any tools listed not obstruct flow of combustion and ventilation air. here. -
Page 5: Electrical Requirements
Mobile Home - Additional Installation Requirements Cabinet Dimensions The installation of this range must conform to the Manufactured Home Construction and Safety Standard, Title 24 CFR, Part 3280 Cabinet opening dimensions shown are for 25" (64.0 cm) (formerly the Federal Standard for Mobile Home Construction countertop depth, 24"... -
Page 6: Gas Supply Requirements
Gas Supply Requirements Flexible metal appliance connector: WARNING If local codes permit, a new CSA design-certified, 4 to 5 ft (122 to 152.4 cm) long, ½" (1.3 cm) or ¾" (1.9 cm) I.D., flexible metal appliance connector may be used for connecting range to the gas supply line. A ½"... -
Page 7: Installation Instructions
Line pressure testing above ½ psi gauge (14" WCP) Burner Input Requirements The range and its individual shutoff valve must be disconnected from the gas supply piping system during any pressure testing of Input ratings shown on the model/serial rating plate are for that system at test pressures in excess of ½... -
Page 8: Make Gas Connection
3. Determine and mark centerline of the cutout space. The mounting can be installed on either the left side or right side Make Gas Connection of the cutout. Position mounting bracket against the wall in the cutout so that the V-notch of the bracket is 12 "... -
Page 9: Verify Anti-Tip Bracket Is Installed And Engaged
3. Use a combination wrench and pliers to attach the flexible connector to the adapters. Check that connector is not Verify Anti-Tip Bracket Is Installed and kinked. Engaged 1. Place the outside of your foot against the bottom front of the broiler, and grasp the lower right or left side of the control panel as shown. -
Page 10: Level Range
Level Range 1. Place a standard flat rack in oven. 2. Place level on the rack and check levelness of the range, first side to side; then front to back. 3. If range is not level, pull range forward until rear leveling leg is removed from the anti-tip bracket. -
Page 11: Battery Status Indicator
4. Remove the battery holder and insert a new 9V DC alkaline Test the battery by lighting a burner. See “Electronic Ignition battery into it. System” section. The electrode in each burner will spark and make a clicking noise. When the battery needs to be replaced, follow these instructions and remove the old battery before inserting a new battery. - Page 12 Check Operation of Cooktop Burners Check Operation of Oven/Broil Burner 1. If control panel and knobs were removed earlier, reinstall 1. Open the oven door knobs. 2. Press in and turn the oven control knob to the “LITE” position 2. Push in and turn each surface unit control knob to the “LITE” position.
-
Page 13: Complete Installation
6. When the flame has been properly adjusted, turn the oven off If range does not operate, check the following: and wait for the burner to cool down. 9V DC alkaline battery is installed correctly. 7. Tighten the shutter screw. 9V DC alkaline battery is not defective or discharged. -
Page 14: Gas Conversions
GAS CONVERSIONS Gas conversions from Natural gas to LP gas or from LP gas to Natural gas must be done by a qualified installer. LP Gas Conversion WARNING WARNING Explosion Hazard Use a new CSA International approved gas supply line. Tip Over Hazard Install a shut-off valve. - Page 15 4. Remove the cap from the gas pressure regulator using a 4. Install LP gas orifice spuds using a 7 mm combination flat-blade screwdriver. wrench. A. Cap 5. Turn the cap over so “LP” is visible. A. Spud B. Holder NOTE: Depending on model, the range cooktop may be equipped with 4 standard burners or 3 standard burners and 1 super burner.
-
Page 16: Complete Conversion
To Convert Oven Burner Natural Gas Conversion 1. Open the oven door and remove oven racks, oven tray and WARNING flame spreader and set aside. 2. Lift oven burner. The orifice spud is behind the oven burner air shutter. Tip Over Hazard A child or adult can tip the range and be killed. - Page 17 4. Remove the cap from the gas pressure regulator using a flat- 4. Install the Natural gas orifice spuds using a 7 mm blade screwdriver. combination wrench. A. Cap 5. Turn the cap over so that “N” or “NAT” is visible. A.
-
Page 18: Complete Conversion
To Convert Oven Burner Complete Conversion 1. Refer to the “Make Gas Connection” section for properly 1. Open the oven door and remove oven racks, oven tray, and connecting the range to the gas supply. flame spreader and set aside. 2. - Page 19 Notes...
- Page 20 W10533016A © 2012 Whirlpool Corporation. 9/12 All rights reserved. Printed in Mexico...
Need help?
Do you have a question about the AGR3530AAW and is the answer not in the manual?
Questions and answers