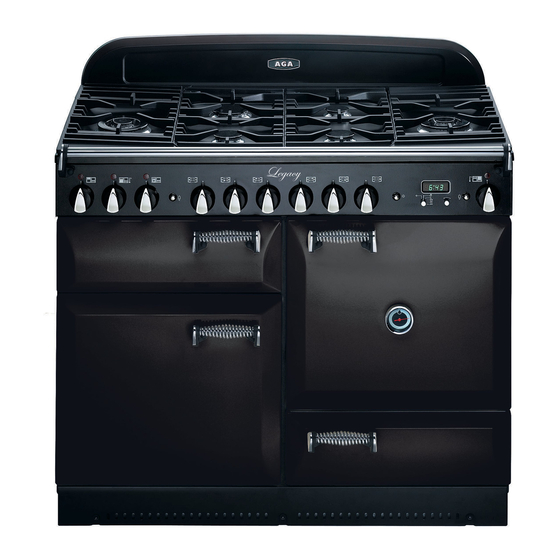
AGA legacy 110 Dual Fuel Range Service Instructions Manual
Dual fuel range
Hide thumbs
Also See for legacy 110 Dual Fuel Range:
- User's manual and installation instructions (40 pages)

Related Manuals for AGA legacy 110 Dual Fuel Range


Summary of Contents for AGA legacy 110 Dual Fuel Range
-
Page 1: Service Instructions
110 Dual Fuel Range Service Instructions This book contains many important safety messages. Always read and obey all safety messages. F104010-01 www.aga-ranges.com... -
Page 3: Table Of Contents
Contents Servicing Notes To Remove the Hand Rail To Remove Control Panel To Remove the Cooktop To Remove a Side Panel To Remove Oven Light Switch To Remove Electronic Timer To Remove A Thermostat To Change Broiler Controller To Change Cooktop Control Valve 10. -
Page 4: Servicing Notes
SERVICING - WARNING Disconnect from electricity and gas before servicing. Check appliance is safe when you have finished. Reassemble in reverse order. When replacing Servicing Notes leads refer to the wiring diagram. Check operation of timer, ignition, and oven light When servicing or replacing gas carrying switches. -
Page 5: To Remove A Side Panel
SERVICING - WARNING Disconnect from electricity and gas before servicing. Check appliance is safe when you have finished. 4. To Remove a Side Panel 7. To Remove A Thermostat Disconnect from electricity supply. Remove control panel (see 2) and cooktop (see 3). -
Page 6: To Change Cooktop Burner Orifice
SERVICING - WARNING Disconnect from electricity and gas before servicing. Check appliance is safe when you have finished. top of range with cooktop removed 10. To Change Cooktop Burner Orifice burners. Remove the screw at the front holding the cross support. Slide the support to the right to release in from the rear location. -
Page 7: To Remove Broiler Outer Door Panel
SERVICING - WARNING Disconnect from electricity and gas before servicing. Check appliance is safe when you have finished. 13. To Remove Broiler Outer Door 15. To Change Oven Door Outer Panel Panel Open left hand oven door and remove 2 screws from bottom edge of broiler door. -
Page 8: To Change Oven Door Catch
SERVICING - WARNING Disconnect from electricity and gas before servicing. Check appliance is safe when you have finished. 16. To Change Oven Door Catch 18. To Adjust Oven Door Catch Keep Remove outer door panel (see 15). Remove Open oven door, slacken off locknut at base of screws ‘B’... -
Page 9: To Replace The Cooling Fan
SERVICING - WARNING Disconnect from electricity and gas before servicing. Check appliance is safe when you have finished. panel away. Re-assemble in reverse order. replacement and re-assemble parts in reverse Ensure that the retaining fixings are fully order. Check that the oven operates tightened. -
Page 10: To Remove The Lh Oven Bottom And Top Elements
SERVICING - WARNING Disconnect from electricity and gas before servicing. Check appliance is safe when you have finished. 25 To Remove the LH Oven Bottom 26. To change oven light bulb. and Top Elements Disconnect from the electricity supply. Disconnect from the electricity supply. Remove the oven furniture. - Page 11 SERVICING - WARNING Disconnect from electricity and gas before servicing. Check appliance is safe when you have finished.
-
Page 12: Schematic Circuit Diagram
SERVICING - WARNING Disconnect from electricity and gas before servicing. Check appliance is safe when you have finished. - Page 13 SERVICING - WARNING Disconnect from electricity and gas before servicing. Check appliance is safe when you have finished.
-
Page 14: Technical Data
SERVICING - WARNING Disconnect from electricity and gas before servicing. Check appliance is safe when you have finished. Technical Data This cooker is supplied set for Natural gas. A conversion kit from NG to LP gas is included. INSTALLER: Please leave these instructions with the User. DATA BADGE LOCATION: Inside base of drawer cavity - remove drawer. - Page 15 SERVICING - WARNING Disconnect from electricity and gas before servicing. Check appliance is safe when you have finished. Orifices A Wok burner B Large Burner C Medium Burners A valve bypass screw D Small Burner Ratings Natural Gas Propane Gas Orifice Screw Orifice Screw Cooktop...
- Page 16 Aga Ranges LLC 110 Woodcrest Road Cherry Hill NJ 08003 Telephone Number 1-800-633-9200 Email support@aga-ranges.com...
Need help?
Do you have a question about the legacy 110 Dual Fuel Range and is the answer not in the manual?
Questions and answers