
Subscribe to Our Youtube Channel
Related Manuals for SII DPU-3445-30A-E


Summary of Contents for SII DPU-3445-30A-E
- Page 1 USER’S GUIDE Thermal Printer DPU-3445-20 Read this user’s guide carefully before using the printer. Keep this user’s guide in a place where it can be accessed quickly. Seiko Instruments Inc.
- Page 2 Copyright 1999, 2000, 2001 by Seiko Instruments Inc. All rights reserved. Seiko Instruments Inc. (SII) has prepared this User’s Guide for use by SII personnel, licensees, and customers. The information contained herein is the property of SII and shall not be reproduced in whole or in part without the prior written approval of SII.
- Page 3 This equipment has been tested and found to comply with the limits for a Class B digital device pursuant to Part 15 of the FCC Rules. These limits are designed to provide reasonable protection against harmful interference in a residential installation.
-
Page 4: Table Of Contents
INTRODUCTION User’s Guide applies to the DPU-3445-20 Thermal Printer. Read through the Safety Precautions on pages 2 to 6 carefully before using the printer. Also read the instruction manuals of the optional equipment that you purchased with the printer. The User’s Guide consists of the following sections. SAFETY PRECAUTIONS................ -
Page 5: Safety Precautions
SAFETY PRECAUTIONS The following symbols are used in this User’s Guide in order to make use of the printer properly and prevent the printer from being damaged. Follow the instructions marked with the symbol. Failure to follow the guidelines marked with WARNING this symbol could result in severe personal injury or death. - Page 6 WARNING DO NOT use an AC adapter or battery pack other than that which is specified. Doing so may cause fire leading to serious accidents. DO NOT bend the power cable forcibly, or place heavy object on the cable because it might damage the cable and cause fire or electric shock.
- Page 7 CAUTION This printer is not designed to be dust-proof or water-proof. DO NOT drop any metallic objects or liquids, such as water or coffee, into the printer. DO NOT disassemble or remodel the printer. DO NOT REPAIR THE PRINTER YOURSELF. Doing so may cause fire, electric shock or other accidents.
-
Page 8: Operating Precautions
OPERATING PRECAUTIONS Please follow the precautions below to enjoy and maintain the full performance of the printer. Using the Printer Be careful not to drop or bump the printer on a hard surface. DO NOT install the printer in direct sunlight or such areas. Suitable environment for the use of the printer is as follows: ·... - Page 9 Thermal Paper Handling Store the thermal paper in a cool, dry, and dark place. Do not rub the paper with hard objects. Do not leave the paper near organic solvents. Do not allow plastic film, erasers, or adhesive tape to touch the paper for long periods.
-
Page 10: Preparation
1 PREPARATION Once you have opened the carton, make sure it contains the printer and all accessories. Printer User’s Guide (this document) Printer The following are available as options: AC cable AC adapter Battery pack Paper holder Battery charger Keep the package and packing materials for future transportation or long-term storage. -
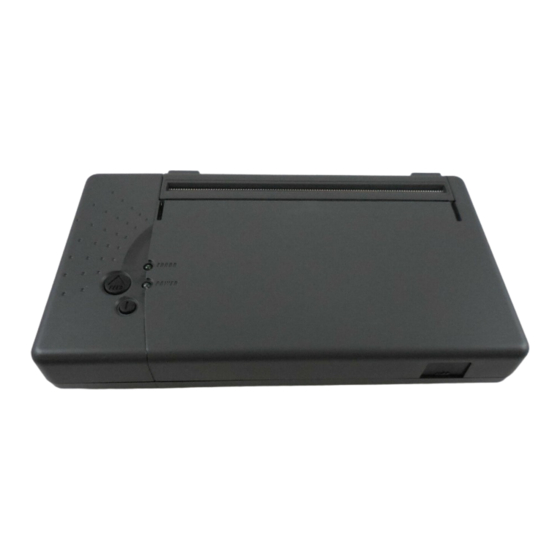
Page 11: Names Of Parts
2 NAMES OF PARTS (10) (11) (12) Back Front (13) Bottom (14) (1) POWER button (4) ERROR lamp The POWER button turns the printer ON The ERROR lamp lights when something or OFF. To turn the printer on, hold down is wrong with the printer. - Page 12 (7) Paper outlet (10) Platen roller Paper port with a paper cutter. When the The platen roller brings the paper in platen cover closed, paper contact with the thermal head. discharged from the top of the printer. platen roller is turned to feed the paper. (8) Thermal head (11) Power connector The thermal head prints characters on...
-
Page 13: Power Connection
3 POWER CONNECTION The printer can be powered with a battery pack or an AC adapter. Installing a Battery Pack The battery pack should be fully recharged. See Section 8, Recharging the Battery Pack, for details on the recharging method. NOTE Before installing or removing the battery pack, turn the printer off. -
Page 14: Connecting The Ac Adapter
Connecting the AC Adapter (1) Connect the AC cable to the AC adapter. (2) Insert the DC jack of the AC adapter to the power connector of the printer. (3) Insert the AC plug of the AC cable to an electric outlet. NOTE Before installing or removing the AC adapter, turn the printer off. -
Page 15: Paper Setting
4 PAPER SETTING This printer can feed cut sheets and roll paper. The printer function setting for cut sheets is different from that for roll paper. See Section 6, Function Setting, for details. Setting Cut Sheets (1) Turn the printer on. The POWER and Place a cut sheet with the paper position detection mark facing up. -
Page 16: Setting Roll Paper
Setting Roll Paper This printer can be equipped with an optional paper holder to feed roll paper. Install the paper holder, then set the paper. CAUTION Take care not to get your fingers caught in the printer when loading paper. (1) Insert the paper holder hooks into the upper square holes on both sides of the platen cover (shown 1 in figure). - Page 17 (6) Turn the printer over again. The ERROR lamp should be lit. Press the FEED button once, and the printer will go into standby mode. HINT • To remove the paper, turn the printer off and open the platen cover. Turn the printer over, and open the paper cover.
-
Page 18: Test Printing
5 TEST PRINTING After loading paper in the printer, perform test printing. In test printing, the printer's function setting and character strings for testing are printed. (1) Make sure that the paper is loaded in the printer and the printer is off. If the paper is not loaded, load the paper as instructed in Section 4, Paper Setting, and turn the printer off. -
Page 19: Function Setting
6 FUNCTION SETTING This printer allows you to set various function according to operating conditions or uses. The settings are stored in the software DIP switches (non-volatile memory) in the printer. They can be set by using buttons or by entering commands. This manual describes how to set functions by using buttons. -
Page 20: Changing Settings
(4) If the message shown at the right is printed, press the FEED button. [SETTING MODE] Yes: Feed SW / No: Power SW HINT • If you press the POWER button, the printer leaves the function setting mode and turns off. •... - Page 21 POWER Press the POWER button. FEED Press the FEED button. Setting complete POWER POWER POWER POWER DIP switch 1 DIP switch 2 DIP switch 3 Setting end selection selection selection selection Operation 1 Operation 1 Operation 1 Operation 3 FEED FEED FEED FEED...
- Page 22 Operation 2: DIP switch setting (1) When the message shown at the right is printed, set the bits from the most significant bit (bit 8) to the least significant bit (bit 1). Input 8 bits. 1: Feed SW / 0: Power SW To set 1: Press the FEED button.
- Page 23 Software DIP Switch Setting List : Factory settings DIP switch 1 Posi Function Setting -tion 1 Busy control Serial bit8 control 0 Xon/Xoff control 1 1 bit bit7 Stop bit 0 2 bits 1 Even bit6 0 Odd Parity 1 Yes bit5 0 No 1 8 bits...
- Page 24 DIP switch 2 Posi- Function Setting tion Initial status 1 Disabled automatic bit8 transmission 0 Enabled Kanji 1 JIS code encoding bit7 system 0 Shift JIS code 1 24-dot bit6 Font size 0 16-dot Auto power 1 Disabled bit5 0 Enabled 1 Katakana character bit4 Character set...
-
Page 25: Connecting To The Host Computer
CONNECTING TO THE HOST COMPUTER This printer supports serial transmission through an interface cable and infrared transmission. The transmission mode is selected according to the software DIP switch setting at power on. When automatic selection is set as the transmission mode by the DIP switch 2, the printer checks whether an interface cable is connected to the printer when it is turned on. - Page 26 Infrared transmission by IrDA (1) Turn the printer off. (2) Turn the printer on without connecting the interface cable to it. (3) Place the infrared transmitter/receiver of the host computer and the infrared transmitter /receiver of the printer as shown in the figure. (4) Check the transmission status from the host computer.
-
Page 27: Recharging The Battery Pack
8 RECHARGING THE BATTERY PACK The battery pack is partially charged prior to shipping, and provides sufficient power to check the printer operation. To use the printer for an extended time, fully recharge the battery pack. This battery pack does not need to be used up or discharged before recharging. The battery pack can be recharged when it is installed in the printer connected with an AC adapter. - Page 28 Recharging with Exclusive Battery Charger (1) Install a battery pack in the charger. Push the battery pack into the charger and slide it in the direction of the arrow. Push in the battery pack until the charger shutter is hidden. (2) Connect the power cable to the charger and insert the AC plug of the AC cable to a wall outlet.
-
Page 29: Thermal Head Maintenance
9 THERMAL HEAD MAINTENANCE The thermal head of this printer does not require user maintenance. If paper dust accumulates, clean the thermal head to maintain maximum print quality for an extended time. Cleaning the Thermal Head (1) Turn the power off. (2) Open the platen cover. -
Page 30: Troubleschooting
10 TROUBLESHOOTING Check the following points before you make a request for repair. The power does not turn on. · Is the recommended AC adapter or battery pack being used ? · Are the AC cable and AC adapter connected correctly ? ·... -
Page 31: Specifications
11 SPECIFICATIONS Printer Specifications Battery charger (BC-3008-W1) Specifications (Option) Item Specification Printing method Thermal Item Specification Characters per line Input voltage 100 - 240 VAC, 50/60 Hz Character size Output capacity 10 W (recharging 100 V) 17 W (recharging 240 V) (H ×... -
Page 32: Options And Consumable Parts
12 OPTIONS AND CONSUMABLE PARTS Options Paper Name Model Name Model (Specification) Paper holder RH-48-00 Thick paper (125 µm) TS-341-125 Battery pack BP-3007-A1 (112 mm (width) x 158 mm (length); AC adapter PW-3009-W2 cut sheets) Battery charger BC-3008-W1 Thick paper (145 µm) TS-341-145 AC cable (Japan)* CB-A01-J1 (112 mm (width) x 158 mm (length);... - Page 33 4-5/F, Wyler Centre 2,200 Tai Lin Pai Road, Kwai Chung, N.T., Kowloon, Hong Kong Telephone:+852-2421-8611 Facsimile:+852-2480-5479 Seiko Instruments Taiwan Inc. 4F, No.40, Sec. 2, Min-Chuan E.Rd,.Taipei 104, Taiwan, R.O.C. Telephone:+886-2-563-5001 Facsimile:+886-2-521-9519 Seiko Instruments Singapore Pte. Ltd. 2, Marsiling Lane Singapore 739144 Telephone:+65-269-1370 Facsimile:+65-269-9729 (Specifications are subject to change without notice.)
Need help?
Do you have a question about the DPU-3445-30A-E and is the answer not in the manual?
Questions and answers