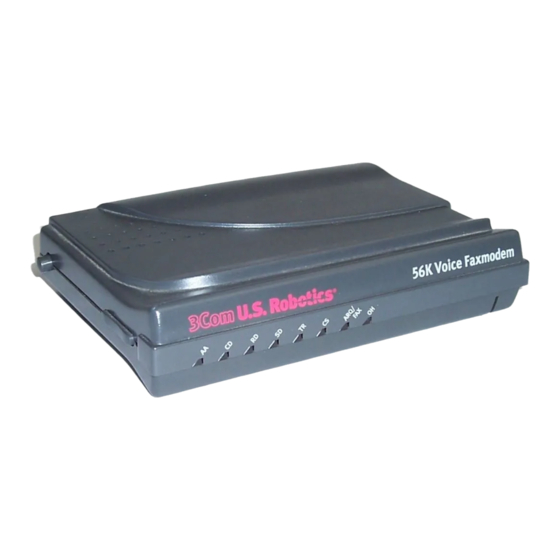
3Com U.S. Robotics 56K Voice User Manual
56k voice faxmodem internal
Hide thumbs
Also See for U.S. Robotics 56K Voice:
- Command reference manual (210 pages) ,
- User manual (168 pages) ,
- User's manual and reference (85 pages)
Table of Contents
Advertisement
Quick Links
Download this manual
See also:
User Manual
Advertisement
Table of Contents

Related Manuals for 3Com U.S. Robotics 56K Voice


Summary of Contents for 3Com U.S. Robotics 56K Voice
- Page 1 56K Voice Faxmodem Internal User’s Guide PN 1.024.1644-00...
- Page 2 31.2 Kbps. An analogue phone line compatible with the ITU V.90 standard or 3Com’s proprietary 56K technology, and an Internet provider or corporate host site with the ITU V.90 standard or 3Com’s proprietary 56K technology are necessary for these high-speed downloads. The ITU V.90 standard was officially determined in February, 1998 and is expected to be ratified in September, 1998.
-
Page 3: Table Of Contents
Table of Contents WELCOME TO 56K INFORMATION ACCESS........1 PRODUCT FEATURES ...............2 INTERNAL MODEM INSTALLATION WITH WINDOWS 95....5 ............5 ETERMINING VAILABLE ESOURCES 95.........6 ETERMINING ERSION OF INDOWS ............7 LUG AND NSTALLATION ......7 OW TO REPARE FOR LUG AND NSTALLATION ........8 OW TO NSERT THE ODEM INTO THE OMPUTER... - Page 5 Table of Contents TECHNICAL REFERENCE ..............51 ................51 YPING OMMANDS ..............51 ASIC OMMANDS ............. 57 XTENDED OMMANDS .................. 64 EGISTERS ................71 OMMANDS ) ........73 ERIAL NTERFACE ABLE NFORMATION REGULATORY (CE COMPLIANCE)........... 74 ............74 LECTROMAGNETIC OMPATIBILITY ............
-
Page 7: Welcome To 56K Information Access
31.2 Kbps. An analogue phone line compatible with the ITU V.90 standard or 3Com’s proprietary 56K technology, and an Internet provider or corporate host site with the ITU V.90 standard or 3Com’s proprietary 56K technology are necessary for these high-speed downloads. The ITU V.90 standard was officially determined in February, 1998 and is expected to be ratified in September, 1998. -
Page 8: Product Features
Product Features Modulation Schemes ITU-T V.90 x2™ technology (Download up to 56kbps, and Upload using V.34) ITU-T V.34+ ITU-T V.34 ITU-T V.32bis ITU-T V.32 ITU-T V.23 ITU-T V.22bis ITU-T V.22 Bell 212A ITU-T V.21 Bell 103 Error Control and Data Compression Schemes ITU-T V.42 ITU-T V.42bis MNP 2-5... -
Page 9: Product Features
Product Features Back Channel Link Rates (Upload Speeds) 4800, 7200, 9600, 12000, 14400, 16800, 19200, 21600, 24000, 26400, 28800, 31200 V.34+ Link Rates 4800, 7200, 9600, 12000, 14400, 16800, 19200, 21600, 24000, 26400, 28800, 31200, 33600 V.32bis Link Rates 4800, 7200, 9600, 12000, 14400 Additional Link Rates 300, 1200/75 (V.23), 1200, 2400 Fax Link Rates... - Page 10 Product Features Flash ROM Upgradable 56K Voice Faxmodem Internal supports software download through flash memory. You can obtain the latest features by downloading updates quickly and easily. Speakerphone* With the addition of an inexpensive set of externally powered speakers, your new voice modem provides all the convenience of a full-duplex speakerphone.
-
Page 11: Internal Modem Installation With Windows 95
Internal Modem Installation with Windows 95 Before you start your installation, make sure that you have the following items: Modem U.S. Robotics Disk RJ-11 Phone Lead Tail Lead Microphone Analogue (Standard) Telephone Wall Socket Phillips Head Screwdriver or ¼” Hex Screwdriver Data/Fax/Voice Communications Software and Manual Determining Available Resources Your U.S. -
Page 12: Determining Your Version Of Windows 95
Internal Modem Installation with Windows 95 You will see the IRQs your system is currently using. If IRQs 3, 4, 5, and 7 are being used, you need to free an IRQ before you begin installation. This process involves moving a device from the IRQ you want to use to a different (and usually higher) IRQ setting. -
Page 13: Plug And Play Installation
Internal Modem Installation with Windows 95 Plug and Play Installation This modem’s factory default setting is “Plug and Play” operation. If you are using the Windows 95 environment, the COM port and IRQ will automatically be set to Windows as the environment. Since your new U.S. -
Page 14: How To Insert The Modem Into The Computer
Internal Modem Installation with Windows 95 4. When doing a “Plug and Play” installation, the jumper shunts should be placed so that they are hanging from single jumper pins rather than on pairs of pins. Move your jumper shunts so they are hanging as in the diagram. -
Page 15: C Omputer
Internal Modem Installation with Windows 95 4. Remove the screws from your computer’s cover and then remove the cover, as shown in the following diagrams. Your computer may differ in appearance from these diagrams, but the basic principle for removing the cover should be the same. - Page 16 Internal Modem Installation with Windows 95 6. Holding the modem by each corner, align the gold edge with the empty expansion slot. Push down gently until the modem snaps into the slot. The diagram shows horizontally aligned expansion slots. Some computers have vertically aligned slots.
- Page 17 Internal Modem Installation with Windows 95 56K Voice Faxmodem Internal - User’s Guide...
- Page 18 Internal Modem Installation with Windows 95 You cannot use the modem and a phone at the same time if they share the same telephone line. If you want to use a telephone on the same line as the modem when the modem is not in use, plug your telephone cord into the modem’s PHONEsocket, using the supplied Tail Lead Adaptor.
-
Page 19: Installing Modem Drivers With Windows 95
Internal Modem Installation with Windows 95 Installing Modem Drivers with Windows 95: Versions 950 and 950a Moving Through the “New Hardware Found” Screens 1. When Windows 95 starts, it should detect the modem. If it does, you will see the following screen. Click Driver from disk provided by hardware manufacturer. - Page 20 Internal Modem Installation with Windows 95 3. Once Windows finishes loading the information from the disk, verify that the modem installation was a success. When your desktop returns, click the Windows Start button and point to Settings. Then click Control Panel. 4.
- Page 21 Internal Modem Installation with Windows 95 5. In the “Modems Properties” screen, you should see a description for your modem. This means the installation was a success. Click OK. If you do not see your modem listed in the preceding screen, the Plug and Play installation was unsuccessful.
- Page 22 Internal Modem Installation with Windows 95 6. Click More Info…. Click OK. Turn to “Software Installation” on page 29 for information about installing communications software. 56K Voice Faxmodem Internal - User’s Guide...
-
Page 23: Version 950B (Using The Update Device Driver Wizard Screens)
Internal Modem Installation with Windows 95 Installing Modem Drivers with Windows 95: Version 950b Using the Update Device Driver Wizard Screens 1. Start Windows. Insert the U.S. Robotics disk into your disk drive. Click Next. If this screen does not appear, go to “If Plug and Play Does Not Detect Your Modem”... - Page 24 Internal Modem Installation with Windows 95 3. Now you should verify that the modem installation was a success. When your desktop returns, click the Windows Start button and point to Settings. Then click Control Panel. 4. Double-click the Modems icon (circled in the screen image below). 56K Voice Faxmodem Internal - User’s Guide...
- Page 25 Internal Modem Installation with Windows 95 5. In the “Modems Properties” screen, you should see a description of your modem. This means the installation was a success. Click OK. If you do not see your modem listed in the preceding screen, the Plug and Play installation was unsuccessful.
- Page 26 Internal Modem Installation with Windows 95 7. Click More Info…. Click OK. Turn to “Software Installation” on page 29 for information about installing communications software. 56K Voice Faxmodem Internal - User’s Guide...
-
Page 27: Internal Modem Installation With Windows 3.X
Internal Modem Installation with Windows 3.x Before you start your installation, make sure that you have the following items: Modem U.S. Robotics Disk RJ-11 Phone Lead Tail Lead Microphone Analogue (Standard) Telephone Wall Socket Phillips Head Screwdriver or ¼” Hex Screwdriver Data/Fax/Voice Communications Software and Manual A Word about COM Ports and IRQs Most computer accessories —... -
Page 28: How To Change The Modem's Settings
3Com has set your modem to a default Plug and Play setting geared towards Windows 95 users. In this configuration, the shunts used to set your modem’s COM port and IRQ settings are hanging from single jumper... - Page 29 Internal Modem Installation with Windows 3.x The jumper shunts will be hanging from single jumper pins as shown in the following illustration. 4. To change the COM port and IRQ settings, you need to reposition the jumper shunts on the COM port and IRQ pins. To do this, lift the jumper shunts off the pins.
-
Page 30: How To Insert The Modem Into The Computer
Internal Modem Installation with Windows 3.x The following are recommended combinations of COM port and IRQ settings when not using Plug and Play: COM 1, IRQ 4 COM 2, IRQ 3 Most computers provide you with COM1 and COM2. If you do not use either of these two ports, you may disable them either in your computer's BIOS or with jumpers (refer to the manual of your PC). - Page 31 Internal Modem Installation with Windows 3.x 2. Turn off your computer and unplug it from the electrical outlet. 2.3.Unplug any peripheral devices (printer, monitor, keyboard, mouse, etc.) from the computer. CAUTION: To avoid risk of electric shock, make sure your computer and all peripheral devices are turned off and unplugged from electrical outlets.
- Page 32 Internal Modem Installation with Windows 3.x 5. Find an empty ISA expansion slot that’s at least as long as the gold edge of your modem. (ISA slots are dark plastic grooves lined with metal.) Unscrew and remove the expansion slot cover. It is the long narrow piece of metal that keeps dust from entering through the opening perpendicular to the slot.
- Page 33 Internal Modem Installation with Windows 3.x 7. Once the modem is inserted, fasten it firmly into place using the screw that you removed in step 5. 8. Replace the computer’s cover and fasten it with the screws you removed in step 4. 9.
- Page 34 Internal Modem Installation with Windows 3.x 14. Plug the power cords, cables, and peripherals back into the computer and turn on the computer. 15. Start Windows 3.x. 16. If you have your modem set to COM1/IRQ4 or COM2/IRQ3, go to “Software Installation”...
- Page 35 Internal Modem Installation with Windows 3.x 20. Set the Baud Rate to the highest option and Flow Control to Hardware. Then click Advanced. 21. In the Interrupt Request Line (IRQ) box, select the IRQ. 22. Click OK. 23. You will see a screen prompting you to restart Windows. Click Restart Now.
-
Page 36: Software Installation
Software Installation Voice Fax, Data, and Telecommunications Software (communications software) allows sending and receiving faxes directly from your computer desktop. You can build your own fax directory, send faxes to specified groups of fax numbers, select individual cover pages when necessary, and send individual faxes without exiting your word processing program. -
Page 37: Type Of Modem
For software flow control, select XON/XOFF. You may need to disable the flow control (hardware or software) that you are not using. Congratulations! You are now ready to start using your 3Com U.S. Robotics modem. 56K Voice Faxmodem Internal - User’s Guide... - Page 38 Software Installation Read This First! 1. Click Windows Start, point to Settings, and click Control Panel. 2. Double-click the Modems icon. 3. Click the Diagnostics tab. 4. Click on the COM port that your modem is assigned to, so that it is highlighted.
-
Page 39: Troubleshooting
Troubleshooting POSSIBLE SOLUTION You may have a COM port/IRQ conflict. If you have an internal modem and a Windows 95 system, right-click on the My Computer icon on your desktop. Click Properties. Click the Device Manager tab. If you see a yellow exclamation point over your modem, you have a resource conflict, and it is probably an IRQ conflict. - Page 40 Troubleshooting POSSIBLE SOLUTION You may have plugged your modem’s phone cord into the wrong jack on the modem. Make sure the phone cord is plugged into a jack labeled with the word TELCO (marked with a wall jack icon on externals). POSSIBLE SOLUTION You might have a bad phone cord connection to your modem.
- Page 41 31.2 Kbps. An analogue phone line compatible with the ITU V.90 standard or 3Com’s proprietary 56K technology, and an Internet provider or corporate host site with the ITU V.90 standard or 3Com’s proprietary 56K technology are necessary for these high-speed downloads. Check http://www.3com.com/56k for a list of ISPs that observe the 56K ITU...
- Page 42 Troubleshooting PROBLEM: Errors are constantly occurring in your V.17 fax transmissions. POSSIBLE SOLUTION Your modem initialisation string may be insufficient for fax transmissions. In terminal mode, type the following initialisation string: AT&F&H3&I2&R2S7=90 and then press ENTER. The standard string for faxing is AT&F1S36=0 POSSIBLE SOLUTION There may be a Terminate and Stay Resident (TSR) program (such as a...
- Page 43 Troubleshooting 56K Voice Faxmodem Internal - User’s Guide...
- Page 44 Troubleshooting PROBLEM: If Plug and Play does not detect your modem. You have installed the modem and Windows has restarted, but you see only your normal desktop. You do not see any screens indicating new hardware has been detected. POSSIBLE SOLUTION The Plug and Play installation was not successful.
-
Page 45: Support Resources
Support Resources Connecting to the 3Com Bulletin Board System (BBS) To connect to the 3Com BBS, dial 33320910308. If this is your first time connecting to our BBS, you will be asked to enter your name, create a password of your choice, and to fill out a questionnaire. -
Page 46: Are You Still Having Problems
Internet:: eurosupport@usr.com If You Must Return the Modem to Us Contact 3Com U.S. Robotics Customer Support to obtain a Return Materials Authorisation (RMA) number. You must have an RMA number before returning the modem to us. Phone : +33 (0) 3 20 87 04 97... -
Page 47: Glossary
Glossary Cross references are printed in boldface. Cross references with items in the Technical Reference section are printed in italics. analogue loopback A modem self-test in which data from the keyboard or an internal test pattern is sent to the modem's transmitter, turned into analogue form, looped back to the receiver, and converted back into digital form. - Page 48 Glossary certain number of rings. See S-register (S0) in the Technical Reference section. 56K Voice Faxmodem Internal - User’s Guide...
- Page 49 Glossary auto dial A process where your modem dials a call for you. The dialling process is initiated by sending an ATDT (dial tone) or ATDP (dial pulse) command followed by the telephone number to dial. Auto Dial is used to dial voice numbers.
- Page 50 Glossary character A representation, coded in binary digits, of a letter, number, or other symbol. characters per second (CPS) A data transfer rate generally estimated from the bit rate and the character length. For example, at 2400 bps, 8-bit characters with start/ stop bits (for a total of ten bits per character) will be transmitted at a rate of approximately 240 characters per second (cps).
- Page 51 Glossary Data Communications (or Circuit-Terminating) Equipment is equipment such as dial-up modems that establish and control the data link via the telephone network. default Any setting assumed, at startup or reset, by the computer's software and attached devices. The computer or software will use these settings until changed by the user or other software.
- Page 52 Glossary error control A variety of techniques that check the reliability of characters (parity) or blocks of data. V.42 and MNP error-control protocols use error detection (CRC) and retransmission of flawed frames (ARQ). facsimile A method for transmitting the image on a page from one point to another. This is commonly referred to as fax.
- Page 53 (NVRAM) A user-programmable random access memory which retains data when power is turned off. On the 3Com U.S. Robotics modem it includes four stored phone numbers and the modem settings. OFF/ON hook Modem operations that are the equivalent of manually lifting a phone receiver (taking it off-hook) and replacing it (going on-hook).
- Page 54 Glossary online fallback/fall forward A feature that allows a high-speed, error-control modem to monitor line quality and fall back to the next lower speed in a defined range if line quality diminishes. As line conditions improve, the modem switches up to the next higher speed.
- Page 55 Glossary Read Only Memory is permanent memory, which is not user- programmable. serial transmission The consecutive flow of data in a single channel. Compare to parallel transmissions where data flows simultaneously in multiple channels. start/stop bits These signalling bits attached to a character before and after the character is transmitted during asynchronous transmission.
- Page 56 Glossary V.22 An ITU-T standard for modem communications at 1200 bps, compatible with the Bell 212A standard observed in the U.S. and Canada. V.22 bis An ITU-T standard for modem communications at 2400 bps. The standard includes an automatic link negotiation fallback to 1200 bps and compatibility with Bell 212A/V.22 modems.
- Page 57 Glossary V.42 An ITU-T standard for modem communications that defines a two-stage process of detection and negotiation for LAPM error control. V.42 bis An extension of ITU-T V.42 that defines a specific data compression scheme for use during V.42 connections. Xmodem The first of a family of error control software protocols used to transfer files between modems.
-
Page 58: Technical Reference
Technical Reference Typing Commands Type commands in either upper or lower case, not a combination. Use the Backspace key to delete errors. (You cannot delete the original AT command since it is stored in the modem buffer.) If a command has numeric options and you do not include a number, zero is assumed. - Page 59 Technical Reference Aborts off-hook dial/answer operation and hangs up. Any key Required command prefix, except with A/, +++, and A>. Use alone to test for OK result code. U.S./ITU-T answer sequence ITU-T answer sequence U.S. answer tone Dials the specified phone number, includes the following: Numeric digits #, *...
- Page 60 Technical Reference Controls ON/OFF hook Hangs up (goes on hook) Goes off hook Displays the following information Four-digit product code Results of ROM checksum Results of RAM checksum Product type Current modem settings Nonvolatile memory (NVRAM) settings Link diagnostics Product configuration Plug and Play information Extended link diagnostics Controls speaker volume (internals only)
- Page 61 Technical Reference Sr.b=n Sets bit .b of register r to n (0/OFF or 1/ON) Sr=n Sets register r to n. Displays contents of S-Register r Displays a list of the S-Registers Sets tone dial Displays verbal/numeric result codes Numeric codes Verbal codes...
- Page 62 Technical Reference Sets result code displayed, default is X4 Xn Setting Result Codes 0/OK 1/CONNECT 2/RING 3/NO CARRIER 4/ERROR 5/CONNECT 1200 6/NO DIAL TONE 7/BUSY 8/NO ANSWER* 9/Reserved 10/CONNECT 2400 11/RINGING 13/CONNECT 9600 18/CONNECT 4800 20/CONNECT 7200 21/CONNECT 12000 25/CONNECT 14400 43/CONNECT 16800 85/CONNECT 19200 91/CONNECT 21600...
- Page 63 Technical Reference Xn (Continued) Xn Setting Result Codes 256/CONNECT 28000 260/CONNECT 29333 264/CONNECT 30666 268/CONNECT 32000 180/CONNECT 33333 272/CONNECT 34666 276/CONNECT 36000 184/CONNECT 37333 280/CONNECT 38666 284/CONNECT 40000 188/CONNECT 41333 192/CONNECT 42666 196/CONNECT 44000 200/CONNECT 45333 204/CONNECT 46666 208/CONNECT 48000 212/CONNECT 49333 216/CONNECT 50666 220/CONNECT 52000...
-
Page 64: Extended Data Commands
Technical Reference Selects power-on/reset default configuration Use profile 0 setting in NVRAM Use profile 1 setting in NVRAM Use factory configuration 0 Use factory configuration 1 Use factory configuration 2 Resets modem Resets modem to NVRAM profile selected by Y command or dip 7 Resets modem to NVRAM profile 0 Resets modem to NVRAM profile 1... - Page 65 Technical Reference &Dn Controls Data Terminal Ready (DTR) operations &D0 DTR override &D1 DTR toggle causes online Command mode &D2 Normal DTR operations &D3 Resets on receipt of DTR &Fn Loads a read-only (non-programmable) factory configuration &F0 Generic template &F1 Hardware flow control template &F2 Software flow control template...
- Page 66 Technical Reference &Nn Sets connect speed, if connection cannot be made at this speed, the modem will hang up. When used in conjunction with &Un and &Un is greater than 0, &Nn sets the ceiling connect speed. &Un sets the floor connect speed.
- Page 67 Technical Reference &Nn (Continued) &N30 45,333 bps &N31 46,666 bps &N32 48,000 bps &N33 49,333 bps &N34 50,666 bps &N35 52,000 bps &N36 53,333 bps &N37 54,666 bps &N38 56,000 bps &N39 57,333 bps &Pn Sets pulse (rotary) dial make/break ratio &P0 U.S./Canada ratio, 39%/61% &P1...
- Page 68 Technical Reference &Un Sets floor connect speed when set above 0, if the connection cannot be established above this speed, the modem will hang up. When &Un is used in conjunction with &Nn and &Nn is greater than 0, &Nn is the ceiling connect speed.
- Page 69 Technical Reference &Un (Continued) &U22 34666 bps &U23 36000 bps &U24 37,333 bps &U25 38666 bps &U26 40000 bps &U27 41,333 bps &U28 42,666 bps &U29 44,000 bps &U30 45,333 bps &U31 46666 bps &U32 48000 bps &U33 49333 bps &U34 50666 bps &U35...
- Page 70 Technical Reference 56K Voice Faxmodem Internal - User’s Guide...
-
Page 71: S-Registers
Technical Reference S-Registers To change a setting, use the ATSr=n command, where r is the register and n is a decimal value from 0 255 (unless otherwise indicated). Register Default Function Sets the number of rings on which to answer in Auto Answer mode. - Page 72 Technical Reference Register Default Function Sets the duration, in tenths of a second, that the modem waits to hang up after loss of carrier. This guard time allows the modem to distinguish between a line disturbance from a true disconnect (hang up) by the remote modem.
- Page 73 Technical Reference Register Default Function S13 (Continued) * The 1.5K-byte non-ARQ buffer allows data transfer with Xmodem- and Ymodem-type file transfer protocols without using flow control. The 128-byte option lets remote users with slower modems keep data you are sending from scrolling off their screens. When remote users send your computer an XOFF (Ctrl-S) and you stop transmitting, the data in transit from your modem’s buffer does not exceed the size of their screen.
- Page 74 Technical Reference Register Default Function Sets the duration, in minutes, for the inactivity timer. The timer activates when there is no data activity on the phone line; at time-out the modem hangs up. S19 = 0 disables the timer. Reserved Sets the length, in 10-millisecond units, of breaks sent from the modem to the computer;...
- Page 75 Technical Reference Register Default Function S27 (Continued) Value Result Disables V.32 modulation. Disables 2100 Hz answer tone to allow two V.42 modems to connect faster. Enables V.23 fallback mode. Disables V.32bis mode. Disable V.42 selective reject. Software compatibility mode. This setting disables the codes and displays the 9600 code instead.
- Page 76 Technical Reference Register Default Function Bit-mapped register setup. To set the register, see the instructions for S13. Value Result V.8 Call Indicate enabled. Enables V.8 mode. Reserved. Disable V.34 modulation. Disable V.34+ modulation. Disable 56K modulation. Disable V.90 modulation. Reserved. Bit-mapped register setup.
- Page 77 Technical Reference Register Default Function S34 (Continued) Bit Value Result Disable TX level deviation. Disable Pre-emphasis. Disable Pre-coding. S35-S37 Reserved Sets an optional delay, in seconds, before a forced hang- up and clearing of the Transmit buffer when DTR drops during an ARQ call.
-
Page 78: Fax Commands
Technical Reference Fax Commands +FCLASS=n Sets the mode of operation FCLASS=0 Data mode FCLASS=1 Group 3 Facsimile Service Class 1 mode FCLASS? Displays the current FCLASS mode (See mode descriptions above) +FCLASS=? Displays the FCLASS mode options (See mode descriptions above) +FTS=n Stops the fax transmission. - Page 79 Technical Reference +FTH=n Transmits data framed in the HDLC protocol using the modulation specified by n.(n = 3, 24, 48, 72, 96, 97, 98, 121, 22, 145, or 146) Note: See the “Screen Messages” table at the end of this section for an explanation of messages that appear in response to this command.
-
Page 80: Regulatory (Ce Compliance)
Regulatory CE Compliance Electromagnetic Compatibility This device complies with the following standards in accordance with the European Directives 89/336/EEC. Immunity EN 50082-1 06/92 Emission EN 55022 class B 08/87 Safety (Low Voltage Directive) This device complies with the following standards in accordance with European Directives 91/263/EEC and 91/263/EEC: EN 60950/A2 10/93 EN 41003 08/93... -
Page 81: Limited Warranty
Limited Warranty U.S. Robotics Access Corp., a subsidiary of 3Com Corporation, warrants to the original end-user purchaser that this product will be free from defects in materials and workmanship for the life of the modem. During the limited warranty period, and upon proof of purchase, the product will be repaired or replaced (with the same or a similar model, which may be a refurbished model) at U.S.
Need help?
Do you have a question about the U.S. Robotics 56K Voice and is the answer not in the manual?
Questions and answers